
Likes
Comments
Share


@Slobasian
Follow
Stacking up on my plant genetic options for mothers and what to grow out green house diary coming soon with some of these plants. I ready for ethos genetics to enter my tent and green house


Likes
50
Share


@Rwein93
Follow
Ciao ragazzi e bentornati qui con me e l albero di Limoni!!!😉
Questa settimana si conclusa magnificamente da un lato e male dall altro. La pianta numero 1 è la più forte e grande, davvero grande!💪 La numero 2 e giusta per la sua età, nella media diciamo, ma la numero 3 mi preoccupa un po. 🤔È rimasta troppo piccola e le foglie sono chiare e brutte, come raggrinzite in certi punti. Speriamo si riprendi lei!🤞
Ho applicato LST sulla pianta numero ¹ perché è la più resistente e mi darà sicuramente grandi soddisfazioni.
Alla numero 2 ho aperto solo i rami laterali per dargli una forma a candelabro, ma lascerò che cresca dritta senza stravolgere la struttura.
La numero 3 invece ho solo aperto 2 rametti perché stava un po soffocando, ma cercherò di stressare lei il meno possibile!👍
Ho bagnato loro tutta settimana con il mix di nuts NPK, ma ho aggiunto un po di cal/mag extra nel giorno 20 per cercare di risolvere i problemi alla numero 3.👌
Eh niente! L albero numero 1 ha i miei occhi puntati addosso tra tutte immagino già i grossi limoni che pendono dai rami.🤩
Grazie a tutti per aver guardato e restate sintonizzati per nuovi fantastici aggiornamenti!🙏
Buona settimana e felice crescita 🌱🌱🌱
P.S.
Il video mostra la mia intera growbox con tutte le mie piante , riconoscerete sicuramente le ragazze dalle foto le altre sono talee varie e le cugine Mimorange Punch!🍀

Likes
16
Share


@DonKrika
Follow
No problems this week, plants growing extremely well.
I got a new TDS meter, but unfortunately, I was not able to set up a drip system yet.
The only training I did was to defoliate the first true leaves and everything below that.
DAY 17 - Nutes
PH - 6.1
Solution Temp - 19.5
PPM-1340
Watering Volume per plant - 2L
DAY 20 - Water
PH - 6.04
Solution Temp - 19.2
PPM-570
Watering Volume per plant - 2.5L
Plant B is about 14cm Height and Plant A is about 17 cm Height.
One interesting thing that I'm seeing is the fact that Plant B continues to show signs of deformity. On the video, you can see that the right side is missing a node, this missing node corresponds to the deform leaf. Maybe they are related,
Plant A was slightly bigger from the beginning, but the node development is bigger in Plant B.

Likes
14
Share


@rinnr
Follow
Day 82. Sprayed Monterey BT as a precaution, I'll keep that up weekly or so. I've sprayed neem oil a handful of times over the grow. No pest issues aside from the cat.The bigger the plant gets the harder it is to keep it in this cage so the cat has taken more chunks out of it...including one of the budsites.
Lost my TDS meter the last couple months but got it back.
Probably gonna go thru and cut the really yellow leaves. I need more bulk on the buds!!

Likes
6
Share


@rvabudman
Follow
Graduated, and am off from work for a few weeks, so went overboard on photos. Plant is doing well, leaves are starting to turn yellow (strain trait).
Can't wait for the harvest and being able legally gift my xmas ornaments to my cousins during our "cousins walk" at our family xmas party.


Likes
73
Share


@Burmese
Follow
Hi everyone, Here's the update for this week.All of them are looking good.Among them,Gelato is the tallest.Gorilla Cookie is the strongest and Zkittlez is the smallest.Enjoy and Happy growing...✌️🇲🇲
BTW this week I changed my light to new Marshydro SP-6500 which is from my New Year with Marshydro winning award.I don't add any CO2 yet.So I think I can't run the light at full intensity.Now the light is at 25% intensity and at a height of 30inches.Max during the flowering stage would be 50% at 18~24inches.

Likes
8
Share


@MrGrowthSpurt
Follow
It's week 14 total and week 7 of flowering (maybe week 5 for WR and Caramel. I thought they were autos and it took me about 2 weeks into the Blueberry beginning to flower to realize they were photos 😂. I sacrificed the 18/6 on my BB auto and flipped them to 12/12) everything is going pretty well considering I know not wtf I'm doing, lol. Tips are all crisp obvious some sort of nutrient burn, but hey it is what it is, they still look pretty decent If I might say so myself for my very first grow of anything ever.
I cranked up the nutes to we exactly what the bottle says now.....1 tsp/gal of the green macroflora 2 tsp/gal of the dark red micro stuff, lol and 3 tsp/gal of the Bloom, they fattened up a bit since, I also feed them just plain p.h.'d water.
I need to get a lope, I'm pretty sure the BB has got to be reaching its peak. The once all white colored hairs or pistols are now about 30 to 45% amber colored. I'm not sure if you can see them in my pictures but if your reading and care to help out do you think it's ready?


Likes
21
Share


@SupremeTimmy
Follow
the week passed splendidly, the bushes began to bloom and the smell was crackling
the plants develop very well, I continue to water them with clean water and do not use chemicals.
I removed the large leaves that were inside, on the sides I left now the light penetrates better in the middle

Likes
8
Share


@TeaTime
Follow
Fastberry Auto is truly a gem among autoflowering cannabis strains! Its rapid growth, delightful berry-like aroma, and beautiful purple buds make it a joy to cultivate. The sweet and fruity flavor is a treat for the senses, and the balanced high leaves me feeling creatively inspired and deeply relaxed. A must-try for any cannabis enthusiast, whether you're a seasoned grower or just starting out! -
Likes
13
Share


@Robeeriegenetics
Follow
Ooops I made some mistakes lol all gravy teachable moment …I really think I got a ghost in my grow op lol….anyone recommend an exorcist …im scared lol
Likes
20
Share


@Boomdrawfyah
Follow
Dia 35 de vida en total y 10 dias después del transplante desprenden bastante olor y van cogiendose a la tierra se puede notar en la robustez tambien en la grandaria de las hojas, estamos a la espera del tirón fuerte que no tardarán!!


Likes
12
Share


@FlavoursUk
Follow
Day 30 for this girl and shes getting fatter every day, she smells fruity and very pleasant on the nose. Very strong aroma. Very pleased with her so far, and I'm already tempted to do another run of this girl. Highly recommend, she can take a heavy feeding.
Also her first sign of brown pistols were showing today which normally indicates harvest is 3 weeks away, however I only harvest based on the trichomes and the overall maturity of the plant. Nice to know I'm not too far now. Being an 8 week strain I may let her go to 9/10 weeks. Cant wait to see what she produces. So far soooooo good! Back with an update soon. Stay tuned. FlavoursUK.
If you're not already following my Instagram and youtube channel.. give me a follow and SUBSCRIBE if you like the content. Loads to come. Thanks again.

Likes
8
Share

@PurpleBeen
Follow
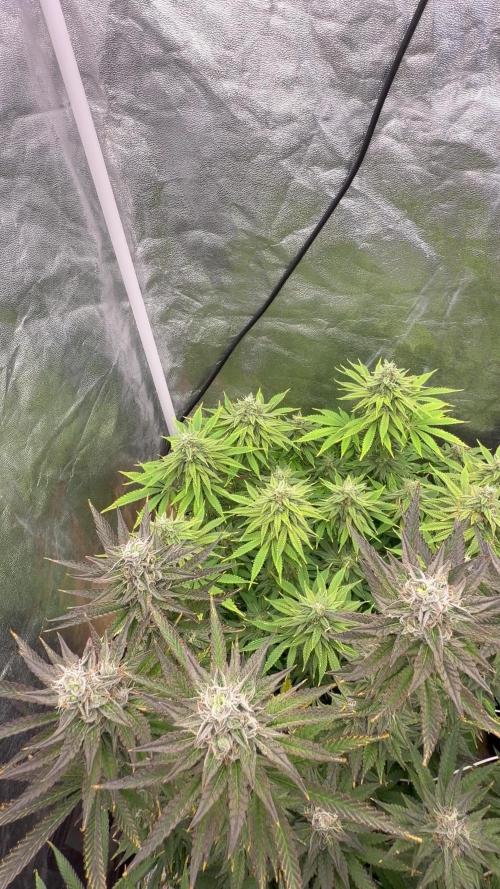
Week 7/ Flowering
We’re entering the last two weeks. I haven’t inspected the trichomes yet, but visually I think they’re where I want them to be. I’ll check them over the next few days. I’ll also be reducing the nutrients during these final weeks. They definitely smell amazing, especially the Strawberry Lemonade, with its beautiful colors.
Repotting : 23/04/2026
12/12 swtich:15/05/2026
Middle: Strawberry Lemonade 16-20l x2
(too much light/ height) = hermaphrodite 5- 10%
Background : Amnesia Lemon :11l x2
Front : Cherry Mc Muffin 7l / Oreoz : 11l
Topping : 01/05/2026
Light : 50-60cm / 100% dimmer
24-26 degrees / 30-40 % hygro
22-24 degrees
Watering is light at this stage — around 1l5;2,5l;3l depend pot size ( 1. watering humic ; 2. if plants show excess signs(1) if not, 3. watering with fertilizers flower )700-1000 ppm calmag 1/2 watering


Likes
17
Share


@CanadianFillmore
Follow
Week 3 begins for DS and MD ladies. All four are developing nice bud sites, but the plants have not stretched as much as I was expecting they would by now.
Thank you to Kaoritracy from Mars-Hydro for the TSW2000 light, I am very happy with it's performance.
Thanks for stopping by growfessors 👽🌳💚


