
Likes
Comments
Share


@S_V_F_O
Follow
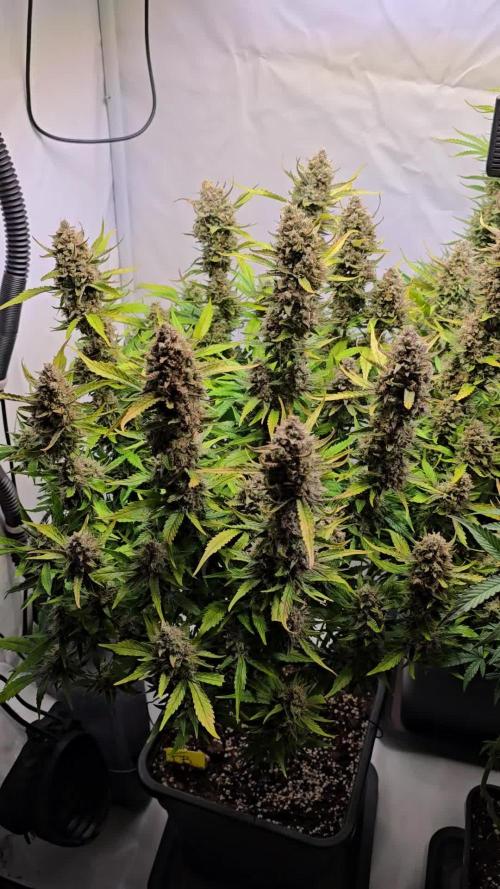
in
ppm 800 ph 7,5
out
ppm 2000 ph 5,7
Pots 40cm
Satori 50cm
Blueberry 35cm
Height from floor to light source 1m 25cm


Likes
19
Share


@Tropicannibis_Todd
Follow
Alright Then
REMINDER I DO 2 UPDATES PER WEEK 👉WEEKLYROUNDUP👈👉MIDWEEKLY UPDATE👈
We just hit week 4 and all is well , have to admit she's ahead of all the others of same age however she's yet to show any pre-flowers 😃 ....... 👌
I was happy with the internode spacing but not the branching , begun heavy LST to try and bring the internode branching up last week 👌 and I'm glad to report that it did workout and I also decided to top her 👈
Very little water given ,so far and rain water to be used entire growth
Lights being readjusted and chart updated .........👍
I GOT MULTIPLE DIARIES ON THE GO 😱 please check them out 😎
👉I WISH GD HAD DISCORD SERVER SO GROWMIES COULD HAVE A PLACE TO HELP AND TALK THINGS RELATED TO GROWING IN REAL TIME.....👈
👉SO I CREATED ONE ALL YOU NEED IS TO JOIN THE GROWDIARIES DISCORD SERVER !!!!!!!!!!!👈
LINK IS 👉
https://discord.gg/zQmTHkbejs
AND SEE HOW IT PLAYS OUT !!!!!!!


Likes
172
Share


@Zannabis7
Follow
Day 35 – The Girl Scout Cookies is just starting to throw lots of pistols from the tops of her flowers. She gained about 4” in height this week and it seems vertical growth is continuing.
Continuing to feed the Nectar for the Gods nutrients and have added Triton’s Trawl (liquid fishbone meal that is rich in calcium from fish cartilage and is designed to deliver flavor, aroma and color to the finished product) and Aphrodite’s Extraction (a rich blend of sucrose, fructose, chelated nutrients, and organic acids necessary for enzymatic activity, and a complete balance of vitamins A, C, D, E, B1, B6 and B12, which are essential to a plants’ biological growth processes). These two additions are known to increases oil, resin, frost, and terpene production in flower. Continuing to add Recharge as a soil amendment to establish colonies of beneficial fungal and bacterial microbes.
Temperatures are consistently between 74° - 78° and humidity between 30% - 45%. Soil pH is 6.5 and PPMs at 321 which is perfect for the Nectar for the Gods nutrient line.
Added a homemade Co2 generator to boost carbon dioxide levels and to improve overall plant growth and health. – Zannabis7
Day 36 - Fed the Nectar of the Gods nutrients as indicated above and in photo. Added Recharge to the nutrient mix for microbes and to aid in the breakdown and uptake of nutrients. - Zannabis7
Day 39 - Fed the Nectar of the Gods nutrients as indicated above and in photo. Again added Recharge to the nutrient mix for microbes and to aid in the breakdown and uptake of nutrients. Also did some very light defoliation and more leaf tucking to expose flower sites - Zannabis7
Likes
16
Share

@ThatsmyGrow
Follow
I'm keeping a close eye on the tichomes, but they're still not amber enough for my liking.
So we'll give her another week and flush her out.
Likes
46
Share


@Cannabeast40
Follow
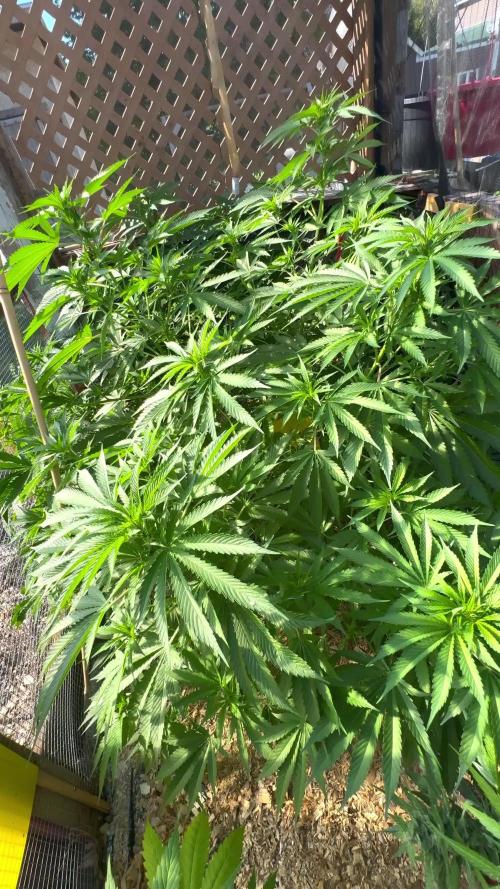
Here we go 😊
Planning & germination 👍
I´m really looking forward to this run, the SpectrumX from Medicgrow with
build in PPFD, 4 spectrums V1, F1, VS, FS and 880 Watt is definitely serious business 👊
Trying out a new soil in this grow.
The plant mulch is an exclusive mixture of harped mulch, nutrient-rich natural fertiliser,
hill sand and long-term matured compost. The mixture provides a porous and airy structure,
which ensures that both water and nutrients are easily accessible to the plant's roots.
Stay tuned and Keep it green 😎
______________________________________________________________________________________________
Light source:
Medicgrow SpectrumX
880W LED
Build in PPFD
4 controllable spectrums V1, F1, VS, FS
Visit https://medicgrow.com/ for more informaton.
Light measurement:
Apogee MQ-610 & Apogee DLI-600.
Fertiliser:
Organics Nutrients
https://www.organicsnutrients.com/en/
Green Buzz Nutrients
Discount Code: GD42025
Grants 25% with a minimum Order value at 75 Euro.
https://greenbuzzliquids.com/en/shop/

Processing
Likes
13
Share


@GangbudsGenesgdl
Follow
11/01/21. inicio de semana riego con giga grow y forza silicia
13/01/21 no se aprecia pero ya esta mostrando pequeños pistilos , se rego con
nutrientes rootz.mx gigagrow, forza silicia , y magna flor. 2ml por litro
17/01/21. cierre de semana para esta pequeña riego diario con 0.25 lt

Likes
90
Share


@Herbalize
Follow
Hello folks 😎
7th week of flowering and the heat is still here 😔 I hope to have cooler temperatures quickly, otherwise, the drying phase will be complicated ...
Anyway the buds are not very big, but Wow this shit is frosty as fuck and the smell is strongly good !
at the beginning of this week, I gave her the last watering with nutrients ( about 430 ppm ) and in the middle of the week, I started the flush 👌
For the trichomes, many are milky but there is at least a week left on the announced time 😊
Good news, I will completely change my tent and my equipment for the next crop, bigger tent, better light etc. ( soon ™️)
But that's another story ! 😁
Stay tuned and see you next week guys 😘
I also have another diary with two Toxic from Ripperseeds if you want to see
Peace Love & Weed GD Fam😍👊

Likes
2
Share


@Bncgrower
Follow
Another week almost over, the girls are beautiful and smell great. Apparently everything is under control, I'm really looking forward to the results.
Happy growing! 🌱🌱🌱
Likes
29
Share


@nonick123
Follow
Día 41 (03/06) Riego 750 ml sólo H2O pH 6.2
Empieza a engordar sus cogollos 😍
Día 42 (04/06) Riego con 750 ml H2O + Regulator 0,15 ml/l + P-Boost 0,5 ml/l + K-Boost 0,5 ml/l + CaMg-Boost 0,25 ml/I +TopBooster 0,2 ml/l - pH 6.2
Está apilando y engordando sus cogollos, y empieza a mostrar senescencia en la hojas inferiores. La veo capaz de acabar en 8-9 semanas! El tiempo lo dirá
Día 43 (05/06) Riego 750 ml sólo H2O pH 6.2
Día 44 (06/06) Riego con 750 ml H2O + Regulator 0,15 ml/l + P-Boost 0,5 ml/l + K-Boost 0,5 ml/l +TopBooster 0,2 ml/l - pH 6.2
Día 45 (07/06) Riego 750 ml sólo H2O pH 6.2
Está empezando a mostrar tonos morados en los cogollos! 😍
Día 46 (08/06) Riego con 750 ml H2O + Regulator 0,15 ml/l + P-Boost 0,5 ml/l + K-Boost 0,5 ml/l + CaMg-Boost 0,25 ml/I +TopBooster 0,2 ml/l - pH 6.2
El tamaño del cogollo central es impresionante 💥😁
Día 47 (09/06) Riego con 1 Litro H2O + Regulator 0,15 ml/l + P-Boost 0,5 ml/l + K-Boost 0,5 ml/l + CaMg-Boost 0,25 ml/I +TopBooster 0,2 ml/l - pH 6.2
💦Nutrients by Aptus Holland - www.aptus-holland.com
🌱Substrate PRO-MIX HP BACILLUS + MYCORRHIZAE - www.pthorticulture.com/en/products/pro-mix-hp-biostimulant-plus-mycorrhizae


Likes
9
Share


@pascal_dop
Follow
Heute wieder mal ein Update, langsam gehts mir echt nur noch auf den Keks mit diesem Koffer. Die komplette Hälfte der Pflanze wird durch die Lampe völlig verbrannt. Ich warte jetzt echt nur noch auf den Moment an dem die Minibuds erntebereit sind 😢

Processing
Likes
15
Share


@Dico29
Follow
5th week of flower, the plant has stopped growing and focused on the buds.
Both plants look nice, I’m hoping the 3 gallon plant gets fatter before the end though.

Likes
30
Share


@ArtisticGrown
Follow
Wow what a week it's been! I'm surprised with how fast these girls are flowering! The stretch was a bit slow because of the last and training, the amount of coals I've gotten from these girls is amazing to me without topping lst has been great for this auto. I've got a lot going on right now I'll update tomorrow much love happy dayz
Just posted up some new pictures for yalll! What do you think? Is one plant ahead of the other by a few weeks? Im thinking it is! Either that or i just stunned one of the girls while traning her! Any ways, some good pics of some healed super cropping with a good node now from healing, super neat!!!
Oh man i added a video, of the girl that is flowering quick the one i did all the hst, lst, too! I forgot about autos how they count from the day the sprout? Or germination im not too sure a bit confused. But she is far ahead of the other plant. What do you think?

Likes
1
Share


@Slackerbucks
Follow
Once you get to this point in the cannabis life cycle, growing is easy.
Using the Beanstalk line of nutrients allows me to only use water from beginning to the end of my grows. No mixing nutes, no teas, no anything.
I adjust the pH of my water to the 5.8-6.5 range, but I’m not even sure that is necessary. I have never tested using water right out of the tap as it’s almost 9.0, but that would simplify things even further.
Experience has taught me to simplify. This goes for all aspects of growing. I used to top and train my plants under a tellis. Then I would spend hours trimming and had jars overflowing with flowers that I was never going to smoke.
Now, I go for a month of veg and right into flower. No training, no topping. In addition to allowing a much faster turnover, I can gauge the growth habits of my plants much more effectively.
For example, you can see this Shiskaberry plant exhibits significant and abundant lateral branching. Not only that, but those branches are strong enough to support the weight of the flowers they hold. This means that this plant would be an ideal candidate for a ScrOG or LST setup where the goal is a ‘carpet’ of flowers.
After running this cultivar several times, I also have an accurate flowering timeline and can approximate stretch to allow users to fit their grow. More on this in the future.
For now, enjoy the end of week 5.


Likes
9
Share


@Jake13255
Follow
Gonna get the dry weight after they’re done drying and curing. Also more bud pics

Likes
7
Share


@Grisly
Follow
Harvest 2024
Total Hash: 102g
Total Kief: 95g
Total Flower: 3868g/138oz/8.6lb
Total Yield: 4065g/145oz/9lb/4kilo
———-/-////////—vs———-/////————/
Sugar Diesel #1: 117g
Sugar Diesel #2: 313g
White widow Clone: 14g
Dual OG:
112g
LA Affie North Field: 248g
Granddaddy Purple N: 63g
Black Raspberry Kush N: 210g
————————————————-
Total North: 1077g/38oz/2.5lb
————————///——/—————-/
Fruity Pebbles: 184g
Granddaddy Purp S H2: 54g
Granddaddy Purp S H1: 275g
Granddaddy Purp Total: 329g/12oz
Black Rasp Kush S H1: 160g
Black RaspKush S H3: 70g
Black Rasp Kush S H2: 511g
Black Rasp Kush S H4: 17g
Black Rasp Kush S: 758g/27oz
Blue Cheese S H1: 281g
Blue Cheese S H3: 83g
Blue Cheese S H2: 285g
Blue Cheese Total: 649g/23oz
Dr Grinspoon S H1: 485g
—————————————————-
Total South: 2405g/85oz/5.3lb
————————///——/—————-/
North Popcorn: 148g
BC Popcorn: 100g
GP Popcorn: 73g
BRK Popcorn: 65g
—————————————————-
Total Popcorn : 386g/14oz/0.9lb
————————///——/—————-/
Trim: 8lb
—————————————————
————————///——/—————-/


Likes
7
Share


@BlazingAngel420
Follow
Boy oh boy look at these babies grow I'm studying them more and more to ensure they are happy. I've notice that gelato 41 is producing bud spots like thats what it was ment for. Tropi cherry is coming along but not as fast as G41, and runtz muffin im a little disappointed in but i believe that is my fault for im still new and have only grown 1 plant prior to these 3. It also doesnt help i had to cut the vegitation cycle by 2 weeks as well. and further more I was at least able to give 2 clones away, the rest were still good but couldn't find them homes so i had to throw them away. Next time I'll have all the room they need and can't wait to make mother plants of my favorites.
