


Likes
Comments
Share


@Pungolian
Follow
Week 7 of flower starts today. Hoping to make it to 11-12 minimum before the cold sets in! Water consumption is half what it was a month ago. Still top coating with Happy Frog every three waterings. Love taking photos of my girls. Great week everyone!

Likes
14
Share


@DeaneR
Follow
Week 3 of Flower 😀
I think she has stopped stretching. No new change in height this week.
She is really starting to sugar up and is filling in nicely for 21 days.
Smells nice and sweet so far...reminds me of mandarin oranges.
Time-lapse Film : This film was shot over a six hour period with 299 pictures taken. I started filming 4 hours after lights came on and right after I watered her. I then sped the film up and looped it several times. Enjoy!
Stay safe, and grow on!
Peace,
DeaneR😎

Likes
100
Share


@Njanne
Follow
The plants are coming along nicely for the most part. I have been finding bud rot in big mama... not much but I'm a little bit worried. I've been cutting it out when I find it. The trichomes are cloudy with sparse amber. The wind has been a concern the past week or so. I shared a video which kind of gives an idea of what we are dealing with. We are looking at harvest two weeks out - max. Maybe sooner. FFT2 is significantly behind the other varieties... fattening up more slowly.

Likes
12
Share


@Sieben
Follow
I got at least 2 vids this time , in the next week a lil bit more , i use the whole hesi nutrient pack btw and are really impressed what LED and a noob scrog grow results to , don´t get me wrong but its a huge difference to hps and some untopped plants under it ;) , happy about all feedback btw.
The small growing Orange Lemon in mid seems to have a lot more haze DNA .
Left Gran Jefa, right back Fullgas , right Front and mid Lemon Orange.

Likes
6
Share
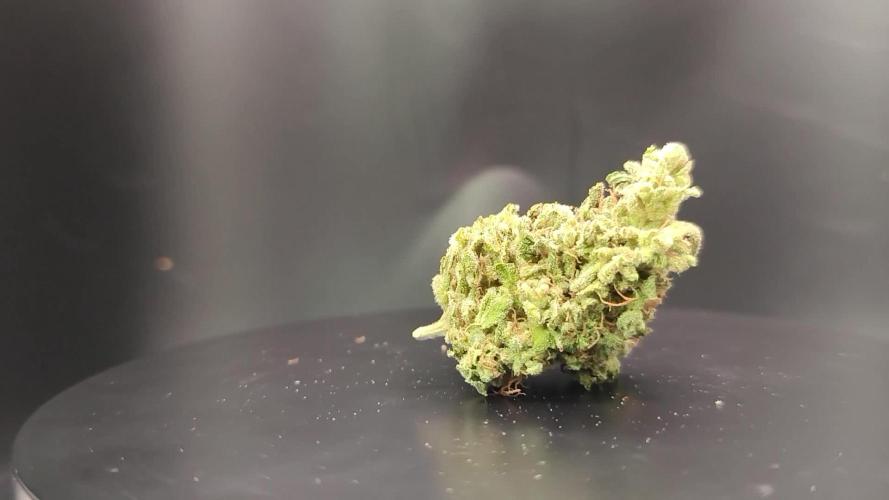

@Xpie77
Follow
🌸 Eindverslag – Amnesia Autoflower (Hy Seeds)
⚙️ Kweekspecificaties
Aantal planten: 5
Medium: Aarde (Lightmix)
Potten: 11 liter
Licht: Mars Hydro 450W LED
Lichtschema: 20/4 tijdens groei & bloei
Temperatuur: 20–26°C
Luchtvochtigheid: 65% groei → 40% eind bloei
Duur: ± 12 weken totaal (± 4 groei, ± 8 bloei)
---
🌿 Groei (Week 1–4)
Snelle, gezonde start uit zaad.
Compacte planten met sterke zijtakontwikkeling.
Geen problemen met voeding van pH.
Hoogte eindgroei: 60–80 cm.
---
🌸 Bloei (week 5–12)
Week 1–3 bloei: duidelijke topvorming, stretchfase afgerond.
Week 4–6: toppen begonnen te verdikken, sterk aroma (citroen/haze).
Week 7–8: trichomenproductie maximaal, stampers begonnen oranje te kleuren.
Week 9–10: laatste gevonden, toppen zeer harsrijk en compact.
Week 11–12: spoeling uitgevoerd met water met een pH-waarde van 6,3.
Oogst bij ±10–20% ambertrichomen.
---
🌾 Oogstresultaat
Droogtijd: 10 dagen bij 20°C en 50% RV.
Behandeling: 3+ weken in glazen potten, dagelijks luchten.
Gemiddeld per plant: ± 20 - 30 gram.
---
👃 Aroma & Smaak
Sterke citrus-haze geur met licht kruidige ondertoon.
Smaak: fris citroenachtig, met lichte aarde/natte dennennasmaak.
Haze-typische sativa high: helder, energiek en langdurig.
---
⚖️ Samenvatting & Notities
✅ Sterke genetica, geen tekenen van stress of hermafrodietgedrag.
✅ Goed bestand tegen voeding en LED-intensiteit.
⚠️ Laat bij volgende ronde op variabele rond week 7–9 – toppen zijn ontsteking voor schimmel bij te hoge RV.
💡 Tip: LST in week 2–3 groei leverde meer zijtoppen en egalere hoogte op.
---
Eindoordeel:
🌟 9/10 – Uitstekende opbrengst, gemakkelijke verzorging, topkwaliteit sativa-effect.
Een echte aanrader voor LED-kweek in aarde — robuust, geurintens en productief.

Likes
1
Share
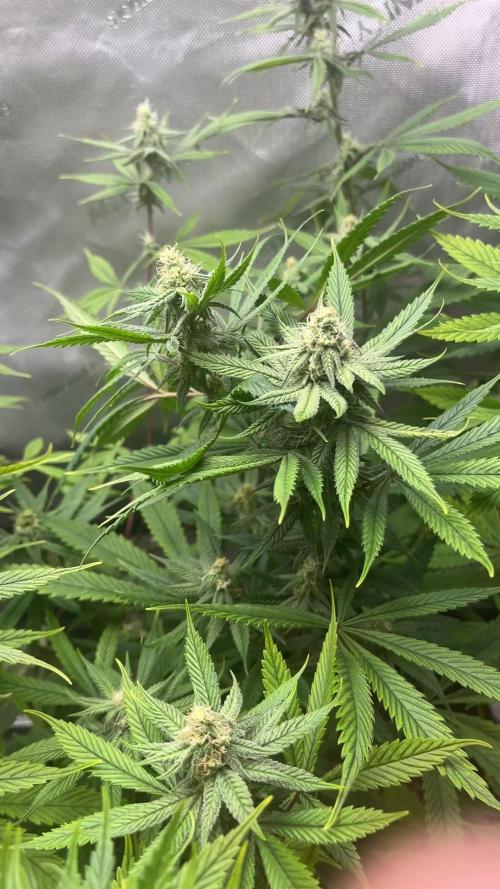

@LokalGrenz
Follow
8/4
Finally got humidity in the range I want things are looking decent some yelling tips and leaves I’m sure it’s from lack of magnesium some times I add some but my lazy days I just say oh well I know it’s from the RO water
Likes
6
Share


@Elfasitoencasa
Follow
Semana 5 Floración.
Día 69(12/10): Estamos bien, hoy regué con grotek, monster bloom, y la Abby esta mas despierta. De a poquito veo el comienzo de los tricomas. Veremos mañana.

Processing
Likes
4
Share


@DrewbieDoobieNoobie
Follow
Well the end of week 5 start of week 6 day 42 from seed I got some early signs of Pre Flower I want to say they are all girls ?!?!?! no hairs yet I'm hoping this week to see some, I took 3 clones also, one from each of the 3 remaining plants. once I get the high sign "no pun intended" hairs that is, I will start to chemically treat the best looking MILF. (Mother I'd Like to fertilize) I hope they are all girls like I said before this way I can get some genetic diversity instead of self pollinating the same MILF. On the observation side of things these plants have taken off in the last week they are all about even at 18" and the Fan leaf's are about 10'' across. The feeding seems to be spot on with no burn from the dry nuites mixed in to the coco. I gave just plain water today ON THE 25TH.
I am feeling the Biologicals on this grow,
The Mammoth P and the Enzymes are really doing a nice job of making the food available to the plants also the Fulife and Cargo Boost are really impressing me as well. This is why I love trying new things on my grows to help me become a more complete grower and really understanding the biology of the plant. It has been Hot these last few days in the 90's I think the C02 has been helping the plant deal with the high temps no sign of heat stress they are drinking a lot more lately respectively. that's it for this week hope the clones take and wish me luck on the MILF's.
Stay safe all.
Likes
4
Share


@adam_pawloski87
Follow
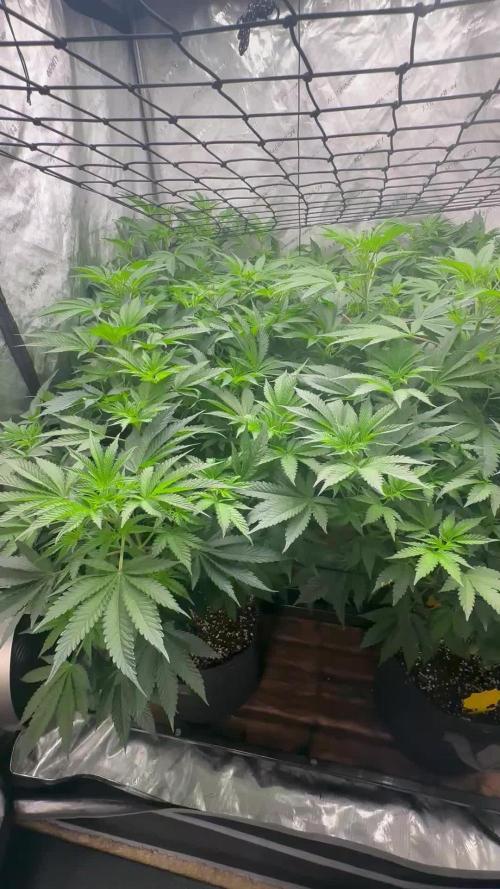
@twenty20mendocino Ateam R&D Update ~ Lets Go day 38 of flower an these ladies are looking amazing! Gettin in some nice frost a the smell is insane, so many different terps Sour , skunky , fuel , gassy funk a berries 😍so amazing! Not too much longer to go a these ladies will be ready for flush , but let’s take it day by day!! Hope y’all enjoy an have an amazing productive day ! Cheers to y’all 😶🌫️💨💨💨💨





Likes
8
Share

@LokalGrenz
Follow
Week5
March 1st day 30
I transplanted one( the one with no broken branch) inti the 7gal today watered and did some LST I really hope it adapts to its new home I’ve never transplanted before I used extreme garden MYCOS hope it works also moved the light up a bit and plan on going 100% once I transplant the other one
March 2nd transplanted the other one (broken branch one) my shop didn’t have 3.0😔😔😔😔😔😔😔 so i used DNC Great Lakes water only soil hopefully this works and I mixed some 3.0 I had left from the other pot cross fingers for nice transition to its new home
March 5 been three days since transplant can’t really tell if they adapted to there new homes yet some sings of stretching since transplant I’ve never transplanted before and I’m not sure if they need water or not so imma chill let them go for couple more days then I’ll water scared to over water them right now since I transplanted them don’t want to over stress them other one in 3.0 seems little droopy to me compared to the one in Great Lakes but Great Lakes soil seems bit dry sooooo idk I’m going keep an eye on them
Likes
9
Share


@Bafforr_autoflower
Follow
Se realiza transplante a maceta definitiva de 20 LT AIRPOT
Sigue el riego día por medio


Likes
57
Share


@SmokieMcPot
Follow
Two girls one cup week 2..
thanks for stopping by and checking out my experiment :)
no need to rotate them.. they're doing it all on their own 🤣.
hit the girls a little hard with the light last week when i turned it up to warm things up in there. kinda blasted em with 22 DLI and the light may have caused the curling on the Godzilla Cookies. all is well, and theyre moving right along. light currently 18in up, and hitting them with 14 DLI. running the 1/2 strength GHE light feed week 2 since last sundays RES change. will prob keep this RES until this sunday. just top off and PH adjust 8am/8pm daily. kinda excited to see the explosion of growth throughout this week. 3rd true set popping out of both GC and WG, and started LST them their separate ways as early as possible. contemplating topping after 5th or 6th node. havent made up my mind as to when yet. we shall see. roots poking their way through the drainage holes in the bottom of the upper growing chamber. Will have to add a stone to the RES here in a few days time.
GHE light feed 1/2 strength week 2 (measurements are per 2gal on 500 scale):
Total nitrogen - 47.5 ppm
PPM range - 200-275 ppm
Spring Water/Tap mix - 220 ppm (calmag and hydroguard already added)
Micro 3.6mL - 144 ppm
Grow 3.4mL - 77 ppm
Bloom 2.6mL - 41 ppm
Total = 482 ppm
GHE is pretty damn accurate on that ppm range huh?
*so far they seem to be loving life.. sooner or later this light won't be able to keep up with their needs. Probably sooner with the rate they're going.
*figured I keep them on the 1/2 strength week 2 GHE Flora feed for now. They've been moving right along, and I don't want to over feed em. Next RES change will get bumped up for sure. Made a nozzle for the reptile fogger since the one it had was made for a 1" hose. MUCH better distribution of moisture now.
*Wedding Glue def showing signs of being under fed. Taking up more water than it needs to get those nutes. Causing droopy leaves. Hopefully she can wait until the start of week 3 for a bump up.
*Nute levels dropping every 12h as expected. Going to crunch numbers tonight to see how much on a 12hr basis to see if we're ready to get bumped up. If so RES changes will be weekly still, just on the week mark instead of Sunday.
*WG said fuck 5 leaves and went straight for 7! Crossing my fingers she gets 13 of em so I can break a personal record of 11. That is unless the ruderalis takes over and puts a stop to them multiplying every node.
*****anyone got some pointers on how to go about getting a sponsorship? Could use a little 300w artificial sun to brighten up a cloudy day. And to finish these girls right.

Likes
11
Share


@MrSpunk
Follow
It has a very nice, abundant buds and a very pleasant aroma. I'm looking forward to trying it in a few weeks.

Likes
16
Share


@SenhorCamarao
Follow
First day of our days....
For this im using a super solo that i mixed by myself
I used a mix of perlite, rice husk, peat moss and agricultural calcium carbonat with 20% earthworm castings
Average RH - 55%
Average Temperature: 25º
500ml pot for rooting fase and than i'll transplant direct to the final 15L pot

Likes
53
Share


@BudBoutique
Follow
! this is my current status, gonna upload my last veg weeks within the next week - got a bit busy around Spannabis - thank you for your understanding! 💚
Welcome to Bud Boutique Grow Diary - really appreciate all your love and support :)
Dont forget to check out my other current grows!
🗓️ This Week:
- Day 24: attaching once a week APTUS Foliar with Regulator & Nutrispray with the amazing CannaFogger by Petra Grow
- Day 28: bud development is super beautiful on each pheno #1 and #2
Thank you for still staying with me 💚
___________________________________________
--- 🌱 Strain (Sponsor) ---
🏷️ P.C.R. by Art Genetix
https://www.artgenetix.world/product-page/p-c-r
--- 🥗 Nutrients and Feeding (sponsored by APTUS: APTUS Ambassador) ---
🍸 APTUS: full nutrient schedule extreme
-- Regulator, N-Boost, P-Boost, CaMg-Boost, K-Boost, Allin1 Liquid, Startbooster, Topbooster, Enzym+ every feeding
-- Fulvic-Blast, NutriSpray as Foliar each once a week
🔗 https://aptus-holland.com/
--- ♻️ Grow Control (Sponsor) ---
TROLMASTER: TENT-X + LM14 Light Adapter to dim/sunrise/sunset lights + Temp & rH Sensor all remote on App
🔗 https://www.trolmaster.eu/
--- 🚿 PetraGrow (Sponsor) ---
CannaFogger Foliar Spray
🔗 https://www.petratools.com/product/petragrow-cannafogger-atomizer-new-mini-fogger
--- 🏭 Grow Setup ---
💡LUMATEK Zeus Pro 600
* 🏠🌿 Indoor: Homebox 120x120x200cm (4x4)
* 📐🌀 PrimaKlima exhausting Fan 1180m3/h (running on 60-80%)
* 🌀 Can Light Filter 800m3/h & 1x Fanbox 1x Dyson fan for Air circulation
🔗 https://lumatek-lighting.com/zeus-600w-pro-29/
🔗 https://primaklima.com/de/shop/ventilatoren-de/ec-ventilatoren/pk160ec-tc/
🔗 https://canfilters.com/products/filters/
All Likes and comments are highly appreciated!!!
👨🌾 don't forget to check out my Instagram for daily educational content: budboutiquee
- Bud Boutique

Likes
16
Share


@LowzGrowz
Follow
Favorite N
Best Structure N Nug Stacking N Density
Tropical Aroma Strong Terps
Frosted
Colors Starting to pop


Likes
18
Share

@THcHunteR23
Follow
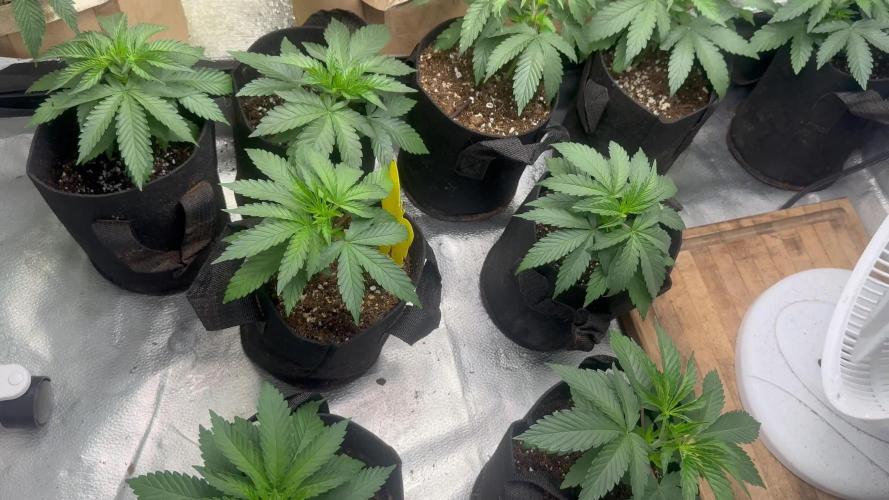
Il en reste 9 sur 11 assez stable j’ai éliminé une de façon volontaire parce que avait beaucoup de retard

Processing
Likes
4
Share


