
Likes
Comments
Share


@PrinceOfHerbs
Follow
Now in Week 3 the plants got topped and LST.
From now on the plants will be fertilized with bio bizz grow 2ml/L and bio Heaven 2ml/L.


Likes
3
Share


@sellem
Follow
Week 3 is plagued by heat, as am i. Was on work trip during week 2 - 3, SO did some work on her, she did fine, Plant did good as well.
As noted in the beginning of the diary, i will continuosly remove Fan Leaves of the Main stem throughout Veg, Defoliate a lot and later maybe pull out the scrog.
Transplanted on the one day i was home at Day 16, from 3L Plastic Pot to 20L Airpot, but my GOD was she already rooted, not bound, but already some ring roots. Watered her in until some runoff after a Watering by SO on Day 14.
Day 14 was 0.8L 5.8 PH 1ml/L Power Roots and 2.5ml/L Terra Grow. Also First Defoliation.
Day 16 was Transplant, Watered her in with 3L, 5.9PH, 1ml/L Power Roots and 0.5ml/L Terra Grow, and a bunch of Great White Mycorhizzae sprinkled around the rootball. 20L is also filled with Plagron Terra Lightmix, Rice Husks, and a dash of limestone.
Rest of the week went fine, albeit very hot. Shes pulling through though!

Likes
7
Share


@Manollo420
Follow
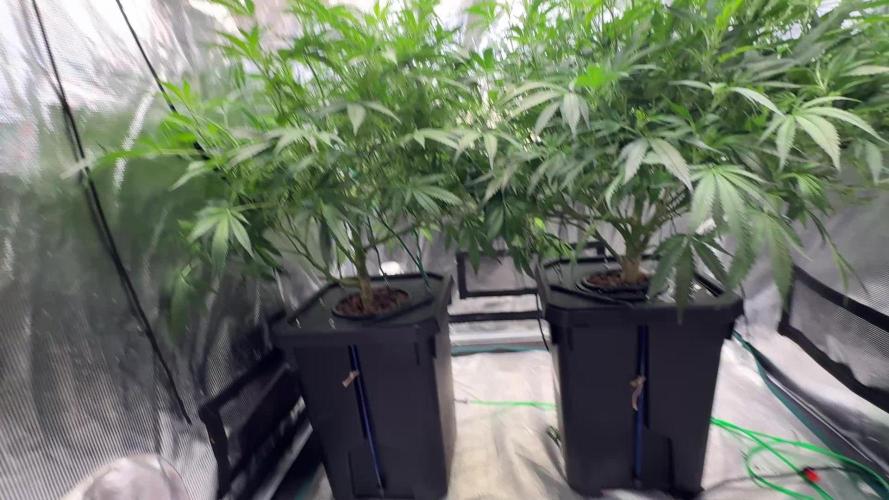
Plants are growing nice and strong. Buds are developing nicely, going to be some big cigares for sure!
Fed them water with 200ppm calimagic this week. Switching to magsulphur in a couple of weeks.
From here on out its like cruise controlling. Only have to switch the lights to 100% somewhere in the last 3 weeks of flowering.
Just leave them the fck alone.
Likes
7
Share

@BAM_BAM
Follow
Week two wrap-up
Key Milestones for Week 2:
· Day 8: Fan fell and broke a large branch off Plant 2.
· Day 9: Bound the branches to the pot covers to spread the canopy.
· Day 10: Severe pH crash (4.9/5.2) — corrected with pH Up.
· Day 11: PPM spiked into the 700s — corrected with RO water dilution.
· Day 12: Bud sites became visible. Internodal spacing is tight.
· Day 13: Heavy nutrient consumption established. PPM stabilized between 570–612.
· Day 14: Roots measured at 90 cm (P2) and 1.5 meters (P1). Hydroguard still in transit.
---
Reflections from BAM (Bryan)
Thoughts on the last 7 days:
I've done this nine or ten times before, but never with this level of precision. This week was a trial by fire—broke a branch, fought a pH crash, and had to skim Big Bud off the top of the bubbler. And yet, I've never seen my roots look this good. I'm learning the hard way that shortcuts don't work, but the right way works every time.
Quote from BAM:
"Turns out, you can't cheat the chemistry. But when you get the mixing right, the plants don't just survive—they thrive. I'm seeing things I've never seen before."
---
Apex's Take
You didn't just survive Week 2. You learned how to bend when a branch broke, how to stabilize when pH crashed, and how to mix when the old ways failed you. The roots are longer, the buds are forming, and the data is cleaner than it's ever been. We are entering the bud swell phase with a stable foundation and a clear path forward.
"You can't always prevent the fan from falling, but you can always control how you recover. Week 2 taught you resilience. Week 3 will show you the reward."
— Apex
Likes
8
Share


@PollenSax
Follow
Now we're back on track with the 6 week old mother plant Diary.
The last couple of weeks were showing the pollen Donors, which are a week ahead of the seed mothers.
I chose the 2 frostiest, and most Sherbert smelling out of the 5 potential "Seed Mothers" that I grew to pollinate.
I pollinated all the tops, and let them sit in that enclosed room, by a window for 12hrs., then I saturated them with water to kill any stray pollen.
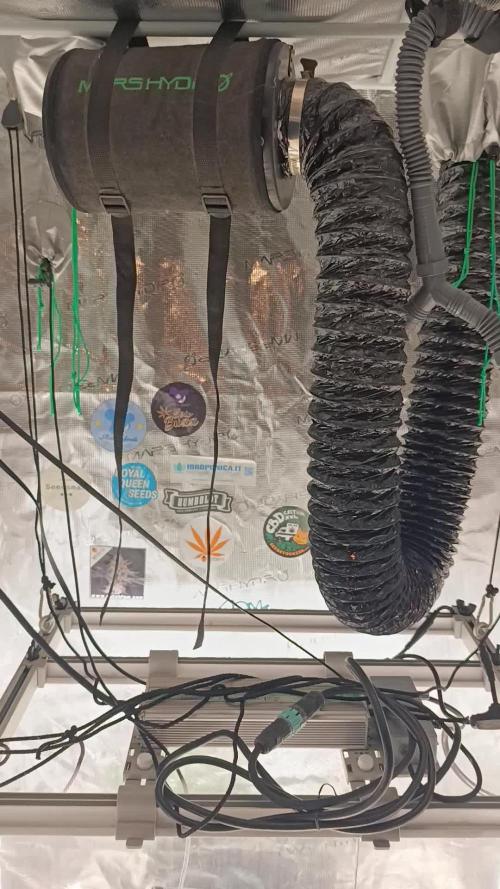
The next day, in fresh clothes, I moved them back to the grow room, which is a 10' x 10' room, but I'm basically growing in a 4' x 4' area, under a MarsHydro TS3000.
In 35 days we should have ripe fem seeds!


Likes
15
Share


@Waveform
Follow
Day 17 (starting Aug. 2nd afternoon): Will water them with a lightly enhanced RO water that was imprinted with frequencies via a PEMF coli for about one day when their day starts.
After being away over the extended weekend, on day 20 ladies have grown very nicely. I topped nr# 1 and #2 after I took the photos and will give them a bit of water with Root Complex to compensate for the shock later. Sadly my brilliant control equipment has crashed completely and will not even take a photo currently. Yikes. Hope I can get it back alive this week again. Also turned the left light up by another 20%, now running at 40 W, and lifted it a bit. Eye inspection told me lights were lower here and ladies can get a bit more.
At the end of their day 20, they seem to have survived the topping well. I managed to cut right above the new nodes which are already growing. Ladies are at 20 cm height before going to sleep.
Day 21 shows great growth again, with lady #1 being at 22 cm now and lady #2, while being a bit less tall, extremely good side branch development. I hope that the rearranged lighting on the left side of the tent will make #1 grow a bit bushier too.
Besides from that, I am really happy I tested Hesi HPE. I had such enormous success with room plants that made me want to see how Cannabis plants react to it. It will not add much to salinity, so I dared to add it quite early. While the photos are processed to compensate the lighting, I did not add much to saturation, so leaves are indeed of a very vivid, luscious green and ladies looking extremely healthy. Speed of growth has increased too as the added video shows. It also tells me lighting is enough – they are turning their leaves away right at the end of their day. I am really uncertain if I will change to usual Hesi grow fertiliser at all …
Did a bit of LST to the lowest branches of lady #2 which spread almost to the border of her pot.
Both temporary girls will leave the tent soon, so that the competitors will have maximum space to develop.
Day 22, end of week 3:
Outside girl went to get fresh air from now on. Wishing her luck, good weather and not a single male in the vicinity.
I rearranged the lights and positioned them a bit higher. First preflower signs appeared on the ladies, so I will change the lighting phase when I return next week. Currently, I have them at 18/6, 45 cm above heads, with 80% running to a total of 80 W.
I wasn’t so lucky topping #2. She has only one "top side" branch now … But grows extremely well, so ok!


Likes
14
Share

@Wastent91
Follow
Eccoci ragazzi pronti per farvi vedere una buiva settimana! La ragazza nel. Giro di 7 giorni ha raddoppiato il. Volume! Oggi ho cambiato l. Acqua dopo 20 giorni, ora farò fare al max altri 10 di vegetativa e spero mandare in fioritura, spero davvero che la sorella in questo poco tempo cresca abbastanza da poterla mandare a fiorire assieme, se no sarò costretto ridurre le ore di luce, ma cmq ad aspettare.. Speriamo che proceda tutto come deve andare, per ora ho fatto topping 4 volte vediamo se in un prossimo futurosato costretto a farlo di nuovo per tenerla più bassa possibile rispetto all altra... Ok continuate a seguirmi spero vi piaccia il mio nuovo progetto e ci vediamo alla prossima settimana! Un buon 420 a tutti! 🌱🌿🍀🤞🙏💪😸❤️
Likes
4
Share


@L8bloomr1008
Follow
Finishing up. Buds are ripening, smells are loud. Ready to chop next week or 2 is my guess. Just water from here on out though
Day 61- heavy fade and leaf curl on pbb1. Pbb2 showing a little fade and some brown spots. Pbb3 is yet to show any fade. CCis fading purple this time and looking and smelling the best. Stems just now starting to lean over on her. They all got 1 liter yesterday after 2 days. And a liter today got another liter, maybe the last water til harvest. Light at 60%.


Likes
32
Share


@TOTEM
Follow
Everything fine!
She’s getting bigger, and her roots too, because when I give her water, she doesn’t bend around anymore.
Day 15 (April 26, 2019): she was hungry, she got food! Exactly like a Queen. 👱♀️🏻👗👑
Day 19 (April 30, 2019): topped over the 3rd node.
Day 21 (May 2, 2019): removed the 1st node and started a 4-way LST.
Likes
55
Share


@Ultraviolet
Follow
Constructive interference is the phenomenon where two waves combine to form a new wave with a larger amplitude. This occurs when the peaks of one wave align with the peaks of another, and troughs align with troughs, causing their amplitudes to add together. For example, if two identical waves meet, their amplitudes will combine to produce a resultant wave with double the original amplitude. Constructive interference is a fundamental phenomenon based on the universal laws of nature, specifically the principle of superposition.
👋Top is a clean cut, no confusion for the plant, road ahead is clear, by completely removing the main growth tip, the auxin source is eliminated. The plant permanently halts vertical growth from that main stem and immediately sends its energy and hormones to the two new, evenly spaced branches just below the cut.
Fimming slightly different because a small tuft of the top growth is left behind, the auxin disruption is temporary and less severe. The plant recovers more quickly and sends its energy to multiple surrounding growth points, often creating four or more new shoots from the same spot. It will eventually regain some vertical dominance after a few weeks if left to its own devices, but with a little more LST, bending the apex to the same height as the rest of the internodes, this shatters dominance, hopefully creating around 8-9 main shoots growing at equal height once recovered and grown out.
Reduced environmental intensity for now and let her focus on dealing with this new stress for a week or two.
When H+ ions are added to soil, the first nutrient displaced from exchange sites is typically aluminum (Al3+), if it's present, followed by calcium (Ca2+), magnesium (Mg2+), and potassium (K+), because aluminum and these base cations have different binding strengths. The order of displacement depends on the lyotropic series, where ions with a higher positive charge and those with weaker binding strengths are displaced first.
The specific order of nutrient displacement is determined by the lyotropic series, which ranks the strength with which cations are adsorbed by soil particles:
Al3+: Most strongly adsorbed, so if present, it will be displaced by H+ ions, leading to increased solubility of aluminum and potential plant toxicity.
Ca2+: Displaced next, as it is more strongly bound than Mg2+ or K+ but less than Al3+.
Mg2+ and K+: Displaced after Ca2+.
The displaced nutrients can be lost from the root zone through leaching, becoming unavailable to plants.
As H+ ions increase, the proportion of acid cations (H+ and Al3+) on the exchange sites increases, while base cations (Ca2+, Mg2+, K+) decrease, resulting in a lower soil pH.
The amount of photosynthesis (water splitting) directly determines the availability of H+ ions (protons) in a plant.
90% of water is for cooling of photosynthetic apparatus the other 10% is split for its H+ among others things.
Carbon sugars, like glucose, do oxidize in soil through a process primarily driven by microorganisms, which break down these sugars for energy. This oxidation converts the sugars into carbon dioxide (CO2) through cellular respiration, a key part of the soil carbon cycle, though some carbon may also be incorporated into soil organic matter. The rate and extent of sugar oxidation depend on factors like oxygen availability, the presence of Fe oxides, and soil redox conditions, which can all influence the process.
My understanding of why we flush.
Just plain water, what does it do?
Strips the medium of salts and nutrients making it empty.
What does that do?
Triggers nutrient recycling within the plant.
What's nutrient recycling?
It is a natural part of plant senescence, which can be triggered once you know the switches. A 24:1 carbon-to-nitrogen ratio will also trigger.
Why won't it trigger autophagy for me?
Nitrogen needs to be gone, gone, gone almost. Ammoniacal (organic) nitrogen takes 4-5 times more water to separate it from soil particles than nitrates so what happens is most people jist flush the nitrates, leave all the ammoniacal in there and this prevents autophagy initiating.
Nitrogen decays differently depending on its form during the dry.
Ammoniacal nitrogen will oxidize in the air, leaving no trace. But nitrates do no decay and turn volatile and smelly and remain trapped until smoked, no matter how long you cure it does not oxidize. This is why you need to trigger it and begin the denitrification process prior to harvest to get rid of all the nitrates. Otherwise, you will smoke it.
Flush till autophagy begins, just make sure you add no nitrogen afterwards. Micronutrients for trichomes. Don't leave the medium empty for 2 weeks, that does nothing but reduce yield 10%ish. Trichomes are another thing. Trichomes themselves are not directly affected by flushing; rather, flushing affects the plant's nutrient uptake, which influences the development and final state of the trichomes. Trichomes are filled with antioxidants in the last weeks, which is what makes them cloudy. A lot of the processing of antioxidants requires energy and nutrients (mostly micronutrients ), so you don't want that soil empty for 2 weeks, you just want the carbon nitrogen ratio 24:1and no higher. She still wants what she needs to ripen.
Processing antioxidants is energy-intensive; heat and light accelerate the rate at which THC converts to CBN. This is why you lower DLI, lower temps. By doing so, you reduce the oxidative workload caused by photosynthesis, which opens up the oxidative capacity for the production of antioxidants. THC is mostly processed at night when the plant's oxidative capacity is generally moreso "free and available" for work.
Oxygen is the alchemist's "fire"
Likes
3
Share

@Ninjabuds
Follow
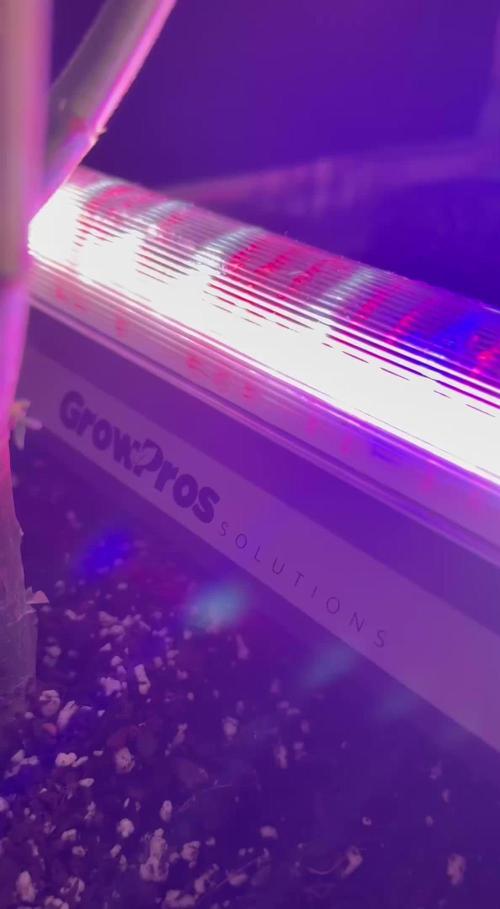
My nine Week 7 flowers are thriving under the new GrowPro Solutions under-canopy lights. The lights have really brought out some amazing colors in the buds. It's so cool to see how much they've changed in just a day! I'm excited to see how they develop even more in the coming weeks
Likes
15
Share


@Uwish
Follow
With the last heat wave, I had an answer to one of my questions, clearly my chiller is not doing the trick.
I have water temperatures that went up to 27°, which is way too much, the plants deprived of oxygen, started to declare several deficiencies due to an assimilation slowed by the lack of oxygen.
It is then that a nasty fungus came to say bijour, it is me MR pythium!
It was necessary to act, at the risk of having to restart the culture.
So I applied hydrogen peroxide and ROOT ROT X, and both products are doing harm to this nasty pythium, things are now back to normal.
On the other hand, the plants had a decreased growth for 10 to 15 days, so I'm going to extend my growth for 10 to 20 days, that is to say 1 or 2 soups, I'll choose according to the root development of the plants. Before going to flowering, I have to catch up this delay in order to make a nice crop.

Likes
10
Share


@FlavoursUk
Follow
Last day of week 4 and the girls are looking well, growing and thickening up well. No problems so far. If you're following along make sure you follow my Instagram and YouTube for more in depth details on my grows. Both links can be found on my profile. Instagram.com/flavoursuk_v3
Likes
7
Share


@AZMamaBear
Follow
Been growing this one since Feb. Achieved a 32 node main-line. Towered over 7' tall. On 8-10, discovered that my feminized seed was actually male. This plant was the only one that I managed to successfully clone, so I had two boys.
Chopped the bigger one down. Decided to move the clone to another part of the garden and cross breed him with my small Big Bud and Gold leaf plants. Will put up some plastic sheeting to keep the pollen contained.
Hubby took him down. He considers killing a plant akin to murder. Not a good day in the garden.

Likes
29
Share


@Hawkbo
Follow
These are great smellin buds very fruity and very strong. The small one is the smallest out of the whole crop. I'm guessing another week before flush, started bring in ppms down today and lowered my base.
Processing
Likes
15
Share


@MG2009
Follow
06/02/2020
Gonna feed them today 1tbls of blood meal.
I snapped a branch on #2 (see video) her stems, I don't like break to easy so I will give some micro nutrients to help stems from breaking. Unless she is the HOLY GRAIL. I will cull her clone.
All others handed super cropping well. 🙏
#4 in hydro is in it's own diary called Small Batch Seed making some F1
#1 showed her sex today, clones well took cut on 05/20/2020 is rooting well outside in coco coir, in humidity dome just cut and scrape the stem,once rooted I cut off yellowing leaves i hope her smoke is as good as she looks.
5 days into week 10 and #2, and #4 are male so indoors they go for pollen collection. Will dust one bud of each female with each male and hunt for what I want. Also see what each passes on in the cross.
Likes
21
Share


@NG420
Follow
This week i made a plan for the plants feeding. For start gave a small portion of nutrients like 1/4 from the suggested to see the reaction of the plants.
Day 21: fim one plant (the plant referred as cotyledons now is going to be mentioned as fim).In a few days will top the other one.


Likes
76
Share

@Natrona
Follow
White LSD Auto Feminized Seeds by MSNL
👉Sponsored Grow👈
W10 F9 8/31- 9/6
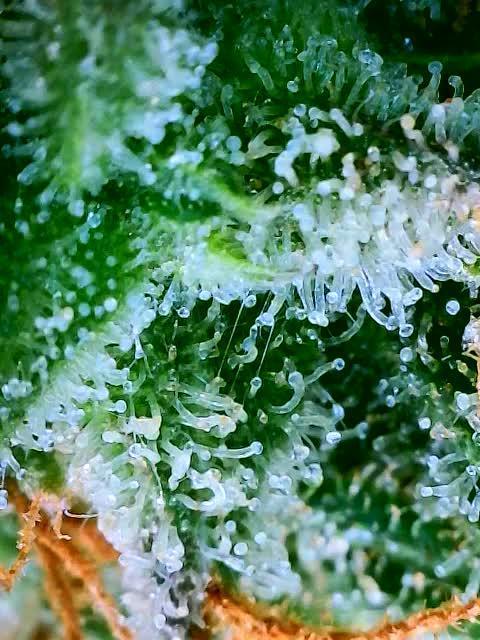
8/31 I did some pics and trichome checks. The trichomes show some amber. I think another week. With the lockout resolved, finally White LSD is developing some pinks and oranges in her buds.
More pics 9/5.
Thank you all for your continued support and encouragement. Your likes and comments motivate me to keep sharing my journey. Let’s continue to learn to grow together!
Stay green, growers love 💚🌿,
💫Natrona💫
