
Likes
Comments
Share


@Madman2020
Follow
Week5 Vegetative steering
Day 29
————-
4 minute shots(220+-ml).
50-60klux
68 leaf temp
Defoliated/Lollipopped
Plants seem to be inefficiently spaced. I moved them all closer and they are now positioned better under the lights
————
Day 30
VPDis about a .95
Vegetative steering schedule for 3gal who drink a little over a quart a day
220 P1
440 P1
660 P1
880 P1
1000 P1
1220 P2
1330(1%)P3
I achieve runoff at end of P1 then do a maintenance shot and finish the day off with a watering.
P1 waters every 15 min starting 1.5hours after lights on
Plants are swelling. But not as well as when i use CO2. I think plants in flower still need co2 so that we can get these lights closer.(as long as the leaf(temp does not go over 80 and vpd stays good)
Also, i found a plant to have hermied in week 2 so i removed the pollen sac and rubbed some pollen on 2 plants. Seems like they are just starting to take form on the flowers.
**need to check for hermies beginning week 2** Am happy to get seeds from these ladies as this was very isolated in the grow
________________
Day 31
Plants are starting to frost.
Group1 has swelled the most
Group 2 has average growth and nice frost
Group 3 looks like it was over dosed.
*Bras&MJ study shows that MJ does mot need to be sprayed with Bras as it will over stress the plants.
Brass was completely fine to spray without having adverse reactions.
MJ seems to decrease yields but is a worthy tradeoff(will continue to use)-*
—————
Day 32
Sprayed 2 plants with MJ(they now have been sprayed both week 4&6)
Sprayed 3 with bras(also have been sprayed twice in flower)
Finally frosting On the plants


Likes
14
Share


@BoboLacetti
Follow
I've finally managed to stabilize the PH value at around 6. The lamp has been running at 600W for 10 days. It gets really warm in the tent but the buds get nice and thick :)
Or do you prefer 400W then I can keep the temperature better at around 24 degrees


Likes
9
Share


@BudXs
Follow
One of two turned out to be a herm. Fucking autos. No matter how flashy the packs, no matter how many clicks a company gets, you cant escape the instability of products rushed to market
First and last time I grow this strain, easy choice.
Save your money, grow photos

Likes
17
Share


@exMoleKing
Follow
Posting Tuesday instead of Saturday because I'm heading out of town for the rest of the week. Luckily have some good help with watering but I'm going to feed them before I take off tomorrow. Bottle cap/gallon of veg nutrients for the photoperiods and same amount of bloom nutrients for the auto flowers.
Still no signs of males and THINK there are female preflowers on two of the photos. The tallest plant is still worrying me. Wouldn't be surprised if that's male but the others are looking good so far. The gangly one in the pink pot and the only one I didn't top (germinated Ina beer can) are the ones that look like they are showing female preflowers.
Using bamboo sticks and gardening tape to support some branches but also using the additional support to spread some of the branches. The light green one (germinated in a beer can as well) is the bushiest out of all them and seems to be liking the ScrOG. Will add more bamboo to the top of the tomato cages like the other plants in the next week or so.
Autos are in the beginning of week 8 and about their third week of flowering. They've only been outdoors and started them April 6th so is there a possibility they could take longer than 12 weeks? This is my first auto grow so curious to see my yield. Been light on the nutrients since I'm a novice grower and afraid of frying them.

Likes
19
Share


@NeedOner
Follow
La fioritura procede bene.
Le piante iniziano a diffondere il loro aroma.
Ho inserito ona gel e ona block cosi da bloccare la fuoriuscita di odori.
Oggi ho applicato la rete scrog per far prendere equamente luice ai fiori.


Likes
57
Share


@TheBudWhisperer
Follow
Week 8 of flower is in the books and this show is quickly coming to an end. I said last week we had about 7-10 days and I was spot on at the 10 day mark. I was only wrong about the order. The cheese is ready to chop before the rest and the gorilla cookies, cherry Bomb and lemon haze will follow in due course. The cheese is a beast and it’ll take a little time to get it all run through the bowl trimmer. At least the big one goes first. Her tallest colas have foxtailed like mar, despite the late supercrop. You can tell where the sweet spot for the light is at about 10” distance from the canopy. Any closer than that and the tails begin to show prominently. It’s a good example of just how close you can get to these fixtures with a little bit of prior experience. It’s been noted for the next run😎👍😎. The res. is on an h2o2 only flush for the remainder until the rest are ready to come down. Not a moment too soon either - the pollen chucking project has stalled out waiting for these girls to finish and now that we’ll have a little extra room, we can start running our cuts in the aerocloner🤟. Not long at all now folks. Thanks for tagging along through all this. Learned a bunch about this system and we’re back to hardware mode to make some serious improvements for the next run🤙😎. I love hardware mode😉.
Background/Repetitive Nonsense
The strain line up on this grow is look’n quite saucy 😈. We’ve got 2 FB strains this time around - Gorilla Cookies (seems we always have some GSC cross in the works). Mainly because the colours look stellar and remind me of a sugar breathe we did last year that was 🔥. The other FB is their original Cheese strain... because we already smoked all our cheese... and we really like our cheese...😉. Emerald triangle was kind enough to include a freebie of Lemon Haze. Wasn’t really big on the list but we haven’t done a haze strain to write home about yet so worth a go👍. The last is a Cherry auto from Bomb seeds that we’ve been trying to get to for months. Let’s just hope that she’s not a dud like the last bean.
The new digs for this run are courtesy MarsHydro👊. Their 2x4 single grow tent, paired with a shiny new 240w QB courtesy ViparSpectra.
These folks were kind enough to discuss a collaboration and as a result, here we are to test out the gear with an inaugural run of autos. Each week, we’ll try to expand on some of the benefits of each, as well as any limiting factors or considerations that need attention when pondering purchase.
Already I can say that both are high quality products in terms of overall craftsmanship.
MarsHydro 2x4 Grow Tent:
Excellent construction in terms of durability. Reinforced stitching on the zippers and corners ensures zero tearing. Conveniently placed screen vents and intake/exhaust ports. The ceiling exhaust port only exists on the right side. Perfect for me but not great if you’re running exhaust from the top on the left side (left side wall port makes up for this however). The aluminum frame is rigid enough to support the weight of the lights and accessories. Once you have some weight in the tent, she’s go’n nowhere and you can assemble and break it down in record time if moving or stashing the grow op.
Only limiting factors I’ve noticed is that temp. Control will be an issue for a tent. It just doesn’t have the same insulating ability as a wood cabinet or other permanent enclosed space. No worries, this is offset by a small desktop heater and keeps the environment exactly where desired. The other issue was a production problem - the ceiling vent was accidentally stitched into the corner seams on the assembly line. Again, no real issue - just pulled it out with no damage or fraying to the tent or port👍.
Website link here:
https://www.mars-hydro.com/grow-tent/buy-mars-hydro-grow-tent-24x48x70-2-x-4-cabinet-closet-grow-box-upgraded-diamond-1680d-mylar-for-sale
ViparSpectra 240w Quantum Board:
This thing is sleek and slick in terms of design. Closest comparable to it that I’ve seen would be spiderfarmers line of qbs. They feature the same top-o-the-line components and roughly similar spectrums. Where VS takes the advantage is in the convenience of the dimmer nob which is easily accessible and works great at 50% with no strobing👍. The heat sink is also larger which contributes to lower temps. That’s not a good thing in my case but beneficial for most folks.
I can already say that this will be a great fixture through all stages of growth. Where I know this light will excel will be in the veg. Stage for sure. Dimming function gives seedlings a much better chance of success with the ability to use lower lighting levels early on and the coverage area on a 240w is great. The average grower will find this panel suitable and fitting to their needs in a 2x4 grow space although I’d suggest 2 units if going any larger than that. The total output in this space equates to about 30w/sq.ft. Which is a decent amount of coverage based on power vs. Growprint. Ideal for veg. Certainly but, in flower - I tend to run closer to 50-60w/sq.ft to achieve higher yields. Again, similar fixtures have performed admirably in the past and while this wouldn’t be considered an “entry-level” fixture, I’d recommend that any grower new to the game not skimp on lighting and start with one of these. The price points are a great value for quality LED tech. These days, so there’s little reason to even consider a lesser fixture👍.
I have no detail on limiting factors for this light as yet but have heard that stock branded fixtures don’t necessarily incorporate enough red diodes. I’ve seen no issue myself but confess - I’m no lighting guru.
Website link:
https://www.viparspectra.com/collections/xs-series/products/xs-series-xs2000
***8% discount when using code: “ItBudWhisper”***
Happy to have you along for the ride if you made it this far through my opening rant!!😎🤟😎🤟😎


Likes
47
Share


@GrowGuy97
Follow
The bud smells like candy in a jar! Very impressed with how this lady turn out, took her a little while for the buds to fatten up but I’m glad I gave her a little extra time because she definitely filled out more! Buds are extremely dense & sticky and definitely has a couch lock high! Can’t wait to grow this again using a full nutrient line & see how she does! Make sure to go check out Doctors Choice for some amazing genetics! Thanks for following & happy growing friends!🙏🏼✌️🏼🌱

Likes
5
Share

@Growbody
Follow
Herzlich Willkommen zu meinem neuen Grow mit der Frostbanger Auto F3 von 2Fast4Buds. Die "Eltern" sind (GG4 Auto F6 x Bruce Banner Auto F5) x Sour Diesel Auto F5 und das ergibt eine F3 feminisierte dreifache Polyhybrid Autoflower. Klingt schonmal heftig. Der Strain ist beim Autoflowerworldcup 2025 zur stärksten Autoflower gewählt worden. Mit dem Versprechen, süsse, cremige Aromen zu produzieren, muss ich diese Pflanze testen.
Die 20 Liter AirPots 7th gen., die Sonnenerde Bio Hanferde, BioBizz Wurmhumus, Sonnenerde Bio Faser, BIONOVA x zamnesia MonsterBud Mix Living Soil, zamnesias SmartStart und Plagrons Seedbooster Plus werden bei diesem Grow wieder verwendet.
Tag 21: Die Frostbanger Auto F3 von 2Fast4Buds hat schon schöne Seitentriebe entwickelt.
Tag 23: 1,0 Liter Wasser.
Tag 24: Das Stämmchen ist sehr fest, deshalb vorsichtig etwas LST angewendet.
Tag 25: Die Große bekommt 1,0 Liter Wasser.
Tag 26: Nochmal vorsichtig LST. Sie bekommt jetzt schon Blüten.
Tag 28: 1,0 Liter Wasser. Sie wächst rund 2 cm am Tag.
Schön, dass du dich für meinen Grow interessierst. Freut mich, wenn du wieder reinschaust 👋😎


Likes
37
Share


@GrownwithLED
Follow
During week 9 the flowering continued nicely and all plants developed nice flower crowns. Unfortunately I spotted some brown pistils on some plants and at this stage that only can mean they have been inseminated by pollen. Since I have no male plants around I thoroughly inspect the nodes of all plants from bottom to top. I am searching for hidden male pollen-sacks that have grown on my female plants and sure enough I find several ripe and open pollen sacks on three plants. This means those plants ARE HERMAPHRODITES, plants that have BOTH SEXES, they are female plants that also grow male pollensacks...my ABSOLUTE HORROR! The open pollen sacks have released pollen onto the female pistils around them and this turned the pistils brown. Where those fertilized pistils are, seeds will now start to grow inside the buds of my grow. 😢 After spraying water over the plants, in order to neutralize the free pollen inside, I carefully cut off the hermie-plants on the main stem right above the soil and immediately discard them far away from my grow-tent into the trash. Since I spotted the hermies early, I hope my grow will not be fully seeded, but only have a few seeds grow in some buds here and there. My fingers are crossed!
My 'CHEESE'-plant from BIG BUDDHA SEEDS has turned a little yellow and developed some dark spots on the leaves, which I attribute to the plant standing alone in a tray now. She seems to be overfed a little and getting too much water to the roots. I therefore take her out of the water for a few days, in order to let the medium dry out a little and let the roots get some air.
The SANlight EVO4-120 LED-lights work like a treat. They are now running at 100% dimm-level and are hung 30 cm above the top of the plants.
The BIO NOVA nutrients are still given at half strength of the recommended dose and some plants seem to be overfed...I have to keep an eye on them.


Processing
Likes
2
Share


Likes
14
Share


@madlangs
Follow
All going very well no problems. Thought I had a problem with banana punch but it was a bit of wind burn on 4 fan leaves so turned fan down
8.1.23
Turned water off for 6 hours turned back on following morning watered in trays
recharge 1.5tsp in 6L
Mammoth P
8.1.23
Big Defoliation and lollipopped
Ppfd 500 in centre
Dli 36
11.1.23
Ppfd 560
Dli 40
12.1.23
Ppfd 580
Dli 41.76
Light 57cm
12.1.23
Looks like a very slight calcium deficiency one some of the top sugar leaves on the very green gorilla cookies.
13.1.23
cherry cola 73cm
Cherry cola 42cm
Strawberry gorilla 62cm
Punch 80cm
Gorilla cookies 62cm
Gorilla cookies 50cm
Light 55cm
Likes
12
Share

@GrowGuy97
Follow
Will post dry weights & more comments soon! Sorry for the lack of updates but Thanks for following & happy growing friends!✌️🏼🙏🏼🌱
Likes
195
Share

@yan402
Follow
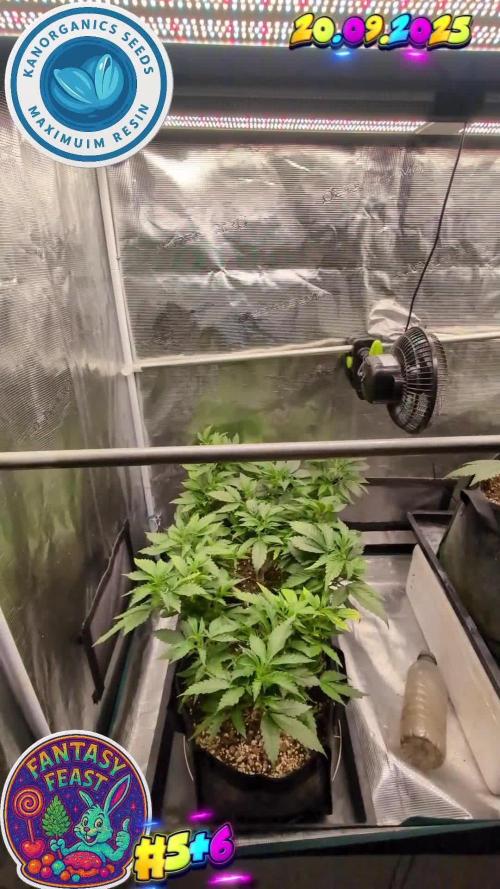
This two were part of another diary and got moved out due to space reasons at VW8 and moved back indoors at VW20
https://growdiaries.com/diaries/218151-auto-god-s-glue-grow-journal-by-yan402
13.09.25 VW21 Both are looking good and are developing tighter nodes than when they were outside, I'm going to have to keep cutting them back every once and a while I also applied nematodes against thrips and fungus gnats.
20.09.25 VW22 some spots and some yellow leafs, I think it's a root problem, probably root bound, but both seem healthy and are getting thicker so maybe just top up with Coco coir and give a slight different nutrient schedule less Tri Part Bloom could do the trick MAYBE lol.
🌱💦🌱💦🌱💦🌱💦🌱💦🌱
Day to day tasks & actions 🌿
🌱💦🌱💦🌱💦🌱💦🌱💦🌱
20.09.25 VW22 – Fed 3l of plain water→ 1l runoff
21.09.25 VW22 no water no feed
22.09.25 VW22 – Fed 3l of #1 → 1l runoff
23.09.25 VW22 – Fed 3l of #1 → 1l runoff
24.09.25 VW22 – Fed 3l of #1 → 1l runoff
25.09.25 VW22 no water no feed
26.09.25 VW22 no water no feed
27.09.25 VW22 – Fed 3l of #1 → 2l runoff
(*RUNOFF reused for tomato plants)
🍶💧🍶💧🍶💧🍶💧🍶
💧 Nutrients in 30L #1
🍶💧🍶💧🍶💧🍶💧🍶
💧 TriPart Micro:
10ml
= 0.33ml/L
🍶 TriPart Grow:
0ml
= 0.00ml/L
💧 TriPart Bloom:
10ml
= 0.33ml/L
💧 Cal-Mag:
60ml
= 2.00ml/L
🍶 Home-made FFJ/FPJ (new batch):
30ml
= 1.00ml/L
💧 pH Down:
Citric acid (BuxXtrade) — adjust to ~pH 6.0
📦 TOTAL:
120ml per 30L
🔬 4.00ml/L
🍶💧🍶💧🍶💧🍶💧🍶
⚙️✂️⚙️✂️⚙️✂️⚙️✂️⚙️
✂️ Tools & equipment ✂️
⚙️✂️⚙️✂️⚙️✂️⚙️✂️⚙️
✂️ 2× MarsHydro SP3000
⚙️ MarsHydro 150mm ACF Ventilator
✂️ Trotec dehumidifier (big unit)
⚙️ Mini no-name dehumidifier
✂️ Kebab skewers (LST – stainless)
⚙️ Wire + roast skewers (LST assist)
✂️ Scissors (HST)
⚙️ Vacuum (for spills & cleanup)
✂️⚙️✂️⚙️✂️⚙️⚙️✂️⚙️✂️⚙️✂️⚙️
🍒🍭🍬🌈🍒🍭🍬🌈🍒🍭🍬🌈🍒
🦄Fantasy Feast ( Seeds)🦄
🌈🍒🍭🍬🌈🍒🍭🍬🌈🍒🍭🍬🌈🍒
Species: Hybrid (Regular)
Genetics: The mother is Unicorn Whip by Dirty Bird Genetics. The father is Charcuterie by Cannarado Genetics.
Effect: Unknown Mixed effect body and head high
Flavor: Some phenos are Skunky gassy fruity, some are fruity sour citrus with a chemical touch and a touch of skunk
Flowering: Estimated 8–10 weeks
Resistance: Strong — Testing phase done
Likes
126
Share


@DogDoctorOfficial
Follow
this is a very easy one to grow with an enormous bag appeal true her all cycle, a must in any garden, her trichomes production is out of these world, as are them grams on them fruits, a true must for us all to grow
Likes
3
Share


@CannaGods
Follow
Last week I had decided to flower the plant as it is growing very large, here are a few notes for new growers.
Always flip your plant's light schedule when the plant is at the desired height this plant is now 3 1/2 feet tall. Cannabis plants tend to double in size depending on how well they are taking care of.
If you do not pay close attention to the height of your plants you will inevitably have a plant that will outgrow your tent.
Here are a few notes for some growers that have not grown in h20.,
First you can grow your cannabis in any substrate you want, the substrates that growers put here are common that you can find all over the Internet and in some local flowering shops however, all that matters is that the roots touch the water. You can grow in the glass fish balls, you can grow in non-toxic gel balls, you can pretty much grow in any substrate you want.
Second note: growing in h20 in my opinion is a lot more easier than growing in soil. Some growers will say that cannabis has a different taste in soil there is no science that concludes that the cannabis will taste any better or any less good in H2O or soil. It is all opinion.
However, growing in H2O does need to be taken care of carefully. Always remember to make sure no light is getting inside the reservoir and keep the reservoir clean of all debris. It's the same concept of having a pool. If you have a pool with no debridement it will stay crystal-clear with no filtration for a very long time. However, if you get debris in a pool unwanted organisms will start to grow such as algae bacteria, and other things that you would not want to touch your body, take that concept and apply it to a cannabis plant.
Hydro guard is a failsafe in case you are too lazy to keep the reservoir clean. It will prevent root slime rot and many root problems (It's beneficial bacteria similar to what is in recharge only for H2O)
Lastly, Your plants if grown in hydrogen will grow rapidly more rapidly than in soil you yield will be produced faster. Also, remember the substrate is free, if you cannot purchase deionized water you can use regular tap water as long as the PPM is low, even so, you can offset the PPM as long as it's tested. You will save hundreds of dollars in soil Perlite, and other fertilizers. Some growers will state that the chemical fertilizers are bad for you, that is completely untrue and also unproven. Again NASA uses general hydroponics To grow produce in space.
Likes
200
Share


@Ferenc
Follow
Day 65, 14th of November 2020:
Amazing week....
RQS Wedding Gelato does not strech a lot and pistils coming out nicely....
Original Sensible Seeds has amazing gentics they are so strechy except Black Ghost OG, rest of them crazyyyyyyy..... I also broke two of the sides from Gelato Original Sensible Seeds but fixed with tape and now all good lol 🤣🤣🤣
Pre flowers out and I really hope they stop growing lol.
I also noticed that the Original Sensible Seeds strains have nice purple colours of the fan leave's stem.
All the same fertilization happens every 2nd day with the mix above and ratio.
One more thing:
I set the lamp 15 minutes shorter to switch off earlier so they receive 11:45 of darkness. I would like to imitate the nature when longer nights come with time till the 4th week (when they will receive 13 hours darkness a day 15 minutes minus 4 times = 1hour) so every week 15 min longer darkness for 4 weeks and then back to 12/12 to have bigger buds from the 4th week....


Likes
97
Share


@Zurban_Poison
Follow
Hello everyone everyone everyone!
It rarely happens!
when the plant is so perfect in everything!
Yes I know! praising your own is not entirely decent.)) but isn't that true? isn't she perfect in everything?
I cannot find any flaw.
I believe that I was able to Raise such a Phoenix to be proud of. which 100% reflects everything that GreenHausSeeds put into this wonderful variety!
for which I want to say thank you very much!
rare varieties so cling to the heart!) I never cease to be surprised and admire how beautiful and ideal she is in her development. this is just a miracle!