







Likes
4
Share


@DaddyPrime2
Follow
10/26/24
she gets thirsty thirsty. her fan leaves are damaged and messed up considering needing to reveg and fight bugs but she is very nice looking in the pistils and sugar leaves
10/30
she has a nice candy smell to her already. i sprayed all of my plants with spinosad. the spidermites seem to jump from one plant to the others if i only get some of them. she has seemed absolutely wrecked this whole grow but the qualityvis shining through
11/01/24
shes fighting fairly well. aesthetically she looks rough with thw reveg leaves and then the fan leaves dying from dehydration amongst other things. but shes really shining through all the bullshit. the biggest issue is having her veg for so long in such small pots. she was root bound in a solo cup and then a 1 gallon. if i wouldve put her in a bigger pot like 7 gallon or maybe even bigger, i think wed have a better time with keeping her soil moisture levels stable. if i dint water her daily, she struggles bad and i think its just the root to soil ratio is way off.
Likes
1
Share


@Kern420
Follow
Woche über haben sich die Blüten weiter entwickelt. Die Trichome wurden mehr und man fängt an erste Terpene zu riechen.
Wir haben Donnerstag (BT 2) stark entlaubt und schauen jetzt wie die Pflanzen wachsen.
C.C ist bissl kleiner aber trotzdem hat sie starke Triebe und scheint gute Blüten auszubilden. Der Geruch ist aufjedenfall schon funky.
Likes
18
Share


@TheCannaProphet
Follow
~ FASTBUDS TESTER #2204 ~
Well friends, here we go on another 'canna-venture' together!
The grow room has had a complete remodel and some upgrades done to it including brand spanking new 4x8 and 4x4 tents and a Trolmaster Hydro X controller along with a new Control Panel.
This tester strain is one of six tester strains that FastBuds has graciously provided me with and I'm looking forward to seeing what this girl has to offer when she's grown to her full potential!
One drawback of 'testers' is I have little to no information on it other than its number and that it's an autoflower... 🤪 But, it's ALWAYS a blast growing them for me because not knowing a lot allows me to just concentrate on the essentials: Light, Environment, Water, Nutrients and possibly a bit of LST... not complicated, just basics like keeping a constant temperature and RH in the tent at a level that gives a good VPD, watering when almost dry and maintaining proper light levels according to their stage of growth.
____________________________________________________________________________________________________________________________________________________________________________________________________________________________________________________________________________________________________________________________________________________________________________________________________________________________________________________
~THE SETUP~
~Initially seeds were lightly scuffed, then soaked for 3 hours in 78℉ distilled water after which they were transferred to moist paper towels laid out in a Jiffy Pellet plastic starter tray with lid. Underneath the tray was placed a Vivosun Heat Mat with Controller that was set to 78℉ where they stayed until their tap roots emerged.
~Planted into Jiffy Peat Pellets that were hydrated with distilled water warmed to 78℉ with a 7.0 ph.
~Once roots emerge from the Jiffy Pellet they're transferred to their fabric pots.
~Grown 100% organic in a 4g Gronest fabric pot and a 3g fabric pot by Wraxly filled with Mother Earth 70/30 Coco/Perlite medium and initially amended with Dr. Earth 4-4-4 / Earthworm Castings / Dr. Earth Flower Girl 3-9-4 and Coast of Maine Stonington Blend Organic Plant Food 5-2-4.
~19/5 light cycle for the entire run with supplemental UVA added during flower. Lights are controlled by a Trolmaster Hydro X controller set for a 15min Sunrise/Sunset simulation.
~Top dressing every 3-4 weeks with slow release dry amendments and Earthworm castings.
~Straight water ph'd @ 6.2-6.8 when needed and bi-weekly Compost Tea's.
____________________________________________________________________________________________________________________________________________________________________________________________________________________________________________________________________________________________________________________________________________________________________________________________
Weekly Updates:
1/19- Here we go into Week Three of flower and these testers are finally in flower mode!🧐👍
Both testers are in flower and are ready to eat! Today I gave both girls a top dressing with Down To Earth 4-8-4 Flower Mix at a ratio of 2tbsp/g and Coast of Maine's Stonington Blend 5-2-4 Organic Plant Food at a ratio of 1tbsp/g which I simplified by using 1/3 cup of the 4-8-4 and 1/4 cup of the 5-2-4 in the 4g pot and 3/8 cup of 4-8-4 and 1/8 cup of the 5-2-4 in the 3g pot. After working the amendments into the medium, I watered it in with 1g of straight de-chlorinated water ph'd to 6.6 @ 74℉. It will take a week for the microbes to begin breaking it down and will last for 3 weeks or so. I'll monitor them and decide on whether I'll give them another top dress or let them ride.
I've also increased the power to the HLG 650R's the the Trolmaster Hydro X Controller to 75% which has them pulling 990w at the wall and have them hung 32" above canopy. I also starting adding in 4 hours of UVA during the middle of the light cycle for the remainder of flower. I've been monitoring their leaf temperatures and they're running 71-73℉ which is perfect! I have the AutoPilot APC8200 co2 Controller set to 1100ppm with a 100ppm window and the AC Infinity Cloudline T6 controller set to maintain a 74℉ temperature in the tent while the lights are on.
1/21- I'm watering these thirsty girls daily with straight de-chlorinated water ph'd it to 6.6 @ 74℉ and they're both thriving! The #1 pheno being roughly a week ahead of the #2 is starting to flower nicely. The #2 pheno, while different behind her sister, is finally beginning to get her act together a is making flowers!🧐
1/23- I watered/fed both testers today with 0.5g of de-chlorinated water each with GreenGro's Natures Brix and Granular Myco mixed in, after which I added 1 tsp/g of unsulfured molasses and then ph'd it to 6.6 @ 74℉. They'll be getting only one more feed from here moving forward as they will take a little longer than the other testers in the run that are well into flower now.
1/25- Yesterday I didn't water but continued today with 0.75g for the #1, and 0.5g for the #2, of straight de-chlorinated water ph'd to 6.6 @ 74℉.
They're both looking really healthy and both into flower! I'm really looking forward to Week Four of flower where they should start to reveal how they're going to look after stretching!😍💚
😎💚 Thank you for checking out my passion in life! Please visit as often as you wish and I hope you enjoy this journey as much as I know I will! Grow Strong! 💪😎🤙
Likes
35
Share


@Master_weeda
Follow
Bonjour à tous les padawans et les maîtres jedis
Pour cette semaine je prévoit de pratiquer comme technique spéciale le LST et juste un arrosage.
Pour cela comme à mon habitude j'attend le cinquième noeud ou que je juge la plante robuste.
Je profite que cette semaine qui va être relativement calme pour faire un LST appliqué et vous faire un rappel de ce qui est pour moi la meilleure technique pour arroser une autofloraison et la façon dont je pratique le LST.
En suivant ces quelques simples conseils vous obtiendrez un résultat optimal tout au long de votre culture :
Le cannabis est une plante qui n’aime pas recevoir un léger arrosage en continu. Il est impératif de l’arroser en grosse quantité, puis d’attendre que la terre soit bien sèche avant d’arroser à nouveau!
Pour calculer la quantité d’eau nécessaire à chaque plante, suivez cette règle :
Le volume d’eau à donner lors de chaque arrosage doit représenter au moins environ un quart du volume du pot !!
Exemples :
pour un pot d’1L, donnez 0,25L d’eau à chaque arrosage pour un pot de 4L, donnez 1L d’eau à chaque arrosage pour un pot de 12L, donnez 3L d’eau à chaque arrosage pour un pot de 30L, donnez 7,5L d’eau à chaque arrosage !etc…
Pour donner un tel volume d’eau, il est souvent nécessaire d’arroser en deux (voir trois) fois, lentement et uniformément sur toute la surface. Disposez de bonnes coupelles sous les pots, celles ci se rempliront d’eau qui remontera dans le pot par capillarité en moins d’une journée. Il est également très important d’utiliser un bon terreau de qualité, avec une bonne capacité de rétention d’eau mais qui assure également un bon drainage (celui ci doit contenir de la perlite, et/ou de la coco, etc..)
Il vous faut alors maintenant attendre quelques jours en sous-pesant régulièrement les pot avec vos bras. Quand ils seront redevenus très légers, vous pourrez arroser à nouveau !!
En effet, comme l’eau pèse beaucoup plus lourd que la terre, un pot gorgé d’eau pèse plusieurs fois le poids d’un pot d’une plante prête à être arrosée. Avec un peu d’entraînement, vous apprendrez donc très rapidement à sous-peser vos pots pour savoir quand une plante a soif.
C’est une technique à la fois très facile et très efficace, et qui peut être appliquée à toutes les plantes en pots !
En arrosant de cette façon, en général vous devrez arroser vos plantes tous les 3 à 6 jours.
Pour cette semaine 3 au jour 17 ma plante fais 12 centimètres et son cinquième noeud apparaît je décide donc de pratiquer un LST sur ma plante.
Pour ce j'utilise du fil de fer galvanisé que je plante directement dans le substrat en faisant attention de ne pas endommagé les racines car n'oublions pas que ce qui pousse dessus pousse aussi dessous.
Jour 17 je pulvérise du une solution composé d'une cuillère à café de savon noir mou dilué dans un litre d'eau en prévention d'éventuels nuisibles.
Je corrige mon LST suivant la pousse de ma plante ...
Pour ma par c'est la manière dont je procède. Comme promis petit rapel de:
Quand commencer à appliquer la technique LST
De nombreux cultivateurs commencent la manipulation dés que les plantes possèdent entre 3 et 6 nœuds ou une paire de feuilles. Durant cette première étape de la croissance, le tronc encore flexible est pliable sans risque qu’il ne se casse, même si au fur et à mesure du développement de la plante il sera de plus en plus difficile de le plier. Nous pouvons continuer à guider la croissance des branches durant toute la culture, même durant la floraison, ce qui pour cette étape représente un grand avantage face à la taille, qui n’est pas du tout recommandé une fois que la formation des têtes commence, cela stressera en effet la plante, ce qui aura pour effet de retarder la récolte.
Comment appliquer la technique de guidage LST
Si nous sommes prudents, la flexibilité naturelle des fibres du cannabis permet de plier leur tronc et branches avec une relative facilitée, même durant la floraison des plantes.
En utilisant une corde fine, nous pouvons accrocher la pointe de la plante à la base du pot par exemple ou à un tuteur que nous aurons planté dans le substrat. Nous plierons le tronc avec précaution et nous le fixerons avec la corde, à partir de là, nous pouvons augmenter progressivement la tension de la corde, chaque jour un peu plus, jusqu’à obtenir la position souhaitée. Soyez attentif à la réaction de la plante, essayez de ne pas appliquer trop de pression sur la corde et rappelez-vous que la flexibilité des branches peut varier d’une plante à l’autre.
Pour obtenir de meilleurs résultats, il suffit de suivre quelques règles simples. Pour commencer, nous devons choisir une corde fine mais pas trop pour ne pas blesser les troncs au fur et à mesure qu’ils grandissent et qu’ils deviennent plus gros.
Nous pouvons utiliser des crochets en plastique souple ou de n’importe quelle autre matière flexible pour éviter d’endommager les plantes. Spécialement en intérieur, utiliser des cordons en plastique de couleur (voir les diaries de @Silky) est très pratique pour voir facilement les accroches et faciliter le travail au milieu du réseau formés par les cordes, les tuteurs, les mailles ou les supports que nous aurons dans la culture. Bien entendu, en culture extérieure et surtout en guerilla nous ferons juste le contraire et nous utiliserons des matériaux de couleur qui n’attirent pas l’attention pour que notre jardin reste discret.
Pour stresser les plantes au minimum, la mieux est de réaliser ces manipulations le soir ou juste après que les lampes en intérieur s’éteignent, ce qui leur permettra de se remettre durant la nuit. Normalement, le jour suivant nous pourrons observer comme les pointes des branches que nous avons pliées se dressent de nouveau vers le haut à la recherche d’une source de lumière.
Que la force soit avec vous
Likes
79
Share

@THcHunteR23
Follow
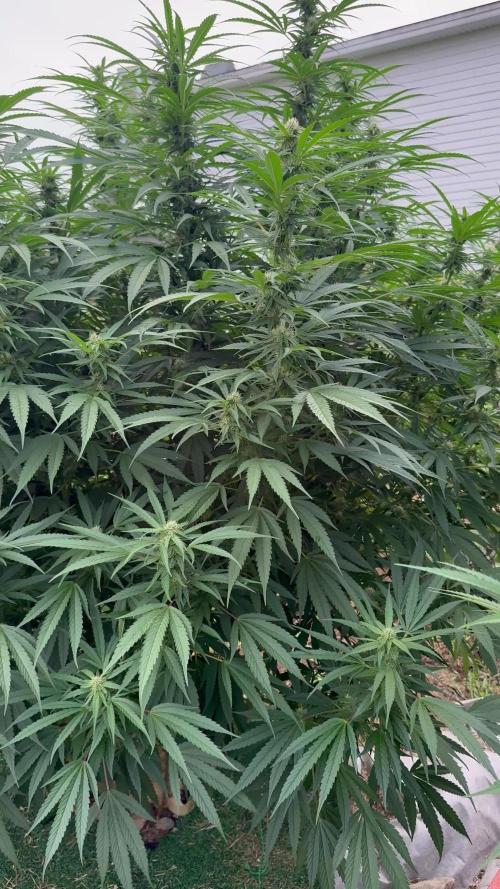
Dernière défoliation Et encore WoW si vous pouviez sentir cette douceur crémeuse et sucrée 🤤🤤 🧡🧡Kannabia🔥🔥😍

Likes
45
Share


@MadeInGermany
Follow
Info:
Unfortunately, I had to find out that my account is used for fake pages in social media.
I am only active here on growdiaries.
I am not on facebook instagram twitter etc All accounts except this one are fake.
Flowering day 47
since time change
to 12/12 h.
Hi everyone :-) .
A lot has happened this week.
The lady has developed wonderfully 😊.
The buds keep getting thicker and smell better :-).
This week I added 1 g GHSC enhancer per l Coco.
in total it was poured twice with 1.2 l each time.
Fresh osmosis water was prepared and filled into canisters.
The tent was completely cleaned and each plant was checked individually under the magnifying glass.
Otherwise a few little things were done like yellow boards against sciarid mosquitoes and blue boards to prevent tripods.
have fun with the update.
Stay healthy 🙏🏻
You can buy this Strain and Nutrients at :
https://greenhouseseeds.nl/
☝️🏼☝️🏼☝️🏼☝️🏼☝️🏼☝️🏼☝️🏼☝️🏼☝️🏼☝️🏼☝️🏼☝️🏼
Green House Seeds Company Cup Clone 🏆
Type:
Wonder Pie
☝️🏼
Genetics:
Wedding Cake x OG Kush
👍😍
Vega lamp: 2 x Todogrow Led
Quantum Board 100 W
💡
Flower Lamp : 2 x Todogrow Led
Cxb 3590 COB 3500 K 205 W
💡💡☝️🏼
Earth: Canna Coco
☝️🏼
Fertilizer: Bio Grow Feeding ( GHSC ) , Enhancer ( GHSC ) , Bio Bloom ( GHSC)
☝️🏼🌱
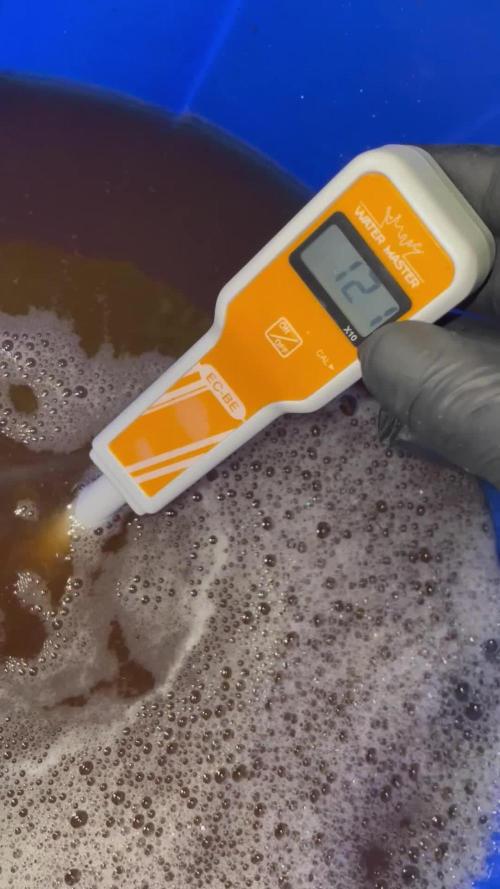
Water: Osmosis water mixed with normal water (24 hours stale that the chlorine evaporates) to 0.2 EC. Add Cal / Mag to 0.4 Ec Ph with Organic Ph - to 5.8

Likes
10
Share

@carlitoshaze44
Follow
Día 20!!! Estamos en el punto de comienzo de la 4 semana de floración ! Esa en la que notamos como el cultivo nos da el cambio que queremos y a partir de los dos vemos como
Nuestras flores evolucionan de una manera u otra dependiendo de clima,genética,nuestra mano con ella etc..
Vamos a comenzar la media floración bien cargados con la paleta de nutrientes alta en potasio y nitrógeno!
Siempre añadiendo también,nuestras mañanas de agricultor.
Tuve el fallo de abrir el tupper de lombrices y echarlas a el cultivo y no poderos grabar el proceso.
Fue algo rápido que hice con el armario apagado..lo tuve que iluminar por un minuto para añadir la bola de lombrices unas 60!!!
La siguiente tanda de flores si empezara a sacarle provecho a estas amigas!!
Deciros que el cambio en altura es muy grande no para aún de crecer!
Y las últimas están engordando mucho las flores a pesar de el corto periodo se ve que nuestra selección de amnesia haze,es un fenotipo muy especial..
Es de unas 8 semanas de floración y muy buena productora!
Día 21
Primer día de la cuarta semana de floración tenemos una escalera
Desde la puerta del armario hacia el fondo tenemos alturas que van 54cm/62cm/71cm/80cm
Gracias a el control individual en altura de cada luminaria iré trabajando con el control de dividir el área en tres Alturas diferentes,así lo requiera cada planta.
Una pequeña planta que está cerca de una rendija de ventilación tuvo unas pequeñas picaduras de tips”.
Observaré si no es de un periodo anterior de antes del fumigado..
Si no es así trabajaré un poco de jabón potásico y ajo!
De momento el olor es muy sutil.
Algunas flores empiezan a producir resina de manera temprana.
Dia 22
Va todo sobre ruedas,un verde lima en las hojas,las puntas tensas y bien firmes esperando el regado de mañana!
Una humedad de un 55% en el armario,cerrándolo con un 59% una vez echo el seguimiento,inspecccion de este en el día de hoy.
Seguimos con una semana de humedad en el exterior del 90% y toda una semana por delante de más lluvias.
Seguiremos controlando la humedad como hasta ahora con los riegos.
Guardo paciencia en las plantas que aún no llegaron a la red,para poder tener un control visual de todas las puntas!
Me alegra ver la cantidad de flores que están produciendo por casi todas partes de la planta y la resina que empieza a producir alrededor de estas,es un gran fenotipo de amnesia haze,con gran rendimiento productivo de flores y resina.
Todo un hacierto para quienes buscan genes de sativa bien marcados con un corto periodo de floración.
Día 24
Primero felices fiestas y feliz navidad a todos.
Mi pequeño jardín de pinos 🌲 jejejej está estos días espectacular,ya comienza a afinar el olor ese toque a madera recién cortada y ese fondo de lima tan característico de las haze,aaag que rico olerá en las siguientes semanas buen fenotipo y no es el más oloroso..
Esta semana la humedad ronda 65% después de un riego que fueron 60litros,más de un litro por planta!.
Justo lo que va necesitando para esta etapa de formación y engorde de flores… espero que en los siguientes días vuelva mejor clima también a esta zona ya que estos días de agua fueron nefastos para la interacción de aire de el exterior..no ayudaban a reducir la humedad.
Deciros que el riego se aplicó el día 23.
Con una EC1300 PH6,3.
Una de las 44 en el último riego sufrió un poco de sobrefertilizacion,mostrando está un poco de color en el tallo,rojizo.
Solo una quedó más pequeña,siendo esta 52 cm.
🏴☠️
Dia 25
Todo perfecto,las plantas están al 100x100
Un color perfecto,las hojas tensas y cojiendo volumen como es debido.
Ya solo queda mantenerlas,y que no sufran ninguna carencia nutritiva ni exceso de esta.
Dia 26
Último riego de la cuarta semana de floración.
Esta vez adaptando el riego subiendo la EC de 1400 a 1700.
En la siguiente semana ya trabajaremos con una EC de 2000,si es que la planta lo permite ya que con la EC de la tabla no me convence.
El PH sube a 6,3 y se mantendra entre 6,2/6,3 en el sustrato.
El siguiente riego será otro con carga de azúcares y aminoácidos.
Intercalando riego sí y riego no el PK 50-30.
Hoy me sorprendió mucho lo definido que es el olor con la humedad ambiental exterior,teniendo la puerta abierta salía un rico aroma que gana más en madera que lima 🍋

Likes
12
Share


@2Stones1Bird
Follow
Checkout my Instagram @smallbudz to see the Small budget grow setup for indoor use, low watt, low heat, low noise, step by step.
27/12/2019 - Fed her 1.5l of 6.4PH water with 0,5ml of each: Grow, Bloom and Max, and 1ml of each: Heaven, Alga-mic and Vera, I use about 1/3 of the nutrient dosage on the chart, to achieve about 200/300PPM (500 scale).
01/01/2020 - Fed her 1.5l of 6.4PH water with 0,25ml of Grow, 0,75ml Bloom and 0.5ml Max, and 2ml of each: Heaven, Alga-mic and Vera, mesured about 280PPM (500 scale).

Processing
Likes
30
Share


@Velk1
Follow
Videos are uploading finally 👌🏾 baby's have been switched to bloom nutes ,and moved from the nursery to the main room
I decided to build a scrog to help keep the power of the mbap's under control 🌱🌿🌲🌳 was a very easy and cheap build really happy with the quality.
Grapewalker kush are booming the one that sprouted already topped I decided to go with main lined kind of training it's gone to a lovely shape , may even put in the scrog who knows
The gold glue all I'm gonna say is the topping went down a treat , it has formed really thick stems and branches and seems to be quite tall hopefully this and training will unleash the beast

Likes
14
Share


@LokalGrenz
Follow
Did defoliation on all three never done it before not sure did k over do it but they needed the trim I had a lot of fan leaves blocking bud sights
Jan23 started to use the self watering pots from acinfinity gallon in each pot with fish shit


Likes
102
Share


@Hashy
Follow
Light settings
12/12 on at 9.00am off 9.00pm
Light power= 62% 150w
Radiator settings
LIghts on
Turn on if temp drops below 23c
Turn off if temp goes above 23c
Lights off
Turn on if temp drops below 19c
Turn off if temp goes above 19c
Dehumidifier settings
LIghts on
Turn off if humidity drops below 60%
Turn on if humidity goes above 60%
LIghts off
Turn off if humidity drops below 62%
Turn on if humidity goes above 62%
Extractor settings
temperature 24c with 1c steps
Humidity 54% with 2% steps
Max speed 9
Min speed 4
VPD aim 0.8-1.2
Wednesday 1/3/23 Day 36
Autofeed 5 15 minute runs
Water 10L Ec=0.21 Ph=6.5/7.0
3L left
Roughly 2.3L each.
#3 no runoff
7.15pm Lowered light 3cm
#3 DLI= 31.4
Thursday 2/3/23 Day 37
10.00pm
Extractor settings
temperature 24c with 1c steps
Humidity 54% with 2% steps
Max speed 10
Min speed 5
Friday 3/3/23 Day 38
Autofeed 5 15 minute runs
Feed 10L Ec=1.73 Ph=6.3
2.5L left.
Roughly 2.5L each.
#3 run 0.3L Ec=3.78 Ph=5.8
Saturday 4/3/23 Day 39
5.00pm
#3 Height= 40CM Dist= 30CM DLI= 37.9
Lifted lights 3 clicks and Lst and defoliate
Sunday 5/3/23 Day 40
Bit of Lst and scrogging
Monday 6/3/23 Day 41
Autofeed 5 15 minute runs
Feed 12L Ec=1.78 Ph=6.3/6.3
4.5L left
Roughly 2.5L each.
#3 no run
#3 DLI=38.0
#3 showing signs of light stress.
Lifted light
#3 Height= 38CM Dist= 38CM DLI= 28.6
Tuesday 7/3/23 Day 42 (Day 14 flower)
Radiator didn't come on when it should have. It was cold today and I don't understand why the sensor didn't trigger the Radiator.
#3 Height= 38CM Dist= 38CM DLI= 28.6
The 2nd week of flower has gone well. I have tried to keep the canopy of the overall grow as level as I can, the only problem with running different strains is they all have different traits and grow at different speeds. Nearer the end of the week the weather started getting cold again so the radiator is going to be working a bit more over the next week or 2.
#3 Gorilla Cookies FF is just mega, she has been stretching so much throughout the grow and has 90Deg bends all over, a snapped main, a few damages sides but not as fucked as the main and she is still doing champion. Its been hard work keeping her the level of the others but she has a shit load of space, way more then the other 2 strains.
Power used for week
Light
(1.77+1.84+1.84+1.84+1.84+1.83+1.84)=12.8Kw
Extractor
(0.19+0.24+0.25+0.27+0.31+0.31+0.41)=1.98Kw
Fans
(0.48+0.47+0.47+0.47+0.47+0.48+0.48)=3.32Kw
Dehumidifier
(0.69+0.65+0.0+0.01+0.6+0.02+0.69)=2.66Kw
Radiator
(3.3+3.98+3.38+3.16+3.8+3.31+4.07)=25.0Kw
Water pump.
(0.02+0.0+0.02+0.0+0.0+0.2+0.0)=0.24Kw
Total for the week=46Kw
Back in a week.
Thanks for stopping by.
Likes
24
Share

@eldruida_lamota
Follow
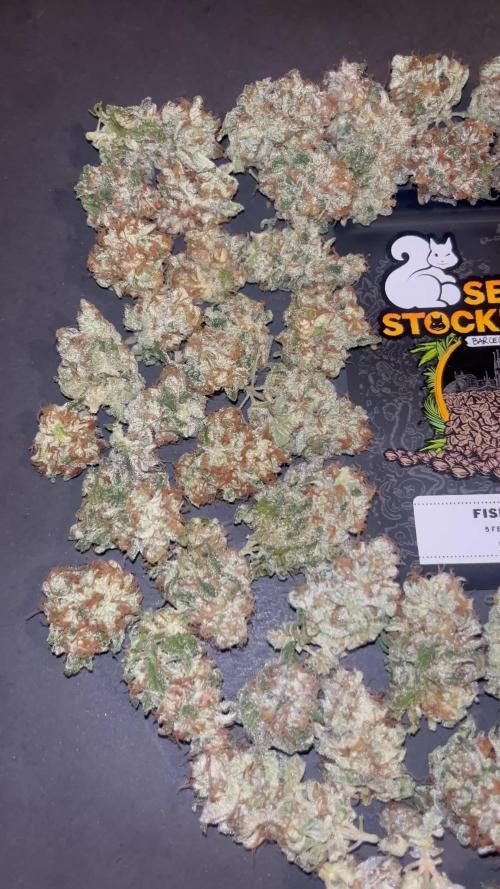
Venga familia que ya viene la cosecha de estas Fishy Zoap de Seedstockers, que ganas que tenia ya de darles tijeretazo.
Que variedad , me encantó cultivarla , sacaron unas flores alucinantes.
Las flores aparte de piedras, se ven resinosas, son muy pegajosas, desprenden olores dulces.
a sido una genética recién salida este 2026 con la que disfruté bastante, no fue muy complicada cultivarla. Os la recomiendo si os gustan las genéticas con alto thc.
Agrobeta:
https://www.agrobeta.com/agrobetatiendaonline/36-abonos-canamo
Mars hydro:
Code discount: Eldruida
https://www.mars-hydro.com/
Hasta aquí es todo , espero que lo disfrutéis, buenos humos 💨💨.

Likes
13
Share


@FreakShow
Follow
Buds Getting dens and super frosty 😍😍😍
Have really nice fruity and citrus smeeling 🤤🤤🤤
Likes
76
Share


@Roberts
Follow
Auto creeper has grown really well. I probably could of harvested her a week ago. She has about 40 percent amber trichromes on tops. Mis judgement on my part. Plus just been super busy. Smells really strong. Heavy frost. Pretty purple hue to buds. I will be back for the smoke report in a few months once it has dried, and cured some. The Mars Hydro light worked great for the grow. Thank you Mars Hydro, and Super Sativa Club 🤜🤛🌱🌱🌱 I tried to upload my harvest video, and it won't let me. 😔
Thank you grow diaries community for the 👇likes👇, follows, comments, and subscriptions on my YouTube channel👇. ❄️🌱🍻
Happy Growing 🌱🌱🌱
https://youtube.com/channel/UCAhN7yRzWLpcaRHhMIQ7X4g


Likes
4
Share


@UnUlver
Follow
Новое видео - жду новый спам в комментах. Может быть вы знаете как зарабатывать 1 000 000 в день и можете мне об этом рассказать? GD лучшее для этого место!
Растения чувствуют себя хорошо. Я в целом тоже. Спам боты тоже чувствуют себя прекрасно. Режу листву. Бывает не режу.
Думаю начать использовать GD строго для видео. В этом плане не видел более достойный ресурсов. Видите какие видео чудесные? Никаких авторских прав, никакой цензуры! Могу брать любую музыку, ставить логотипы брендов, удобрений, сидшопов. Следующий цикл буду вести именно так, семян подогнали люди Doctor'а.
Всем мир! Первостепенно спамерам.
Некоторые кусты пахнут жвачкой. Под конец цикла перестанут.
Не понимаю как вводить удобрения которых нет в базе, это нужно где-то согасовывать или самому вбивать составы? Кормлю по таблице, о! Добавлю таблицу в "G"

Likes
37
Share


@RickJames_Mcdank
Follow
Well this week I start to increase Green sensation and Alga bloom. She is responding really wel to it and fatten up really good. She is getting frostier and frostier. So far so good.

Likes
38
Share


@Chucky324
Follow
Hello This is the end of week 2 and the beginning of week 3 of flowering, for the 6 plants in the greenhouse.
This is the end of week 1 and the beginning of week 2 of flowering, for the 3 plants inside.
Things are going good in here this week. I want to get in here this week and do my last trim/prune before the resin starts flowing.
The Voodoo Plant opened this week. It smells like rotten stuff so the flies pollenate it. It's only a 4 day flower before it goes bad.
I showed some of the sweat shirts and t-shirts I put image's on, with a ink jet printer and some iron on transfer paper.
Are you a pot/cannabis activist too. Make your own shirts with the images "you" want on them.
Ok. Wishing you the Best Wishes. Be Great.
Chuck
