The Grow Awards 2026 🏆 


Likes
Comments
Share


@SantaStone
Follow
Hello everyone!👋 Thanks to everyone who stops by!😉
We continue to recruit.💪
-The plant began to actively secrete resin and grow new trichomes.
-The resin has a rich and sweet smell, similar to berry candy.
-Nirvana from AN has been added to the diet.
-Added a little macro photo.😍
-No problems or deficiencies were found.
Likes
5
Share


@blacknpearl
Follow
dec 12. megacrop 1.06gr/litre ph'ed at 6.35. about 500 ml
dec 14. megacrop 1.06gr/litre ph'ed at 6.35. about 500 ml
dec 16. megacrop 1.19gr/litre ph'ed at 6.38. about 500 ml (increased nutrients to 1.19)
dec 18. megacrop 1.19gr/litre ph'ed at 6.38. about 500 ml
Likes
19
Share


@GoldenWeedGrower
Follow
Legend
Timestamp: 📅
EC - pH: ⚗️
Temp - Hum: 🌡️
Water: 🌊
Food: 🍗
pH Correction: 💧
Actions: 💼
Thoughts: 🧠
Events: 🚀
Media: 🎬
D: DAY, G: GERMINATION, V: VEGETATIVE, B: BLOOMING, R: RIPENING, D: DRYING, C: CURING
________________________________
📅 D98/B36 - 21/02/24
⚗️ EC: 0.8 pH: 5.3
🌡️ T: 21-23 °C H: 45-75 %
🌊
🍗
💧
💼 Some defolation
🧠
🚀
🎬 Added timelapse video and screenshots
________________________________
📅 D99/B37 - 22/02/24
⚗️ EC: 0.8 pH: 5.3
🌡️ T: 19-24 °C H: 50-75 %
🌊 14 L
🍗 Calmag - Bloom A-B
💧
💼 I've prepared all the stuff for 3 days out. I'm going to leave today and get back on Sunday (25/02). Humidifier filled up
🧠
🚀
🎬
________________________________
📅 D100/B38 - 23/02/24 💯💯💯
⚗️
🌡️ T: 19-23 °C H: 45-65 %
🌊
🍗
💧
💼
🧠
🚀 First Day Out
🎬
________________________________
📅 D101/B39 - 24/02/24
⚗️
🌡️ T: 21-24 °C H: 50-65 %
🌊
🍗
💧
💼
🧠
🚀 Second Day Out
🎬
________________________________
📅 D102/B40 - 25/02/24
⚗️ EC: 1.0 pH: 6.0
🌡️ T: 20-24 °C H: 55-70 %
🌊 RES Changed 💦💦💦
🍗 Calmag - Bloom A-B - Bud Candy - B52 - Overdrive
💧
💼 I changed the res for last 10-15 days of blooming until ripening and flush
🧠
🚀 I'm back
🎬 Big job on media. I edited the cumulated time lapse videos and splitted day by day. Also uploaded the screenshots from the TrolMaster App for each day out. Great job !
________________________________
📅 D103/B41 - 26/02/24
⚗️ EC: 0.8 pH: 5.2
🌡️ T: 20-24 °C H: 50-70 %
🌊 1L
🍗
💧
💼 Some defolation
🧠 She's not yet ready, I think a couple of week more
🚀
🎬 8 pics added + 4 pics macro. Timelapse and screenshots
________________________________
📅 D104/B42 - 27/02/24
⚗️ EC: 1 pH: 5.9
🌡️ T: 20-24 °C H: 50-65 %
🌊 6L
🍗 Calmag - Bloom A-B - Bud Candy - B52 - Overdrive
💧 some pH+
💼
🧠
🚀 End of the 6 weeks of flowering
🎬 Added timelapse and screenshots. I also prepared a timelapse of the entire week with some music 🎵🎵🎵 and weekly rate of T-H and VPD 📈📈📈
Likes
6
Share


@SAC87
Follow
Hey Growers.
It’s going great around here. These girls are happy, healthy and growing like mad. They’ve chunked up so much that they’re starting to lay down. It’s just a couple at the moment so I’ll keep an eye on them and see if intervention is needed. The trichomes are so gritty it feels like table salt between your fingers and the Cali has a orange/lemon citrus and woody scent. The Jack is sour skunk and the cookies Kush is a sweet sugary scent.
I’m not 100% sure if they’re fox tailing from light stress or just natural Kush characteristics. I’ll be keeping an eye out for hermie’s and stress. I’ve added some Green Planet Rezin, as I think it’s awesome and helps with aroma and makes oily terps. I’m thinking this will be my last top dress and I’ll probably just do half dose and top up with monster bloom for the next couple waters then drop everything except cal and Rezin.
Happy Growing 🌱
Likes
9
Share


@Garamantes
Follow
After 4 days of heavy rain, the first mold appeared...
So I spent about 18 hours searching for plants and picking out mold with tweezers
After last year's experience with another seed bank, I expected the plants to be very affected by mold, but I have to say that Fast Buds genetics coped very well! Mold appear mainly on blisters to which the stem of the leaf leads water, which then collects between the stem and the blister
I trimmed the plants more so that the air flows better and that water does not stick to them
The plants look healthy and the flowers are gaining strength
Especially the dark purple phenotypes look very dense and hard. it also looks very resistant to mold
Very pleasant sweet fruity scent
I haven't seen my children for 3 days, it's raining extremely ... the last time I was chased out by swarms of ants in the early evening, I've never experienced this before, there were maybe a million of them and they sat on me and on the plants
I'm finally going to visit them tomorrow, I expect I'll have a lot of work to do with mold and I hope the swarms of ants haven't harmed them in any way
Likes
24
Share


@Weedzoks
Follow
La plante est passé en 12/12 pour lancer la floraison des féminisées
Flo 8: Arrosage engrais complets et taille secondaires
Flo 12: Arrosage eau
Likes
35
Share


@Ganjagrandaddy
Follow
Yay! video is back up again..
Day 22 flowering: Well what a week this has been for the Amnesia Haze. She began the week intact and showed the many bud sets throughout her frame. I have been waiting until day 19 to defoliate her and get as much of the light down lownas I can
she has some perfect stacking developing now and all of her quadded limbs are top to base with flowering sites. Her speed and progress has been excellent from the off and I am now preparing to run 3 Sweet Seeds Autos of this strain with their Amnesia Haze XL alongside 3 Gorilla Girl XL and 3 Sweet Cheese XL , I cannot wait to see what these genetics can throw up.
The amnesia has got a nice fruity smell starting to be noticeable as i open the tent. She is 3ft across inn parts and has a lot of mains vying for top spot . I am hoping she will be a great yielder with the way I have trained her out.
She is feeding well and not showing signs of any issues at all so its a head for the finish line now in about 5 weeks time.
S.a.d is alive but not looking the best still , she is in flower but her initial poor start has effected her too much. power toner for keeping going though, same with the red hot cookie really. gutted to have lost so many in the heatwave issue and be left with so few to show this breeders genetics. Thankfully the Amnesia will be a star and the next Sweet Seeds run will be a roaring success.
Until next time . Be safe and well.
Thanks for the visit.
Likes
11
Share


@4_Pro2Bono_0
Follow
Seedlings stretched a bit had to put them under the light early. Popped 2 seeds initially with 2 freebies I got, unfortunately the freebies didn't germinate in a week so I tossed them and popped two more Dolatos and all four germinated with 100% success rate. Kept them on a 20/4 schedule watering them only once and sprayed the top soil with a mister every now and again. 👍🏿
Likes
23
Share


@dataTwiiix
Follow
06/12: c'est le moment de commencer à compter les semaines de floraison.
Arrosage ce matin qui a été suivi par une drôle de réaction de la part de la plante je n'arose que très peu depuis le début vus que c'est une automatique et aujourd'hui après deux jours de canicule et 3 jours depuis le dernier arrosage. Enfin voilà ce matin j'arrose et les feuilles deviennent tombante je me dit ok: attendons quelques heures voir ce qui se passe et je l'a retrouve dans une forme holympique.
Mise quotidienne du LST.
06/13: arrosage 1L *engraisser
06/14: vague de chaleur. ... je sent que je vais vite devoir arroser de nouveau la chaleur et les ventilateurs et pot en geotextiles égale substrat qui sèche vite!
06/16: arrosage 1.2L (engraisser)
06/17: température extérieure 33*C température dans la box 30*C malgré cette vague de chaleur la wcc réagi plutôt bien on dirait qu'elle aime la chaleur et le vent plus que les vario. Que j'ai grow jusqu'à présent.
06/18: la temperature retombe sous les 30°C ouf temp. dans la +/-26° arrosage 1.5(AN ph Perfect grow pour corriger un manque d'azote + bud candy) (j33)
Likes
10
Share


@Martymar021208
Follow
The smells are becoming very strong in my house and truthfully I am still pretty pleased with trichome production although I definitely can tell the wish i had calmag 3 weeks earlier but better late then never about 3 weeks from harvest can't wait for this one been long road but a rewarding one.
Likes
2
Share


@StickyBlack
Follow
Tropicana Cookies - Starting to see amber/cloudy trichomes. Will probably harvest in the next couple of days. Not a big plant by any means but I’m stoked on it. Covered in trichomes, smells like god and nice, dense buds.
Likes
48
Share


@PrairieFrostGrow
Follow
******** Week 10 - Feb 10 to 16/20 (Days 64 - 70 from seed popping out)
It’s flush week so not much to update really. This week you anticipate the outcome with great hopes and also think about missed opportunities......no different here 😂 😂 😂
Last feed given last week. First good flush this week. I did not use any flushing agent with this girl. Want to get her natural taste and see what she can do on her own. The medium is pretty good with going into the week with a run of 900ppm. She is more dark on the bottom than I would prefer but it will be what it will be. Found an issue my pH pen this week and it will have contributed to some of the stresses this girl went through in recent two weeks. She picked back up this week and is taking roughly 2 days to work through 4L of water. Her run off by the end of the week was in mid 300ppm so we should be good with her feeding from her leaves. The top leaves are fading and giving a yellow with a slight purple on the edges. Combined with he red hairs and different shades in the bud and she is getting pretty🤩🤩
She is fading and looking more beautiful everyday! Will be pushing this girl and don’t anticipate chopping her down before next weekend.....want least day 75 to 77 idea.......see what the week brings. She has beautiful buds but they need more squishing and I want to ensure she can feed on herself as much as possible. I personally prefer the smoke from a plant flushed for two weeks, so that is the goal......only concern is what will happen to tricombs over the next four days or so????
She squished out bud very well over the weekend and has swelled quite a bit. She is getting fat and happy.......putting on the weight and frost this week girl!! Dropped the night temps to 60 degrees and the humidity to roughly 40% at night. Stripped more of her leaves this week. Some are still left where I don’t want to remove the leaves for fear of bruising the bud trying to get it off. 😧 She is such a dense bushy little girl!!! When you shake her and you feel how much she moves the pot you instantly smile👍😆👍 Again, trimming more lower growth on the main stems would have given her little extra to fill in the tops of colas even more.......next time👍
Crazy good genetics is what keeps going through my mind this grow.....impressed......I have to get more FastBuds in my seed collection!!!
Little more detail......to come
Feb 10/20 - Day 64
- her first flush after feed two days ago.
- 6L water with Rezin & Liquid Weight @ 2ml/l = 100ppm and 5.8pH
- runoff: 895ppm and 6.1pH.
- Good looking numbers for two weeks flush.
- no flushing agent used and she is not crazy for ppm in medium and she is not showing signs of toxicity.
Feb 11/20 - Day 65
- Nothing today.
Feb 12/20 - Day 66
- 2L water with Rezin @ 2ml/l and LW8 @ 1.5ml/L = 75ppm and 5.95pH
- her tops appear to be mainly bud now. Not many sugar leaves pointing out anymore.
Feb 13/20 - Day 67
- 2L water with Rezin & LW8 @ 2ml/l = 80ppm and 6.15pH
- been cool in tent last couple of days......slowed down a bit.
Feb 14/20 - Day 68
- Nothing today.
Feb 15/20 - Day 69
- 3L water with Rezin & LW8 @ 2ml/l = 100ppm and 6.1pH
- Her claw is coming out more. Could she be root bound?
- Light is at 18', pH is inline, same when medium is dry and wet, nitrogen hasn't been too excessive??
Feb 16/20 - Day 70
- 3L water with Rezin & LW8 @ 2ml/l = 100ppm and 6.0pH
- Pulled a few more lower leaves......she is thick!......she is also getting sticky moving around her buds😀😀
- closer to the end so will keep dropping temps and humidity in tent.
- Have a great week all and may your gardens be full of colour and shine!!🙏
Likes
2
Share


@BosOBG
Follow
So i gave her last feeding of grow and bloom nutes at the end of week @1600ppm, Ph@ 6.5 and on the next ill only be giving ripen and drop the ph to 6.0 to fatten her up a bit more before i chop her. She's absolutely stinking up the place with some sweet gummy lemon gas coming thru. Think ill call this strain 🍋🍭Lemon lightning🍭🍋
Likes
36
Share


@Cannabeast40
Follow
Welcome back 🤗
Another week has passed and I’ve started adding a small amount of Grow nutrients to the mix🌱
Cranking up the light a bit again this week trying to maintain about 400PPFD.
See you next week 😎🤙🏻💚
------------------------------------------------------------------------------------------
Light source:
Medicgrow SpectrumX
880W LED
Build in PPFD
4 controllable spectrums V1, F1, VS, FS
Visit https://medicgrow.com/ for more informaton.
Light measurement:
Apogee MQ-610 & Apogee DLI-600.
Fertiliser:
Organics Nutrients
https://www.organicsnutrients.com/en/
Green Buzz Nutrients
Discount Code: GD42025
Grants 25% with a minimum Order value at 75 Euro.
https://greenbuzzliquids.com/en/shop/
Likes
14
Share


@Fatbudz
Follow
I'm sorry, but at the time I stopped updating the diaries because I moved to a new house and changed my routines. I'll leave a photo of the final product here, but don't worry, I'll be back at full speed. 🚀🚀
new diaries coming 🔜🔜
Likes
3
Share


@biglittlebird
Follow
Je to zatím nádhera, košaté děvčice to jsou, tak uvidíme co vykouzlí v kvetení, snad to budou pořádně oharky ✌️
Likes
Comments
Share


@Antarctic
Follow
Week 6 update:
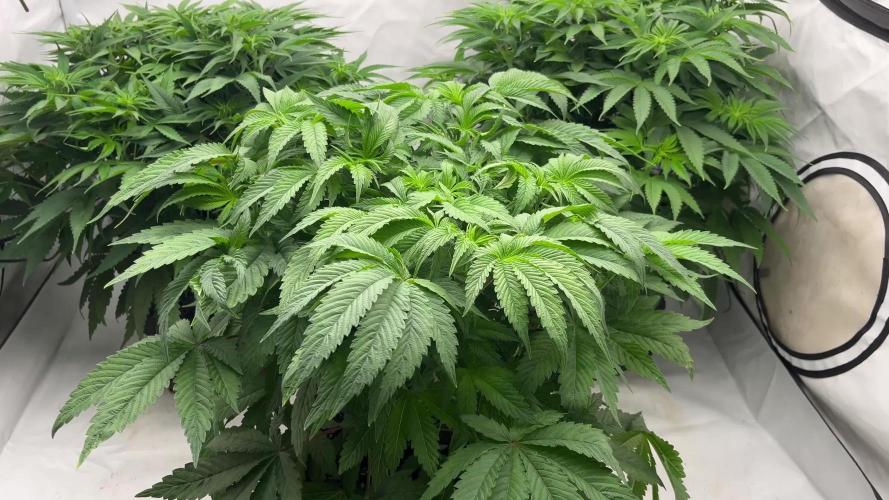
This week I focused on training and canopy management. I did some defoliation to open up the plant structure and improve airflow/light penetration. I also shaped the plants with main-lining and continued LST to keep the tops even and strong. The goal is to push all the energy into the main colas so they finish fat and dense later.
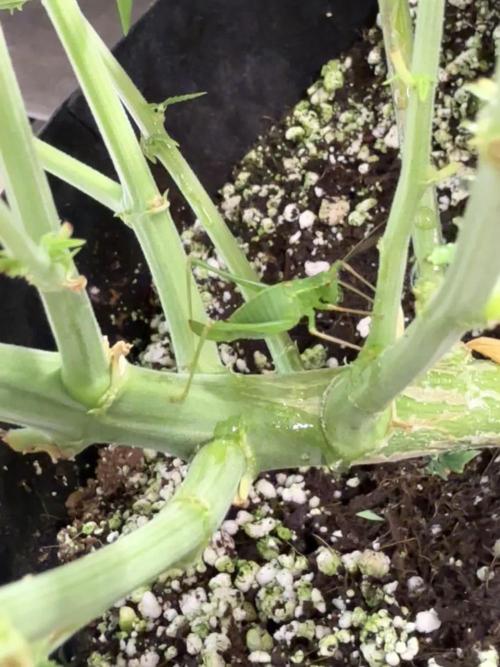
Funny moment this week – I actually found a little grasshopper hanging out on one of the leaves! 🦗 Looks like even the bugs think these girls are tasty.
Nutrients used:
• Terra Aquatica Grow A + Grow B – moderate dose (~700–800 ppm)
• CalMag – 1 ml/L
• Silic Rock – 1 ml/L
• Great White + Trikologic – root support
• PowerZyme back in rotation (light dose)
Training & care:
• Defoliation: cleared out fan leaves blocking budsites
• Main-lining + LST to keep canopy flat
• Watching closely for any recovery signs on Mike Tyson auto (still behind but alive)
Plan for next week:
• Expect to see stronger preflowers forming and some pistils starting to stack up
• Increase bloom-focused feeding gradually once stretch slows
Processing
Likes
142
Share


@MadeInGermany
Follow
Hi everyone :-)
This week a lot of nice things happened in the flower tent :-)
Everyone looks super nice, and is growing stronger and more beautiful week by week 😍👌.
The blue cheese smells like a dream ;-) As usual from this variety 👍.
The kosher tangie is also very, very tasty 👏🏻.
Both got Pk 13/14 this week for the last time :-)
Everyone else is developing very well 👍, That will be the last diary with several strains together :-)
In future everyone will come individually 👌.
I wish you a lot of fun with the videos, have a nice weekend, stay healthy 🙏🏻 and let it grow 😎👌
Likes
14
Share


@oxieg3ngrows
Follow
She has entered her "flush" stage of low dose nutrients (as suggested by emerald harvest) and should wrap up in the next week to 10 days. Her smell is intoxicating and she is EXTREMELY sticky to the touch


