The Grow Awards 2026 🏆 


Likes
Comments
Share
@Insaniac_0
Follow
All feeds with nutes use either a whole ratio or combination of "Veg Mix" and "Bloom Mix"concentrates DILUTED in water until a total ppm of add in is reached using a (Total Dissolved Solids)TDS Meter measured in PPM (parts per million). The "Veg Mix" concentrate will eventually be added in smaller ratios and "Bloom Mix" concentrate what will eventually replace the "Veg Mix" concentrate entirely with the ppm and ratios listed when I feed. Veg mix recipe is on week 3. Bloom Mix recipe is on week 5.
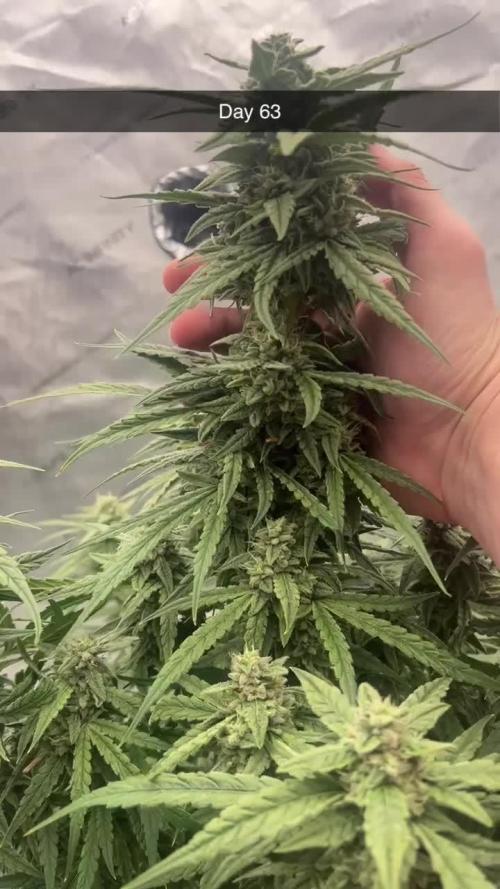
84/14 Fun with Filters
VPD was controlled at reduced temps and RH today - RH now set to 55% max and Temps are 75F at max Over night allowed down to 67F when lights go out. Lights were good and same as yesterday with some light LST PPFD at 750 down to 550. I used 20 minutes of UV and 1 hr of IR with 15 before and after main lights on/off. She's now about 25" tall and 35" wide.
Also took some black back and shadow pics for fun (no filters or sharpen only)
Day 85/15
Feed Day I gave 2 gallons of de-chlorinated tap combined with 25:75 Veg/Bloom mix total 600ppm and a ph of 6.4. Foliar sprayed some on the outer leaves and left the tent door open to help dry them. (took like 15 minutes with the fans.) top soil ph checked at 6.22ph and run off was at 5.74 with 1580ppm
Lights at a range of 750 to 500 Ran 25 minutes of UV and the standard 1hr IR with 15/15 before and after lights on/off and 30/30 at that time.
VPD was easy to manage with the doors open and then the fan seemed to have to work more today but just more often and not high fan.
Day 86/16
Humidity was high at 60%RH for most of the day, the ILV was kicking on throughout the day and I have two humidifiers going on high.
Temps on the other hand was controlled at about 74F.
Tips carried a little burn on them today, some all over which makes me think nute burn because ppfd was 550 to 750 as it has been for a few days now and there are tips on leaves with little direct light showing burn as well. Will continue to monitor as well.
IR and UV are set on timers and I screwed up with mine today. I was supposed to change the setting and forgot (time change screwed me up and I thought I did it when I changed timers that needed correction) until it was too late and ended up giving her 30 minutes of IR and 1 hour of UV... will have to check/monitor for effects tomorrow. The good news is that she's had a little over two weeks with UV so maybe not so bad. (fingers crossed it doesnt stress her too much)
Day 87/17
Again, humidity was high at 60%RH for most of the day, the ILV was kicking on throughout the day and I have two de-humidifiers going on high. Temps on the other hand was controlled at about 74F. If I open the tent for a while I can get the humidity down by about another 5% so tomorrow I plan to leave it open after I feed again.
Took some light burn from yesterday's extended UV exposure, but read that it's not bad to take on some stress from UV in flower, especially if you still have time to recover. The pros suggest that you can stress her to grow defensive systems that may create thicker/stickier leaves and flowers with more terpene production. The cons however suggest that it could stress too much and stunt the growth or in extreme/sudden cases, cause her to herm. (thus why they say in mid flower is best if you plan to stress with UV) So it is what it is. I will monitor the leaves that took damage and likely remove them this week when I defoliate schwazz style.
I still resumed the schedule of increasing UV as planned but ahead a few days now so 45minutes of UV and 1 hr IR with 15/15 before and after main lights on/off.
Day 88/18
Lots happening today.
Firstly, I found a split today... on the main stem trunk, so I used superglue to seal the cracks and held together while it set. Then I wrapped it with heavy duty gorilla tape, two 1ft pieces as both a clamp and a support on the other side. I then tied each cola to the inner ring.
So then I decided that since I am here having to work on this I may as well go ahead and do the defoliation I was planning for tomorrow. Schwazze style defoliation (at least my interpretation of the method without having to buy the book, super defoliate week 1 and 3 of flower - so almost)
Then after that I also preformed heavy strength training - I broke each cola right under the bud sites that I left and bent her outward.
I then upped the lights ever so slightly and have a max of 850 ppfd and low of 650 ppfd now.
She had 45 minutes of UV and 1 hr of IR same routine, IR on/off at main light schedule with 15 before and after main lights.
VPD is better now that I placed another open air vent at the bottom, this one is 6 inch. I also placed the fans a little better to blow directly on the leaves left behind. Low speed for now, but as the leaves come back I plan to increase to get dancing leaves in the middle too. Temps were 74F and RH 55% with the ILV set to auto.
I plan to feed 2 gallons of 650ppm 25:75 Veg/Bloom mix. Since my last ph was really low I am going to increase the feed to 7.0ph - not sure what if anything I can do about ppm.
Day 89/19
VPD was normal with the exception of holding the tent open as I said I was going to today. Temps at 74F and RH mostly 55% with the ILV set to auto.
PPFD also checking in with the same settings/results today, 880 to about 650 ppfd. UV was set for 45 minutes midday, and IR with the same 1 hr with 15 minutes before and after main light on/off.
Water feed today with about 2.25 gallons of 7.0 ph de-chlorinated tap diluted with 25:75 ratio of veg/bloom mix (690 ppm total) watered until drip started and I got about .25 gallon runoff. Runoff measured 5.75 ph and 1630 ppm (top soil tested 4x with avg of 6.35)
Next feed will be a plain water salt flush.
Plant looked so nice a day today that I decided to take some more black back pics.
Day 90/20
VPD and PPDF were fine today with normal settings of 74F/55%RH/Auto ILV - PPFD ranged from 550 to 750 because of HST on the limbs. This will be the last stress I give her and hope it wasnt too much. Hoping this all results in a big yield and not a herm.

Likes
Comments
Share
@Ganjin
Follow
Welcome, my friends, to my new diary! 🌱💚
There is some change in my setup and approach to growing. I am only growing one plant at a time now, and that I'll do inside the VGrow. I am going to sell my AC Infinity tent because of space issues and also my lack of time. I want to commit to this hobby but can only allow myself to grow one plant, instead of three. That's why I am sticking with the VGrow. It's pretty small, exceptionally build and pretty nice to handle. Yeah, there can be a height issues, but I figured it out in the Jelly Donutz grow and will continue with that approach. But that's enough about the setup, let's talk about this grow.
I chose the strain High Society from Compound Genetics. It was a really tough choice because I have so many promising genetics from very, very good breeders in the fridge. But since I can only grow one plant at a time, I needed to raffle what I grow next. And originally, the strain Ocean Marker from Robin Hood Genetics (THCTitan) won the raffle, but I wasn't really happy with the result for several reasons:
1. I already grew a strain from titan in my last grow and I really want to try different breeders, too. With limited grows or limited space, I just need to rotate a little bit. Maybe in my next grow I pop another seed from Robin Hood or Square One but for now, I wanted to use someone else's gear.
2. I want to try different types of terpene profiles. Ocean Marker would have been Gas+Candy+Fruit and I already grew this profiles in different combinations (Sour Zoda, Iced Up Cherries, Jelly Donutz..). I know that Permanent Marker and Ocean Fruit are completely different than the strains mentioned, but they're still in the same stratosphere, if you can understand where I am coming from.
3. High Society just was hard stuck in my head since I bought a pack of it. I don't really know why, but my stomach just told me every time: Grow this one next.
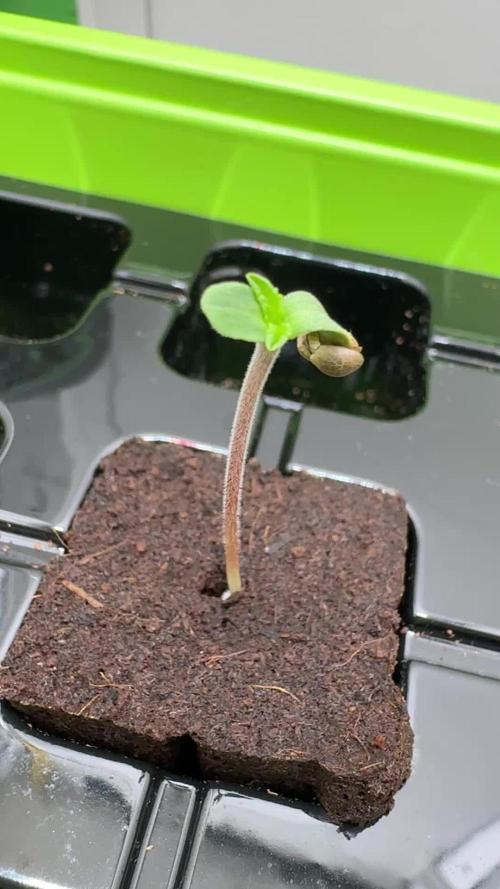
So I ditched the raffle and just popped a High Society seed! This strain is a crossing of Cookie's Biscotti with Compound's Jet Fuel Gelato. I can expect variety when it comes to phenos, some leaning to the Biscotti and some leaning to the JFG. And that's a win/win for me, because I never tried Biscotti and I never tried a Gelato. And it's something very new for me. Yes, both have gas in them but both are also dessert strains. And I always wanted to try the nutty, buttery, toffee-like Biscotti and also the Ice Cream side of a Gelato. That's why it stuck in my head I guess, because it's just something completely new and exciting for me. The seed opened after less than 12 hours, which was very fast. I planted it inside a EazyPlug, as always and waited for 3 days. The seedling came out of the EazyPlug after just one day and today, the little seedling removed its shell (kinda) and opened up!
This grow, I also change some other things up a bit. I will plant the seedling in the upcoming days into a solo cup with BioBizz Light Mix. After approximately 2 weeks, when everything goes well, I will transplant the plant into the 19L (5gal) end pot. My grow of the Sour Zoda inside this bigger pot went so much better than my last three grows inside 11L pots. I think the root zone just needs more space and more buffering soil to tolerate my water, which is very rich in minerals. In combination with the bigger pot, I also use the solid nutrient line from BioTabs! This should also help with the nutrient problems I had during my last three grows. We will see in the upcoming weeks how this new approach performs!
Thank you for sticking around, let's have some awesome grows together this year! 💚

Processing
Likes
7
Share
@x_grower
Follow
Very fast seedling process, seeds stayed soaking for 24h and in the water they were already showing the first white root hair, another 48h in the paper towel and the day I potted them up they showed cotyledons. They took around 11 days to reach third node and complete germination but honestly I belive it could be faster if in better enviroment, mainly the humidity which was low and I transplanted them a day late. From day 5 I started feeding them exact same nutrients and ratio from the first vegetative week but starting at 0.4EC and increasing by 0.1EC/day until 1.1EC

Likes
4
Share
@AZTERPHUNTER
Follow
Will add more photos 7 phenos grown 4 harvested 3 have a 4 weeks or more
Likes
24
Share
@SkunkyDog
Follow
Hallo zusammen 🤙.
Sie wächst sehr schön und macht keine Probleme.
Rabattcode für den BIOTABS-Webshop https://biotabs.nl/en/shop/ GDBT420, damit erhalten Sie 15 Prozent

Likes
17
Share
@Skinnytalls420
Follow
Day 16-27/12/21 all plants are good!!! Day 20-31/12/21 all looking good just need space in other tent to move half of them!!!!


Likes
99
Share
@Sativagrad
Follow
I have already said everything, in principle, I advise everyone to grow this variety, I got an amazing tree half purple with giant cones and a large harvest, I am delighted!

Likes
19
Share
@Mzsnoop2001
Follow
2da semana de flora y cambio positivo para las quebradas 😅 Blue Moby ni se enteró del supercroping accidental lo que si quedo con baja estatura que las demás. moby dick se recupero de la arrancada de la.punta principal 💪 viene un poco atrasada en flora en comparación a ww y bm pero viene remontando. Whithe widow viene súper bien y florando con cambios día a día 😍 está semana defolie las 3 por última vez y agregue una segunda malla de scrog para evitar el error anterior de quebrarla queriendola entrenar!
Como siempre acepto criticas y concejos gracias y buena semana!! 🤝


Likes
26
Share
@HowtoBubatz
Follow
The cannabis plant is in excellent health, showing vibrant green leaves and a robust structure.
The overall appearance suggests that the plant is thriving in its current environment.
No signs of nutrient deficiencies, or diseases have been observed. A light defoliation was performed during this week.
This practice will help the plant focus its energy on the upper buds, leading to better yield and quality in the upcoming weeks.
The plant has been fed according to the BioBizz nutrient schedule, specifically following the guidelines for week 2 of the flowering stage. The nutrients provided include BioBizz Bio-Bloom, Bio-Grow, and Top-Max, which have been carefully measured and administered to support the plant’s transition into full flowering.
I'm curious to see what will become of the plant. Stay tuned! 🌱🌱
Likes
20
Share
@m0use
Follow
Good little week. Bit early posting but that's ok. Been finding the new growth in coming in a bit lighter shade of green then darkening up. Measured the height of them as well and last few weeks I had not updated that part.
Started some new Dill as I ate all the other stuff and started some Chives too, got this stuff shipped in from Poland right as the postal strike happened in Canada so it was sitting around somewhere for a good month and a bit. Excited to try this dill as its said to be supper dilly and its essential oil content is to be stronger then other varieties. I think its true as I could smell the seeds though the international packaging.
The chives I saw had three varieties and did not know they existed so I got all 3 to try out and see what ones I like best. Jemna, Erecta and Perga, The site said Prega are early and have a sharp taste to them, Erecta is mind and delicate with upright growth and the Jemna are thick and juicy.
Added in some BSM to this grow as I feel the soil life is extra hungry with all the other microbe boosters and things going into the mix, also gave it a bit of Mg from Epsom salts as its kinda low in the products and don't want it running out in stretch. then topped it all off with some fish, Still looks to be having some N tox but getting better. I cleared up some leaves that where touching the soil line as I don't like that. and some others fell off when I was cleaning the tent. Don't have pics of the mini plants, CBG and CBDv but they are doing good as well. impressed with their size in the small pot.
The one GTR THCv is still having issues but drank a good amount of its water, so it got a half amount to keep it happy. Hopefully in the next week or two it will be on par with the others.
Found some more gnats in the fan blades but nothing infesting the pots after adding nematodes. And one of the leaves from the corner CANUK CBD plant looked a bit spotted like mite bites but I don't think that's was it id as I can not find any on the underside or webs and it was only isolated on that one leaf. But will keep an eye out for the little 2dot fuckers.
I think that's it.


Likes
10
Share
@CrazyFlowers07
Follow
Ciao a tutti oggi 3/06/2022 è il primo giorno di vita della pianta ✌️🏼✌️🏼 Buon seguimento 😝😝
Likes
27
Share
@eldruida_lamota
Follow
Vamos actualizar la tercera semana de floración de estas Biscotti de RoyalQueenSeeds.
Un SOG que empezó mal pero que se ven con un buen color y avanzan progresivamente, así que a estar atentos.
La humedad es perfecta, la temperatura la e podido corregir y ya la tenemos entre 24/25 grados.
Añadi la base,Blue line B de Agrobeta.
Esta semana añadí tucán, gold joker, silver, tetra 9, beta shark y génesis también de Agrobeta.
Estoy controlando el ph está alrededor de 6- 6,5.
Mars hydro:
Code discount: EL420
https://www.mars-hydro.com/
Agrobeta:
https://www.agrobeta.com/agrobetatiendaonline/36-abonos-canamo
Hasta aquí todo, veremos como progresan pronto. Buenos humos 💨💨💨
Likes
10
Share
@tokesly
Follow
More Flowering! The rest of the strains started to catch up, but nanners started showing in the hermies and TP started to overripen with orange hairs. I would've gone extra days if there were no nanners, but it wasn't worth it to risk seeding the nugs, I'll just have to settle with more larfy buds. Going to start flushing next week.


Likes
9
Share
@wiz4rd
Follow
This week marks the beginning of the flowering phase for the lady. With temperatures reaching 33°C (91°F) and plenty of sunshine, it's been an excellent start.
Overall, the plant is healthy with vibrant color, strong branches, and a sturdy stem. Small buds are already visible, emitting a faint aroma. Trichomes are barely noticeable but definitely present on the calyxes. The leaves are causing some concern, though. I suspect over-fertilization, so I've reduced the feeding schedule to once a week and switched the rest to clear water.
LST has been adjusted again, encouraging the plant to grow wider. It's becoming very compact, almost like a small boxwood shrub, especially compared to my other plants.
Additionally, there was heavy rainfall, which provided the plant with a good 0.5 liters (0.13 gallons) of rainwater with a pH value of 7.46.

Processing
Likes
10
Share
@JohnnyGrower
Follow
Esta semana los nutrientes siguen de la misma manera, es notorio el exceso de Nitrogeno por ende se disminuira en los próximos riegos, se realizaron podas apicales en los clones que no les hice anteriormente para que alcanzaran más altura. Dentro de esta semana instalare la malla scrog Kanovi para guiar los vigorosos brotes.
Además esta semana ya esta retomando el crecimiento la planta madre variedad Tangie la cual cumplió su ciclo de propagación por esquejes y porfin florecerá.
Leo comentarios, opiniones y recomendaciones


Likes
Comments
Share
@Earthsower
Follow
At the end of week she is doing well. The stigmas are fully puffed and the bracts are swelling up. The Afghan #1 has ceased growing. All her energy is being used to flower plus her leaves are beginning to fade. She has a sweet and fruity aroma emanating from her. The Afghan #1 stands at 76cm ta

Likes
2
Share
@Organic473
Follow
Just been feeding her water once a week..she continues to swell I will give her some molasses one for the road and just water until week 8.