
Likes
Comments
Share


@Lukeskywalker
Follow
Ufff... Fortunately finish...
😄 Starting a new Breedbros project, see ya soon

Likes
4
Share


@Coopmc
Follow
Ya buddie got a cut of this to throw in with FruitWalker 50/50 I’ll be reversexig for pollen!
Hell yes😍😍😍
Likes
11
Share


@adam_pawloski87
Follow
This week has been great! Germination on all 4 Pre 98 Bubbas and 2 Dirty Blondes was a success!! We planted them in there pots an through out the week we gave em each a very light spray down of pure water phd at 6.5 and by Friday they all popped out the soil Let’s go!!!!! Next week we will start light feed on nutrients , so y’all keep them eyes peeled for next updates an I appreciate y’all for following my grow !!😶🌫️💨💨💨🙏🏻💚💯🤙🏻


Likes
13
Share


@LeedsGenetics
Follow
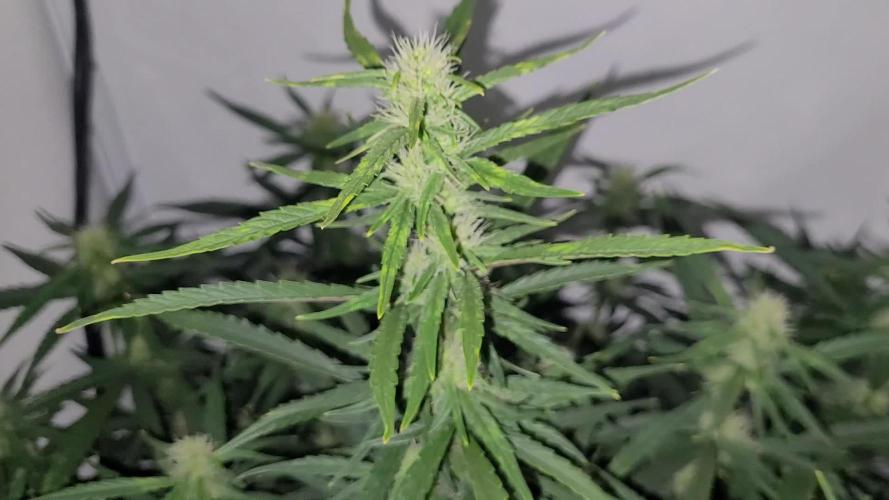
Buds starting to form now looks like all vertical growth has stopped.
All nutrients based on 10 litres
Any questions ask away 💚

Likes
6
Share

@DrewbieDoobieNoobie
Follow
This is why I say always check your garden. In just 3 short days she went BALLS OUT. Now I am down to four ladies, that will be plenty. 3 BBFC and 1 Nuke Heads Nuclear Scary Bubbles. I am not sure if it was Stress or Weak Genes, I did feminize these myself without any back crossing. Sometimes you just get a true Herm. no Nanners on this one just Balls to the wall man. that is an Accept Reference if you don't know it ok your just too young.
Likes
5
Share

@punktkomma
Follow
So far I kinda messed up getting everything done on time. Plants are harvested and in cure now. All in all, the plant would’ve had around 112g dry if I kept it all.

Likes
7
Share


@Fonzi
Follow
Sie duften sehr lecker. Die Jacky White sehr zitronig. Strawberry ak riecht fruchtig nach Erdbeere.


Likes
7
Share

@NoProbation4Weed
Follow
on day 21 of flower the 2 lady have got a new Haircut.
Also some composttea on day 22 of flower.
Light hits the plants with around 850 PPFD.
Both plants look very similar (same leaf shape and structure), but one is about 15% larger than her sister.
They both look healthy and vigorous.


Likes
Comments
Share


@Kannisho
Follow
Hoy comenzamos con el primer riego de C21Nutrients Flores Parte A + Parte B, estamos felices con este proceso 🤩👽.
Likes
12
Share


@Pedro_88
Follow
Estoy muy satisfecho con el crecimiento de mi chemical bride, ayer hubo un fuerte viento y tumbo a mí watermelon skittlez no la pude encontrar, pero ya tenemos otra en proceso que verán en estos días

Likes
14
Share


@Paultemp
Follow
Hi all! 😊👊
Week 1 flower
Og kush
7 gallons pot
Hp promix soil
Remo nutrient
Aelius led 300gh
1 gallons water every 2 days
Start nutrient for flower 2 days after flipper 12/12
Likes
29
Share


@eldruida_lamota
Follow
Hola familia , ya actualizo esta tercera semana de floración de las green poison de sweet seeds.
La verdad que los ejemplares están tremendos, contando alguna pequeña carencia de N que se sola con más alimentación, a mayores huevos de hermafrodita por problemas medioambientales, no obstante se eliminaron y proseguiré hasta el final con el proyecto.
.
La humedad esta al 45% la temperatura está entre 21/25 grados , y como siempre el ph , ya que es de lo más importante,está en 5,8/6,0.
.
AgroBeta:
1 ml x L Flowering black line , vía radicular.
0,2 ml x L Beta shark, vía radicular.
0,3 ml x L Tucán , vía radicular.
0,1 ml x L Betazyme, vía radicular.
0,05 ml x L Gold Joker, vía radicular.
0,2 ml x L Silver, vía radicular.
.
Hasta aquí todo familia 🕸️ , un saludo y buenos humos fumetillas💨💨💨.
Likes
13
Share


@KAPT_SAVE_Da_HOE
Follow
I am seeing a magnesium deficiency with yellowing except the stems and veins.
Likes
10
Share

@Prilyfe13
Follow
12/09/2025
Last week of nutes and last week of real flowering. Both ladies look just about done. Papaya Cookies is nearly there. Lemon Cherry Cookies isn't too far behind either. But she definitely has the whole week plus a couple days to go. Papaya Cookies might be done by the end of the week, if not sooner. I might have to push her a little more so I can harvest them at the same time. I won't be changing out the water until after lights out as I always do. So today will just be a plain water top off. Well, that's been everyday for like 2 weeks. Lol. But, I noticed both ladies definitely didn't drink as much as usual last night. Another sign that they are almost done. Normally it's close to a gallon a day. This was about a half gallon.
Anyway, I won't be recording the morning readings as the water will be changed out today. If it were under the normal night and day schedule, it would be easier to do this, but the AI suggested this time of day for lights out. It's warmer now than at night. Obviously. Lol. So now I have to wait for lights on after the plants have had their rest to change the water out. Then we can take readings.
Next week, which will only be 3 or 4 days, I'll be doing a slow wet trim. Or I guess the defoliation I should have done 2 months ago. Anyway, I'll be pulling anything with a reachable stem. I won't be cutting the sugar leaves. That's after drying with my new cannabrush. We'll see how well this baby works.
On a final note before lights out, Papaya Cookies has a few buds that are nearly done on the bottom and they are super hard. Really nice smalls. There's a bit of larf, and I can't really reach the buds in the middle, but they seem to be the ones taking the longest. So I think we'll be waiting for those ones to finish.
Lemon Cherry Cookies is kind of the same. Lots of bud in the middle that I can't reach. They aren't done and still have loads while pistils. But the buds on top are still swelling, so that's a good thing. We'll definitely see some bigger buds from this little lady.
Good afternoon everyone. It's 6:41pm.
New water new nutes cut in half.
Readings:
Papaya Cookies:
pH: 5.8
EC: 824
TDS: 409
Lemon Cherry Cookies:
pH: 5.8
EC: 874
TDS: 439
So it's 10 pm and I decided to check the pH and whatnot. It spiked to 6.8. What is happening? I cannot get it to stay in range. I don't know what to do here. It has to be something in the roots. I wonder if it's my tap water. It seems to have worsened since I started using it, but I can't afford distilled bottles. I will be ordering distilled for the 3 day flush. But that's only 3 days and I'm saving up for it.
Back to the matter at hand. pH spiking. Both plants. The EC and TDS also increased. Not by much, but still increased. The goal is to decrease. Hopefully, with the lower nutes, the roots or whatever gets diluted enough to slow everything down. They're already not drinking as much. So there's very little time. I wanted to get it corrected by today. But nope. Nothin doin. Well, I guess I'll be checking the pH tomorrow morning and changing the water out. I might have to change it in the morning and after lights out. We shall see. If it drops, I'm going to pH it back to 5.8 and leave the water alone. That's the plan.
12/10/2025
So today I checked the readings like everyday. BUT today my back is killing me and I can't lift the shit. It's really annoying. So frustrating.
Anyway, Lemon Cherry Cookies didn't change one bit overnight. pH is still at 6.8. the EC and TDS are also in roughly the same spot. But she did drink about a half a gallon and there was no change, so that's good. No increase in nutrient concentration. But the pH man, the pH is brutal.
Papaya Cookies dropped her pH down to 6.6, so that's good. Not in range, but still good. Her EC and TDS are also about the same. So same situation but a lower pH.
So I popped 3 ml of pH down in and mixed it up. Half gallon went into each container. It did nothing to Lemon Cherry Cookies. The pH stayed the same. But the EC and TDS dropped a little.
Papaya Cookies with the gallon, dropped down to 6.2 and the EC and TDS dropped a little bit as well.
Readings:
Lemon Cherry Cookies:
pH: 6.74
EC: 922
TDS: 465
Papaya Cookies:
pH: 6.5
EC: 867
TDS: 430
Forget everything you just read. LMAO. The numbers increased. I guess it's just a waiting game now. I'm gonna pH the water for both ladies after lights out. This morning I just added the plain pHed water. And not much happened. It's the roots. Gotta be. There's nothing left to look at. Well there's the tiny dose of nutes, but I don't think that's the problem. It could also be from the water itself. It's pretty hard. But I have no idea what to do about that. Is there a water softener that can be used in a bucket? Or would that be a really bad idea? Also, I just thought about this yesterday when I was removing Lemon Cherry Cookies from her bucket into the reserve for the water swap. As we all know, the tail of the roots is super long. So I have to lift it with my hands out of the water. My question is why didn't it ball up like Papaya Cookies? I think they have the same amount of roots, but Papaya Cookies has an actual ball where Lemon Cherry Cookies has a tail and smaller root ball. What gives?
Anyway, that was my weekly WTF question. Next week it's gonna be something like why won't this carboflush work? Should I add more? Should I swap out the water... Again?... You know. I'm implementing Murphy's Law here. What can go wrong will go wrong. LMAO. It's all good. I'm preparing for that exact question. I bet it's gonna be increasing EC and TDS levels. That's gonna be the problem. And no idea how to solve it. Swap out the water every few hours? That's crazy. Maybe one or two swaps every day, but not every few hours. A waste of carboflush and water.
So I'm super concerned with who will finish first. Papaya Cookies looks like she could be done by the end of the week. Lemon Cherry Cookies looks like she could use the whole week and then some. I know I said this last week, but it is a real concern. And I still have nowhere to put the other tent. But it's only for a few days and not an entire week. Well, hopefully not an entire week.
I have to trim in the tent so I can kinda keep the smell concealed. The fan on level 10 with just a side door open should be fine. Plus, I'm only taking off the sugar leaves at that point. So it should be a little faster with this brush thing and less smell will escape. Oh, I'll be using Grove Bags for the curing process. I really do like them. But I still need to add a Bovida pack because of the dry winter air.
12/11/2025
Morning readings after correction.
Papaya Cookies:
pH: 5.95
EC: 763
TDS: 381
Lemon Cherry Cookies:
pH: 6.2
EC: 946
TDS: 473
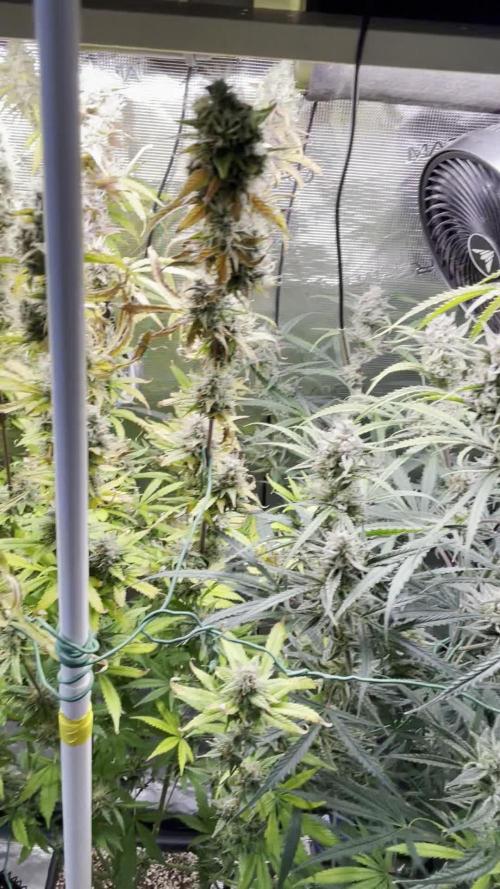
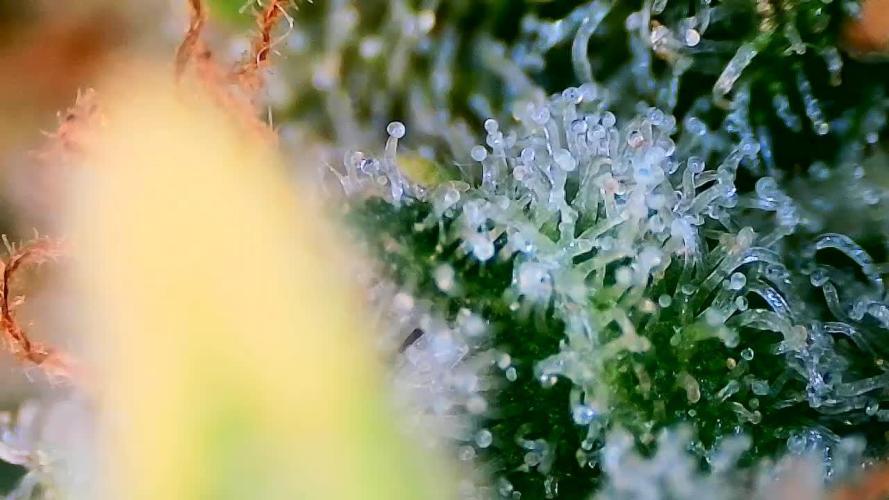
I got a couple trichome videos posted for everyone to see. I actually haven't watched them yet, so I'll update shortly.
But in bigger news. I found a full fledged flower on Lemon Cherry Cookies this morning. Complete with 1 seed. Then I found a bud with 3 seeds. Not developed yet, but there nonetheless. So that explains why she's taking longer to finish up. I'm hoping it was isolated and those are the only ones. I looked all through the bottom where I found the 2 sites. I think I found one more, but I left it alone.
My question is, if I clear out the seeded sites, will the plant mature faster? Good question right?! Because what I read was that seeded cannabis plants will take longer to mature because of seed production, as seeds take 6 to 8 weeks to mature.i had a gorilla cookies that went for like 21 weeks because it got seeded everywhere. No clue how, I never found the pollen sacks. But that plant was super healthy and HUGE. Well huge for an Autoflower in a 3x3 tent with 3 more plants in there.
Anyway, I'll definitely have to bring out the 2x2 now. As I said, I have trichome videos and I haven't seen them yet. But I have a feeling that Papaya Cookies is just about finished. As in I could probably start the flush this weeks as I suspected. We'll see though.
Oh speaking of healthy plants. Lemon Cherry Cookies is also still unhealthy. I spoke too soon. Still locked out and now more leaves are turning yellow. The weird thing is, I added a very small amount of nutrients. How there's still an issue I don't know. I guess just wait longer? 🤔
Ok, so I just watched both videos. Lemon Cherry Cookies definitely has more time to go. The trichomes are mostly clear toward the middle of the plant. So she definitely has more time to go. Hopefully with any luck, she'll mature by the end of the week.
Papaya Cookies has almost all cloudy trichomes. I like a bit of amber in the mix and there is none. So I'm going to wait for Sunday I think then start flushing her. I'll flush for 3 days. So that will be finished on Tuesday. And that's when I should be able to start flushing Lemon Cherry Cookies. Then I chop Papaya Cookies and hang her up. At the same time, I do a 3 day dark period for Lemon Cherry Cookies while she finishes up. In the meantime, Papaya Cookies is happily drying right above her. I'm still trying to figure out the best way to work the environment. I'm thinking I can just keep the temp at around 66° and bring the humidity up to 50% I think that's good. I have to look into it. But it's only for a few days and there's still plenty of airflow. I will be turning 1 fan off though. As to not disturb Papaya Cookies while she dries. Plus I don't need 2 fans for 1 plant this size. So yah, that's my plan. And as long as it works I'm good to go.
If it doesn't work, I'll have to bring out the 2x2 and hook it up to the 3x3 and use that exhaust to pull from the tent. I have an extra fan so I can run that as well. For air circulation. Not too sure how I'm gonna keep the humidity up in there. Hmmmm. That's not good. I can definitely keep the temp low, but the humidity is super dry here right now. Well, it'll be 3 days in the 3x3 drying so if the 3x3 isn't ready for both plants to dry, the 2x2 will only be used for like 7 days. With a 10 day dry, that is. I'd rather not rush the drying time. Although, if I can't figure out the humidity, I may be rushing it quite a bit. Like in a very bad way.
So I hurt my back and am having trouble even checking the readings. Hopefully it's not all messed up.
Also, I've been thinking. Both plants have nutrient lockout. Would it make sense to start flushing Papaya Cookies like tomorrow? She only has about a week left.
12/12/2025
Readings:
Papaya Cookies:
pH: 5.5
EC: 731
TDS: 364
Lemon Cherry Cookies:
pH: 6.2
EC: 877
TDS: 438
So I think Papaya Cookies is just about done. Tons of cloudy pistils. But a lot of clear as well on certain parts. I was gonna wait to flush in 4 days, but I think she needs it now. I'll start the flush later this afternoon I think. Or tomorrow. It all depends on how I'm feeling. My back is still out for torture lunch. Fuck, it hurts. Lol.
Anyway, I think she's really close to harvest.
Lemon Cherry Cookies on the other hand definitely needs more time. The tops look fine, but the middle of the plant is loaded with unfinished larf. Larf I can press into concentrate. And frankly, I don't want to harvest just the top of the plant. However, when I pull Papaya Cookies out, I'm going to center Lemon Cherry Cookies in the tent. I'm thinking about tossing the trellis net on there and pull the top branches outward to open up the canopy. That should help with the lowers in finishing a little faster. We shall see how I feel about it. Maybe I'll ask around.
Update:
I moved a couple things around and setup my dry tent. It's going to be exhausted through the 3x3. I'm thinking about putting the exhaust fan up to help with air exchange. Like very low. Anyone think this is a bad idea?
Another Update:
So I decided to start the flush with Papaya Cookies. She's got plenty of cloudy trichomes. Some buds have some clear on them. The only buds that aren't ready are the ones in the center of the plant. Way in there. I expect they will be ready on the next week. Or 3 days. Lol.
I figure if they have too much nutes, then Papaya Cookies should have enough to last a week or so. If that's how it works. We'll find out.

Likes
10
Share

@StonedSteve
Follow
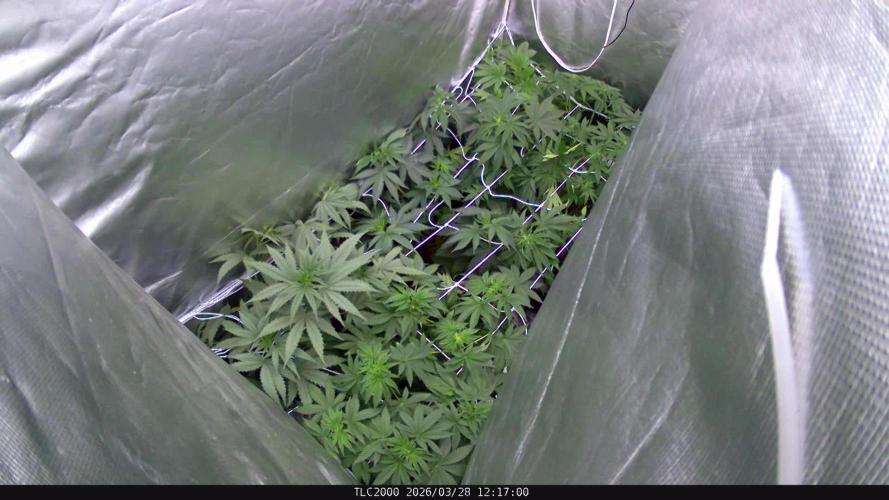
Zdravím✋ týden pryč a já tady mám aktuální fotky po 3. týdnu květu a lehký defoliaci
Dneškem 1.6. startuju 4. týden květu
Major už měří 71 cm.
Defoliace mu prospěla né že ne😉
Vlhkost se motám pořád od 50 do těch 55% ale nad už nejdu.
Teplota taky v cajku.
Zálivka pořád 7L, výtok 1100ml-1300ml
Ph 5.6
Do zálivky jsem už zařadil Big Bud Coco a Bud Factor X s Bud Candym, ale nejsem prasák, že bych dávál 9 lahviček na jednu zálivku ale snažím se to prostřídávat tak že mám A+B základ + Solo Tek Bloom + CalMag vždycky a ten zbytek tak nějak kombinuju, jednou vyřadím Senzysim, jednou zas Rhino Skin a tak, prostě abych měl zálivku max 6 lahviček už tak je to dost😂
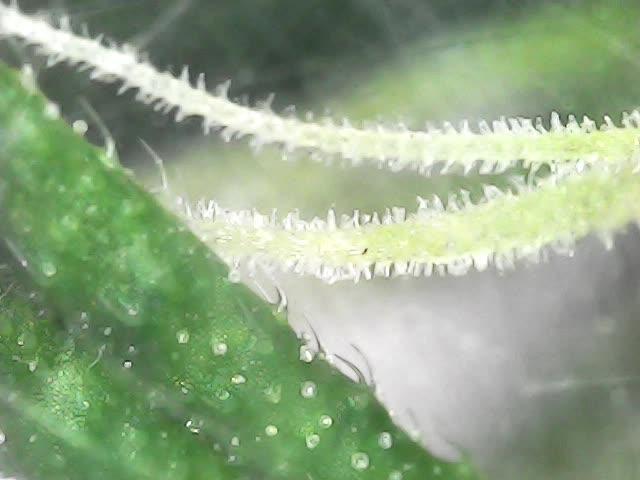
Na lístkách se začali objevovat první náznaky cukříku, ale taky takovej žlutej maskáč z čehož jsem docela nesvůj (na začátku videa to jde vidět), musel jsem lehce povytáhnout světlo protože u hlavní centrální palice se začali listy kroutit a dělat ozubený kola tak snad to pomůže.
Jinak kytce se daří a já doufám že pořád bude až do zdárného konce.
Za týden zase zdar a ať se vám všem daří✊


Likes
4
Share


