




Likes
183
Share


@OrganicNature420
Follow
Germination date 🌱 12/07/2021
Day 85 08/10/2021
Strain 🍁 Ethos Genetics Banana Hammock R1
(Mandarin Sunset x Grapegod)
THC% • Unknown
💡 Mars Hydro FC4800
• Power draw 480W + 5%
• Max coverage 5 x 5
• LED 2070pcsSamsungLM30B1&Osram660nm
• Max Yield 2.5g / watt
• Noise level 0 DB
• Removable Driver +2m cable
• Daisy chain (multiple lights)
https://marshydroled.co.uk/products/mars-hydro-fc-4800-led-grow-light-samsunglm301b-commercial-greenhouse-medical-indoor-kit 🇬🇧
https://www.mars-hydro.com/buy-fc-4800-480w-4x4-energy-saving-full-spectrum-commercial-led-grow-light-mars-hydro-for-sale 🇺🇸
PROMO CODE • (ORG420) DISCOUNT 👍🏻 marshydroled.com
⛺ Mars Hydro 120 x 120 x 200cm
📤📥 AC infinity 6inch
💧 10lt dehumidifier
❄️ 3.1kw air con system
💉 Nutrients GreenBuzzLiquids
Organic Grow Liquid • 1-4ml until 2wk flower
Organic Bloom Liquid • 2-4ml flower stage
Organic More PK • 2-4ml +wk3 of flower
Organic Calmag • 1-2ml/lt whole grow
Fast Plants Spray • first 3days at night lights off
More Roots • 2-5ml veg +2wks flower
Fast Buds • 5ml +wk2 of veg until 1wk flower
Humic Acid Plus • 2-5ml whole grow
Growzyme • 2-5ml whole grow
Big Fruits • 2-5ml flower stage
Clean Fruits • 5ml flush 1wk
Ph powder
Root Gel
Living Organics
PROMO CODE • organicnature420 15%off ✌️🏼
https://greenbuzzliquids.com/
🥥 Growing Media • Coco Coir
Notes 📝
Girls are on fire 🔥🔥🔥 all have massive frost levels 🙌🏻❄️ worm castings to be added as I was away last week. Roll on harvest 🌱
Remember PROMO codes for both GreenBuzzLiquids and MarsHydro.com in the grow bio above 🖕🏼
Happy growing fam ❤️🌱🍁👍🏻


Likes
8
Share


@Indiepolo
Follow
Additional 8cm this week I think my setup can handle 8 more, anyway I am happy with the grow. Have a nice day.


Processing
Likes
23
Share


@eldruida_lamota
Follow
Como estamos familia, a día de hoy, viernes, llevamos exactamente 7 días en la fase de floración y todas ellas están marcadas por su sexo.
Todo va sobre ruedas, tenemos mínimas de 20,5 y maximas de 28,5 grados. la humedad no supera nunca el 60%.
Altura mínima lemon kush 25cm.
Altura maxima northern light xl 42cm.
•las power plant xl Han pegado un estirón serio, están empezando a ensanchar bastante.
•una marea verde desde semilla, con tan solo 5 semanas de crecimiento y un solo trasplante desde que se germinó, para controlar un mal crecimiento.

Likes
6
Share


@PeppeItalia
Follow
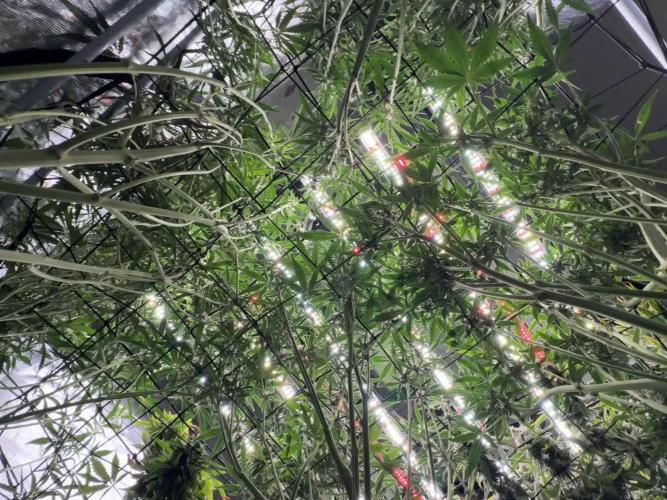
La settimana passata non sono riuscito a trovare tempo per le foto.
Oramai è la terza settimana di crescita .
Tutte le piante crescono rigogliose e felici. Tranne una che si era spezzata mentre avevo travasato il piantino, però piano piano sta recuperando.
Tenendo l umidità molto alta intorno al 70 per cento fin ora le ho annaffiate solo una volta per settimana.
Praticato fimming nel 25 giorno dal seme in terra


Processing
Likes
6
Share


@CityFarmer
Follow
Hello everyone,
Been busy but I shoot a little video for yall to see, also if growing is something you guys intended to do, I suggest you guys get yourselves a Digital Microscope or a jewlers loop.
I just got myself a Digital Microscope for under $20.00 on Walmart.com, I got me a cheap one to start with so I can learn how to use it properly. But for under $20.00 this one brings 8 led lights, a adjustable mount, comes with 3 different connection choices build in, magnifies from 50-1000x, can take pictures and also videos and my favorite part, it connects right to my mobile device, you download and install a Google app and your ready to go, ill work with it and add pictures next week...
See you guys soon 👊👊👊


Processing
Likes
41
Share


@Wicked_Stix
Follow
Been wanting to try out this auto ghost og from original sensible seeds for a while and finally got the opportunity to get one wet.
I originally started this setup to compete in the solo cup challenge, but I needed something that will be minimal maintainence and doesn't require hand watering. So this is what I ended up with. I will not be entering since I know it will bring controversy, but I am going to follow the rules and treat this grow as if I am competing.
I didn't want to use regular solo cups because last time I had a lot of algae growing in the root zone when I harvested. I opted to use a black light proof cup. These cups were 27 oz originally so I filled them with 16 oz of water, marked the level, then cut them down to 16 oz. I set the drain pipes about an inch from the bottom so they have a little reserve if I have pump or power issues. I know people will see the drains as a way for roots to grow out of the cup but in reality I have to keep the entire pipe free of roots or it will clog and overflow. So I am actually losing a little volume due to this.
I filled the bottom inch or so of the cups with river gravel to stop the perlite from washing into the reservoir.
I am running a 5 gallon reservoir with a small air pump and the plants will be getting irritated 24 hours a day from an aquarium power head pump. I set the system up to be totally self contained and easily portable. It was all built from things I had laying around other than 97¢ for the cups. I will be keeping the feed simple as always feeding maxigro and maxibloom with a couple flower boosters.

Likes
5
Share


@killerjoint
Follow
8th days/Flowering /little change
10TH DAYS OF FLOWERING
DUE TO RAIN HAD TO TRIM BOTTOM -LITTLE EARLY
MY HUM WAS HEATING 70 TO 76 BLOWING FANS....
AND CHECKING FOR SEX
POP 9 SEEDS 100% SUCESS
AND ALL FEMALE
THANKS TO COPY CAT GENTICS.
11TH DAYS -FLOWERING
RAINING SEASON HAD TO TRIM BOTTOM FOR AIR VENTILATION
MY HUM HITTING 72%.......T T DUE TO RAIN RUNNING EXTRA FAN FOR AIR VENTILATION.
EVERYDAY PLANTS GROWING ABOUT 2 TO 3 INCHES
LET'S GO GOOMIES


Likes
21
Share


@matthiasbmg
Follow
This week will be the Last week probably, I just flushed them and will not water them any more. I Put the lightcircle down from 20 hours to 18.

Likes
61
Share


@Cannibalgardens
Follow
Well as the strain that was completely making my grow room stink I'm glad she is down finally . Anyone looking for some stinky buds and a girl who can give you nice compact buds and a good amount look no further .I'm going to run these girls again sometime soon as they were just so dam good at taking what ever I threw at them ..They had no nutrient burn or lockout issues , they lived high humidity and never showed stress . They could go with out water for an extended time and recover no problem . The team that did these girls really made a winner here I would recommend this one to anyone out there looking for easy to grow plants with a good return .. cheers canna family check me out on instagram @cannibal19888
Likes
3
Share


@2MiHal3
Follow
Not a perfect round,but i hope that next round will be better... 🤟
I made a few mistakes about buying equipment and chose nutrition that does not suit me, but i will learns from my mistakes...
Likes
8
Share


@DWCpaqy
Follow
Are just in day 5 and two of them seems to enjoy.
Ph 5.8
Ppm 720
Ec 1340
****
First time growing, and first time with dwc. I chose to build my own dwc tank!
First week was alright, I think I put the seed to early in coco coir and then into leca in dwc tank.
Tap water is around 200 ppm and 7.6ph, I boil the water because of kalk.
First 2-3 days I was starting with 7.2 - 6.6 ph and 520 - 640 ppm
D. 4-5
640-790 ppm 5.8-.5.6 adding more terra Aquatica
D. 5-7
790-980 ppm 5.6-6.2 ph 23c tent 19c w.
Likes
8
Share


@sevengreenfingers
Follow
Hello everyone! I promised to track this grow very closely this time and ufortunately life got in the way. Here is a quick sumup of the grow.
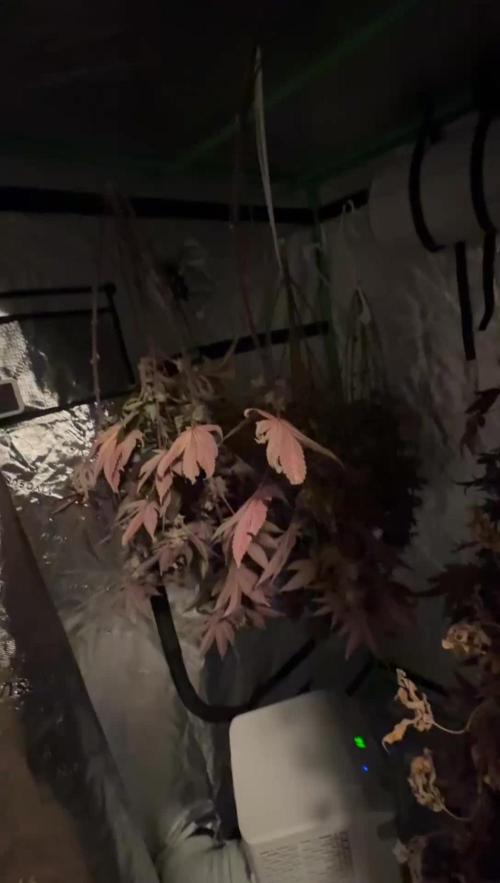
First of all- One of the sour stomper plants unfortunately didn't make it. It died at about week 4. The main stem somehow had rubbed/broken down. That's why it was falling down. It was almost like a mini beaver had chewed it off at the point where the stem touches the riot rooter. At first I thought nothing much of it, maybe it hasn't been rooted in quite well yet or something. And I was constantly touiching it when watering, that made it worse. Soo the leaves were dropping and the plant looked very weak. Then I decided cut thr rapid rooters top layer and found out the severity of the problem. Tried to tape it up and other things, but it was too late. At the end it appeared all good as the remaing plants got so big the I had some space issue so I wouldn't have been able to fit another plant in anyway.
At that time I finally made my self-draining saucers. I took me a while and a lot of effort, but finally they were ready and working well. I also installed the self watering system and flowering was starting. Pretty soon I started noticing weird leaf symtoms. Brown spots, different kind. Some plants had it more, some less. Sour Stomper looked pretty good throughout the grow. Mango smiles seemed sensitive and Strawberry Nuggs were pretty strong until the end.
The grow was basically me experimenting with the setup- changing watering schedules , changing ppm, ph and all that stuff to keep the leaves looking healthy and it was very hard I have to admit. Probably my hardest grow in that regard. But somehow, the bud leaves remained healthy and the buds really fattened up good. I got away with an amzing 700G dry bud harvest which was def a new record from one grow. And the bud quality is very good too!
Next time definetly no more than 4 plants as they got pretty big and I thought it was a little overcrowded. I was doing some good defoliation too. I should have defolited strawberry nugs more tho. Sour Stomper got some amazing bud development from top to bottom because it was was growing next to strawberry nuggets which were really small most of the grow. They actually took the most time to harvest even longer than Mango smile. Mango smiles were ready quite early. Sour Stomper was just in time!
I topped sour stomper and both Mangoi smiles, left SNs both normal. Looking back at it, the way I grow them, Should have topped SNs too. Would probably have more space in the middle and longer side branches. Probably wouldn't have been as bushy!
I followed the full Terra aquatica feed chart until the end. I was supplementing with CalMag a lot as I thought the symptoms could have been from a CalMag deficiency as this was my first grow with RO water.
Overall a very challenging but good grow at the end. First time no mold problems. A record breaking yield for me. Basically surpassed the upper limit for all plant probable harvest sizes. Got good smelling quality bud. Very happy overall and will continue experimenting with Mephisto beans in the future for sure! I guess what I like the most about Mephisto is how close to description the plant is, very stable genes in that regard.
Next time I will also have to start feeding plants higher PPM feed faster at the very start. and during flowering. But still not 100% sure what caused the leaf symptoms.



Likes
3
Share


@Cultiv8or
Follow
Brought them inside this week and borrowed a Dehumidifyer. I’ve been able to get RH , 45-55 now and the resin production has already started increasing

