
Likes
Comments
Share


@FireAntTheGrower
Follow
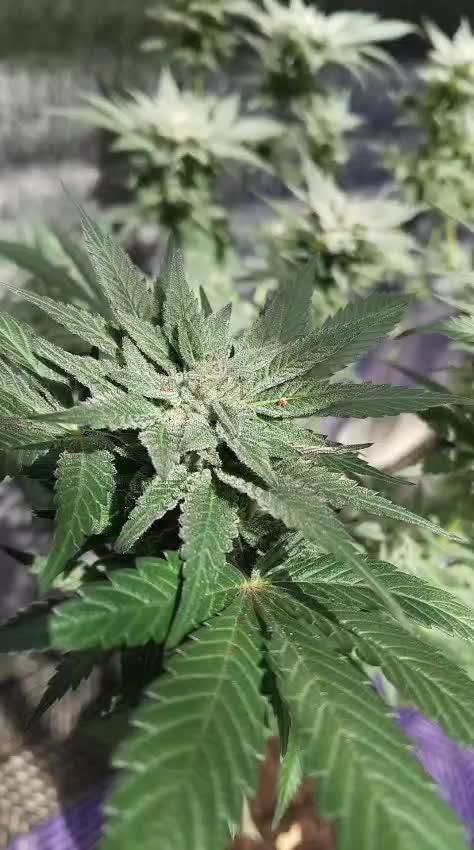
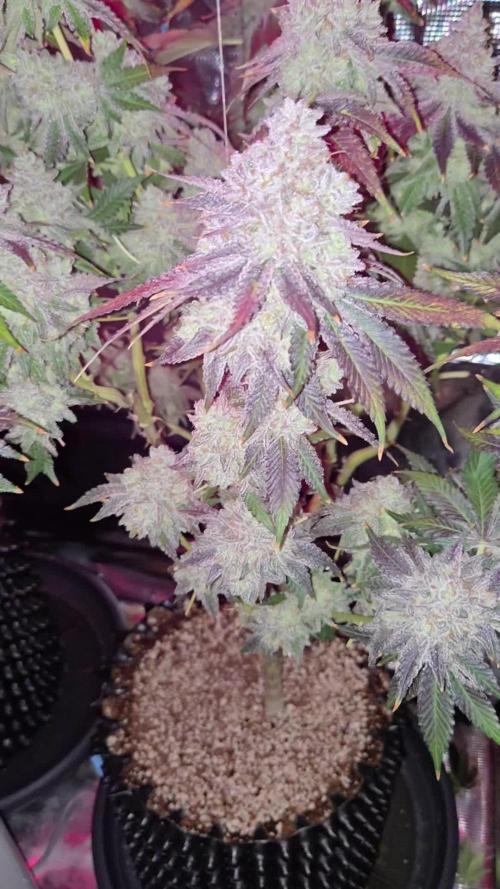
Let say I don’t even know where to begin or how to say this but it more of a challenge w/ the fans leave. I’m like dang but of course got to keep the girls manicure and clean for they can strive to their full potential. I may have or may have not stress the girls out by cutting too many fans leaf off. Regardless I hope they don’t hermies on me . If did no sweat 😅 still will run this back . I only see em at the bottom bottom. For sure have to trims on the regulars… or every time open grow tent. According to Premium Cultivars.. the problem to look out for is trimming & pruning . Humidity Sensitive and mold/mildew. Sorry for late post or update. Outside of that working new 9/5 and doing my best to stay on top LPC. Will see harvest… stay tune!

Likes
12
Share


@Earthling37
Follow
Week 10 Harvest, will update with dry results soon
Use code GROWITGD for a 20% discount over at www.Zamnesia.com
They have a wide variety of smart shop and headshop products, such as cannabis seeds, dried plants and herbs, vaporizers, magic truffles, and mushroom grow kits.


Likes
17
Share


@Troy_Farms
Follow
Just started showing pistils. Moved male Durban Poison out of grow tent so the three remaining girls have more space to flower up. Stretching nice for flowers, 😎 Looking great. 💪
Processing
Likes
77
Share


@ScotlandDrGreen420
Follow
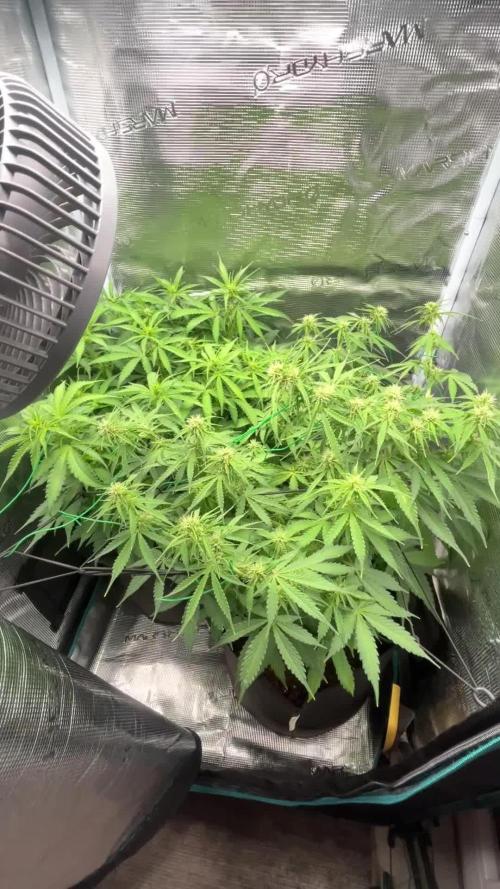
This thing just doesn't stop growing so, I'm experimenting, fired in a scrog net and I'm gonna veg it out to fill a 1.5x1.5 net, 1 plant... Should be fun if it actually is a female lol...
.
.
More pics will be uploaded shortly as I'm just back from a holiday.
The journey continues.....
Plants starting to fill the scrog in nicely, I'm hoping and praying that this remains a female and doesn't hermie as it was originally purchased an auto how ever, I sexed some cutting which sprouted white hairs rather than mini sacks or nanas so, I'm remaining positive as the smell from this plant is insane, the resins coming through the stocks are sticky and have a lovely aroma also.
.
.
Approaching the end of the week and the Gorilla is filling the net nicely 👌.. Fingers crossed now that it turns out a Fem! Pray for me lol...


Likes
18
Share

@World_Breeders
Follow
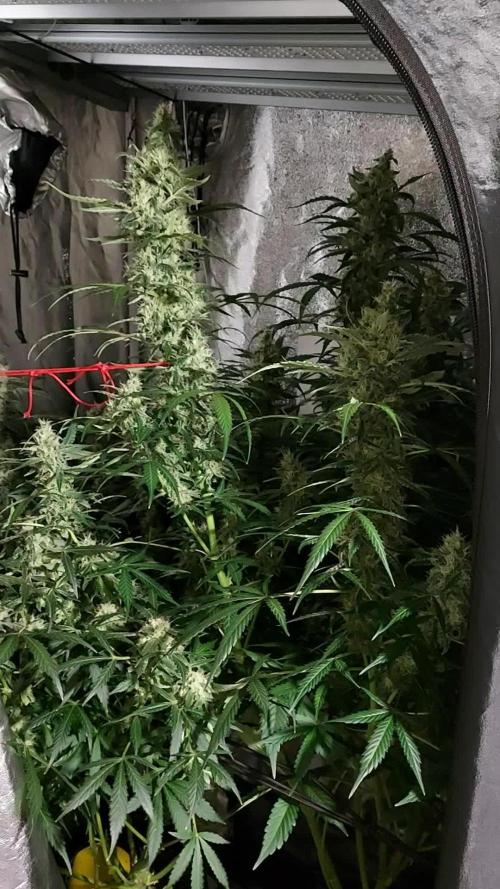
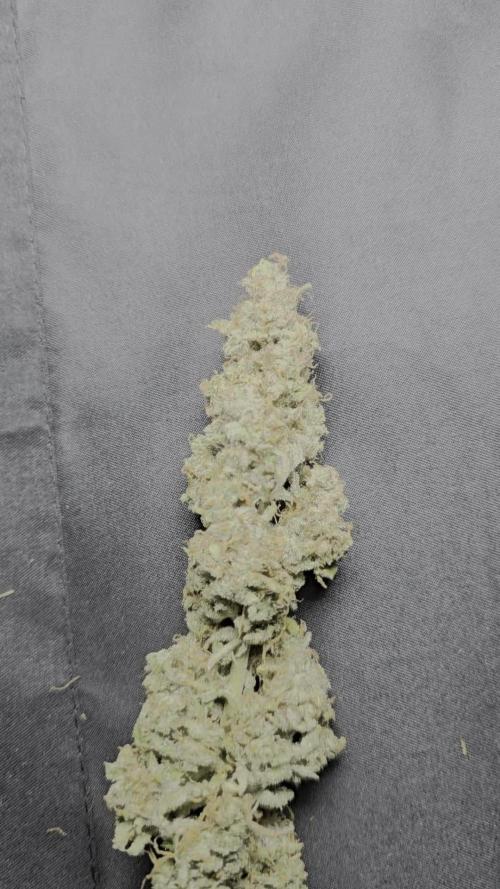
Pilot continues to stand out for its excellent flower development and exceptional resin production. By week 7, the colas have stacked tightly with swollen calyxes, creating dense spear-shaped buds covered by a thick blanket of trichomes that already extends well onto the sugar leaves. The plant has maintained a very balanced structure after training, with strong lateral branches supporting uniform flower formation across the canopy. Resin production is becoming one of its strongest traits, suggesting excellent potential for both premium flower and extraction. At this stage, the plant is entering the final ripening phase while maintaining vigorous health and impressive visual appeal.
Seeds by World Breeders
Cultivated by Piperoots 🇲🇦 🌱🔥
Likes
6
Share


@1Prinz
Follow
18.07 watering with 400ml - 400ml - 400 ml
Blueberry got only water
Trainwreck got Bloom, Top-max and Fish-Mix
All the others got only Top-Max and Bloom.
Search everyday for some spidermites or something else. On some days I find a few on blueberry and Biscotti. I remove the manually.
21.07 watering with 400 - 400 - 400 water.
Again: blueberry only water
All the others Top-Max and Bloom
Trainerwechsel started to flower.
The leaves of Blueberry and Biscotti started to get yellow. Also removed some leaves with were down in the shadow of the top strains of frosted guava.
Likes
6
Share

@RanTanPlan_69
Follow
Starting the sixth week of my ladies. Cleaning the bottom and removing the « suckers » (future popcorn buds at the basis) to get more energy to the top !

Likes
60
Share

@squalino
Follow
🌿 Journal de Culture :
Mac 1 – "Spirit" (Plante #2) –
Floraison Explosive
Date du jour : 15/06/2026
Âge de la plante : J+72 (Semaine 11)
Taille actuelle : 136 cm
Évolution : +2 cm par rapport à la semaine dernière
On franchit un cap impressionnant cette semaine. Le stretch est définitivement de l'histoire ancienne, et Spirit concentre désormais toute sa féroce énergie dans une production de résine et de matière qui dépasse toutes mes attentes.
📊 État de Santé & Descriptif des Fleurs
Compacité phénoménale :
C'est un truc de malade ! Les têtes ne sont même pas encore totalement finies d'être formées qu'elles sont déjà incroyablement compactes et dures au toucher. La densité qui s'annonce est impressionnante.
Production de trichomes :
Les fleurs deviennent de plus en plus résineuses de jour en jour. Elles commencent à se couvrir d'un beau manteau blanc qui scintille sous la lampe.
Profil aromatique :
L'odeur a légèrement évolué ; elle est maintenant très sucrée, extrêmement agréable en nez et pas du tout agressive pour le moment. Un vrai parfum de confiserie.
Guerre de l'espace :
C'est une plante magnifique, mais elle exprime clairement son besoin d'espace. Faute de place et sans un LST plus agressif dès le départ, elle a pris le dessus dans la tente. Elle fait de l'ombre à sa sœur Bee Apee, lui masquant facilement la moitié de la lumière. Pas le choix pour cette fois, on fait avec les moyens du bord, mais c'est une sacrée leçon sur le tempérament de cette génétique.
⚙️ Paramètres Environnementaux
Climat & Tente :
Toujours stable (24°C jour / 21°C nuit, humidité maîtrisée au déshumidificateur pour sécuriser les buds compacts).
Lumière :
Maintenue à 75% d'intensité. La cime principale se stabilise à environ 13-15 cm du panneau LED, tandis que la canopée secondaire profite des 35 cm réglementaires.
Arrosage :
Toujours géré en flux continu via le système Autopot à l'eau claire avec un pH stabilisé à 6,3 depuis le retrait du bulleur.
Nutrition & Entretien (Aujourd'hui)
Apport hebdomadaire :
Pour soutenir ce gonflement massif, j'ai donné aujourd'hui mon arrosage manuel de 5 ml de Bio PK 5-8 de Biotabs.
Observation :
Gourmande comme elle est, elle absorbe ce booster de phosphore et de potassium instantanément. Le feuillage reste majoritairement bien vert, preuve qu'elle utilise chaque goutte de nutriments pour densifier ses structures florales.
📝 Résumé de la situation
Spirit est une force de la nature. Malgré le manque de place flagrant dans la tente et la compétition lumineuse avec sa sœur, elle produit des fleurs dures comme de la pierre à un stade pourtant intermédiaire de la floraison. Les calices se gonflent, l'odeur sucrée s'installe et la couche de résine s'épaissit. On reste vigilants sur l'humidité pour protéger ces buds serrés, et on la laisse continuer son excellent travail.
🙏 Remerciements
Un grand merci à @mia_biotabs et à Mrs_Larimar pour vos conseils avisés qui se traduisent aujourd'hui par des fleurs ultra-compactes, ainsi qu'à vous tous qui suivez l'évolution de ce monstre de résine !
Le gonflement bat son plein, restez connectés pour la suite !

Likes
4
Share

@Naujas
Follow
Day 89!!!! I came back from vacation and started harvesting right away, so the girl grew really big, but I gave her too little light, and at the end of the growth I didn't remove the leaves :( because I was busy on vacation :( but basically I'm still incredibly happy, her flowers are not very firm, they have a lot of "AIR", but a lot of shiny sticky trichomes, the girl grew really well throughout her growth, next time I will definitely use LST, this growth was with very little LST, there will be an update when the harvest dries up :) good luck to everyone:).


Likes
18
Share


@DogDoctorOfficial
Follow
Hey fellow green thumbs! 🌿💚 The day has finally come—our Auto Northern Dragon Fuel from Super Sativa Seed Club has been harvested! After an exciting journey, we’re thrilled to share the details of this incredible plant’s final stage. Let’s dive into the harvest report!
🌟 Harvest Details:
Day 75: Harvest Day
• Harvest Date: Day 75
• Harvest Method: Our beautiful Auto Northern Dragon Fuel was harvested yesterday. After weeks of careful nurturing, the time was right to bring in this amazing plant. 🌿🌼
• Preparation: Before hanging, we meticulously cleaned the plant, removing all leaves without trichomes to ensure a smooth drying process and to enhance the quality of the final product. 🌿✂️
Current Drying Process:
• Method: The entire plant is now hanging upside down to dry. This method helps maintain moisture levels within the buds, allowing for a slower and more even drying process. 🌿🔄
• Environment:
• Temperature: 18-22°C (65-72°F)
• Humidity: 50-60%
Maintaining these conditions is crucial for achieving a perfect dry and preserving the plant’s aromatic and flavorful profile. 🌡️💧
🌟 Plant and Bud Characteristics:
Auto Northern Dragon Fuel:
• Bud Structure: Dense and sticky, with an impressive trichome coverage. The buds are beautifully formed, showcasing the robust genetics of this strain.
• Aroma: Even in the drying phase, the rich and potent aroma is unmistakable. Expect a delightful scent that hints at the powerful experience to come.
• Trichomes: A thick layer of trichomes covers the buds, promising a potent final product with a great flavor profile. 🌿✨
🌟 Care Tips:
• Drying Process: Patience is key. Allowing the plant to dry slowly will enhance the final quality, preserving both flavor and potency. Ensure good airflow around the hanging plant to prevent mold and mildew. 🌬️💧
• Trimming: Once the drying process is complete (typically 10-14 days), it will be time to trim the buds. This is where we’ll shape the final product and get it ready for curing. ✂️🌿
• Curing: After trimming, curing the buds in jars for at least 2-4 weeks will further enhance the flavor and smoothness. This final step is essential for achieving the best possible smoking experience. 🍁
🌟 Genetics Spotlight:
Auto Northern Dragon Fuel:
• Characteristics: Known for its robust structure and dense buds, this strain has shown remarkable resilience and impressive bud development throughout the grow. The final product promises to be potent and flavorful, thanks to the thick trichome coverage and rich aroma.
• Harvest Expectations: High-quality buds with a strong aroma and potent effects. The slow drying process will ensure the best possible preservation of cannabinoids and terpenes.
🌍🌿 Fun Fact:
Did you know? 🌿✨ Drying the entire plant slowly helps retain more terpenes, which are responsible for the plant’s aroma and flavor. This method also helps preserve the potency and quality of the buds, resulting in a smoother and more enjoyable experience.
For all the in-depth action and detailed explanations, head over to my YouTube channel! 🎥✨ I’m sharing all the tips, tricks, and step-by-step guides to help you get the best results from your grow. This week’s harvest has been particularly exciting, and there’s so much more to explore and learn together!
👉 Join me on YouTube Link in my profile 👈
🌟 Conclusion:
Harvesting Auto Northern Dragon Fuel at Day 75 has been a rewarding experience. With the plant now drying, we’re eagerly awaiting the final product. Stay tuned for updates on the drying, trimming, and curing process, and get ready for a high-quality harvest!
Happy growing, and see you next time! 🌿💚✨
#SuperSativaSeedClub #HarvestReport #NorthernDragonFuel #PlantMagic #GardeningJoy #NatureLovers #PlantPower #InspireGrow #YouTubeJourney
Likes
5
Share

@Growfather2
Follow
Hello everyone,
I didn't expect to post another weekly update but the girls are still not finished! The plant on the right is ready the other one needs a day or two.
But this is the end the lights are off 17 minutes ago and won't come back on again, I will keep the plants in darkness for 3 days before harvesting.
Let's see in 17 days how the buds are looking when dried, thanks for stopping by and have a good day.
Best regards,
Growfather


Processing
Likes
15
Share


@ThePotFactory
Follow
Added a scrog today, plants looking healthy. Ill be looking foward to see how they react being autoflowers. Bat guano also added to the coco as a top layer and mixed in about an inch. Upped the cannaboost and cannazym. Next week probably be adding PK 13/14
Likes
1
Share


@BruWeed
Follow
Se secaron rápido. Los cocos son pegajosos y tienen aroma muy fuerte.
En humedo me dio 150g en total. Tengo que esperar que se sequen para ya saber el resultado final.

Likes
44
Share


@APOLLO
Follow
Howdy folks 🙌, been a good week for them, she is gaining weight 😍
Major development in its smell, she smells a lot more citrusy initially with sweet undertones. MUCH HAPPY 😋
She has been a pleasure to deal with and can't wait for her second run already 😄
Her clone is over a month old now and is doing very well. Green Gelatos are over due a flip switch but I'll wait till this round is finished.
Will stop the Pk 13/14 now and A+B too. That's it for this week. Stay safe, cyall later 🙏

Likes
6
Share


@Lazuli
Follow
She got a bit taller then i like but the flowers are so amazing, i had to deal with a heatwave (40celcius) mid flower so she got a bit heat stress on top but nothing dramatic