
Likes
Comments
Share


@artems
Follow
1 week from switching to 1212. Plant looks good and deserved defoliation with little banding. Looks amazing! Watering with 1 liter of water in 2 days.


Likes
Comments
Share


@UrbanBoer
Follow
I would be lying if I knew how far her flower phase come, this couple weeks been absence only gave me results, and left me with a catalogue nightmare, but thank goodness my previous posts are dated, so it gives a rough idea, but genes differ within strains, some strain grow vigorously at certain stages, and I think this baby hit her phase. She will be my best tree when it comes bud quantity, when it comes to potency, I will have settle with what I encounter and except the outcome.
Likes
3
Share

@Dargaville_Dukes
Follow
Plant started drooping in the last couple of days. I'm not completely sure but think it's probably from over watering so I'll keep an eye on it over the next few days. Gave the plant another big defoliation and took off all the small stuff that I don't think will become decent buds. Going away for nine days next week so I'm trying to get the water right.
UPDATE: left the plant for 24 hrs and it continued to droop. Definitely under watering. Gave it 3 l litres and it's looking normal now.

Likes
300
Share


@Ju_Bps
Follow
Hello growmies 👩🌾👨🌾🌲🌲,
Longtime didn't grow Fast Buds strains,
Few days ago I see the contest, "win a ps5", What!?
Let's go pop some seeds 🔥
The seeds come from a win of Diary of the month, didn't remember wich 🤔.
Thanks to @marshydrococo2 and Mars Hydro Lighting for the FC 3000 and 6 inch fan kit 🔥🔥💕💕.
Day 0
I've put the seed in paper towel.
Paper towel + water + seedbooster 7 drop for 1l.
Day 01
Seed popped in 24h, 3/3, fast for seed stored since several months.
I'll keep only the 2 best seeds, the third will go to friend home
Day 02
Put seeds in plug
Day 03
#1 start to come out of soil
Day 04
#1 out of soil, still nothing for #2
Day 05
#2 finally to start to come out
Day 06
#2 out of soil and opened
Day 07
Looking good, keeping wet soil
Seeding box
Temperature around 26*C
7w led 24/24
Humidity 85-90%
💦 I vaporise the plug with water + roots
PH @6
Wish me good luck my friends!
I'll update during the first week
I'll prepare soil and put in 1 liter pot and under light the next week .
Have a good week and see you next week 👋
Thanks community for follow, likes, comments, always a pleasure 👩🌾👨🌾❤️🌲
Mars Hydro - Smart FC3000 300W Samsung LM301B LED Grow Light💡💡
https://www.mars-hydro.com/fc-3000-samsung-lm301b-led-grow-light
Mars Hydro - 6 Inch Inline Fan And Carbon Filter Combo With Thermostat Controller 💨💨
https://www.mars-hydro.com/6-inch-inline-duct-fan-and-carbon-filter-combo-with-thermostat-controller
Fast Buds - Tropicana Cookies FF🌲🌲
https://2fast4buds.com/us/seeds/tropicana-cookies-fast-flowering

Likes
15
Share


@THC123
Follow
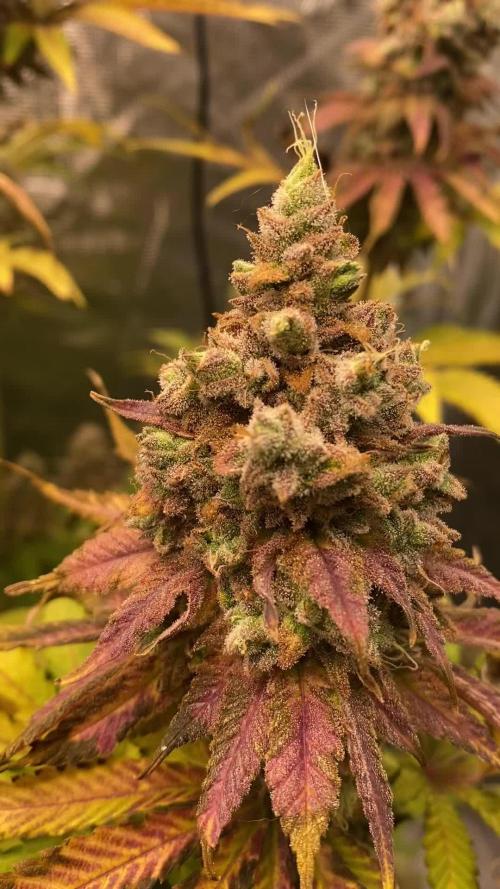
Day 89
I need to get a microscope ASAP. I need to start monitoring the trichomes. They smell so fruity, it’s amazing.
Day 91
Now that the temperature and humidity are staying controlled, you can really see them producing an insane amount of trichomes. They look incredible!
Day 92
Got my macro lens for my phone today. Pictures were meh 🤷♂️🏼 I know they aren’t near ready yet, so I think I’ll need to get myself an old fashion microscope to check
Day 93
Added some water today! Still looking great!

Likes
21
Share


@BB_UK
Follow
She’s a total beast! Gave her a little defol to remove some fan leaves blocking light to the lowers, also removed her from the block she was standing on as it wasn’t necessary anymore because she reached height. Now to see some flowers develop! 😊


Likes
18
Share


@BufoAlvarez
Follow
7/19 I’ve come upon the realize that I had been under watering to an extreme degree. I have since adjusted accordingly today and hope they look better tomorrow.
Did remove some leaves and then found out I really shouldn’t have, hopefully I didn’t stunt them.i believe they are now flowering and next watering I will be adding some tiger bloom at very low strength. the newts I’ve given them have shown tip nute burn often and I have been very minimally watering so my conclusion is my soil was so full of nutes I could have waited until now most likely to start my first feedings. I’ve read about this and w ocean forest this seems to be the trend. Still really happy about the progress. Peace

Likes
4
Share

@The_Doctor_Green
Follow
Hola a todos!
Esta semana no he agregado fertilizantes,solo he regado con agua de ph 6.4
Han vuelto a aparecer los trips 😔, porque han llegado varios días con alta humedad.
Ya dentro de poco hare el lavado de raices.

Likes
4
Share

@eldruida_lamota
Follow
Venga familia que ya viene la cosecha de estas F.U.H. de Seedstockers, que ganas que tenia ya de darles tijeretazo.
Que variedad , me encantó cultivarla , sacaron unas flores bien resinosas y alucinantes.
Las flores aparte son muy pegajosas.
a sido una genética con la que disfruté bastante, fue muy fácil cultivarla. Y a la vez es medio resistente, teniendo trips desde la 4/5 semana incontrolable salieron bastante bien.
Agrobeta:
https://www.agrobeta.com/agrobetatiendaonline/36-abonos-canamo
Mars hydro:
Code discount: Eldruida
https://www.mars-hydro.com/
Hasta aquí es todo , espero que lo disfrutéis, buenos humos 💨💨.

Likes
4
Share


@alexb420
Follow
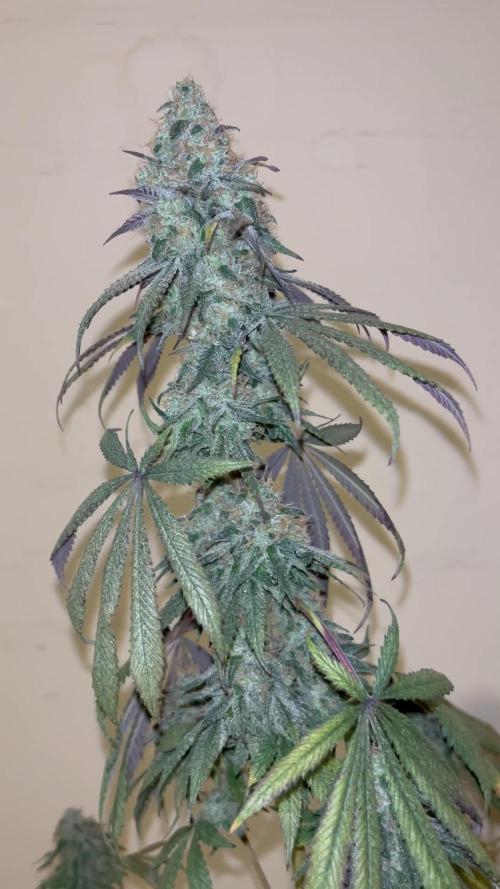
doing great! probably gonna run the blueberry muffin again, shit smells so good. blueberry waffles right now. the two khalifa mintz are still dank, musty OG, with light almost mango tones, no mint. hoping that comes out during dry and cure.

Likes
19
Share


@GuerillaSweed
Follow
Had alot of fun this season!Only 5g got moldy, but it took heavy rain and bad weather for 5-6 days in row.
Bud smells super fruity and exotic
Likes
7
Share


@Tazard
Follow
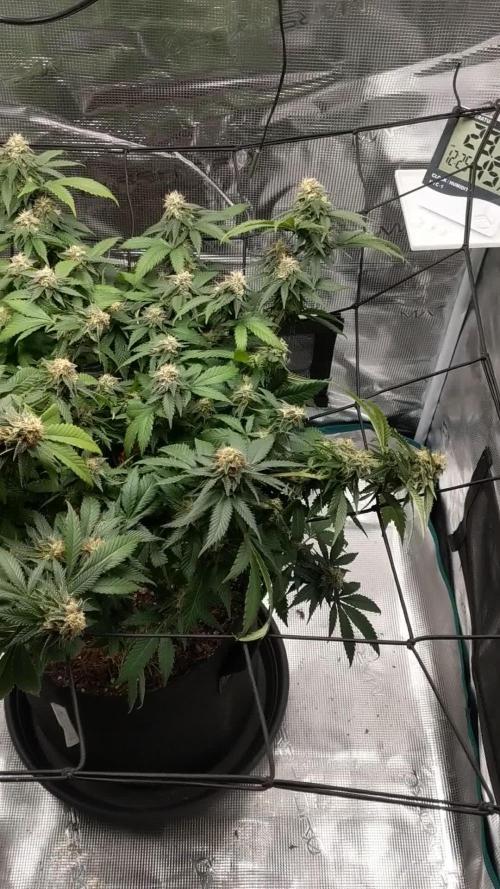
I increased the PK again this week. She is developing nicely I don’t think I’m ready to start flushing her yet going to keep pumping the PK in for another week or so until she’s closer to ripening.

Likes
17
Share


@ZackDuko
Follow
Hemos escogido las mejores 25 de 30 plantas germinadas y hemos colocado las mejores las más homogéneas en macetas de 7 litros en un espacio de 100x100 las mantendré por un peridodo de 2 semanas más en vegetación antes de pasarlas a floración, esperemos que todo salga como espero, saludos cordiales y buenos humos para todos ✌️🏽
Likes
16
Share


@NMGDOC
Follow
Semana del 3 al 9 de Mayo.
Como puse en la pregunta de la semana anterior, ya vieron que tengo una chica hermafrodita. No tengo otro indoor para ponerla, así que la saqué a otra habitación y le puse la TGL60 a ver que pasa. Las otras tres plantas siguen en el indoor con la TGL 220.
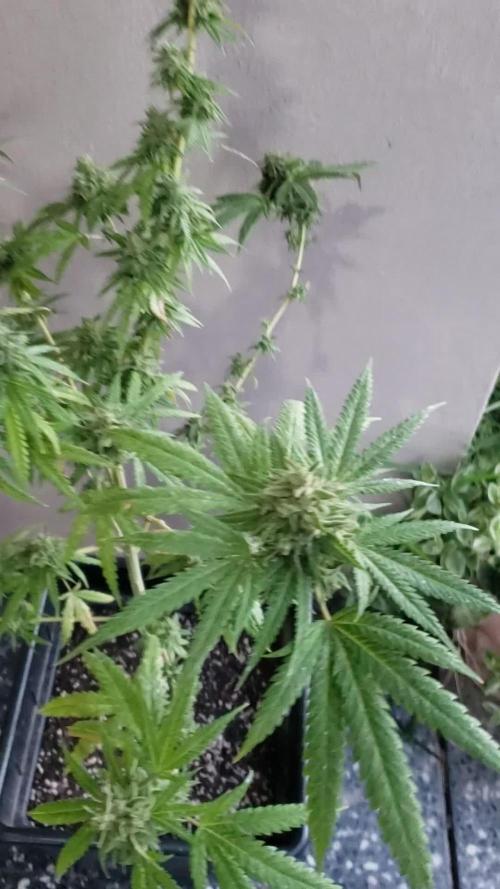
Como estaban con la malla, me costó mucho sacarla del indoor. Tuve que atarla porque las ramas no se sostenían muy bien por si mismas, así que ahora tengo este ramo que cocecharé más o menos el 16 de mayo.
No parecen engordar mucho los cogollos, creo que los insectos afectaron más de lo que pensaba, sobretodo porque estos atacan las raíces.
Las luces estaban a 15cm porque es lo que sugiere el fabricante para este periodo. Consideren que no es el clásico led y ya está. Ahora están a 20cm por miedo a que vayan a sufrir algún estrés lumínico.

Likes
7
Share

@GERGrowDesigns
Follow
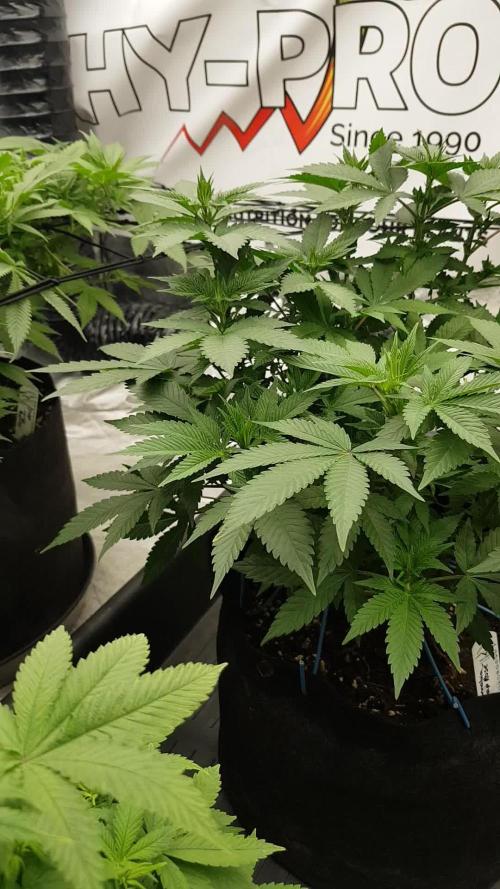
Welcome to Flower Week 1 of Kannabia Zoap Rosé
I'm excited to share my grow journey with you from my
Kannabia Seeds Project . It's going to be an incredible ride, full of learning, growing, and connecting with fellow growers from all around the world!
Check out Kannabia Seeds with my link [https://www.kannabia.com/de?ref=61966] and grab the germination device or the strains I used . Trust me – it’s worth it for sure !
Get another 20% Discount at all products using the code [GGD] at the checkout.
For this Project , I’ve chosen the Feminized Photo Strain Zoap Rosé :
Here’s what I’m working with:
• 🌱 Tent: 120x60x80
• 🧑🌾 Breeder Company: Kannabia Seeds
• 💧 Humidity Range: 60
• ⏳ Flowering Time: 56-63 Days
• Strain Info: 22%THC
• 🌡️ Temperature: 26
• 🍵 Pot Size: 20
• Nutrient Brand: Hy-Pro
• ⚡ Lights : 600W x 2
A huge thank you to Kannabia Seeds for allowing me to try my Best with this amazing collection from Photo Strains they managed to Sponsore . Big thanks for supporting the grower community worldwide! Your genetics and passion speak for themselves!
Let’s grow together – and don’t forget to stop by again to see the latest updates!
Happy growing!
Stay lifted and stay curious!
Peace & Buds!


Likes
4
Share


@Mr_nugs_lover_David
Follow
Looks like she's completely healthy and developing well,I got scared a little bit at first due to three fact that she didn't pop after 48hs in the paper towel,but now that I see her coming up from the soil I'm much more relaxed and expecting the best from this amazing medicinal strain by Dutch passion. I Prepared the soil using bactrex, mycotrex and 2 bio tabs by bio tabs organics. Let's see how this wonderful lady performs.😍💚🌱🤞
Likes
62
Share


@balansa
Follow
pretty excited afyer my forst harvest we had som problems but we were fighting so gether for this day )))))))) 1) i did not balance ph so they had growth problem 2) spider mite )))) tose little bastards almoast killd my babys but we won so foght till the and and everything will be just fine. i will keep updates to let you know how many gr i harvested cheers !!!!!33687336870
