
Likes
Comments
Share


@Jays_Not_Here_Man
Follow
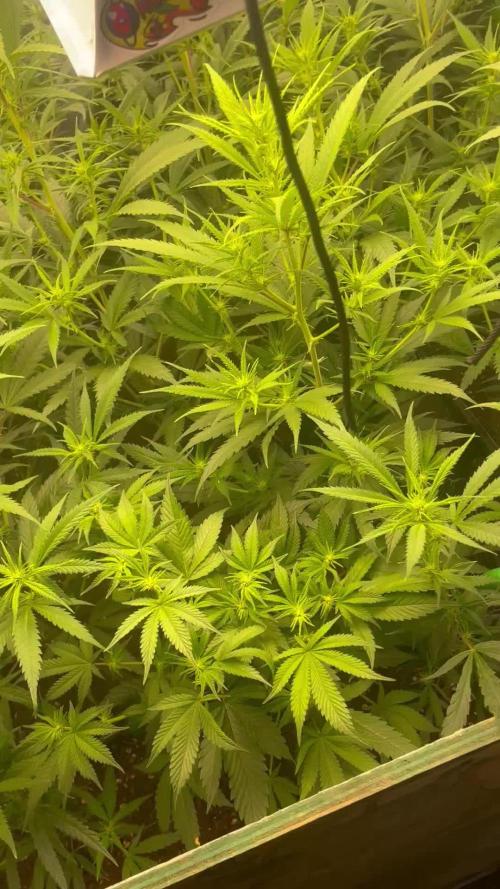
This was the girls last week! I decided to call them finished on day 63 the tricomes are almost all cloudy, with a small amount of amber. I’ve learned that they continue to degrade as you dry and cure your flower, so I’m trying something new for me, and pull them a little earlier than I usually would.
In addition, after watching a podcast (Dude Grows Show) if you don’t know, check it out… I decided to run the lights for 18 hours instead of 12/12 for the last 5 days before harvest. The idea behind this, is to stress the plant enough to increase its natural sunblock/protections, which would be terpenes and tricomes just before you harvest, while also possibly quickening the finishing time for your plant. The group was discussing the benefits of this (listed above) while some already had implemented these practices when finishing plants. The recommended time to run extra light time would be around the last 5-9 days of the plant, without having any nanners or weirdness happening with your plants.
Anyways, they finished amazing, sticky, stinky and heavy ❤️ the Terps are crazy on these strains….Harvest details to come. Thanks for stopping by 💚🇨🇦👊

Processing
Likes
8
Share


@Mistertemps
Follow
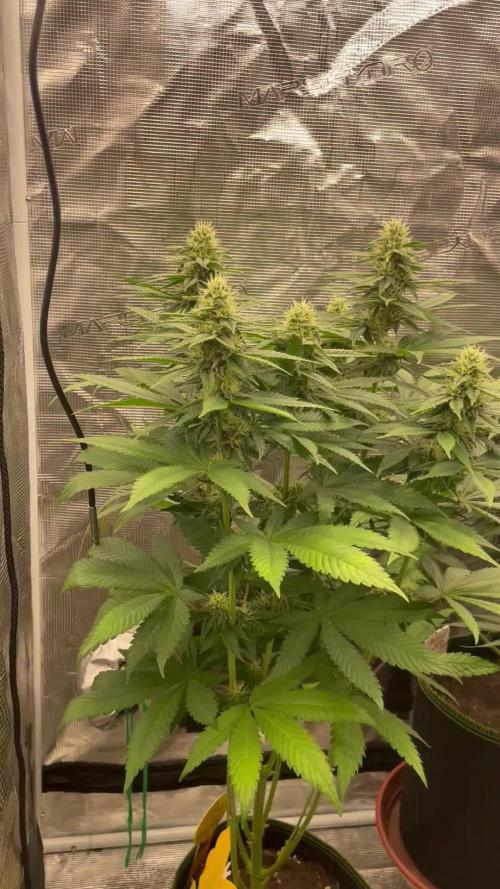
The swelling has just kinda started the smell is still kinda weak but I think I’ll be hooking up the carbon filter this week. StrawberryNCream and Gorilla Zkittles definitely my favorite so far the colas are huge and frosty. Can’t wait to see what they turn into come week 8+


Likes
17
Share


@CanadianFillmore
Follow
Green Crack is wack!! Both ladies got the chop and are drying now. Both packed on considerable size during their last week, hopefully it translates to higher dry weight.
Will update in 7-10 days with dry weight and smoke report.


Likes
147
Share


@MrJones
Follow
MrJones Black Berry OG
🔹🔹🔹🔹🔹🔹GOALS🔹🔹🔹🔹🔹🔹
🌞Flowering Environment - 75/80℉ and 50% Humidity
💧 Feeding - Advanced Nutrients Bloom Regiment - Great APP!
🍃Training / 1 Trellis in place, looking to install a second, may have to do more defoliation..
🕷️ IPM - Will be using Green Cleaner" 1 OZ per Gallon, and CannControl from Mammoth alternating between product each month for Integrated Pest Management.
💡Mars Hydro LED / Veg TS-1000 / Flower 480W FC 4800, this light is just performing very well!
🔹🔹🔹🔹🔹🔹🔹🔹🔹🔹🔹🔹🔹🔹🔹🔹🔹🔹
📜 Rambling - With week 11 here, the ladies are about 3 of 8 weeks into flower, they continue to stretch nicely, and starting to stack on some buds!
🔹🔹🔹🔹🔹🔹🔹🔹🔹🔹🔹🔹🔹🔹🔹🔹🔹🔹
▶️ Friday - 03.26.21/Feeding 40 OZ of Advanced Nutrients
▶️ Saturday - 03.27.21/Feeding 40 OZ of Advanced Nutrients
▶️ Sunday - 03.28.21/ Feeding 40 OZ of Advanced Nutrients
▶️ Monday - 03.29.21/ Feeding 40 OZ of Advanced Nutrients
▶️ Tuesday - 03.30.21/Feeding 40 OZ of Advanced Nutrients
▶️ Wednesday - 03.31.21/Feeding 40 OZ of Advanced Nutrients
▶️ Thursday - 04.01.21/Feeding 40 OZ of Advanced Nutrients
🔹🔹🔹🔹🔹🔹🔹🔹🔹🔹🔹🔹🔹🔹🔹🔹🔹🔹
📜 Cultivar Information - We have created this strain by crossing the best Black Domina available with Very Berry and our own Lost Coast OG Kush, this plant produces large colas with a super intense sweet berry flavor with a sweet-smelling aroma that varies from fruit and berries to sweet candy. This lady offers tight internal stacking giving a perfect structure for those super heavy colas, which is perfect for growth both indoors and out, if grown outside she is fairly resistant to mold and powdery mildew which is a real bonus with such large colas.
🔹🔹🔹🔹🔹🔹🔹🔹🔹🔹🔹🔹🔹🔹🔹🔹🔹🔹

Likes
5
Share


@Jaschkoo0
Follow
On Day 39 i mixed 4.5l with some melasse 2 drips of supervite and 5ml of calmag and an oh of 6.2. I also topped them. I also notized some nutrient burnibgs beacause of the livibg soil and some Magnesium deeficensy.
On Day 41 i mixed 4.5l with 6ml of calmag 6ml of alfa boost 40ml of Lab and sone supervite as well as some melasse.

Likes
21
Share


@NSABND
Follow
Der Start in Woche 8 ist regnerisch und bewölkt bei kühlen Temperaturen und hoher Luftfeuchtigkeit 😳
The start of week 8 is rainy and cloudy with cool temperatures and high humidity 😳
Day 62 "Haircut" for "Hilde" 😏😉

Likes
8
Share


@Youngun
Follow
Very slow this week until I realised the timer was switching on for 15 minutes an hour into darkness, this has put me a couple of weeks behind schedule, should of been flushing for harvest this week instead I’ve been flushing for a couple of days to rid of nutrient lock, after 3 days of water I added just the pk and they’ve bounced back and the buds getting chunkier they’ve also needed a lot of defoliation throughout the week, 2 of the ladies are more a glue pheno in size, structure and a smell of pine, the other is a real chunky blueberry, hopefully I’ll get to the end with no more problems

Likes
Comments
Share


@TheGrowHouse
Follow
Starting to fill out nice now, slowed down on the feed now about every 2 days the coco dries out.
Smell is strong!
Likes
4
Share

@carlitoshaze44
Follow
30/3/26 🌴
Seguimos añadiendo más bacterias concentradas en polvo para ayudar al desarrollo de más brotes!
Junto con el delta9 solo puedo esperar una producción de flores masivas
Están todas las plantas de una manera increíble con ese rezo que me encuentro en las mañanas antes de salir al curro y verlas todas trabajando a todo trapo!
Esta vez sé que vamos en el camino correcto solo puedo esperar a que siga así!
🥁🥁🥁saludos a todos

Likes
43
Share


@Coopmc
Follow
One starting week 3 the other starting week 1 I’m so impressed!!
So excited!!


Likes
13
Share


@Adriplnks
Follow
Las 2 más pequeñas, se adelantan y empiezan a madurar antes que las demás, ya tienen algún pelillo marrón, y sueltan una cantidad de resina increíble.
Las más grandes y con cogollos más gordos, empiezan a doblarse, así que voy atando las que no aguantan el peso
Likes
8
Share


@earthstarza
Follow
High humidity organic outdoor grow, keeping a watch on any mold. sprayed Magret Roberts for mildew and keeping and eye out for any worms Triple cheese is going to be finished soon


Likes
12
Share


@KalooNie
Follow
Switched them to flower on 7/5/18! On 7/14 I switched the nutes to the "transition to bloom" blend which basically means it's winging them off of vegetation nutrients. Next week (week 3 of flower), I will then switch to the full on bloom blend!
Other than that, just keeping them trimmed and trained as they begin to flower!
Likes
115
Share


@DogDoctorOfficial
Follow
Harvesting the Bounty of Cherry Cola Auto
Dear fellow cultivators, we've reached the triumphant culmination of Cherry Cola's journey as we delve into Week 13 – Harvest Time! Join me in celebrating the fruition of our labor and the bountiful rewards awaiting us as we harvest the radiant buds of Cherry Cola Auto.
As the sun sets on Week 13, the air is filled with anticipation and excitement. Harvest season has dawned upon us, marking the culmination of Cherry Cola's remarkable journey from seed to harvest-ready beauty.
In the heart of the garden, Cherry Cola stands tall, her branches heavy with the weight of abundant buds. Each bud is a testament to her resilience, her vigor, and the care and dedication invested in her growth.
With meticulous care and precision, the time has come to harvest Cherry Cola's radiant buds. Each cut is made with reverence, ensuring that only the finest, most pristine flowers make their way into our stash.
As the buds are trimmed and cured, an aromatic symphony is unleashed, filling the air with the tantalizing scent of Cherry Cola's terpene-rich profile. It's a sensory experience like no other, a celebration of nature's bounty.
As we gather the fruits of our labor, let us take a moment to reflect on the journey that has brought us here. It's been a labor of love, a testament to patience, perseverance, and the boundless wonders of nature.
In conclusion, let us raise a toast to Cherry Cola Auto – a true champion of the garden, a symbol of resilience, and a source of boundless joy. May her harvest be plentiful, her flavors unforgettable, and her legacy enduring. Until next time, happy harvesting, fellow enthusiasts! #CherryColaHarvest #BountifulBuds #GrowersPride
Nutrition: @aptusholland @aptus_world @aptus_
Love, Care, and Attention: @dogdoctorofficial
As always, thank you all for joining me on this journey, for your love, and for it all. My horticultural odyssey would never be the same without you. Your love and support are cherished, and I feel both honored and blessed to have you in my life
Friendly reminder all you see here is pure research and for educational purposes only
Growers Love To you All 💚 💚 💚
Likes
50
Share


@Mr_Motalovah
Follow
Hey!
Another week in flower and closer to harvest.
Smelling like a candy store.
Buds are maturing, things are running smoothly.
Take care out there!
One love Growers & tokers!
Likes
6
Share


@Croqueta_Humana
Follow
Semana 9, se esta haciendo largo
Inicialmente pensé que en máximo 8 semanas estaba pronta para pasar a flora, pero ya vamos por la 9 y quedan 2 semanas mas
La próxima semana estaré trasplantando a maceta de 18-20L, maceta ahora si definitiva
También hare una limpieza de bajos, preparare todo para cuando se recupere pasar a 12/12
Sigo regando con nutrientes de Vegetativo, agua de la canilla reposada por 24hs para evaporar el cloro, que tiene 0.35 de EC asi como sale
Regue con una EC de 1.68 y 5.9 de PH
Gran parte de la superficie ya esta cubierta, no seguire abriendo las ramas, solo dejare que crezcan de altura y terminare de completar el espacio antes de pasar a flora


Likes
3
Share


@Canaryweed_tf
Follow
Está semana la HellfireOG de Kannabiaseeds va creciendo muy bien, lo que se me está volviendo un poco amarilla. Para solucionar eso le he estado echando fertilizantes de crecimiento que tienen bastante nitrógeno asique espero que vuelva ha tener un color bueno 💪

Likes
17
Share


@Mastr
Follow
Hi all grower auto orange bud week 13 she had long veg pase due transplant shock but now she get very big and bushy u feed her 1ml bio grow 4ml bloom 2ml big bud
Half ml cal mag with 5 litre water ph every other day
The bud top leaf start getting purple so beautiful plant definitely grow her again
Processing
Likes
6
Share


@BigGGrows
Follow
This week was a big week for the candy cush. I noticed upon watering her to run off, that in the same day the pot would go super dry and light weight. I also noticed stress in the leaves and roots poking out the bottom of the pot. It was time for a transplant. So far so good! Upon transplanting i performed more LST to help her fill in the pot. She went from a 1 gallon to a 5 gallon. She was also defoliated thia week.
