
Likes
Comments
Share


Likes
12
Share


@DeepRootsGrowTrees
Follow
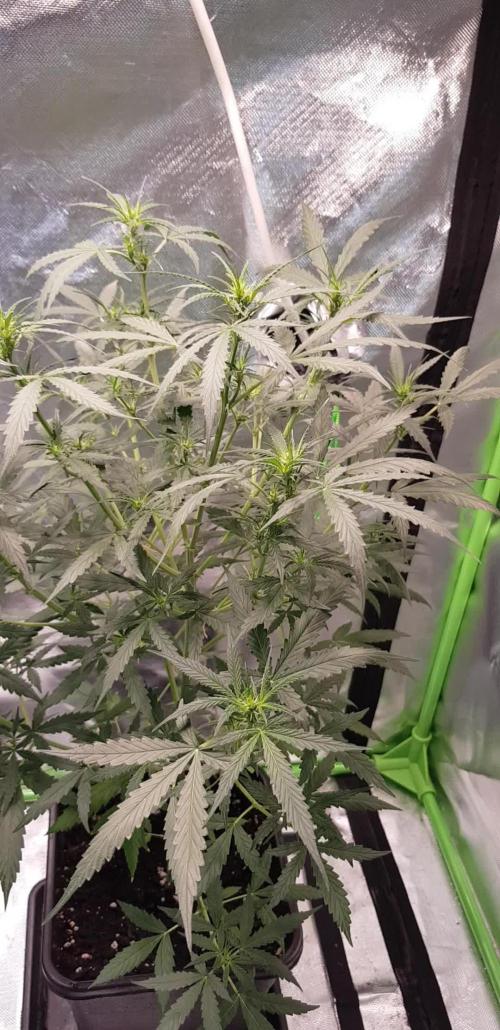
MIMOSA by ROYAL QUEEN SEEDS
Week #23 Overall
Week #6 Flower
This week she is doing great nothing really to report this week she's got good trichome coverage and she smells so sweet!!! Stay Growing!!
ROYAL QUEEN SEEDS MIMOSA


Likes
3
Share


@CanJey_Vec
Follow
Moin Community! 🌿✨
Unsere Ladies von @ganjafarmer.seed sind jetzt bei Tag 24–29 – und sie drehen richtig auf!
Der Umzug ins größere Zelt hat ihnen mega gutgetan: mehr Platz, mehr Ruhe, mehr Energie für frischen Wachstum.
Im Living Soil von @white_ash_botanic , bereitgestellt von @growandstyle , entwickeln sie sich Tag für Tag stärker.
Und mit dem Vollspektrum der @hortispectra bekommen sie jetzt genau die Energie, die diese Phase braucht – sauber geführt, gleichmäßig verteilt und mit richtig schönem Wachstumsschub. ⚡🌱
Gemeinsam mit der @canna.community.germany begleiten wir jede Phase.
Leaf for Leaf. Schritt für Schritt.
Canna Community Germany – We Grow Together. 💚✨

Likes
2
Share


@TheBudWhisperer
Follow
Week 2 flower - no issues, still waiting on cotton balls.
***notes: nutes at 2.5tsp./10L - no def. Or burn in dwc. All of em are lookn perfect. Cut back heavy fan leaf growth this week.


Likes
4
Share

@GERGrowDesigns
Follow
Dear Growers ,
Over the next weeks, we’re excited to share a very special project with you: Sensi Seeds Supreme Jack F1 Automatic 2025 Release
With dedication, knowledge, and hands-on practice, we’ll guide you step by step through the journey—watch with us as growth, development, and small wonders unfold before your eyes.
Whether you're a beginner or an expert, you are warmly invited to join, ask questions, and share your own experiences along the way!
Project Setup & Conditions:
• Brand/Manufacturer: Sensi Seeds
• Tent: 120cmx60cmx80cm
• Light: 2x 200 Watt Full Spectrum
• Humidity: 90%
• Soil: Narcos Organix Mix
• Nutrients: Narcos Products
• pH Value: 6
A Special Thanks To
Sensi Seeds
for the amazing collaboration, trust, and generous support in making this project possible. Your contribution is truly appreciated!
Congratulations on Your Own Projects!
We celebrate your growth, your creativity, and the passion you bring to the table. It’s truly inspiring to witness at Each visit .
Stay curious and keep up Growing —we look forward to welcoming you back for the next chapter soon!
Processing
Likes
13
Share


@Livinit2019
Follow
Lowered the nutes -- didn't feed every 3 days like I previously did, just watered today. Overall looking good. I'm gonna have to move some of the plants to the tub because the bigger auto is getting so bushy.
Let me know what you think in the comments, please!

Likes
23
Share


@peterfly98
Follow
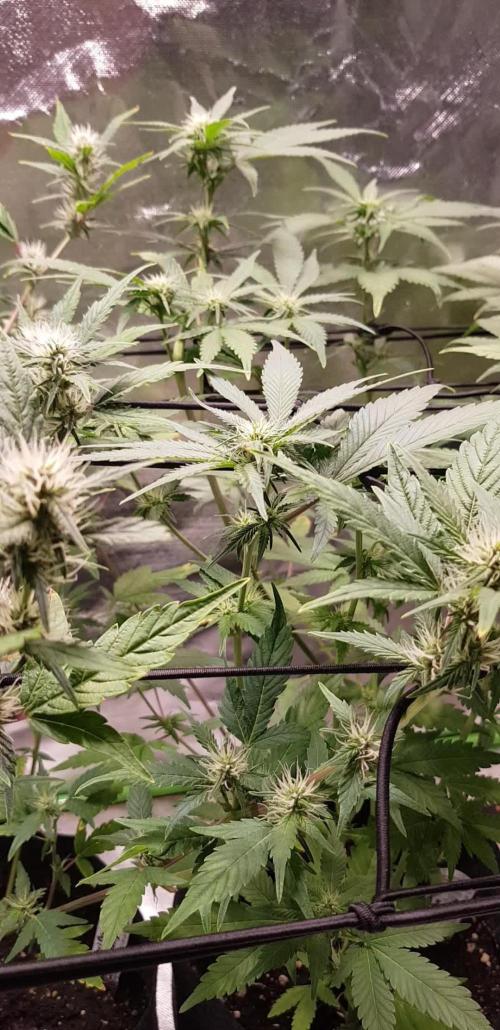
Day24: wedding cheesecake and Tropicana cookies are flowering while the gorilla cookies is a little behind. I turned the exhaust system on to lower the humidity and manage the smell
Day26: I added bloom nutes and increased the light power to 75%. I also tied some branches down. Let’s see how they respond. So far they are going very well
Day27: good response to lst, a little healthier now as well
Likes
5
Share

@GERGrowDesigns
Follow
Welcome to Flower Week 1 of Fast Buds Purple Haze Auto
I'm excited to share my grow journey with you from my
FastBuds Project . It's going to be an incredible ride, full of learning, growing, and connecting with fellow growers from all around the world!
For this Project , I’ve chosen the Feminized Auto Purple Haze:
Here’s what I’m working with:
• 🌱 Tent: 120x60x80
• 🧑🌾 Breeder Company: Fast buds
• 💧 Humidity Range: 60
• ⏳ Flowering Time: 8 Weeks
• Strain Info: 23%THC
• 🌡️ Temperature: 26
• 🍵 Pot Size: 12
• Nutrient Brand: Hy-Pro
• ⚡ Lights : 600W x 2
A huge thank you to Fast Buds for allowing me to try my Best with this amazing collection from Automatic and Photo Strains they managed to Sponsore . Big thanks for supporting the grower community worldwide! Your genetics and passion speak for themselves!
I would truly appreciate every bit of feedback, help, questions, or discussions – and of course, your likes and interactions mean the world to me as I try to stand out in this exciting competition!
Let’s grow together – and don’t forget to stop by again to see the latest updates!
Happy growing!
Stay lifted and stay curious!
Peace & Buds!


Likes
1
Share


@Jordantone1
Follow
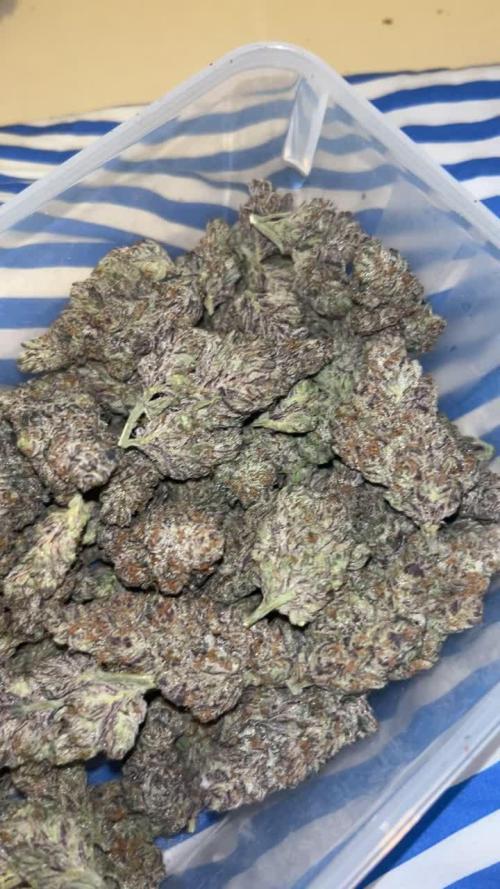
Would definitely recommend for an easy grow. Takes forever due to 100% sativa genetics but well worth the grow. Smells just like cannalopes with a hint of cocoa and a strong dank/sour odor. High is fantastic starting and feeling heaviest right behind the eyes/sinuses. Spreads to extremities in a slight relax feeling. The taste and smell of the smoke is extremely smooth and tastes like the sour + cantaloupes. The buds have a lot of shades of green but are predominantly dark covered in crystals. Smell isn’t extremely strong in bag but once buds begin breaking apart it is almost unbearable and resin makes it hard to break apart by hand do grinder is needed.

Likes
16
Share


@Cannabis_carlitos
Follow
-Flowers are starting to stretch
-Lots of leaf growth, noticed white mold from poor circulation
- did some defoilation to fight the random spot of white mold
-just introduced liquid koolbloom - PK booster. First time using very excited to see if I notice any difference
-able to finally get a handle on the nutrients
- watering to run off - everytime and it has substantially changed the quality of my grow. Zero nutrient issued and run off is coming off at decent PPM
- thinking of adding second scrog
Likes
2
Share

@BombBuds
Follow
Selbes Bedingungen wie bei der strawlectric lemonade. Ging aber 11 Tage bis sie trocken war.
Likes
9
Share


Processing
Likes
6
Share


Processing
Likes
30
Share


@DrewbieDoobieNoobie
Follow
I had to transfer to the bigger pots the week. There was a lot of stretch in the cups and they were falling over. so will see how it goes this week. Coco with the Azomite and a little clone x myco powder at the root base, Just a baby feeding 1 mil/gal of the three part Emerald Harvest and Cal Mag in a 5 gallon bottle. PH at 6.1, then another 5 gallons of plain PH 6.2 water no food to get run off from the pots. The runoff was PH 5.8 so in happy with that. I got the time-lapse running so I will post it at the end of each week moving in to the next one. waiting on a green filter for the camera to help adjust the color so everything will not look blurpule. Cheers.


