
Likes
Comments
Share


@PEAKYPLANTERS
Follow
Hello, fellow growers
I thank you for having dedicated your attention to my garden.
I greet and thank all of you passionate growers who like me make this site a source of inspiration for others...for those who already grow and for those who have never grown
Sometimes I still wonder if we are the ones growing our beloved plants or they are the ones growing us, teaching us something about nature... with every growth... with every failure... with every harvest. Every time... she will know how to surprise you 🤗

Likes
61
Share


@Prilyfe13
Follow
December 27, 2023 Day 113
This week will focus on burping and trichomes. There may also be a harvest? We shall see. I don't think so though. Most likely next week will be a harvest.
Strawberry Gorilla:
Day 3 Curing
I have grove bags coming in today, so the burping won't be a thing after today.
Gorilla Cookies:
Number 1 is coming to the end of her life. She hasn't started fading yet, which bugs me. She has been flushing for a week now and I'm not seeing much change. No fade, pistils still kinda sticking out. Not in all places, but some. Maybe I just can't tell. Either way, she looks great and smells even better.
She got a full gallon top flush with Flawless Finish. I don't expect to do this much more. Maybe one more watering. I have to check trichomes today. I'll update when I do so. She should be ready for harvest within this week. Maybe a couple days.
Number 2 is looking amazing. Her colas are stupid dense and her aroma is starting to really pack a punch. Not much else to do or say today. She's a beast and is beautiful.
She got a gallon top feed today. The reservoir seems to be fine. I may check that later today as well. Just in case. She is quite a thirsty plant after all.
The funny thing about this plant is the tallest cola. It is absolutely stunning with the exception of the top bleaching, but the rest of it is massive and shaped perfectly. It's the only one that did this. Granted its the tallest, but there are a couple others very close and they didn't do this. I mean, I really can't complain. I did the best I could with what I have.
I'd say she will need another week or two of flowering. I'll leave the nutrient regimen alone until I see 50% cloudy trichomes. That will take some time I think. Pistils are still all very much white and clearly shows no signs of readiness. It's wonderful. I can't wait to see what she gives me for yield.
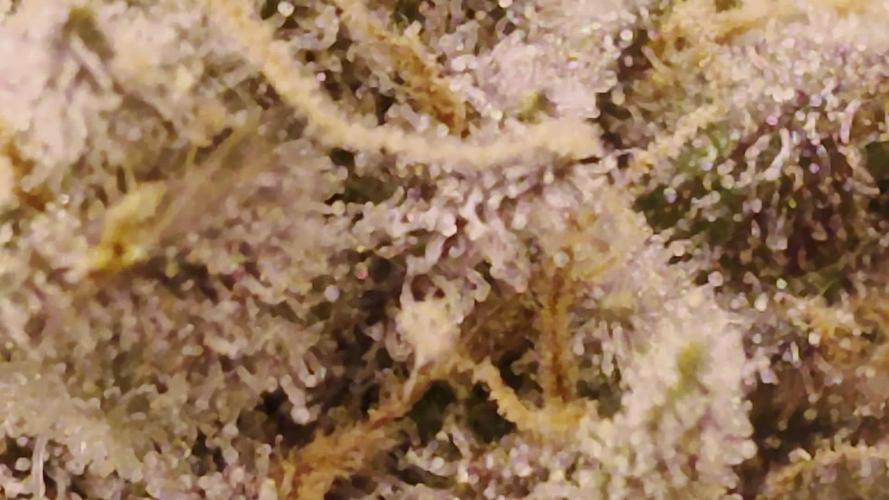
Update: So I checked the trichomes on Gorilla Cookies 1 and posted a video. I believe she will be done in the next couple days. I may not be doing another flush after all. I'm going to hold off though. I want a bit more amber trichomes. But days away instead of the week I was originally thinking.
Grow System Environment:
Temp: 73.2°
RH: 52.6%
VPD: 1.30 kPa
December 28, 2023
Strawberry Gorilla:
Day 4 Curing
Got the grove bags yesterday and sealed a quarter pound one with all but a few buds. Those are in a one ounce grove bags that I'll be picking out of while the main yield cures. This stuff is fire!
Gorilla Cookies:
Number 1 is now in the second week of flush. She still doesn't look ready, but that will change very soon. She needed no watering today.
I'll be getting my supplemental lighting in today and will be installing it. However, I'm not sure how much it will help the lower part of the canopy. It will definitely speed up the maturing process, but that's about it. I can't complain though, the whole plant is pretty good. Lower buds are pretty small. Some are a bit airy and larfy, but still can be viable with the last but of lighting for the rest of the week.
Number 2 may need a top feeding today. I'm not sure. Her reservoir is about half empty now and the soil moisture is hovering around 20%. It may drink down to 16% but the this afternoon. I'll water if she's low enough by 2 pm. After that, I'll just wait for tomorrow. That's the most likely scenario.
Her buds are starting to get really heavy. Most of the outside ones are leaning over and starting to touch the other sides of the tent. The outside is still kinda safe, but that is mostly due to the two other plants stopping it from leaning even more. such a sight to behold. And they are super heavy and dense. Although, I may be seeing the first signs of foxtailing. I expected some because of the light distance, but it's ok. The colas are already super dense. The foxtailing will be just extra bud. I'll separate that in its own bag when it's time to cure. That's if I'm right and will be getting foxtails. Maybe not though, or not enough to warrant a separate bag.
My supplemental lighting after being installed should help the lower part of the plant perk up a bit. I found several dead and dying leaves today. Actually, lots. That tells me a couple things I think. First, there's too much foliage in the upper canopy and the leaves are dying from overcrowding. Second, the light just isn't penetrating enough to really get the lower parts of the canopy. That's where the new lighting comes in. Hopefully that fixes the lower canopy and helps it bring more bud. Maybe not huge colas, but at least some tight smalls. We shall see.
Update: I ended up top watering Gorilla Cookies 2 with recharge. I'm pretty sure I forgot it the other day.
Grow System Environment:
Temp: 74.1°
RH: 55.5%
VPD: 1.25 kPa
It's still super humid and rainy here, and it's showing in the tent. I'm not all that worried about it. It will drop down later this afternoon like it did yesterday. However, I am of course trying to correct it, but it's not working all that well. Lol.
December 29, 2023
Strawberry Gorilla:
Day 5 Curing
Gorilla Cookies:
Number 1 may be harvested later today or tomorrow morning. She is just about done. But I want to see how much more she will finish up in the next day or so with the supplemental lighting.
Obviously she won't be getting anymore watering. But I'd like to have her dried up a bit more, which should be later today or tomorrow. I may put her in the dry tent later today and let her have a dark period. Maybe I should wait 2 days. Give her 36 hours of dark before harvest.
Number 2 should enjoy the supplemental lighting. However, now that it's on and lighting up the whole lower canopy, there are bud sites with branches that have no budlets on them. I really want to remove them. But I'll just let everything go as it is. The goal is to allow the under canopy to mature at the same rate as the upper canopy. I don't think it will do anything with the lower part of the plant.
I also noticed that the majority of the leaves are drooping pretty hard. I wonder if that's due to lack of light. We shall see. She doesn't need water today, but tomorrow she will need a top feed and a reservoir refill.
She's definitely drinking over a gallon a day now.
Cola formation is perfect. They are come shaped and DENSE. The aroma is getting fairly strong now. At least, it's catching up to Gorilla Cookies 1. Sweet, spicy and minty coming off of her.
They colas are also leaning a bit more today. So much weight coming on. I honestly can't wait for her to be alone in the tent. The lower lighting will cover the all of the lower lights without anything blocking the light.
Update: I decided instead of harvesting today or tomorrow, Gorilla Cookies 1 will spend 2 days in the dry tent for a dark period. Then I will harvest.
Also, I spent about an hour combing through the many many branches of Gorilla Cookies 2. I found a bunch of dead fallen leaves. Some that were dying and even a few that were so over lapped they were crushing each other against the SCroG net. So all of that (not much really) came off. I wonder how long the supplemental lighting will take to show a difference in the lower canopy. And what difference will it show?
Grow System Environment:
Temp: 74.1°
RH: 52.7%
VPD: 1.32 kPa
December 30, 2023
Strawberry Gorilla:
Day 6 Curing
Gorilla Cookies:
Number 1 is in her second day of dark. Tomorrow I'll be harvesting her. Nothing else to report.
Number 2 is smashing. Her lower section is still droopy like it doesn't have enough of something. I thought it was light. Maybe it's something else? Or maybe I'm being impatient. Either way, she still has some time left to go. 3 to 4 weeks I'd say.
She got her full gallon top feed as well as a reservoir refill. Unfortunately, I wasn't paying attention and accidentally dumped 10 ml of Overdrive in one of the gallons. That one went in the reservoir. I probably should have top fed it. Oh well, too late now.
Although, I didn't have any dead leaves today. At least nothing I could see. Maybe the light is doing something. Making the leaves stronger, which if I'm correct, also strengthens the bud production. There won't be much down there, but it's definitely better than leaving it as it was. Maybe I'll get an extra half oz out of these little buds. Who knows.
Update: I ended up finding some dead leaves in Gorilla Cookies 2 after all. Not too many. So now another day of cleaned up Beasty beast.
Grow System Environment:
Temp: 73.2°
RH: 50.7%
VPD: 1.34 kPa
December 31, 2023
Strawberry Gorilla:
Day 7 Curing
Gorilla Cookies:
Number 1:
Harvest Day! And the last day of 2023!
We have a 22 oz wet weight whole plant. Not too sure of the total outcome, but I'm thinking 10% weight retention. So 2.2 oz. Dried and trimmed bud. Who knows, maybe I'll get 15% and have a half decent yield of 3.3 oz. Honestly, I should have waited for midnight, but she needed to be harvested for time purposes. I have another plant coming in the dry tent in a few days to a week. I'm hoping I can stretch it out for the week, but I won't be able to wait for Number 1 to dry. Just too much time. I'm thinking a nice 10 day dry. I set the ambient room temperature to 70°. So that should drop the dry tent down about 6°. I'm hoping for a dry temp of 64° or less and the RH to be around 55%.
She has some pretty dense top colas, and I cut them off after the weight check. That should help the whole plant dry at the same time. I left most of it intact. Just the 3 tallest colas. Now there's more room in the plant for air, but also plenty of space for those large colas to dry. And they should dry quite nicely.
Number 2 looks pretty good. I didn't find any dead leaves. One dying leaf I pulled off, but nothing else. So maybe the supplemental lighting is actually doing something. I don't expect the leaves to really recover from the damage, but at least maybe perk up a bit. Again, I'm not expecting a ton of difference. Just enough to keep the lower canopy as dense as the upper canopy. The lower part of the plant, is more like a lost cause. I should have cleaned up the small budlets as they popped up. Oh well. Nothing to do now but wait and see what she turns out like. I'm not all that worried. The small amount of lower plant growth is minimal compared to the actual canopy which is magnificent. She'll be needing a watering later on today. Definitely a very thirsty plant. She's around 18% soil saturation content. I normally water at no less than 15%. So later today it is.
Her colas are getting so dense it's insane. She still hasn't started really swelling yet either. I expect that to start in the next week or so. Also, the worry about foxtails seems to be unnecessary. IF there is any foxtailing, it won't be much or if there's a lot, it won't matter. The buds are already so dense, anything else is just bonus weed. Still, foxtails are a pain in the ass to trim, so let's hope for none. The only cola I'm really concerned about is the tallest one. It's definitely too close to the light. Also, I'm not seeing any stress from the supplemental lighting. I guess there's just enough. I honestly had a feeling that the top light just isn't bright enough to penetrate through the whole canopy. So the tops are getting plenty, but the actual plant may not have been getting enough. Now, that's should be fixed. Again, I see no stress whatsoever. If I notice any, I can just turn the lights down. They are at full blast now, but they aren't nearly as powerful as the main grow light. Still very nice though.
Grow System Environment:
Temp: 72.6°
RH: 47.8%
VPD: 1.40 kPa
January 1, 2024 Day 118 Happy New Year!
Strawberry Gorilla:
Day 8 Curing
Gorilla Cookies:
Number 1:
Day 1 Drying
I have a tray of water on the bottom of the tent with an oscillating clip fan blowing gently over it. It's keeping the RH between 50% and 53%. Temperature is hovering around 65°. Everything looks good.
Number 2 is now really starting to swell those colas up. It was visibly noticable this morning. Not to mention the outer colas are all leaning further and further over. They are over the end of the ScrOG net up front, touching the. Far side wall and nearly touching the front of the tent. The supplemental light seems to be doing something. the lower bud sites are starting to look healthy and getting a deeper green color on what's left of the healthy leaves. I think I caught the very end of when the supplemental lights are useful for growth. Now it's just maturing and a final week of nutrients... I think. I'm cutting off the nutrients when I see 50% cloudy trichomes. There should be plenty of orange pistils by then. In which case, won't be for another week or two. Man, these colas are going to be massive!
No watering today. Most definitely tomorrow morning.
Update: I decided to lower the light intensity to 30%. The PPFD is around 750 now. So that should help prevent the potential foxtailing. I'm not really sure if that will stress her out at all. I don't think it will though. I'll be checking on her daily to see her reaction.
I've read light stress can cause 3 finger fan leaves. In my case, there was a point where the light became too bright during the early flowering stage and caused some of these 3 fingered leaves. It seems to have fixed in some spots where the light was raised high enough to fix it in time other places it stopped when the leaves stopped growing.
Some of the leaves are facing away from the light. With this current intensity, the leaves should level out and even start to reach a bit. Not sure how long it will take. I read it can take up to 2 weeks to recover. I'm not sure how stressed the majority of the plant was though.
Grow System Environment:
Temp: 72.9°
RH: 46.3%
VPD: 1.45 kPa
January 2, 2024
Strawberry Gorilla:
Day 9 Curing
Gorilla Cookies:
Number 1:
Day 2 Drying
Number 2 is her beastly self. She got a top feed today. No need for the reservoir to be topped off yet.
So, I'm not seeing any difference in the lower light intensity yet. Maybe some of the leaves straightened out, but no reaching or anything like that.
The supplemental lighting is doing something. Although the buds down below are tiny, they are weighing down the branches they are on. Still nothing great, but it will definitely be good in the trim bin.
I'm sure they will have plenty of trichomes on them. Perfect for gathering kief.
Her top colas are also doing quite well. They are super dense and heavy. Swelling continues. Not much difference from last night, but still plenty of time to get massive.
I'm also starting to see signs of orange pistils here and there. Which means we are on point. Three or so weeks left until harvest.
Grow System Environment:
Temp: 72.9°
RH: 45.2%
VPD: 1.47 kPa

Likes
32
Share


@Fergie
Follow
So that's Betty finally done , pretty happy with fast berry overall just over 900g wet from both plants😀😀😀 will be doing this strain again very soon 😀
Likes
Comments
Share

@Count-Dooku
Follow
Popped the top for a sampler, probably take the rest down in a week.

Likes
7
Share


@delta_420
Follow
Borked the time tracking on the previous diary weeks, both are still going strong. Grapefruit is developing a lot of new internode fan leaves, but she's too late into bloom now to defoliate etc. and don't want to stress the GG XL either.
Latest GG XL photos are in Week 5. Microgreens are also coming up fast.
17/07: Forgot to take Day 42 photos for both girls, my apologies as my wrists have been giving me hell but will get some more up soon. I've been keeping with the same watering schedule, some bud sites are being shaded by fan leaves so I'm trying to VERY carefully bend them down to prop up the little bud sites better. I've rubbed my fingers on some of the fan leaves to get rid of whatever weird white dust is ending up on my leaves, probably just debris from the air and the fan might need a cleaning soon but holy shit my fingers smell strong like Pomegranate and fruits. It's getting quite addictive to smell the bud sites and rub that resin of her fan leaves, I wish I could describe it better but damn it smells good. If the resin is any indication of the final smoke I know that the Grapefruit is gonna be dank. Can't wait till drying + harvest time :))
18/07: Plucked off some lower burnt leaves that were really old, snipped off two more big fan leaves shading new bud sites and removed the stumps from old leaves rather making those closely cut down stubs instead so no bug invaders can get a free home. :P
Humidity has been ridiculously high today >~65% and dropping now in the evening after the rain has stopped to <~60%, I added some Sodium Bicarbonate in plastic jars around the tent to help pull out water from the air. (18/07: Seems to be helping, I'm seeing about a ~2-5% drop overnight and this morning, usually the humidity in the morning before+after rain is ~60-65%)
20/07: The paper ref regarding RH and Bicarb. of Soda: W.-Y. Kuu et al. / International Journal of Pharmaceutics 166 (1998) 167–175 / PII: S0378-5173(98)00049-0 - I don't know how or why but keeping temps at ~21-23C drops the RH down to a stable mid-low 50's range. Thank fuck now I don't have to drop tonnes of money on a huge dehumidifier... Occam's razor baby :)
21/07: Had to move the light, fan, carbon filter and literally everything. Some minor shit for the cover broke on top of the CaCl -RH% and the bicarb got knocked over. Wiped, sprayed down and cleaned out the fan filter as well. What a fucking start to the day...
31/07: GG XL is in Week 7 now, so getting well into flower, growing at an exponential rate and starting to give off a very subtle smell, Grapefruit smells quite noticeable now too.
03/08: GG XL ending week 7, getting massive. ~77-78CM now. Had to defoliate the Grapefruit since leaf miners were still assaulting her, hopefully this helps get more light and airflow into the bud sites, been having humidity issues but can't do much.


Processing
Likes
12
Share


@GrowGuy97
Follow
Day 28 - These ladies are growing like crazy! 2 of them are already almost as tall as my white widow autos that are about 2 weeks ahead!
Day 30 - Still stretching like crazy, starting to look much better though I have to say!
Day 32 - Ladies are starting to get nice & purple!
Likes
13
Share


@Grownewgenetics
Follow
The Fastbudauto From Sweetseeds are the last strains of these bank to becomes flowering, but Still looking greatly and creating Amazing cola's,we are glad to have these companies in our testing genetics.
Hopefully we will get the videos up on Time.
Likes
7
Share


@SkunkyDog420
Follow
Hallo zusammen 🤙.
Sie wächst sehr schön und macht keine Probleme.
Rabattcode für den BIOTABS-Webshop https://biotabs.nl/en/shop/ GDBT420, damit erhalten Sie 15 Prozent
Likes
5
Share


@WooderIce
Follow
geeze these are some tall ladies. 2 didnt take well to my LST strategy, and are crazy tall for a closet grow. hopefully they just keep budding and dont get any taller. they look great. doing a proper ph balance to my nute/water feed is all the difference. Adding very little PH up, and Im having zero nute defficiency/issues. leaves are green and flat to the tips, looking gorgeous. Im very excited as my ph issue has plagued me on all my previous grows, causing stress & hermies. everything looks beautiful right now.


Likes
7
Share


@Zuppler
Follow
Week 9 - Fourth Week of Flower
The Donutz gang is hitting its stride as the fourth week of flower unfolds. Trichomes are developing beautifully, and the plants are entering full production mode. A few challenges cropped up this week, but quick thinking and some DIY ingenuity kept everything on track.
Key Updates:
Trichome Progress: The resin glands are popping off, with a frosty layer forming across the developing buds. The plants are starting to show their true potential, and the tent is starting to smell.
New Fan Installation: The old ventilator tapped out this week, so a replacement was installed to maintain proper airflow. This ensures the plants stay cool and prevents any issues with humidity or stagnant air.
Lamp Adjustment: The front-left plant shot up too close to the light, so I had to get creative. I built a DIY solution to raise the lamp higher, ensuring even coverage and preventing light stress.
Accident Recovery:
During the light adjustment, I initially tried securing the front-left plant with a rubber band. Concerned it might melt, I removed it, but in the process, the main stem got damaged. Thankfully, the plant is a fighter. The main cola is now growing sideways but remains fully healthy and strong. This unexpected twist has added some character to the tent, and the plant is bouncing back beautifully.
Observations:
Despite the challenges, all plants are thriving, with strong growth and healthy bud development.
The sideways-growing cola on the front-left plant is a unique highlight, showing the resilience of the Donutz genetics.
Next Steps:
Keep monitoring airflow and light height to avoid any further issues.
Continue with the nutrient schedule and reverse osmosis (RO) watering to maintain stability.
Watch the trichomes closely as they continue to mature, signaling the start of the final phases of flower.
The Florida Gang grind is real, and the Donutz are proving their worth week after week. This tent is shaping up to be a legendary grow!

Processing
Likes
16
Share


Likes
2
Share

@PurpleBeen
Follow
Week 1 / Flo
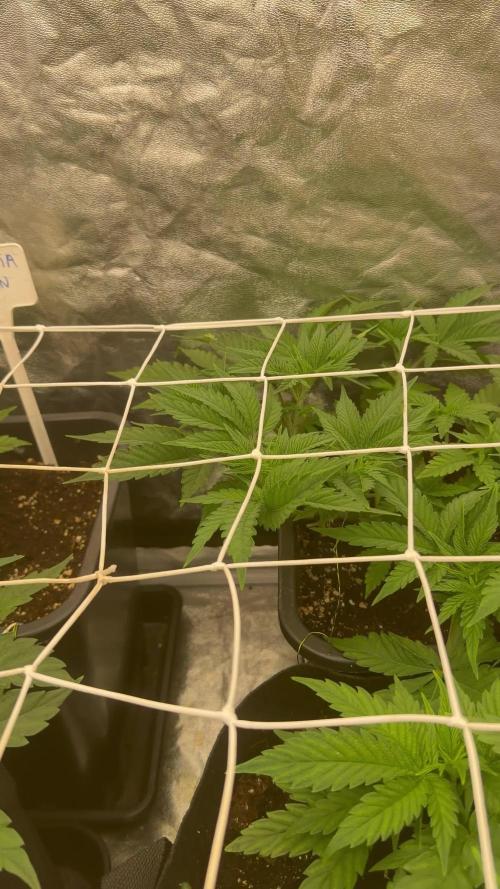
The little babies are strong vegetative development so ready to 12/12 this week, meanwhile i put the 1st scrog and the 2nd if necessary in flowering
Repotting : 23/04/2026
12/12 swtich:15/04/2026
Background : Strawberry Lemonade ≈ 15l-20l x2
Middle : Amensia Lemon 11l x2
Front : Cherry Mc Muffin / Oreoz : 7l / 11l
Topping : 01/05/2026
Light : 60cm-75cm /50-75% dimmer
25-26 degrees / 40 % hygro
23-24 degrees
Watering is light at this stage — around 1l;1,5;2l depend pot size ( 1 watering humic ; 1 with only water and 1 with fertilizers flower ) 600-750 ppm


Likes
10
Share


@Shakazulu
Follow
I am very satisfied with the results as of right now. We have had an incredible amount of rain in the Northeast US. I laid about 2 in of pea gravel at the bottom of the whole I Dug. Seems to be holding up okay. I put in 5 lb of nature's choice super soil concentrate from Amazon, sub cools recipe mix ed with roots organic potting soil at the bottom three or four inches maybe. I filled the rest with roots organic potting soil and a mix of my homemade vermicompost. She is stayed green and super healthy praying all the time. I may need to top dress mid flour maybe. Happy growing
Likes
6
Share


@TheSyndicate
Follow
10/29 - the injured plants growth has slowed and I'm starting to worry. I will watch it for another two weeks to determine if its worth growing.
The second plant is doing well under LST and leaf tucking. Im trying my best to avoid defoliating as I do not like performing this training method. LST method is being further expanded by training the plant to grow in a spiral.
Nutrient addition is on every 3rd feed.
10/31 - today marks the 31st day. I'm impressed with the development and growth from these Skywalkers.

Likes
16
Share


@Dabking
Follow
Dried the flower for 10 days, and got 184.9 grams (roughly 3.3 ounces per plant which is smaller than I expected, but it is what it is)
Curing now and i'm sure the quality will be amazing.

Likes
7
Share

@Zuppler
Follow
Vegetation Phase - Week 5
Week 5 marks a bittersweet milestone. RIP to the Marienkäfer homie — gone but never forgotten. Their watchful eyes and pest-snacking legacy will forever live on in the tent. Meanwhile, the Donutz gang is thriving and about to hit the next big step in their journey: the 7-liter pot upgrade.
Updates & Changes:
RIP Marienkäfer: Nature giveth and taketh away. The tent feels a little emptier without our little guardian, but pest pressure remains nonexistent thanks to their diligent work.
Transplant Time: The plants are moving up to 7L pots this week, giving their roots the room they need to expand and thrive before flipping to bloom. This upgrade will ensure a strong foundation for the explosive growth coming soon.
Watering: Still sticking with reverse osmosis (RO) water for maximum control and cleanliness.
Plan for Flower Transition:
After the transplant, the plants will chill for the rest of the week in their new homes to recover and adjust. Week 6 will cover the flip to flower. With the clean lollipopped structure and solid root development, these plants are set to focus all their energy on producing hefty main colas in the Sea of Green setup.
Observations:
The Donutz are stacking beautifully, with healthy green leaves and strong stems.
The SOG canopy is filling out, and each plant is shaping up to deliver a uniform, productive grow.
Next Steps:
Monitor the plants closely after transplanting to ensure they adjust smoothly to the 7L pots.
Maintain stable environmental conditions to avoid stress during the final veg phase.
Prepare for the flip to flower in Week 6 — the real show is about to begin!
Likes
13
Share


@NordicClosetGrower
Follow
The strain has proven to be extremely sturdy compared to the autoflower version. The smell has been a bit problematic. Some terpenes just can't seem to be tamed even with a brand new carbon air filter. I hope this pays off in terms of aroma quality :)
Likes
33
Share


@STAYINGONMYMAINCBATORUNTWO
Follow
I am officially in flush now! I love how far I have come with these girls! They have started to plump up nearly the size of 2 clipper lighters in width! The smell is so sweet and after the touch you can smell the caramel all through it! I can’t wait to taste!