The Grow Awards 2026 🏆 


Likes
31
Share
@Tweak
Follow
Lots of new growth this week, looks like the screen is about 50% full, I’m thinking in the next week or two I’ll get to 12/12. In the mean time I’m adding an extra hour of darkness every few days to make her transition to flower smooth and stress less for her.


Processing
Likes
7
Share
@Bakeryguy420
Follow
Day 1 today 3/17 on wedding cheesecake auto by fastbuds. One of their newest releases I can't Express happy I am to have the opportunity to grow this :*. One orange sherbet lands at my house I'm going soak them and get that running as well.
At the end of the week doing wonders :) so happy
Likes
8
Share
@Ninjabuds
Follow
Code ; NINJABUDS for a discount on ELUFAH lights
The spectrum from ELUFAH is really making the plants grow really well
My papa Payton I have growing under the ELUFAH uap-1500 along with the ELUFAH Saturn ring under canopy light. I recently put the plant back in a 2x2 I did have 2 plants but the other plant needed up being male. No need for the larger tent still.
Likes
9
Share
@GYOweed
Follow
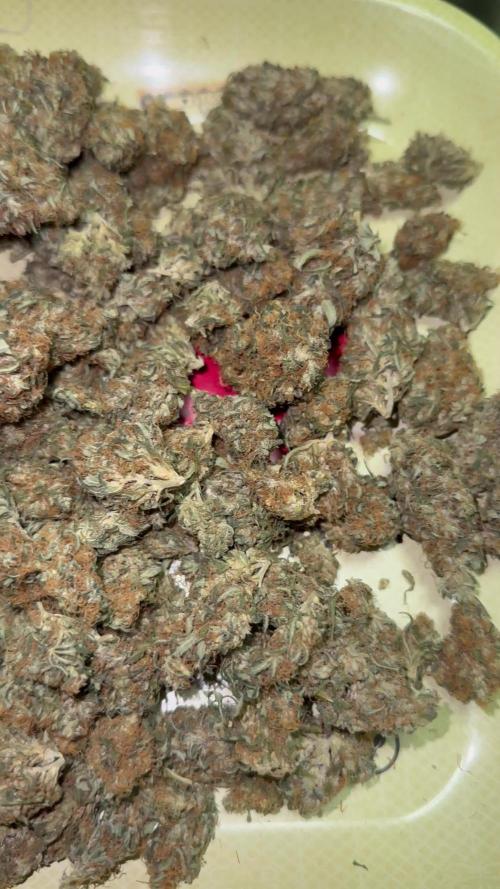
Not a great selection. Low yield. Hopefully it will taste and smoke great as it looks.

Likes
6
Share
@Naujas
Follow
My house is full of sweet chocolate and fruit aroma:) her flowers are full of shiny trichomes :) the girl only bloomed for 57 days, but she is already ready, maybe her flowering sped up in my grow box, high temperature 33°, because of that under my arm my light was set to 85%. From the first days, the girl showed fast and healthy growth:) I made a timelapse video, but unfortunately due to problems with the SD memory card, it takes 3-4 days at the end of the video, besides, my tent is too small for that :D I also made bubble hash from sugar leaves myself :) I tried Zamnesia seeds for the first time - I hope that someday this seed bank will offer me its products to try again :) thank you all. you were together :) good luck with the growing.

Likes
8
Share
@Hawkbo
Follow
She has some strange growth I'm not sure if I'll keep it or not yet, might just throw it in a 1 gal and see how it turns out. Just want to maximize space if it's not perfectly healthy I'll try somethin else.
Likes
12
Share
@Hydronaut
Follow
Big fuck up programming Wi-Fi switches and mapping sequences! Water was actually ph up:| Had to flood and rinse with plain water 4 times:(


Processing
Likes
13
Share
@Cannabar
Follow
Merry Christmas growers!!! Been a very good week, had plenty of time with the ladies.
Nothing major to report other than these two LED's aren't enough for this size tent I don't think. Will definitely be upgrading for the next grow!
Thursday - fed roughly 1.5L with nutrients.
Friday - did nothing.
Saturday - fed roughly 1.5L with nutrients.
Sunday - did nothing.
Monday - fed roughly 1.5L with nutrients.
Tuesday - did nothing.
Likes
25
Share
@Kakui
Follow
Veg44, defoliación grande, y ajuste de amarras. Siempre digo que será la última defoliación y termino defoliando más, ahora a qué crezcan un poco más antes del cambio 12/12
Veg46, las plantas están ya recuperadas y creciendo a buen ritmo.
Veg48, riego con solo Sensizym y Sensi CalMag, con pH 6.3 y EC 0.8, drenaje de EC 1.9 y pH 6.1(ok). Debido al crecimiento de debe ajustar amarras y quitar una que otra hoja.


Processing
Likes
88
Share
@Fergie
Follow
Hey guys so another week has passed these ladies have been repoted in there new 10 gallon pots for next month then will be put into 20 gallon pots for flower stage . Done some major supercropping on them over last week and am just going to continue to build my core structure to these ladies so I am able to flower with as little supports as possible . All going well so far and the monsters are well on way 😉


Likes
29
Share
@GTools
Follow
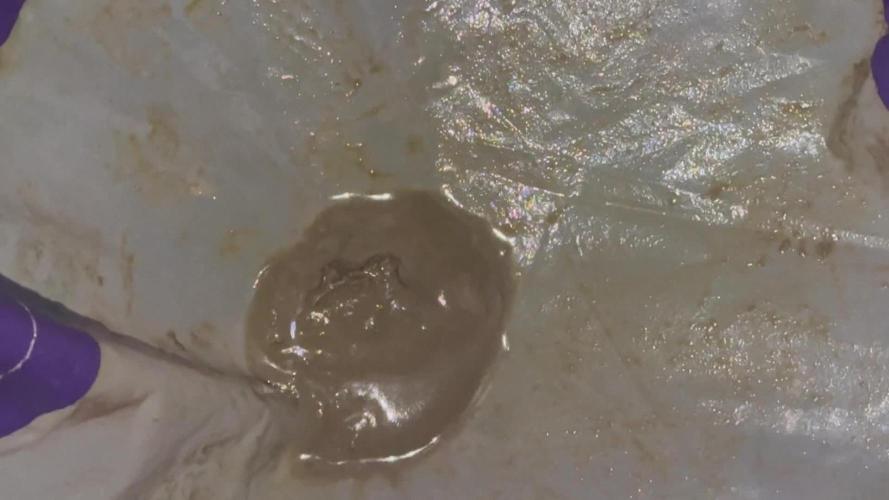
I've been waiting for at least some trichomes to turn amber. I prefer to harvest when there are at least a few amber. I took the PL2 3 days before the PL1. Flushed them for a week only

Likes
4
Share
@CannaIGrow
Follow
Plant is growing well. Transplanted them from a 1 gallon pot into a 3 gallon pot this week.
Likes
10
Share
@CHILLING_RACOONS
Follow
Hi Dear Friends, 👨🌾 👩🌾
Plants showed some deficiencies, but we are recovering it. I prefer to have deficiencies instead excesses..
Maybe It was better if I started a week ago to give Top Veg.
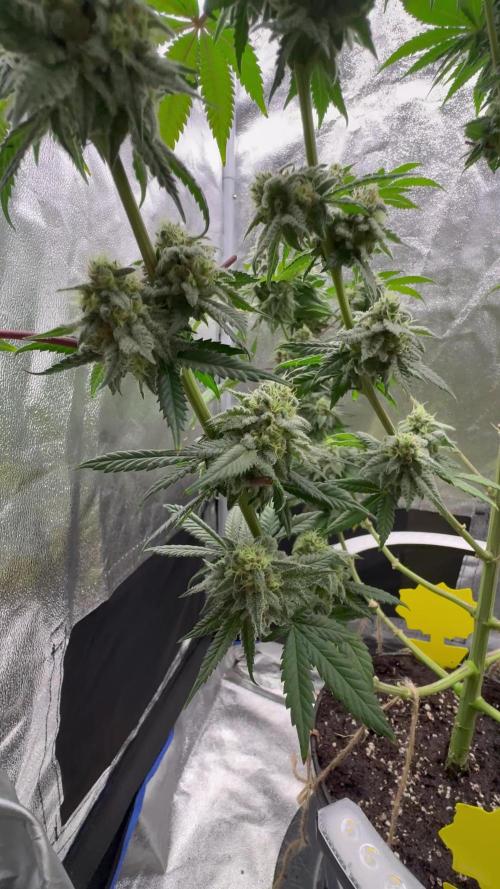
It is the biggest of the cycle and it is really fast.
I notice a HUGE difference compared to other plants growed under the 480w quantum board.
The Kush mintz Fast is under the the XS2000 by ViparSpectra and it is bigger and stronger compared to other plants. Small distance between internodes and stems hard like rocks.
This lamp is really a beast, can't wait to try the new models!!
✅ VEGETATIVE week #7 (LAST WEEK)
30/12 SWITCH 12/12H
📅this week goes from 26/12 to 01/01.📅
💡💡💡Viparspectra XS2000 is working at 50% power.
💉🔍Fertilization schedule:🔍💉
26/12 3ml/lt TOP VEG
30/12 TOP MASS 0.2ml/L + 2.2 ml/L TOP VEG
31/12 SENSI CAL MAG EXTRA 2ml/L foliar spray
WE ARE BACK!!!
We are back after a little pause.
We take a break because we were too busy to post high quality diaries. In the last diaries we tried to post as good as possible and we have to publish about 6 or 8 diaries (in addition to these that we will publish shortly). We opened also an educational Instagram page, we growed a lot in a short amount of time BUT, Instagram suspended our account and we lost all our posts, I was so sad and disappointed... a lot of work lost in a night....
In this diary you will see our journey with Kush Mintz Fast by Original Sensible 🤩, sit down and enjoy the show!
We are growing in a 15L Smart Pot with Light Mix soil by BioBizz under the AWESOME XS2000 by Viparspectra 🤩
DATA SHEET:
Bubba Kush , Animal Mints, Secret Hybrid
Genetics: mostly Indica
Yield: 650g/m² indoor
flowering time: 50/55 days
THC: 25%
Aroma: cookie mint
Effect: happy relaxed
💸💸💸💸💸 Here you can buy seeds of this top shelf strain: https://originalsensible.com/original-sensible-seeds-kush-mintz-fast~21711
_______________________________________________________________________
🔧💡OUR SET UP💡🔧
✔️ 💲💲💲VIPARSPECTRA 🚀🚀🚀🌕🌕
ViparSpectra®️ XS2000 240W Infrared Full Spectrum LED Grow Light:
Excellent ratio between wattage and ppfd, excellent light penetraton, perfect light spectrum (it also has IR 🤩) and it has the best build quality on the market. Until now, built quality is really awesome. You can touch that quality. Materials are really strong, excellent driver and the best leds on the market. Heat dissipation is perfect, the lamp is never too hot and it has a passive dissipator so you will have zero noise. It also has IP65 certification. I like that this lamp is bigger than others, so the 240w of power are well distribuited on the space. Viparspectra has an awesome customer service, and shipping was creazy fast!
This awesome brand also offers 3 years warranty.
This lamp has no rivals.
A special thanks to Emily of Viparspectra ❤️❤️❤️❤️
HERE YOU CAN BUY THIS PROFESSIONAL LIGHT: https://www.viparspectra.com/products/xs-series-xs2000 or https://amzn.to/3dyUoJl
and here you can buy other awesome stuff: https://www.viparspectra.com
✔️ 💲💲💲MARSHYDRO 🚀🚀🚀🌕🌕
📦120X120 GROW TENT: an awesome box, easy and fast to assembly. Made by strong materials, solid zips and it is totally lightproof. The position of holes is optimal and the two lateral windows will make easier the work inside the box. There is also a double end, so you are 100% sure that dirt or liquids will not spill out. You can find it here: https://www.mars-hydro.com/grow-tent/buy-mars-hydro-grow-tent-48x48x80-1680d-4-x-4-size-keeps-all-light-in-top-quality-1680d-canvas-is-tear-proof-and-double-stitched-light-blocking-fast-installation-for-sale
💡TS 600 FULL SPECTRUM 100W LED GROW LIGHT : with this light you will achieve excellent buds, you will not need anything more. This lamp replace a 150w HPS lamp, but, with this Led Light you will smoke bigger, harder and tastier buds because Led have a complete spectrum and a powerful light penetration, so your plants will work as much as possible to make you happy. Psssssss it it extremely cheap and it is only 100w, your bills will never be too high, YOU HAVE NO EXCUSES!! Here if you want this little beast: https://www.mars-hydro.com/led-grow-light/mars-ts-series-led-grow-light/mars-tsw-600-led-full-spectrum-hydroponic-led-grow-light
Thank you Eleen of Marshydro❤️❤️❤️❤️
💣Quantum board - 480w - 4x120w Boards by Zhoangshan Koray Opto-Electronic Ltd.
Samsung LM301B 288 led/board 3000K 0dB noise
+24led/board led Osram 660nm
Efficiency 2.6 umol/J 220 lm/w
Driver: Meanwell HLG-480H-36B
💣Quantum board - 240w - 2x120w Boards by Shenzen Yuanhui Led Ltd.
Samsung LM301H 504 led 3500K 0dB noise
+24led/board led Osram 660nm
Efficiency 2.7 umol/J 220 lm/w
Driver: Meanwell HLG-240H-48B
-ESTRACTION FAN:
Blauberg 125 Turbo Pro Series
Maximum air flow: 430-560 m³ / h 50W 32-44 dBA
-FANS:
A)OSCILLATING FAN D.15cm 2 speeds 20w
B) COMPUTER FAN Sunon DP200A – 230V 20w (Strong, reliable and quiet)
C)Cornawall Electronics Multifan Turbo, three speeds, can be used both on support surfaces and mounted on the wall. High capacity, about 740 m3 / h. High silence and reliability.
💊💉💊FEEDINGS:
We used BioBizz light Mix
TOP CROP:
-DEEPER UNDERGROUND: to stimulate roots system
-TOP VEG: for a excellent growth in the vegetative phase
-GREEN EXPLOSION: to promote creation of bud sites and to allow a faster growth
-MICRO VITA: bacterias for equilibrate the soil and to make the plant healty
-BIG ONE: to stimulate bud sites and to stimulate resin production
-TOP BLOOM: to achieve excellent big and hard buds
-TOP CANDY: to feed the buds with molasses for a tastier smoke and to gain weight
-TOP BUD: to enlarge buds and to gain weight
PLAGRON: PK 13-14 to have big and hard buds and to feed plants with lower effort
ADVANCED NUTRIENTS: Sensi Cal-Mag Extra-> for cal mag deficiency
GROTEK: CAL MAG for cal mag deficiency
HESI: PowerZyme to clean and balance the soil. It feeds the plant cleaning the soil.
GHE: - Final Part (ex Ripen) accelerate the final flowering phase, dissolves minerals in excess
- Flash Clean to flush the plant and to be sure that all excesses are out from plant and pot
These two products improve A LOT the smoke of our babies
-PURPINATOR to stimulate flavonoids and to have a better taste and smell.
____________________________________________________________________________________________
🙏❤️ THANK YOU FOR BEING HERE ❤️🙏
Please leave a comment with your opinions, it is very important to us to have a comparison.
If you like our job, tap the weed button and follow us. It will be really appreciated.🙏
We want to thank again everyone that help us in our project. You support us to support our dream. ❤️
SPREAD THE LOVE OF THIS PLANT ALL AROUND THE WORLD
🌿Thank you again🌿
❤️Sweet hugs❤️
👨🌾CHILLING_RACOONS👩🌾