
Likes
Comments
Share


@Xpie77
Follow
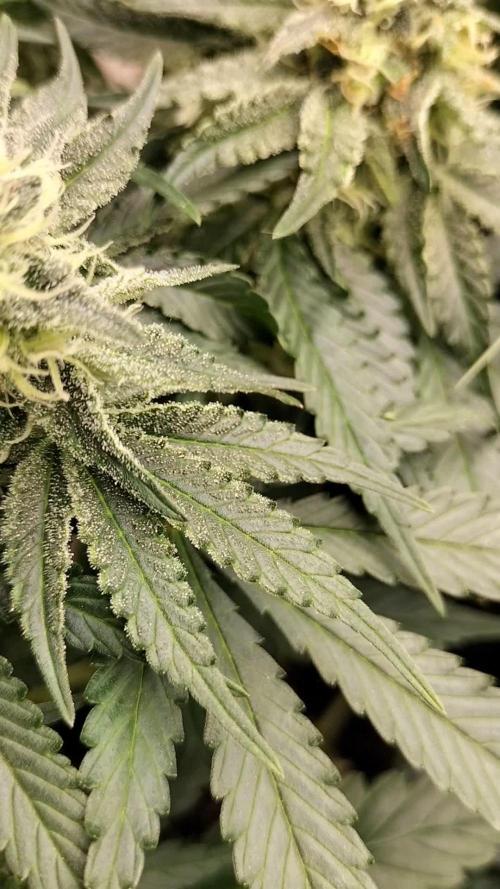
Day 18 of flowering!
💚Please Like This Diary and Leave a Comment!💚
This week the flowers start to swell up. The smell is very nice and love this strain to grow🌿💚🍀
Nutrition: not so much, just a quarter of what is asked on the bottle.
Smell: plant already have a nice smell, very punchy, skunky, forest fruits
Health: nice strong plants, will grow big and flower fast!
Red Wine was created by crossing Rozay F2 with Jet A. They are 2 very powerful aromatic Cali hybrids. This exclusive new Cali strain is a very strong and fast flowering indica-dominant strain. It has an aromatic, intoxicating and relaxing effect. That is comparable to enjoying a good glass of wine.
Red Wine has an average flowering time of about 7-8 weeks when grown indoors. Outdoors it is ready fairly early, usually around the end of September.
The yield is very good. Indoors she has an average yield of 450-650 gr/m². When growing outdoors, 600-800 grams can easily be achieved per plant.
Red Wine has an aromatic scent that can be compared to a full red wine. Her full, purple-green buds are very compact with few leaves. This is very convenient when cutting the plants and saves a lot of time. Smoking this weed gives you a nice high with relaxing properties. The taste of Red Wine is very fruity sweet with an aroma of red grapes.
Flowering time: 7 – 8 weeks
Genetics: Rozay F2 x Jet A
30% Sativa, 70% Indica
Plant height outside: 100 – 180 cm
Outdoor harvest month: from June to October
Yield indoors: 450 – 650 gr/m²
Yield outdoors: 200 – 800 gr / plant
THC: 25%
💚💚Wanna Try Red Wine from Seeds Genetics💚💚
Link:
https://seedsgenetics.nl/product/red-wine-gefeminiseerd/


Likes
3
Share


@Badger161291
Follow
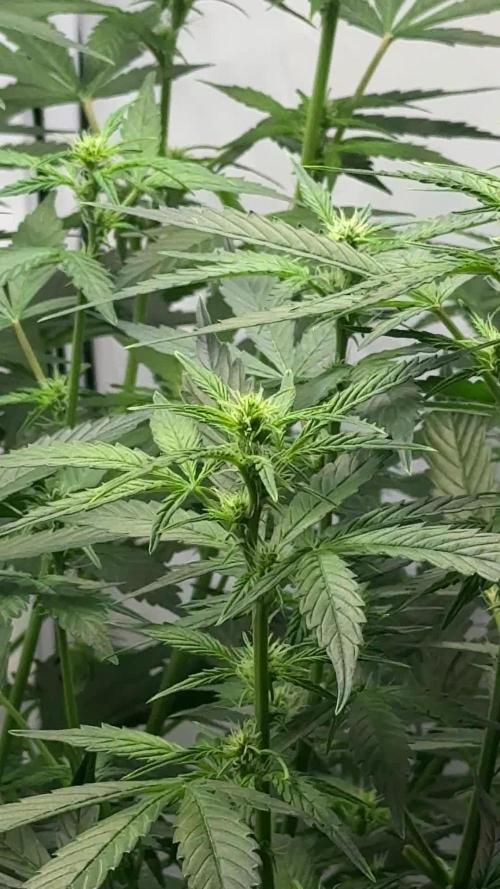
Flowering some them look small can any one tell me if these okay and it is my first time any tips


Likes
16
Share


@aalpi
Follow
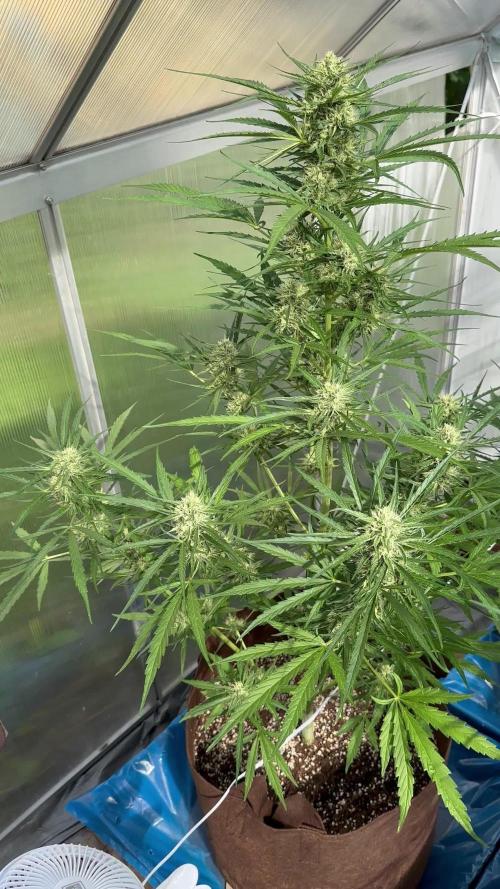
The last two days of flowering. I am really glad with the grow so far. Haven't watered them for 5-6 days before chopping them


Likes
7
Share

@sedygrows
Follow
Today we had a lollipopping session with the "little one". I've had to give her enriched water regularly the last few days because she's been so thirsty. I'm really curious to see how she handles the training.
Likes
10
Share


@Geili_Seili_fireinfireout
Follow
Heute ist der 2. Tag in woche 6 in blüte.
Leider war ihnen 2-3 tage etwas zu warm bei mir. Da ich unbedingt auf meine 660watt bestehn wollte.🤦♂️😅😅
Jetzt bin ich auf 400 watt und ihnen gefällts🤷♂️😁

Likes
9
Share


@Fede224466
Follow
The first week of vegetative growth has passed, the seedlings are recovering from the shock of repotting and the growth has slowed down a bit, probably due to the growth of the root system in the new soil. In this second week I hope to get to the fifth node to start some lst. Irrigation / fertilization: I continue with the same light solution as last week with the addition of root stim 1ml / l to promote rooting. 0.1-2 l every 2-3 days.
20/01 150ml each plant of 8ml/l plant start 1ml/l root stim 1ml/l calmag pH 6,2
23/01 150ml each plant of 1ml/l calmag pH 6,0
Likes
29
Share


@THCeitor
Follow
Ya en la cuarta semana podemos ver mayor cantidad de pistilos sobre todo en la planta mas pequeña y la que de seguro estará lista antes para cosechar, la R.S.Banana #2.
La R.S.Banana #1 muestra un crecimiento mas vigoroso con un tallo muy ancho y aunque ya muestra algunos pistilos, esta tardará mas que la R.S.B.#2 pero será mas productora.
En relación al LST es una tarea que se realiza a diario.


Likes
3
Share

@Seeds_growforgreen
Follow
Beautiful blooming Golf ball size..🏑⚾️
Nutrients Plagron on bloom is very very good. 👌
Alga Bloom 4ml/l 🍡🥜
Royal Sugar 1ml/l 🍭🍯
Green Sensation 1ml/l 🥦

Likes
11
Share


@Sejnik
Follow
Sweet Orange XL a Special Kush v pondělí sklizeny podle plánu. Ke zbytku není co dodat.
Zalévám již pouze čistou vodou s upraveným PH. 4,5 litrů na rostlinu každých 5 dní
Likes
67
Share


@Ageddd
Follow
Whats up GD !!!
------------- GROWTH-------------
The plant is growing more leaves, but the flowering is getting weird, i dunno what is going to happen, im giving her like 16 hours, 6am-10pm.
Weather is the worst i have ever seen in years, last year summer stayed until October, and now the counterpart haha, Nature things.. im letting the plant to decide what to do so, cause is in advanced flowering, gave her a bigger pot (25L) to manifest the fact that she has more soil avaliable.
------------- IRRIGATION-------------
2l, watering aprox each 2-3 days, when soils is dry.
1 of 2 irrigations with nutes, and the other with ph adjusted water.
Deeper Unerground 2ml/L, for transplant.
------------- NUTRIENTS-------------
Bio-Grow (3.5ml/l).
Green Explosion (1ml/l)
---------------------------------------
Good vibes !!
_06/06/2018_
Processing
Likes
12
Share


@LockDownGrow
Follow
So I had absolutely no ill effect on the plants at at all moving from the green buzz veg feed too the house & garden soil a&b feeds,
I did not even given them a water only inbetween the two,
I also went straight in with 50% the recommended dose stated on the house & Gardens bottles this switched happened the day before week 5 none showed any signed of defects or deficiency intact they exploded into life over night and then every day after that, I have been using the green buzz fast buds as a folar spry appied too the leaves of the early flower formation after lights out,
They seemed too love that too and I also kept the note roots going in,
I also started too apply C-RESULT at the fullbl dose stated on the bottle,
The plants live this stuff if you have not tried it do it,
I am not sponcered by c-result I was given this by my local grow store,
It brings all the nutrients straight too the roots it states,
All I know is this stuff triggers the plants too suck the pots dry in 24 hours,
So make sure you have your feed bucket fully in order before adding this stuff as a mistake here could cost you,
But get it right and in 24 hours these little autos doubled in size,
It states too used week one of flower only and smells like a sewer lol
I have today day one of week 6
Started too add house & garden
Bud XL at half strength too increase next week and also I added there top shooter at 1ml per liter of water as 7 as I plan too removed all chemicals exactly as of day 1 of week 7 leaving me week 9 clean, I am training all the shooting tips too my scrog netting the best I can due too very limited space in the grow space,
And am praying for some of the promised purple leaves on the fast buds Web site, I did not too these this time,
I has on lemon pie this round that is 2 weeks behind the rest due too non germination but I am wondering if a staggered planting each plant exactly one week behind each other would give me a little more canapé space and the treat of harvesting a plant every week,
Using the skyline 1000 only
I did not too any of these autos
2 x strawberry cheese cake
2 x lemon pie
4 x fyah
Sounds like a plan too me,
Thanks for reading
Processing
Likes
34
Share


@ILoVeThiSpLaNt
Follow
Cime dure come cemento ricoperte di zucchero. Profilo terpenico fruttato con tocchi zkittlez. Che dire?Non vedo l'ora di fumare anche questa 😊


Likes
47
Share


@terpproducer
Follow
👇 This week:
---
Watering 1l-1.5l every day.
PPFD at canopy height approximately 900 (increase slowly), VPD ~1.3
Big defoliation, lollipopped some plants at day 21, will wait for the last 2 till day 28
Ladys got 500ml compost tea each (biotabs recipe from kees) from now on every week - Recipe: 15gr compost PK/L, 5ml orgatrex/L, 1gr bactrex/L - brew for 24-36h)
---
Happy growing and thanks for checking out my report! I really appreciate you! 😁💪🙏

Likes
11
Share


@Jays_Not_Here_Man
Follow
She was super easy to grow. After figuring out she loved to feed, I began mixing her own nutrients separately and within a week had any deficiencies in check. She kept to a regular cycle of regular feed, light feed, then straight ph’d water. This kept her healthy all throughout. No signs of disease or pests, she performed
Like a champ and ended up giving me a little over 6 oz of dense gassy buds. She took a full 10 weeks, and I probably could have given her a few more days, but she is already a very potent smoke, something that is great in the day time for me. For the price of these beans, $45 for 5 feminized seeds, I would highly recommend the 34 street seed Pink Kush strain 🇨🇦👊❤️

Likes
3
Share


