


Likes
Comments
Share


@AsNoriu
Follow
Day 72 since seed touched soil. All is okeish in garden. Twins are showing signs of light burn and toxicity. I always get toxicity during first few waterings with slow release nutes. One twin is bigger and way frostier than any other plant in garden.
Mars TSL2000 is now on very healthy distance. Works fine.
Temps are in good range. Humidity spikes to 70 on watering day, but is in 60-65 during others.
Happy Growing !!!

Likes
15
Share


@38PLAN
Follow
Le piante iniziano a fiorire, le più piccole hanno 3 settimane mentre le più grandi 5
Non sono un novellino é solo il primo raccolto di cui faccio il diario

Likes
5
Share


@Chubbs
Follow
420FASTBUDS-Week 5
Strain:FBPHP03
What up grow fam. Weekly update on these girls. Finally the weather is nice enough I transplanted them into there final 4gal pots and put them into the greenhousefor the season. Got my drip line all hooked up and so far seems like it's going good. All in all Happy Growing
Likes
2
Share


@Yiyis_Grow
Follow
Lámpara: Bestva Quantum Board LED LM301B
Sustrato: 2 Jiffy fino : 1 Floragard
Especies: Charlotte Dream CBD - Auto Dark Purple - Purple Kush - Triping 25 - Gelato Ice
Acontecimientos :
1. Las automáticas que me enviaron de regalía empezaron a florar muy pronto y van a dar muy poca producción. No vuelvo a poner automáticas gratis en mis indoor.
2. Las Charlotte Dream han crecido de forma brutal comparadas con las demás.
3. Se está empezando a hacer LST a algunas de las plantas, otras se quedaron al natural.
4. Luz 20h/día, nutriente y viento.
Buenos humos


Likes
3
Share


Likes
27
Share


@LSchnabel
Follow
9 weeks into this grow. Packing on the mass for sure. Main buds are the size of my hand. The smell hits you hard and is very very strong now.
Very happy with the ease of this plant. Still have had no issues whatsoever.
I think the plan is to harvest this weekend at 10 weeks total.
Likes
17
Share


@MG2009
Follow
07/30/2023
Begining week 3 of veg and growing. AK #1 up to 9.5", AK #2 is up to 6.",, Bruce Banner is up to 9".
Hope for big growth this week🙏🏻 I will do no training for fear of slowing them down.
But top dress with 5-2-4 and will change to flowering food
08/03/2022
Week #3 day 4 Bruce Banner is showing some pistols, starting to feed Big Bloom, first of her biweekly feedings
Description of Bruce Banner Auto - Ganja Farmer Seeds
Are you in search of a real hidden strength and power? The solution is an autoflowering strain Bruce Banner Auto from Ganja Farmer Seeds. It is an extremely productive Sativa-dominant plant. The concentration of THC can reach even 25%! Those traits do not come as a surprise as it is based on Bruce Banner and Gorilla Cookies Auto. It can grow up to 130 cm. These feminized marijuana seeds are unusually productive. What is the aroma of this potent strain? A delicate fruity and flowery aroma combined with earthy notes. The effect is surely strong and affects mind and body. It is long lasting and will stimulate imagination of every cannabis enthusiast.
Data sheet of Bruce Banner Auto
Genetics: Bruce Banner x Gorilla Cookies Auto
Flowering type: Autoflowering
Strain type: Autoflowering
Sex: Feminized
Indica/Sativa/Ruderalis: 41,1/58,7/0,2 %
From seeds to harvest: 9 weeks
Height Indoor: 50-110 cm
Harvest Indoor: 400-500 g/m2
Harvest Outdoor: 50-150 g/plant
THC: 18-25 %
CBD: 0,1 %
Taste: Fruits, Sweet, Earthy, Diesel, Floral
Effect: Happy, Creativity boosting, Stimulating
General specification of Bruce Banner Auto
Brand Ganja Farmer Seeds
Seed type
Seed type Autoflowering
Sex
Sex Feminized (100% females)
Flowering type
Flowering type Autoflowering
From seed to harvest
From seed to harvest Very short (up to 65 days)
Indica or Sativa
Indica or Sativa Mostly Sativa
Height
Height Short
Yield
Yield High
THC content
THC content Very high (+20%)


Likes
3
Share

@JVKdopegrow
Follow
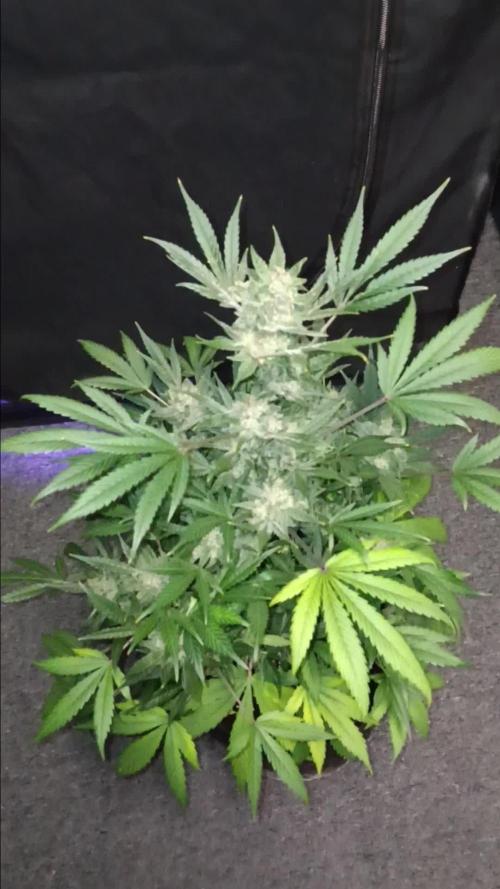
Getting close. Nice buds but trichomes are still mostly clear. Very healthy lady. I really let this girl go on her own after some early trimming. Definitely the best plant grown by me to date!
Likes
1
Share

@Bdog7878
Follow
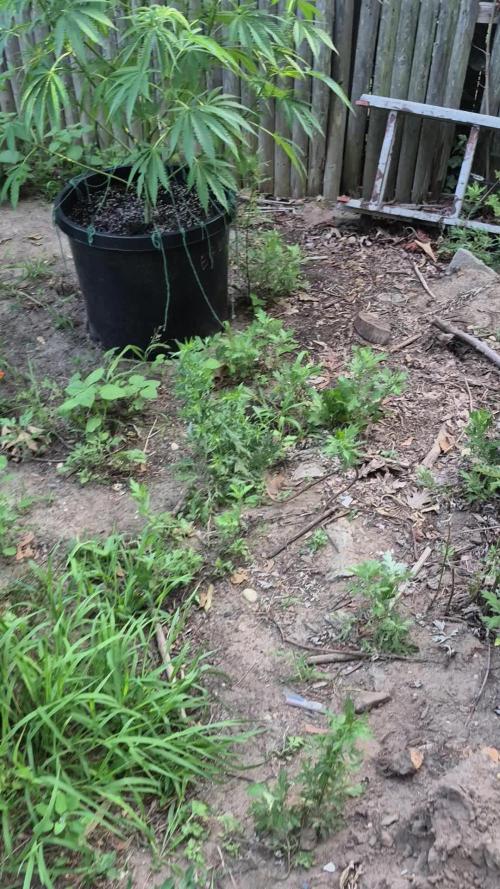
They seem to be getting back on track. There using a lot of water now so i been feeding heavy they are growing and the color in the few that were a lighter green is coming back darker green. Needing water almost every day now. Been hitting with some recharge once a week and feeding once week. One of the end games is past my 6 foot fence and hasn't stretched yet. Definitely seeing some white hairs starting so flowering is close.i did some trimming and removing over last week and half before flowering starts


Likes
2
Share


@Ryno1990
Follow
Strawberry Banana from canuk seeds is on her flush week an she is looking very nice sparkling with her nice trichrome covered solid buds an smelling of sweetness she grew some amazing buds an can't wait to try them out


Likes
26
Share


@Targona
Follow
02.10.2022 - 56 days since my little girl sprouted from seeds🌱
Fourth week of flowering for my Bruce Lemon Diesel 🍋⛽🌻
Nutrients:
Jungle Indabox - I serve the same as last week
Advanced Nutrientiens - Bud Candy - carbohydrates for my plants 🍭🍭
Building Stimulators 🌼🌼🌼:
Jungle Indabox Environ X
Advanced Nutrientiens - Big Bud - I applied this week for the last time
ATAMI - ATA CALMAG - When growing under LED lights it is recommended to use Calmag and Atami is an excellent brand
The plants tolerate the nutrients well, some of the lower leaves showed slight signs of burning, they turned a little yellow and the tips of the leaves were brown 🍃🍃
Therefore, I will continue to use only one Bud Stimulator and that - Jungle Indabox Environ X, I will leave Big Bud from Advanced Nutrientiens for other plants.
Training:
Defoliation: I still remove the large and lower leaves so that they do not shade themselves 🌞🌞
I'm not planning a bigger defoliation until next week, the girls are a little leafy, but not enough to need more trimming 🌴🌴
General: The girl is already blooming strongly, dense buds are forming 🌸🌸, the branches reach the same height, exactly as I wanted 👍 At the moment it has more leaves than I would like, but I will do more defoliation later, as I wrote 🍃
I will adjust the nutrients from the next watering, I will leave the only bud stimulator 🏵️
🏵️
The girl no longer grows tall, she puts all her strength and energy into her buds 🌸
Light: Believe - the best light of sponsor Mars Hydro TS 1000 💡💡
Smell: The whole box already smells a lot, the smells mix and flow out of the box, when I open the tent, I get a strong smell of flowering cannabis 🍇⛽🍬
Thanks for your opinions, smile and fun with my diary, you can follow me on Twitter 🐦: @targona666
See you soon 😍

Likes
26
Share


@TheCannaProphet
Follow
WEEK 5
8/16- Alrighty! Start of week five and all the ladies are in flower and starting to look sexy as hell! Even the Crystal Meth #2 in the SOHUM Living Soil that had a soil ph of 5.2-5.4 and 4.2 ph runoff on a 4 1/2 gallon flush of 7.7 ph water is doing well! I checked the ph on her soil this morning and she's at 6.4...PERFECT! I gave all the girls a drink of de-chlorinated water in the amount of 2 1/2g with 1 tsp CalMag+ added and ph'd to 6.9 split evenly between them.
8/17- Day 30- The girls are all really growing like crazy filling out their 10g fabric pots. I went through all of them today and, using the green horticultural wire LST'd the crap out of everyone! I know, I know....LST on Day 30??? I've LST'd this late before and had really good results so giving it a go this run. Gave all the girls a small drink as they were moist 2" down using 2 1/2g de-chlorinated water ph'd to 6.8 @ 75 deg. After I LST'd all the girls, I selectively tucked shade leaves and defoliated a couple here and there and also removed all the shitty little undergrowth down low on the main stalks. Can't believe the FastBuds Crystal Meth #2 came back from the edge of oblivion. I checked her medium(SOHUM Living Soil) ph which is still @ 6.4...whew! I think she's gonna do just fine, although not as good as her sister who's an obviously different phenotype.
8/18- Cranked up the HLG 650R's to max today. Now drawing 1300w at the wall-650w each and raised both lights to 42" high which is giving 800-1100 umols depending on what place on the canopy you check.
8/19- I administered the second dose of live Nematode's with the girls morning watering. I put the Nematodes in 2 1/2 gallons of de-chlorinated water ph'd to 6.8 @ 74 deg. and split it evenly between all eight pots. I tightened up the LST on all the girls to keep spreading them out and getting better light penetration into the lower canopy.
8/20- I started a batch of Compost Tea this morning- 4 cups worm castings, 1 cup of Alfalfa Meal, 1 cup Kelp Meal, 2 tbsp Bat Guano into 4 1/2 gallons of de-chlorinated water with a 6.9ph in which I added 5 tbsp of unsulphured molasses as a catalyst for the microbes. I'll brew this for 48 hours.
The ladies all were moist enough that I felt safe skipping the water for today, I'll give them a light watering tomorrow, then a heavy feed with the compost tea. I went through and tucked the heck out of leaves blocking bud sites from light (this is a chore as the girls are getting BUSHY as hell!) and removed a few scattered fan leaves that refused to be tucked and were really blocking light into the lower canopy....can't be having that, need the LIGHT!
8/21- Ladies were all looking very perky this morning and the FastBuds Crystal Meth and Purple Lemonade are both getting beautiful purple shades to them especially the FastBuds Crystal Meth #1 in Natures Living Soil Autoflower Concentrate, she's absolutely on FIRE although her node spacing is very wide. The #2 Crystal Meth in SOHUM that had the ph issue with her medium seems to have recovered after I flushed the shit out of her. She's behind her sister and definitely has a different structure than the #1 phenotype. The Purple Lemonade #1 & #2 are both flowering with #2 looking way better. The #1 Purple Lemonade has some thick kushy leaves and she's a short little biatch, in contrast to the #2 which is tall and lanky with wider node spacing. The #2 Purple Lemonade is having a little issue apparently with the nitrogen level in the medium as she's getting 'claw tips' on several of her leaves and judging by her dark green coloration, she's nitrogen rich right now. I'll keep an eye on her but don't think it's a big issue at this moment in time. The Seedsman Gelato OG in Natures Living Soil Autoflower Concentrate is getting bushy and has filled out the 10 gallon fabric pot. She's got a ton of bud sites and it's a struggle training to keep all the sites exposed to light. The #2 Gelato OG in SOHUM is doing about the same as her sister but she's not quite as tall. The Seedsman Zkittles #1 slowed down on her stretch and just decided to get bushy instead! She's still in pre-flower but is very healthy and will be getting it on very soon! Her 'Sin Twisters' Zkittles #2 & #3 are beautiful and in flower. The Zkittles 'twins' were previously the shortest plants in this run but have caught up and are as tall as the Zkittles #1 @ 14".
8/22- End of Week 4! The girls got Compost Tea ( 8.1 ph, 840 ppm and 1636 EC @ 78 deg.) for breakfast this morning along with a top dress on the six ladies growing in Natures Living Soil Autoflower Concentrate / Fox Farms Happy Frog mix. The two SOHUM pots with the Seedsman Gelato OG #2 and FastBuds Crystal Meth #2 got 4 tbsp of 2-8-4 slow release dry amendments by Down To Earth top dressed and worked in by hand. I gave them each 1/2 gallon of Compost Tea after top dressing to help water in the nutrients. I went through all the girls and tucked and gently spread their branches to continue to train them as they get ready to really start flowering. The FastBuds girls are getting MORE colorful each and every day and I can't wait to open the tent each morning to see them....BEAUTIFUL!!!
Likes
11
Share


@StartGrowingShxt
Follow
Week 15
May 21
-ladies are still swelling all but the grapefruit pheno but she is frostier than the rest so good with the bad I guess hopefully she just takes longer to finish
-just been ferments with recharge mostly and been doing well alternating between top and bottom watering and watering every other day
-light burn and possible calcium deficiency on one plant but she’s the chunkiest girl and might finish before the rest
-smooth sailing other than that
Likes
24
Share


@Frank_cultiva
Follow
Las 4 nenas del scrog iniciaron con el ciclo 12/12 el día 05/11/2021: están siendo alimentadas con advanced nutrients(dosis indicadas en la foto de la tabla)
-micro
-blom
-grow
-b52
-rhino skin
-big bue
-bud ignitor
-bud candy
-sensi cal mag xtra
Las 2 nenas en macetas de 30LT 18/6:
por el momento están siendo alimentadas con advanced nutrients(dosis indicadas en la foto de la tabla)
-micro
-grow
-blom
-b52
