


Likes
Comments
Share


@Synkery
Follow
Lamentablemente al principio del cultivo tuve algun problema en los transplantes y se estancaron un poco i no crecieron lo que me hubiese gustado, pero con una media de 35g por planta en seco me doy por satisfecho


Likes
5
Share


@Ensign420
Follow
Week 02 Introduction
This week has been a bit of a struggle. Had my first experience dealing with slime and brown algae. But I think adding enzymes and increasing the beneficial bacteria helped to fix the issue. Also experienced nutrient burn for the first time. My nutrient solution strength got as high as 671 PPMs. So backed it down to about 430 PPMs during the end-of-week reservoir change. Also cut Hydroguard (expired?), CaliMagic, and Superthrive from this grow. Now she's still stunted, but is starting to recover. Hopefully...
[START OF WEEK 02]
Day 01 - Monday - 08/10/20 - Total Days: 008
-----------------------------------
- [0830]: Still looks a bit yellow. But getting larger!
--- Solution strength was at 248 PPMs.
--- Just topped off with a bit of distilled water
--- PH went up to 6.1 so PH'd down to 5.8
--- Ran the top feed for a bit to wet the hydroton.
- [2130]: She's looking even more yellow now.
--- Even the new leaves are really yellow.
--- Decided to add more base nutes.
--- Added 4ml of Sensi A
--- Added 4ml of Sensi B
--- Now at about
--- Solution Strength went up to 304 PPM.
--- PH was at 6,
--- Also raised the water level a bit more.
--- I really hope it's a nutrient deficiency and not an over-watering issue.
--- Please live!
Day 02 - Tuesday - 08/11/20 - Total Days: 009
-----------------------------------
- [0830]: Looking less droopy. But still yellow.
--- Decided to do a reservoir change.
--- 4.5gal of distilled water
--- 8ml of Sensi Grow A
--- 8ml of Sensi Grow B
--- 8ml of Voodoo Juice
--- 4ml of B-52
--- 4ml of CaliMagic
--- 4ml of Hydroguard
--- 4 drops of Superthrive
--- PH'd down to 5.8
--- Solution strength: 302 PPM
--- Since I didn't want to risk over-watering the rockwool, I did not to do a top feed, may do one tonight after the sleep cycle (lights are still set to go off at 10am and back on at 4pm).
--- As I was doing a reservoir change, I noticed that the tubes and bucket were a bit slimy. Didn't really stink or anything. Is this normal? Maybe due to the Hydroguard and Voodoo Juice?
--- I hope she gets better soon!
- [2215]: Getting larger! But still yellow.
--- Also can see a root growing through the net pot! Tiny little thing but it's there! Will have to start dropping water once more appear.
--- After looking over a few DWC diaries using AN nutes, seems like my solution strength is still too low. Most around this stage average around 500 PPMs with about 4ml per gallon.
--- Top fed for a minute to wet the top of the hydroton.
--- Solution strength went down to 263 PPM.
--- Added 8ml more of Sensi A
--- Added 8ml more of Sensi B
--- Now base nutes are at 16ml for 4.5 gal of water.
--- PPMs went up to 411.
--- Still lower than 500 PPMs, but that's okay.
--- PH was at 6. Not sure if I should adjust PH using AN nutes. So going to not ajdust unless PH goes above 6.1.
Day 03 - Wednesday - 08/12/20 - Total Days: 010
-----------------------------------
- [0830]: Looks like more root growth!
--- She still looks yellow. But leaves are perky.
--- PH was at 6.2 so lowered down to 5.8.
--- Solution strength was at 394 PPMs
--- Since roots are still growing, I decide to lower the water level a bit. Now water level is a bit below the net pot.
- [2200]: Root is getting longer!
--- Slime is returning. Not sure why.
--- Solution strength: 357 PPMs
--- PH: 6.1
--- Decided to add an enzyme along with more beneficial bacteria to hopefully cure the slime.
--- Added 16ml of Sensizym
--- Added 5ml of Hydroguard
--- Added 8ml of Voodoo Juice
--- New solution strength: 430 PPMs
--- New PH: 6.1
--- Top fed for a minute.
--- This slimy residue is really freaking me out! I hope the added enzymes will help eliminate the slime.
--- Going to do a full reservoir sterilization/nutrient change over the weekend. Please survive until then girl!
Day 04 - Thursday - 08/13/20 - Total Days: 011
-----------------------------------
- [0930]: I think the enzymes worked! There is little to no slime now!
--- Although I think the root was also dissolved in the process. It's now just a little stub sticking just below the net pot. The enzyme is also suppose to dissolved dead roots too but guess that root was too weak? Not sure what happened there. But I think the slime is cured!
--- Solution strength went down to 395 PPMs. Decided to add more base nutrients.
--- Added 8ml of Sensi A
--- Added 8ml of Sensi B
--- Added 4ml of B-52
--- Solution strength went up to 598 PPMs.
--- PH was at 6.1
--- As long as the PH is between 5.5 and 6.3, I'm not going to use PH Up or Down. But still will monitor PH levels.
- [1715]: Checked up on her after her nap and shes looking alive but stunted. But no slime!
--- Decided to add some sugars to help maintain the enzymes and beneficial bacteria.
--- Solution strength was at 587 PPMs.
--- PH was at 6.2
--- Added 8ml of Bud Candy
--- Solution strength went up to 671 PPMs.
--- PH also went up to 6.3
--- Lowered water level a bit to hopefully promote more root growth.
--- Top fed for a minute.
--- She is getting bigger, but still looks yellow.
Day 05 - Friday - 08/14/20 - Total Days: 012
-----------------------------------
- [0915]: Leaves look a little burnt on the tips. Still no slime.
--- Going to back off on the PPMs to hopefully fix the nutrient toxicity.
--- Solution strength was at 632 PPMs
--- PH was at 6.3
--- Added/Removed water until PPMs were at 536.
--- PH was still at 6.3
--- Raised water up a bit, then top fed for a minute.
- [2200]: Looking better. Still yellow though.
--- Solution strength: 514 PPMs
--- PH: 6.5
--- Added PH down.
--- New solution strength: 518 PPMs
--- New PH: 5.2
--- PH was kind of high. So decided to PH down. Had to use quite a bit to bring it down. But eventually got it to drop down to 5.3. A little low, but so far, the PH has always gone up so wanted to start it really low.
--- Ran the top feed for a minute to re-saturate the top of the hydroton.
Day 06 - Saturday - 08/15/20 - Total Days: 013
-----------------------------------
- [0830]: She looks stunted. leaves are still yellow.
--- Solution strength: 514 PPMs
--- PH: 5.6
--- Top fed for a minute.
--- Not sure what to do at this point. Going to do another reservoir change soon. Hoping she lives until then.
- [2145]: Looking pretty much the same.
--- A bit of slime has returned. Since I've been diluting the nutrient solution, the enzyme ratio has dropped. So I guess this is expected.
--- Also noticed that slime build up was on the air-stones. Never really checked the stones so not sure how long that has been there. Looks brown too, which can't be good.
--- Going to do an H202 sterilization of the system (minus the net pot) tomorrow so did not add anything.
--- Lowered the water level to below the net pot.
--- Then top fed for a minute.
Day 07 - Sunday - 08/16/20 - Total Days: 014
-----------------------------------
- [0900]: STERILIZATION DAY!
--- Decided to skip today's night cycle for a deep clean.
--- I'm hoping that skipping a night cycle won't be too stressful.
--- Temporarily moved her to a new bucket.
--- Used about a half of gallon of straight distilled water to flush out the net pot.
--- Drained the system and wiped up all the brown sludge. Also removed the air stones and cleaned up all the goo.
--- Filled the system with 2 gallons of distilled water and at least 30ml of food grade hydrogen peroxide (35% strength).
--- Yea its a lot, but since I'm not going to sterilize the system overnight, I went with a really high doseage. Basically I kept adding until I started to see little bubbles start to form.
--- Then I ran the water pump.
- [0915]: Boiled the air stones in tap water for about 10 min. Then reconnected them to the airlines.
--- I let the air stones and hose soak in the sterilization solution for about 5 minutes so the peroxide can absorb into the stones. Then ran the air stone to help mix and agitate the solution.
--- Occasionally, I'd repeat the process of turning the air pump off for a few minutes to let the stones soak.
- [1000]: Covered the top two row of holes of the net pot with some aluminum tape. Hopefully this solves the light leaking in through the hydroton.
- [1200]: Used an old toothbrush and scrubbed the pump clean. Then drained the system.
--- Refilled with more distilled water and peroxide. Again added a lot.
--- Ran system again to sterilize even more.
- [1530]: Drained the system and refilled with distilled water to rinse.
--- Ran the system for a few minutes, then drained and rinsed again.
--- Did this a few more times over about an hour.
- [1630]: Added 4 gallons of fresh distilled water.
--- Added 15ml Sensi Grow A
--- Added 15ml Sensi Grow B
--- Added 12ml of B-52
--- Added 16ml of Voodoo Juice
--- Added 16ml Sensizym
--- Solution strength was at 430 PPMs
--- PH was at 5.6
--- I was going to add Hydroguard, but I think the bottle is expired. Since 2017 or 2018!? I think Hydroguard is good for up to 2 years from the date on the bottle or 6 months after opening. So not going to use from now on. I wonder if this could have contributed to the slime build up.
--- Also removed the CaliMagic and Superthrive too. Going to only use AN products to eliminate the chance of incompatible nutrients.
--- Placed her back in the bucket and top fed for a minute.
--- Here's hoping for the best. Going to let it ride until morning! Please feel better!
[END OF WEEK 02]



Likes
14
Share


@BudXs
Follow
CRAZY NIGHT (Continued)
And not only is Frontdesk girl steaming mad that NX hit it and quit it (apparently she was looking to make him breakfast and then introduce himn to the family!!!), she brought along her rather large brother! Frontdeskgirl sees the Stephanies, they see her, large brother see NX's eyes and everyone puts 2 and 2 together. Stphanie 1 was the first to smack NX accross the face, followed by S2 with a kick to the shin, more from S1, S2 with the assist, NX starts hobbling away. But no! Now Frontdesk girl has made it to the group and shes swinging at EVERYONE!!!! Luckily myself and the others in our group were safely out of arms reach and were able to witness this spectacle alongside the curious morning Montreal onlookers. The stephas start fighting back with FDG, and the brother starts to chase my brother!!! Now in most situations, my brother would get backup, bit there was just too muych going on to watch, the big dude obviously had a bum knee, and my bro had a head start and an athletic build. So, there we were, bags dumped outside the hotel, a classy fight on the sidewalk in front of us, my brother running away into the sunrise, and a whole day of events planned. I picked up my shit, my bros shit, my buddies did the same, and we noped the fuck out of there., leaving the girls to figure that shit out themselves. Never saw the Stephanies again. To this day they could still be in Montreal, who knows. My bro is still alive, and I will never know what happened to Frontdeskgirl.
DIARY STUFF
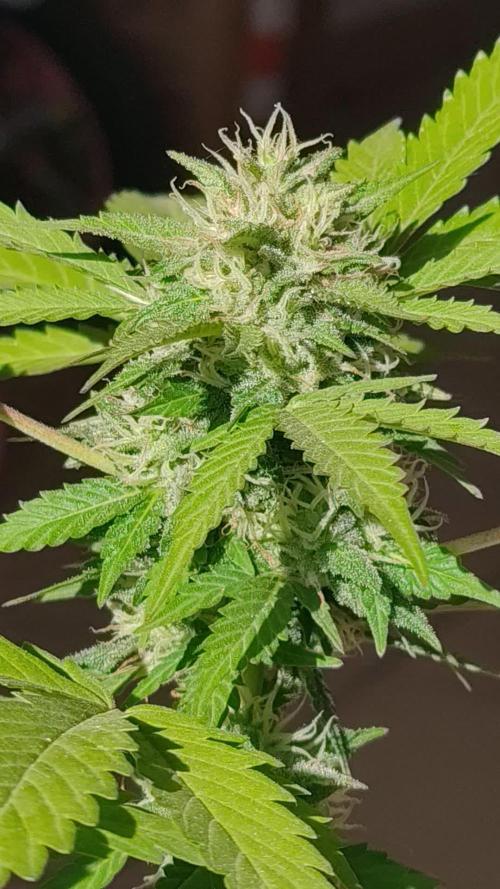
CHOPPED IT!!! Its huge, it stinks, and I cant wait to show you the harvest and cure photos. Im a big fan of this strain, and I hope it makes it to the FB roster!!!!
Thank you Heather and the Fastbuds team for allowing me to grow and profile this wonderful genetic

Processing
Likes
44
Share


@I_and_I
Follow
First grow completed, turned out far better than I could ever have hoped, the plants totally bossed it for all the winging it and improvising I put them through, but we got there in the end haha,
Looking forward to next grow, can't wait to enjoy using all good genetics, already have some Bruce banner #3 seeds ready to roll out :)
Thanks for reading


Likes
6
Share


@EazyRider
Follow
two need another week maybe and the middle one looks like another two weeks. All three very frosty and stinky.
Likes
10
Share


@CanarianGrow92
Follow
Week 5 for the Green Papayas from super sativa seeds club.
Some of the lower leaves are letting us know that the mother plant need a lot more food. we added additional PK booster to her. The clones seems to go a lot better, these buds are bigger also, but happy in general. I still need to get used to all this organic nutrients. Lots of things to learn and a long way to go, always happy to learn new methods of growing!
For the rest, as always just water!
Likes
3
Share

@Muravushka
Follow
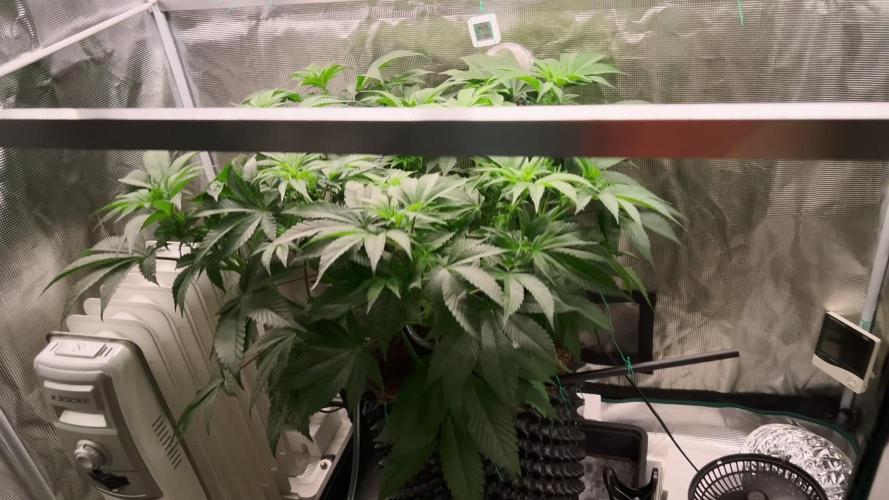
I'm trying to bend the plant to the right, but the stem is very thick and powerful, and I'm afraid of breaking it, so I'm letting it grow at almost 45 degrees
Likes
16
Share


@Chocolopeison
Follow
Mitad de semana cinto, estuve desaparecido por 10 día desde la última actualización del diario y 7 días en que deje a las plantas solas porque me fui de vacaciones, por lo menos estuvieron bien con un sistema de riego que le implemento a mis plantas.
Aun las mantengo en macetas de 1L (queda por llenar el pan de raiz). Ahora si las voy a cuidar como se merecen por que en los 7 días igual se deterioraron las plantas. También hice prueba de runoff y tengo variación de ph y ec obviamente. Siempre se le ah dado la misma agua con los nutrientes pero está vez le estoy dando los fertilizantes que aparecen en está semana por que me voy a enfocar en recuperar las raíces, ahora que estuvieron los 7 días igual el estanque se acumularon sales y incremento mi ph pero ya lo estamos regulando en el riego, no voy hacer lavado de raíces para ver si se pueden recuperar solas
Antes de salir de vacaciones se les hizo super cropping en el 6to nudo a las 4 nenas y ahora le voy a mostrar los resultados luego de 8 días le hice unas defoliaciones y otro super cropping. Cuando llegue igual estaban con falta de riego (ya estarán pidiendo 2 riegos al día, por su tamaño)


Likes
111
Share


@Salokin
Follow
Hello Growmies,
I'm thrilled to update you on the plant's progress! In the last week, she has beautifully filled out the scrog. Just yesterday, I flipped her into the flowering stage. This means I'll slowly increase her feeding, although I don't plan to go too heavy on the nutrients since she seems to prefer a lighter touch.
She's quite particular about her nutrients, requiring me to change the reservoir every five days. If I delay, she shows signs of distress on her leaves, but these issues resolve immediately after I refresh the reservoir.
While she's stretching in the preflower stage, I'll continue to guide her growth into the empty areas of the scrog screen.
Also, here's a special offer: use the code ZAMMIGD2023 at Zamnesia's online store to get a 20% discount.
Thanks for dropping by, and I'll share more updates next week!


Likes
18
Share


@Rinna
Follow
As said before, I'm incredibly happy that I got to harvest a little bit. Never expected her to make it, but she kind off did! The smell was pungent and sweet like an amnesia haze should be, hoping that will be even better after drying and curing!

Likes
25
Share


@Weedbadk
Follow
Enamorado de esta variedad,está demostrando unos colores muy hermosos,su aroma es muy fuerte y notorio,esta semana vamos a aplicar la técnica rib para ver si tiene un beneficio en la planta . Ahora se viene el engorde unas de mis etapas favoritas.estoy pensando en poner tutores para soportar el peso de las flores

Likes
15
Share


@Mcdiggley420
Follow
Girlscout is doing great looks and smells perfect I reckon I can get another few days in before flush updates of others will be up later


Likes
4
Share


@Englandshigh
Follow
very good strain to grow , very resiant, loves being trained , beautiful smell much better than I expected everyone should defo try it

Likes
149
Share


@CBD_Sweden
Follow
Hi all the happy people here in GrowDiaries.
This is my second cultivation ever and it will be fun to try a bigger space than my closet grow.
First, I'm just going to say I'm done with the construction of my new growroom.
I put some pictures on the construction here in week one.
The room is 2.14 meters by 1.7 meters and has a ceiling height of 2 meters.
It provides a floor area of 3.6 square meters.
I use a 54 Watt Lightwawe T5 for germination and 2 Pcs 400 Watt HPS lamps.
I have a channel fan that replaces the room air about 40 times an hour to get a comfortable theme in the room, the air enters a fresh air intake from the outside.
The air is purified through a carbon filter to then leave the room to the rest of the basement.
Then I use that heat to heat the rest of the basement.
I will use 8 pcs 15 liter Autopots to grow with and a 100 liter water tank that supplies the pots of water and nutrition.
I will grow completely organically in soil and will watercure my buds to get the best possible medicine for me.
But there are no cultivation rooms to be displayed here, so I continue with what is most important.
Today I have put my seeds in my moisture dome and hope the seeds have germinated within a few days.
I am very excited to see how the new growroom will work and how this Blue cheese Auto from Royal queen seeds will turn out.
Blue Cheese automatic cannabis seeds are a cross of Blueberry Automatic and Cheese Automatic that has been perfected over five years of breeding and careful selection. The result is a feminized, autoflowering strain with superior yield, flavor, and effects to either of its distinguished parent strains.
THC: 16%
CBD: Low
Yield Indoor : 325 - 375 gr/m2
Yield Outdoor: 60 - 110 gr/plant
Height Indoor: 40 - 70 cm
Height Outdoor: 60 - 110 cm
Flowering: 7 - 8 weeks
Harvest month: 9-10 weeks after planting
Genetic Background: Blueberry x Cheese x Ruderalis
Type: Sa 35% In 40% Ru 25%
Effect: Cerebral and uplifting
Climate: Mild
..............................................................................................................................................................................................................................................................................................................................................
2017-09-11. Kl 12.00. Week 4 starts. I have cleaned the whole room for the new week and gave the girls water and nutes. Added videos and pics. Girl nr 1 is 27 cm high and girl nr 2 is 50 cm high and nr 3 is 15 cm high.
-------------------------------------------------------------------------------
2017-09-12. Kl 10.00. New pics and video. Nr 2 has grown 5 cm in 23 h, its incredible.
---------------------------------------------------------------------------------------------
2017-09-13. Kl 22.00. Everything is great in the garden right now. Updated with new video.
----------------------------------------------------------------------------------------------------------------------------
2017-09-15. KL 10.00. New pics and videos. Girl Nr 1 is 33 cm high, Nr2 is 70 cm and girl Nr is 22 cm. Nr 2 has grown 20 cm the last 3 days. Look at the stem of girl Nr 2 😍
The girls are starting to smell a lot now. Its a intense smell in the grow room.
-----------------------------------------------------------------------------------------------------------------------------------------
2017-09-16. Kl 10.00. The girls grow like crazy, i have to defoliate about 20 leafs a day. Nr 2 is 76 cm tall now, i wonder when she slows down?. Added 2 liters of water and nutes this morning and 2 new videos.
------------------------------------------------------------------------------------------------------------------------------------------------------------------
2017-09-17. Made a time laps of the girls first 28 days.
Likes
37
Share

@DogDoctorOfficial
Follow
Cosmic Noodles Auto — Final Strain Review
14 Weeks From Seed To Harvest — 12/12 From Seed
What a ride this one has been.
Our Cosmic Noodles Auto officially comes to an end after 14 weeks from seed to harvest, grown fully under a 12/12 light cycle from day one, side by side with photoperiods and other autoflower genetics inside the 8x8 tent — no special treatment, no isolated environment, no extended light schedules.
And honestly?
She absolutely crushed expectations.
This entire run was another reminder that autoflowers do not necessarily need 18/6 or 24/0 to produce beautiful flowers and respectable yields. With proper environment, stable feeding, patience, and healthy roots, they can still thrive and deliver excellent results even under a no-veg approach like this one.
We started this project with three plants. One of them unfortunately became part of an overwatering experiment that eventually led to losing the plant around early-to-mid flower. While painful, it became an important educational moment. We documented the process honestly so growers could learn from it — what overwatering looks like, how roots respond, and what to avoid. If anyone is interested, those reports are still available further back in the diary.
The remaining two plants, however, grew with very little resistance. Easygoing, vigorous, resilient, and surprisingly adaptable considering the mixed environment and unconventional schedule.
And in the end?
372.1 grams dry from the two harvested plants.
For autoflowers grown under 12/12 from seed, mixed together with photoperiods, we are genuinely very happy with these numbers.
But beyond numbers, what truly stood out was the quality.
⸻
Drying Process
After harvest, the plants were dried whole for approximately 10 days.
The environment stayed around:
* ~20°C
* ~60% RH
During the first couple of days, humidity was intentionally kept closer to ~45% to help remove the initial excess surface moisture from the flowers before stabilizing the drying curve more gently afterward.
The slow dry helped preserve aroma, resin texture, and overall flower integrity beautifully.
And the smell coming from the drying room… incredible.
⸻
Hand Trimming — Slow, Sticky & Worth It
Once drying was complete, every flower was separated and hand-trimmed carefully using the Zamnesia scissors together with the Trim Bin setup.
Hand trimming takes time. A lot of time.
But it also allows a level of precision and care that machine trimming simply cannot replicate. Every bud gets individual attention. Resin heads stay more protected. Structure remains more natural. And honestly, it becomes part of the ritual itself.
Our fingers were absolutely coated in resin by the end of it.
Sticky gloves. Sticky scissors. Sticky everything.
The Trim Bin itself collected a beautiful layer of golden dry sift during the process, and naturally, none of that went to waste. Everything was collected carefully and stored cold for future enjoyment.
Even the smallest parts of the harvest deserve respect.
⸻
Curing — The Part Many People Rush
After trimming, the flowers were placed into Grove Bags for curing.
For larger harvests especially, these bags are honestly an amazing tool. The TerpLoc technology helps maintain the internal humidity in the ideal curing range of approximately 58–62%, reducing the need for constant burping while helping protect the flowers from excessive moisture swings.
This matters because curing is not simply “storing weed.”
Curing is the process where the flowers slowly stabilize and mature internally:
* chlorophyll continues breaking down
* harshness reduces
* aromas become cleaner and deeper
* terpenes settle and express themselves better
* smoke quality improves significantly
This is why we usually prefer allowing at least one month of curing minimum, while many flowers continue improving for two or even three months depending on the cultivar and storage conditions.
Patience changes the experience dramatically.
And Cosmic Noodles definitely rewarded patience.
⸻
Aroma & Smoke
Even straight off the trim, the first smoke test was already extremely enjoyable.
The dominant profile came through as:
* citrus
* floral notes
* earthy depth
* creamy herbal background
As curing progressed, the profile did not change dramatically — it simply became more refined, cleaner, smoother, and more layered.
The smoke itself leans toward the relaxing side. Comfortable, calming, peaceful. Not a “race your brain” type of cultivar, but more something to slow down with and enjoy properly.
A dedicated smoke review will eventually come separately, but first impressions are honestly fantastic.
⸻
The Final Flowers
The cured flowers developed beautifully over time.
Dense but still natural. Resin-rich without looking artificially swollen. Strong aroma retention. Sticky interiors. Frosty surfaces. And some truly beautiful structure throughout the harvest.
We are also sharing photos of the cured flowers after roughly one and a half months of curing so people can see how the flowers evolved after resting properly.
Because sometimes the real magic happens after harvest.
⸻
Final Thoughts
Cosmic Noodles Auto turned out to be:
* easy to grow
* adaptable
* resilient
* productive
* aromatic
* enjoyable from start to finish
And most importantly:
fun.
No drama. No impossible feeding requirements. No extreme sensitivity. Just a solid cultivar capable of producing beautiful medicine even under unconventional conditions like 12/12 from seed.
For us, this one easily earns:
⭐ 10/10 ⭐
⸻
Thank You
Huge thanks to everybody involved in this journey:
* the breeders and genetics teams
* the companies providing gear and support
* the platforms that allow us to document these grows
* the communities following along
* the OG followers who have been here since the beginning
* the new people just discovering the diary now
* the supporters
* the skeptics
* the silent viewers
* even the haters stopping by for five seconds
Love is still sent your way.
And of course…
special thanks to Mr. Baggy for accompanying us through the cure once again. 🍃
Because in the end, this was never only about chasing numbers.
It was about learning, documenting, improving, sharing experiences, and appreciating the process from seed to final smoke.
From grower to growers — much love. 🌱
📡 DELETED @ 1K Please stay tuned.we never quit https://www.youtube.com/@TheDogDoctorOfficial NEW 🙏 Thank you for your patience and continued support.
FOR DISCOUNT CODES AND MORE JUST FOLLOW THE LINK https://website.beacons.ai/dogdoctorofficial
📲 Don’t forget to Subscribe and follow me on Instagram and YouTube @DogDoctorOfficial for exclusive content, real-time updates, and behind-the-scenes magic. We’ve got so much more coming, including transplanting and all the amazing techniques that go along with it. You won’t want to miss it.
GrowDiaries Journal: https://growdiaries.com/grower/dogdoctorofficial
Instagram: https://www.instagram.com/dogdoctorofficial/
YouTube: https://www.youtube.com/@dogdoctorofficial Deleted by Youtube - https://www.youtube.com/@TheDogDoctorOfficial NEW
Vimeo : https://vimeo.com/dogdoctorofficial Under construction stay tuned ⸻
Explore the Gear that Powers My Grow
If you’re curious about the tech I’m using, check out these links:
🔆 Lighting & Environmental Control
• Future of Grow — Advanced LED lighting technology
https://www.futureofgrow.com/
DISCOUNT CODE: DOG20
• Lumiflora — Under-canopy LED lighting
https://lumiflorade.com/
• TrollMaster — Environmental controllers and automation gear (past collaboration)
⸻
Genetics
• Zamnesia Seeds — Genetics used in this project
https://www.zamnesia.com/
⸻
🌱 Soil, Substrates, Boosters & Root Support
• Plagron — Substrates, bio mixes, and supportive products
https://plagron.com/en/
⸻
🎒 Storage, Curing & Preservation
• Grove Bags — Curing and storage solutions
https://grovebags.com/
⸻
📸 Photography Equipment & Tools
(Not sponsors, but part of my creative toolkit)
• Sony A6700
• Sony full-frame macro lens + few more
• Stacking photography workflow - learning
• iPhone (for behind-the-scenes shots)
We’ve got much more coming as we move through the grow cycles. Trust me, you won’t want to miss the next steps, let’s push the boundaries of indoor horticulture together!
As always, this is shared for educational purposes, aiming to spread understanding and appreciation for this plant. Let’s celebrate it responsibly and continue to learn and grow together.
With true love comes happiness. Always believe in yourself, and always do things expecting nothing and with an open heart. Be a giver, and the universe will give back in ways you could never imagine.
💚 Growers love to all 💚
📸 P.S. – The Eye Behind the Lens
All photos in this diary (for now — except for the ones showing the camera, which I took with an iPhone) are taken with a Sony A6700 paired with a Sony full-frame macro lens and a few more.
Photography is part of the story — it’s how we share the fine textures, the glow, and the quiet details that words can’t always capture.
I’ve also started experimenting with photo stacking — a technique where multiple images, each taken at a slightly different focus point, are layered together to create one perfectly sharp image from front to back.
It’s not digital enhancement or AI; it’s pure photography — a way to reveal the plant’s beauty in microscopic depth, from trichome to petal.
You’ll even see a few shots of "ghost me" capturing the shots — camera, lens, setup — because every grow deserves not just to be cultivated, but documented like art.
FOR DISCOUNT CODES AND MORE JUST FOLLOW THE LINK https://website.beacons.ai/dogdoctorofficial
NEW DISCORD - Official Server Invite Link : https://discord.gg/ksjAkA5T74
Likes
18
Share


@Jays_Not_Here_Man
Follow
Week 1 (Day 7) Flower- Running with the Indo nutrient line, easy to use, 3 bottles. They were recommended from the friend I got the clones from, and his did great. The girls started to stretch immediately, waited till day 7 flower to start the Flowering nutrient dosages.
Setup:
2x4x5 AC Infinity Tent
X2 LED 600 watt (blurples ☹️)
X2 6” clip on fans for canopy and light heat
Floor fan pushing fresh air from the bottom
Vivosun 4”in-line fan/12” carbon filter
Humidifier in the tent
Dehumidifier In the lung room for excess Rh
Timers set to 11 hours 💡/ 13 hours 🌜💤


Processing
Likes
38
Share


@STAYINGONMYMAINCBATORUNTWO
Follow
Still forming her delicious buds had a lot of heat problems can’t seem to keep them down below 34 reaching 36c highest! 😮 I’m trying different things everyday but I think if I don’t fit ridge vents or tile vents I’ll be having more dramas with this heat! Unless typical UK gives us rain then I’ll be happy lol
I’ve added some examples of my heats in the tents the blue one (blue illuminate) is the bananan glue the first yellow one is the fast flowers second is the autos! I have 2 coolers an extraction fan and another fan to blow the heat towards the extractor but still can’t bring it down! I think I’ll go back to my old way until the summer passes on the next ones which are in germ btw! Looking to rotate a harvest every 4 weeks from when I harvest the autos! Wish me luck please buddies the struggle is real!