
Likes
Comments
Share


@SmokingTiki
Follow
Last week I thought that the 50cm distance between the light and the top of the canopy was ok. But this week, I get some signs of light burns on every plants and I decided to put it back to 60cm. This distance seems to work best for this grow.
I think the Cashew Kush shows some slight signs of nitrogen deficiency so I added a bit of BioGrow (1ml/l) and hope it will help.
For more info about the "Soil people", see week 9.
As part of the "Tent-X Ultimate Grow Challenge" contest, I received a free Tent-X controller, a MBS-TH Humidity/temperature/light sensor and a LMA-14 light control adapter. I requested them on sunday and get them on thursday so it was super fast, thank you @TrolMaster_Europe ! 👌
-------------------------------
Controller + MBS-TH review
-------------------------------
The Tent-X controller combined with the MBS-TH sensor provides information about temperature and humidity. The light detector of this sensor is used to trigger the day/night mode of the Tent-X controller but doesn't measure light intensity (you need another sensor for that).
I've tried to connect the controller to the phone app and it seemed to work. I will not use this function because it requires to connect the controller to the internet with an Ethernet cable and I don't have an Ethernet plug in my grow room. I set-up a rudimentary fixation system to hang the controller and the sensor since I'm not growing in a tent, but it works haha. Now, I can make my measurement in the center of the canopy instead of making them just above the ground.
----------------------------------------
LMA-14 light control adapter review
----------------------------------------
This adapter allows you to control your light via a RJ45 cable. I'm not using it because my light and my fan are synchronized and my fan cannot be controled by a RJ45 cable. I don't want to have a timer for the fan and a controller for the light. I just use the timer for both. However, Trolmaster sells some plug sockets that can be controled by RJ45 cable so you can control everything with your Tent-X controller.

Likes
2
Share

@Bdog7878
Follow
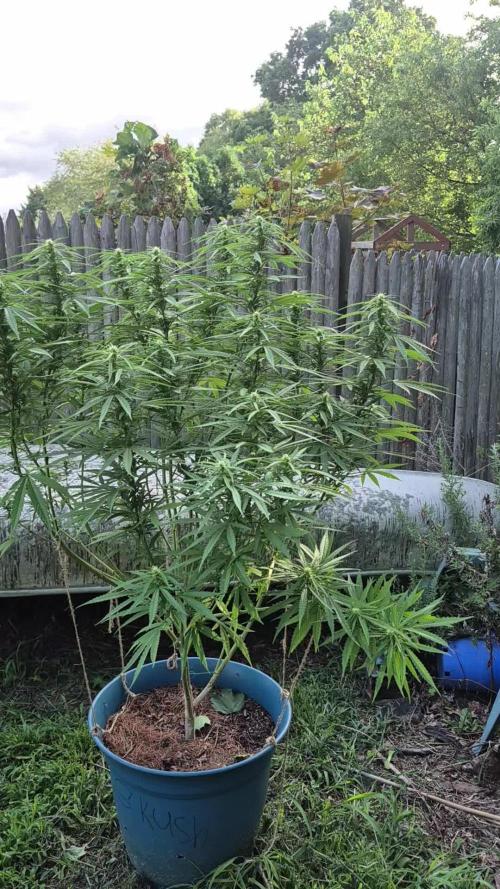
So over all there all doing ok. I've had some issues with bud rot on auto i lost 2 more buds. I'm going to harvest it this weekend 2 more days its ready it smells great. Last week I found some yellowing leaves which prompted me to buy a soil ph tester. I had a bit high ph on both orange punch at 8 ph and around 7.6 on the dynamite desiel and 7 on the og kush. I ordered ph down but by time it got here the ph has come down on everything but 1 dynamite. We had some rain 2 days im thinking that dropped it a bit idk but the yellowing has stopped and they all look healthy just a few left over yellowish leaves. I've also bought a water ph tester it came today but ill be testing my nute solution from now on. All ph was between 6.2 and 7 except the one desiel was at 7.8. The orange punch 1 is budding up real good #2 is slightly behind. The dynamite are both starting to show flowers but are about 2 weeks behind the orange and the og kush is somewhere in between.the orange punch definitely has a citrus smell to it for sure its strong


Likes
8
Share


@McGrowin
Follow
Day 57 and looking forward to harvesting. Hoping to dry slowly. Gotta chop with others all at same time, so just waiting on this girl to wrap up.
What do you think - she about ready for harvesting?
Harvest day 60
Found seeds, nanners and pollen sack - fucking lame. we grow again another day!
Likely will make bubble out of this stuff.

Likes
22
Share


@Psicultivo
Follow
Primera semana de floración; he usado por primera vez rhino skin el cual lo use solo con el riego de agua, deje reposar 2 hrs antes de regar para una mejor dilusión, hasta el momento todo en perfectas condiciones, no se ven carencias y las plantas conservan muy bien su color.
Problema de iluminación; tuve problema con el foco de sodio (HPS) el cual estaba quemado, así que decidí probar iniciar las 2 semanas primeras semanas de floración con el foco de haluro metálico para ver que diferencias hay con respecto al otro foco, me decidí a probar solo parar ver si hay un poco mas de masa vegetativa en las primeras semanas de floración, estuve leyendo y a esto le llaman "floración a lo yankees" sera cierto? no lo se en realidad.
Habrá que esperar resultados durante las próximas semanas, saludos! 👽


Likes
12
Share


@RookieGrowerTH
Follow
Get back on track since I was busy.
Now I flip them to 12/12 this weekend
18/06/23
I got report from my friend who grew the Dante and OSDxPablo from the same package of mine that half of them turn to Hermies
I am thinking to cut some of the out soon as the show the sex if some of them in my grow tent be hermie
Likes
7
Share


@Weedganja420
Follow
Muy buenas!!
Asi va esta bonita cepa!
Muy indica y chatita ahunque ahora que tenemos menos horas de luz se ve como va estirando mas.
Ya se ven los primeros pistilos, vamos a ir viendo como se forman esas flores!!


Likes
17
Share


@Zanto
Follow
Day 32 of flowering
Looking good, Delta 9 reacted nicely and now Im combining guano and organic sugar.
Autumn is here and fresh air with low temperatures are excellent coworkers for the final cut.


Likes
20
Share


@LaGrassaFarm
Follow
Espero que hayáis pasado buena semana! Las plantas sí, como se ven, siguen felices.
Antes de entrar en floración, le realicé una defoliación, que se recuperaron genial. No mucho más que contar, han estirado un poco, que lo seguirán haciendo durante dos semanas más.
Un saludo y que paséis una buena semana, buenos humos!🙌

Processing
Likes
3
Share


@Ogbangbang2981
Follow
right now I'm just waiting on some pollen sacks and some pollen but other than that plant looks healthy as we can see and I also changed my lights and my schedule to 12/12 . Feeding big bloom and tiger bloom with a lil secret ingredient and lots of bat poo noticed a seed think we talked about that before looks like imma plant this seed if my pollen sacks don't kick in on time which time is almost up.al I'm also waiting on my crystal to start forming I see it coming In but has a few weeks to fully brighten up the night recording

Likes
37
Share


@Roberts
Follow
So the cbg pretty much didn't make it all 3 tries. There Is still a little bit on one plant of the cbg in pictures. I doubt it makes it. So I stuffed the air tube thru it a week ago, and I stuck a home brewed sour diesel from oasis seeds, with north lights from seedsman both autoflowers. So far its growing, but slow. It should continue. I just set ph, and a light nutrition feed after that. She is propped up to allow the straw access to air on both ends. I forget in these little potters that extra air helps a ton. Is likely why I did not have any luck with the CBG. I will get it again when I win some seeds. She is under the Mars hydro FC4800 light. So far its alive. Thank you Mars Hydro, and my reckless not contained properly attemptat crossing strains for a first mix. This was from my early days when I started growing😂🌱👍. 🤜🤛🌱
Thank you grow diaries community for the 👇likes👇, follows, comments, and subscriptions on my YouTube channel👇. ❄️🌱🍻
Happy Growing 🌱🌱🌱
https://youtube.com/channel/UCAhN7yRzWLpcaRHhMIQ7X4g
Likes
12
Share


@Northernlights
Follow
Ich bin mir nicht sicher wann ich sie ernten soll... ist es jetzt schon zu kalt? Helft mir mal bitte
Danke im Voraus
Lg Jan
Likes
3
Share


@theicyeffect
Follow
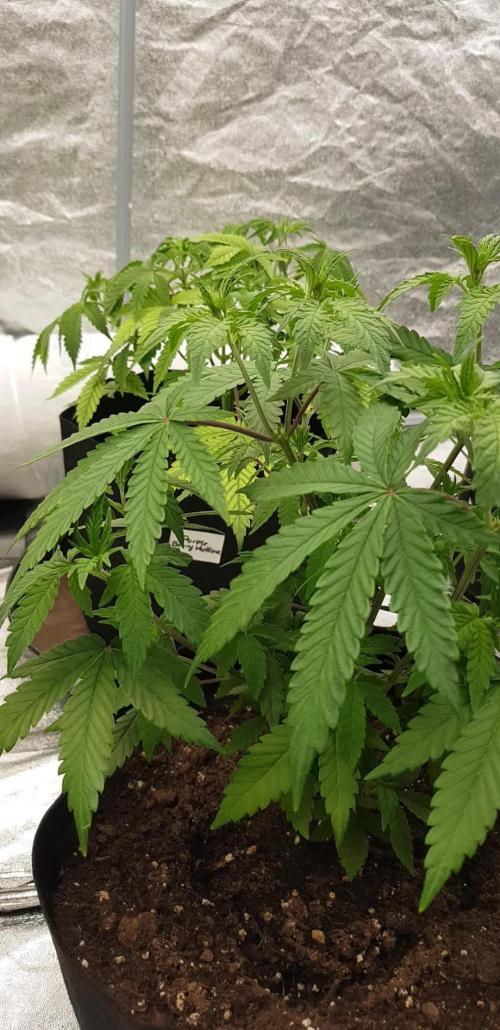
Last week Veg completed.
She has grown into a very robust structure and is at peak health. Can definitely see the results of the LST, since we’re going into flowering with many developed shootings that will manage to reach the top with no issue. Choosing to train when working with small spaces is a no brainer.
Temperatures are starting to get lower as days go by too, which is great news.
Looking forward to watch this gorgeous girl flower 🤩

Likes
24
Share


@DeepRootsGrowTrees
Follow
SWISS DREAM ROSE CBD 🌹 AUTO ORGANIC GROW
WEEK #12 Overall
Week #9 Flower
This CBD plant is 👏 amazing first she's just a beautiful plant with her dense purple buds that just pop with the orange hairs and trichomes she even has a nice aroma about her. She's got a few weeks left. Stay Growing!!
Kannabia.com
SWISS DREAM ROSE CBD AUTO
Likes
25
Share


@FabioFobia
Follow
Incredibile!!! Ogni giorno dalla cistera svanisce più di un litro d'acqua.
Questa settimana sono sceso a livelli accettabili di EC.
La casa incomincia ad avere un profumo fantastico: tartufo dolciastro all'arancio, una delizia...
I due genotipi continuano a manifestare tratti diversi: la pianta posizionata a sinistra ora sta colorando di magenta le sue foglie ed emana diesel dolcissimo, mentre la pianta posizionata a destra rimane del suo colore ma ha un odore più terra e agrumi.

Processing
Likes
10
Share


@Barcelona_Farmers710
Follow
Bueno entramos en semana 3 de flora... pasaremos usar pl booster y esperemos poder pasar led antes que acabe esté cultivo. El calor lo hace insoportable para las plantas están bastante resentidas a ver que tal sale! Salut y força al canut farmers!🔥
Likes
23
Share


@Ferenc
Follow
Day 65, 17th of November 2020:
Strong lady!
I was angry with me because 2 x managed to break bud sites....🤫🤐
She is so fragile but all good still looks good these one smaller sides so luckily nothing serious damage.
Streching stopped or not she my strech a bit more....buds are on the way now haha
Some lollipopping (defoliation) has been done and also removed all the old LST's as the plant remains in shape from now.
And then after if you look at my pictures she has a crazily twisted main stalk and the plant is like the Leaning Tower of Pisa..... 🤣🤣🤣
So I needed to balance a bit and try to bring back to be normal..... haha
Fertilization is still the same like before happens every 2nd day with the ratio and mix above.
The lamp is on 11.30 min and off 12.30 min.
Last week was 15 min longer light cycle....
So every week 15 min shorter light cycle until the 5th week. So far -30 min. It switches on at 6 am and off at 17.30 pm.

Likes
11
Share


@Inceptionist
Follow
Soo, I think I can start to call it the first week of flower. #2 definitely is showing a few white pistols, #1 is just starting her first set and I'm pretty sure #3 will shoot them out any day!
Also seems that removing the lowest two side branches of #1 was a huge success! She basically is the same hight as the others BUT I LST her a bit to expose the smallest side branches out of the three to more light! Also, I put a little elevation for her, so they stay the same high.
#3 is doing #3 things and continues to grow rapidly. Topping her was the right move I think.
I'm quite new to autoflowers (I mean pretty much in general but I had one random regular seed run before this but that's it) so I hope, I didn't call it too early but I'm positive:)
Also my new microscope and the Blumat drip irrigation system finally arrived. I heard it can be a bit tricky to get it running but once it runs, it should run like a charm. Very very excited for this since I'm planning on going living soil in the future, which should fit very well together.
Before installing the system, I removed the first set of true leaves of #1 and buried the wounds in soil. I hope she will build roots there.
With #2 I took scissors and scratched up the main stem and filled it up with soil. As well I hope for more root growth. #3 just got a little bit more soil without any extras because of the topping.
After doing all that, I watered with the BioEnhancer. I took 0,5g/l and around 1,5l in total.
Quite a lot of update for just one day haha. Flowerpower baby!
Didn't really have the time for further updates besides pictures. I did defoliate all 3 a little bit and keep fine tuning the Blumat. I think it's working quite well so far.
#3 has some little spots looking different but nothing major I feel. I'm more worried about #2. Her tips start to yellow up a little. I hope it's because she grew too fast into the lights and now where I pulled lights back up to 35cm, she will be fine again

Likes
4
Share

@GERGrowDesigns
Follow
Welcome to Veg Week 5 of Sweet Seeds Strawberry Cola Sherbet F1
I'm excited to share my grow journey with you from my
Sweet Seeds Project . It's going to be an incredible ride, full of learning, growing, and connecting with fellow growers from all around the world!
For this Project , I’ve chosen the Feminized Photo strain Strawberry Cola Sherbet F1 :
Here’s what I’m working with:
• 🌱 Tent: 120x60x80
• 🧑🌾 Breeder Company: Sweet Seeds
• 💧 Humidity Range: 60
• ⏳ Flowering Time: 7weeks
• Strain Info: 18-22%THC
• 🌡️ Temperature: 26
• 🍵 Pot Size: 0.5l
• Nutrient Brand: Narcos
• ⚡ Lights : 600W x 2
A huge thank you to Sweet Seeds for allowing me to try my Best with this amazing collection from Photo Strains they managed to Sponsore . Big thanks for supporting the grower community worldwide! Your genetics and passion speak for themselves!
I would truly appreciate every bit of feedback, help, questions, or discussions – and of course, your likes and interactions mean the world to me as I try to stand out in this exciting competition!
Let’s grow together – and don’t forget to stop by again to see the latest updates!
Happy growing!
Stay lifted and stay curious!
Peace & Buds!