
Likes
Comments
Share


@sirstickyfingers
Follow
Good week, seeing alot of growth sites but they are all still short af. IM not sure if i should worry how short these girls are or not since they seem healthy??? They look healthy and seem to be liking what I been doin. Watering 1.5 liters per plant every 3rd day at 6.5 ph. IM still torn about transplanting to a 5gal a week before flower or just keep amending my soil with top dressing, I am open to opinions and or thought from anyone reading this on tips, what you would do or recommend


Processing
Likes
24
Share


@DaddyPrime
Follow
7/19 shes starting to fill out more around the top. I keep thinking about what she'll look like with buds on her
7/21 watered and took pictures
7/22 she has most her dark green color back. She was hungry for nitrogen for awhile and shes responded nicely

Likes
48
Share


@Stork
Follow
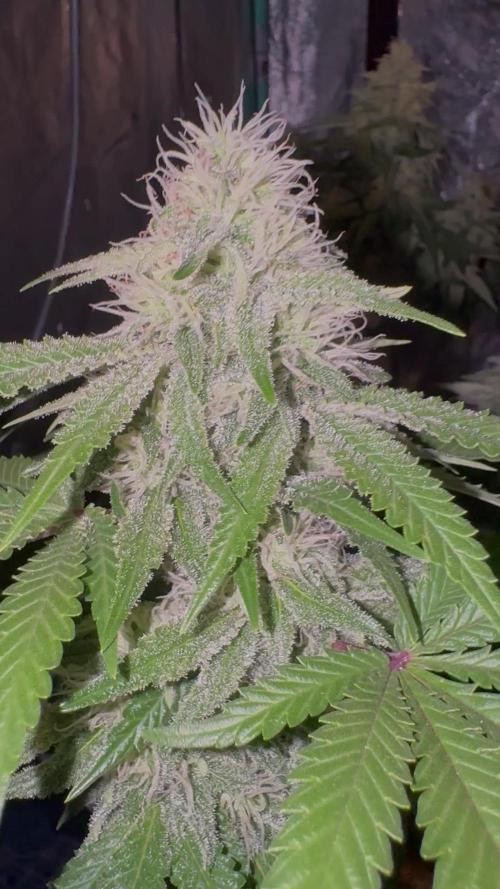
It was very easy to grow as a super-strong nothing can hurt her for nut burs u need to do it way over so she starts to get burns well for my first DWC I love it buds are amazing even not experienced like me can grow her perfectly I can't wait to try and smoke here 😎😎🤩😘

Likes
26
Share


@420DeepGrow
Follow
Gracias al equipo de Seedsman y XpertNutrients sin ellos esto no sería posible.
💐🍁 Bubba Cheescake:
Bubba Cheesecake es un cruce de Bubba Kush anterior al 98 con Cheese Cake (Wedding Cake x Exodus Cheese). Se trata de un híbrido 70% índica con muy buenos rendimientos, alto en THC y bajo en CBD. Bubba Cheesecake prospera en interiores y exteriores. En interior se aconseja un corto periodo de crecimiento vegetativo debido a la cantidad de estiramiento que presentan las plantas. Las plantas pueden crecer hasta una altura de 250 a 350 cm. cuando se deja crecer naturalmente al aire libre. En interior, la floración dura entre 60 y 65 días, con rendimientos entre buenos y altos, de 400 a 550 gr/m2. Las plantas de exterior son capaces de producir entre 700 - 800 gr. peso seco. En las latitudes norteñas, en exterior, los productores pueden esperar cosechar a principios de octubre. Los cogollos son grandes y duros como piedras. Las plantas maduras muestran atractivos colores púrpuras y azules y brillan con una resina pegajosa que cubrirá las manos del cultivador si no tiene cuidado. El componente Wedding Cake agrega dulzura al sabor del regaliz y el aroma es terroso y musgoso. La producción de THC es muy alta con un nivel bajo de CBD. El efecto es intensamente narcótico, fuerte y duradero.
🌻🚀 Consigue aqui tus semillas:
🍣🍦🌴 Xpert Nutrients es una empresa especializada en la producción y comercialización de fertilizantes líquidos y tierras, que garantizan excelentes cosechas y un crecimiento activo para sus plantas durante todas las fases de cultivo.
Consigue aqui tus Nutrientes:
https://xpertnutrients.com/es/shop/
📆 Semana 9:
No ha sido una gran semana respecto al tiempo pero el incremento de nutrientes le ha venido muy bien
Continuo con la dosis recomendada por el fabricante.
Likes
29
Share


@GrownwithLED
Follow
During week 14 all my 'Fruity Terp'-ladies are continuing to flower and develop bigger and bigger buds. I have raised the EC-value in my 'FLEXITANK'-reservoir to 1,8 by adding more BIO NOVA nutrients. Now in full flowering my babies get VITASOL added to their other nutrients and THEY LOVE IT. The plants have a nice healthy dark green color, except one plant of THE PURPS from BC-BUD-Depot. This beauty is PURPLE as hell, she has purple colored leaves as well as buds! You can clearly see her in the pics...lol 👊😎 The plants exude a very fruity smell now, which is DELICIOUS! My two SANlight EVO4-120 LED-lamps are running on FULL POWER and do excellent in nurturing my trichome production! I SIMPLY LOVE THEM! The super-cropped plant of Strawberry Sour Diesel from DevilHarvestOriginal is doing well, she has a main-stem that is angled at 90 degrees now (see in pics). This way the buds will turn towards the light and can continue to grow in opposite to a topped plant.


Likes
25
Share


@JonnyKush
Follow
Hello friends! day 60! following your advice I applied the cropping in order to bring the tops back into the light and I wanted to try adding ADV nutes to integrate a little! apart from this extreme elongation everything seems to be going the right way! thank you very much for stopping by, leave a like and some advice! happy day and great growth 🌱💚

Likes
57
Share


@Kmikaz420
Follow
Je passerai demain pour remplir les commentaires j ai actuellement pas mal de travail à couper/trimer 😀 et le tous sur une jambe ..merci de votre compréhension..
Et voilà une de moins la 1ere dos-i-dos de batney à été couper et cette plante a fais les tête les plus compacte et dur que j ai jamais vue je pense être pas loin de la vérité en disant qu il doit y avoir 120g.. 150g sec sur cette seul plante ;) affaire à suivre ..je rajouterai des photos demain )les photos avec flasch ne rendent pas service aux plantes;)
Enfin on t est la recolte !!!! La strawberry x gorrila seche avec les dos i dos et la gorrilla x purple punch
Les 2 cherry cola ont été trimer et mis en bocale pour curring
Cherry cola 1= 88g
Cherry cola 2= 83g
Gorrila x purple punch = 40g
J ai pas mal de travail je mettrais le journal à jour au fur et à mesure ;)
Likes
112
Share


@Tropicannibis_Todd
Follow
ALRIGHTY THEN
REMINDER I DO 2 UPDATES PER WEEK 👉WEEKLYROUNDUP👈👉MIDWEEKLY UPDATE👈
We just hit week 7 and all is well , have to admit she been a little bit of the runt of the litter ,But not any longer she's really coming in well starting to fill the pot and has exploded into flower mode 😃 .......
So just waiting on that stretch, she's already producing some nice frost 👈......
I've been doing LST on her baby Sister and it's coming along very well , I plan to do a little defolation later in the week 😏
rain water to be used entire growth
Her little sister is about 5 weeks now at 35 days from seed ...👈
Lights being readjusted and chart updated .........👍
I GOT MULTIPLE DIARIES ON THE GO 😱 please check them out 😎
CHECKOUT MY GROWMIE Green_fiend 👈 AS HES JUST A WEEK OR TWO FROM HARVEST ON HIS AFGHAN KUSH DIARY 👈
👉IF ANYONE IS LOOKING FOR A PLACE TO HANGOUT VIA GROWDIARIES AND TALK GROWING AND JUST CHILL AND WHATEVER .....👈
👉I CREATED GROWDIARIES DISCORD SERVER !!!!!!!!!!!👈
LINK IS 👉
https://discord.gg/zQmTHkbejs
AND SEE HOW IT PLAYS OUT !!!!!!!
Likes
25
Share


@Organic_G
Follow
Die Ladys haben sich gut gefangen und erholt. War zwei Wochen in Urlaub, mein Kollege war nur zwei mal gießen und die wachsen super… bisher scheint die Topfgröße und das Volumen von 300L + gut zu laufen 😎 bin mehr als gehyped wenn die fertig sind… denke mache morgen ein scrog Netz drüber und breite die maximal aus bevor es in die Blüte geht


Processing
Likes
3
Share


@Dico29
Follow
Day 136.... buds are swelling and looking nice, don’t really do much beside chill in my closet with my other plants but all in all it’s great smell and destroys all my chances of smell control, which is very little to a point of non existent
Likes
1
Share

@Franco123
Follow
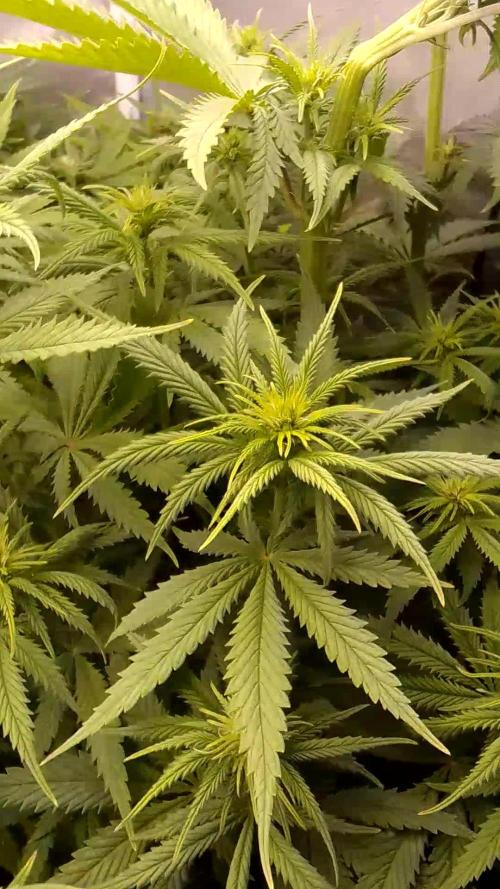
hi, the plant is growing well but this week it has shown its sativa side, stretching with some heads upwards more than the others and on one I had to do a super crop to keep it from burning from the lamps, I don't want to turn up the lights because the other plants are fine like that and if I move the lights away they will have stretched too, the smell has increased and I think she's the one who smells like sweat/cheese and who I'm curious to taste
Likes
143
Share

@Hologram
Follow
Ok my friends, i have to end this growing season with a bit smaller wedding party than planded.. becouse nasty weddingcrashers who came
have ruined the cake! (caterpillers, blackflies, spidermites and mold!!💀)
At first i thought i had to cancel the whole party.. but i could, luckily, still save a small amount of buds...(very small, most of it i had to throw away 😿)
Those i had, luckily, already cut off days before(tshtf)..i was affraid to vape it but(mayb make oil from it) luckily, when it was dry i could see it was safe enough to vape👍
..its a pity but no worries, love conquers all! 😻
This cake is so sweet, gonna save this for xmas😇
happy growing for all ✊
smoke/VAPE REVIEW:
Wedding cake is a beautiful name for her becouse my eyes are getting abit teary 😂..and i have a feeling of bliss and unconditional love for all 😘
Chronic pain fades to the background for a while too.. (I feel its still there but do i still care? 😎)
Im Just being very relaxed with feelings of serenity and contentment..
I feel like this hibernation this winter is gonna b over as quickly as a.. honeymoon!😚

Likes
22
Share


@SolitudeCorners
Follow
So impressed with all these amazing colors and terpenes cant wait to smoke!
Feeding💪
10/3 Water32L+Rootdrip10ml+Calmag@150ppm
Ph6.1
Ebb
Repel 9.30/10
Refresh 11.30/14
Average runoff ph6.4 ec2.8
Clone
Repel 10.05/10.25/10.50/11.05
Refresh 12.30
10/4 Water34L+Rootdrip10ml+Fultilt50g+
Ec0.8 ph6.2
Ebb
Repel 10.15/10.48(3min)
Refresh 12.30/14.30
Average runoff ec2.4 ph6.4
Clone
Repel 10.30/10.45/11.20/11.50
Refresh 14/14.30/15.30
Average runoff ec3.3 ph6.3
10/5 Water32L+Purpinator60ml+Calmag170- 240ppm ph6.1 ppm240
Ebb
Repel 10.2/10.32
Refresh 12/13.30
Average runoff ec2.4 ph6.4
Clone
Repel 10.2/10.30/10.50/11.05
Refresh 13/14/14.30
Runoff ec2.6 ph6.4
Keeper 400ml
10/6 Water32L+Rootdrip10ml+Fulltilt36g+calmag ec0.8 ph6.2
Ebb
Repel 10.10/11
Refresh 12.30/14
Average runoff ec2.2 ph6.4
Clone
Repel 10.10/10.30/11
Refresh 12.30/14.15/15
Average runoff ec2.6 ph6.4
Keeper
300ml
10/7 Water35L+calmag@150ppm+Purpinator80ml
0.3ec ph6.1
Ebb
Repel 11.05/11.48(3min)
Refresh 13.20/14.50
Average runoff ec2.2 ph6.4
Clone
Repel 11.15/11.35/11.53/12.33
Refresh 14.20/15.20
Average runoff ec2.5 ph6.4
10/8 Water35L+Rootdrip+Fulltilt40g ec0.8 ph6.2
Ebb
Repel 11.38(3min)/12.20
Refresh 13.30 /15
Average runoff 2.3ec ph6.4
Clone
Repel 11.35/11.55/12.10/12.40
Refresh 14/16
Average runoff ec2.4 ph6.3
10/9 Water35L+Rootdrip30ml ppm40 ph6.1
Ebb
Repel 9.05(3min)/9.55
Refresh 11.35/13.35
Average runoff2.1ec ph6.3
Clone
Repel 9.35/10.10/10.35/11
Refresh 12.35/14.30
Keeper 400ml per [email protected]
Likes
16
Share


@Canadian
Follow
This girl it is a very resilient client has only received mistreating him from me I have them all tied up like a bouquet of flowers came in then no space to breathe and no place to move because it has such an incredible stretch and growth that it was taking over the light of the entire tent despite being a back up plant that I put in the same planter with another string that I thought I was going to lose her this one is very strong and I have not allow her to develop properly so it is very Bushy plant I am not sure if it’s me or is the strain of plant nevertheless it has a very vigourous growth thank you for reading I will continue to update have a happy grow

Likes
11
Share


@CanarianGrow92
Follow
Week 3 for the purple banana punch from our favorite autoflower company, of course fastbuds 420!
All looks quite good at the moment.
This week we gave bloom, root, silica, calmag amino, sugar shot, sticky fingers and bloom booster all from xpert nutrients!
Likes
9
Share


@MacBrGrow
Follow
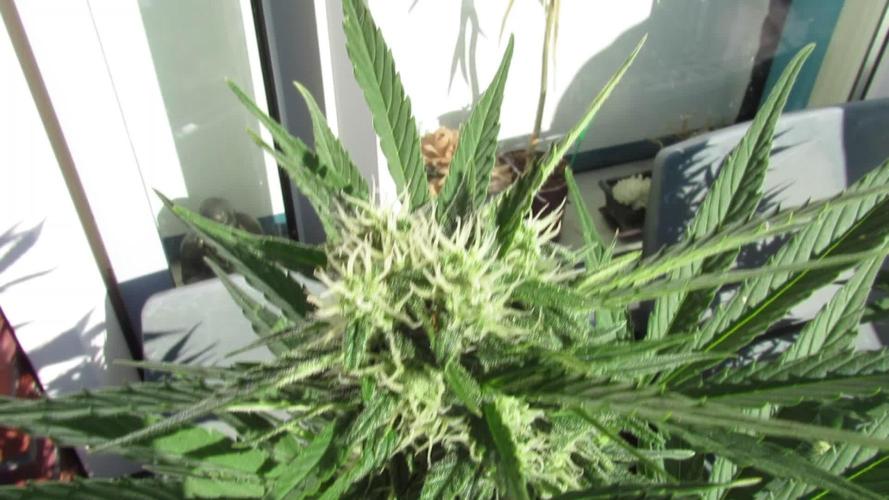
this week I did the top pruning to increase the production of the lower shoots to serve as clones when they are put to flower


