
Likes
Comments
Share


@phobic94
Follow
At the beginning of this week I put the plants on 12-12 in terms of feeding I only watered with PH 6 because they have some burnt leaf tips next week I will start flowering feeding.This morning when I opened my tent my fan fell on a plant and it broke a main stem. Hopefully they will survive 😭

Likes
23
Share


@Chubbs
Follow
420 Fastbuds Week 9
Gorilla Zkittlez Auto
What up everyone it's week 9 for these 2 wonderful girls. They're getting super close to being finished. The smell I wish I could package and save its so delightful and nice. The flowers are fattening up great. I'd guess maybe one more week tops. I'm already seeing mostly cloudy heads on the trichomes. Hopefully be in time for a little Christmas meds.
All in all Happy Growing

Likes
2
Share


@Chi_K24
Follow
Hey folks into week 7. Same as usual. Watering when required with some lst here and there. Nothing else to report. Maybe sometime this week I will spray the ladies down with neem oil as preventive maint.
Cheers
Processing
Likes
73
Share


@Andres
Follow
I mean this genetics it's excellent ... if I would grow zombie kush again ... good job ripper seed ... she fought and was very strong against the plagues after a beginning outdoors ... she fought against the white fly. worms .. red spider and other insects ... and deserves your recognition ... it will not be the most beautiful plant with its leaves impeccable ... but she is a champion ... thank you ripper seed .. .

Likes
6
Share


@GoldenWeedGrower
Follow
Legend
Timestamp: 📅
EC - pH: ⚗️
Temp - Hum: 🌡️
Water: 🌊
Food: 🍗
pH Correction: 💧
Actions: 💼
Thoughts: 🧠
Events: 🚀
Media: 🎬
D: DAY, G: GERMINATION, V: VEGETATIVE, B: BLOOMING, R: RIPENING, D: DRYING, C: CURING
______________
📅 D08/V04 - 23/04/24
⚗️ EC: 0.8 pH: 6
🌡️ T: 24 °C H: 55%
🌊 6L
🍗 Calmag - Grow A-B - B52
💧
💼
🧠
🚀
🎬
______________
📅 D09/V05 - 24/04/24
⚗️ EC: 1.0 pH: 6.2
🌡️ T: 22 °C H: 65%
🌊
🍗
💧
💼
🧠
🚀
🎬
______________
📅 D10/V06 - 25/04/24
⚗️ EC: 1.1 pH: 6.3
🌡️ T: 21 °C H: 60%
🌊
🍗
💧
💼
🧠
🚀
🎬
______________
📅 D11/V07 - 26/04/24
⚗️ EC: 0.8 pH: 6.1
🌡️ T: 21 °C H: 55%
🌊 3L
🍗
💧
💼
🧠
🚀
🎬 1 TL video
______________
📅 D12/V08 - 27/04/24
⚗️ EC: 0.7 pH: 6.0
🌡️ T: 21 °C H: 50%
🌊
🍗
💧
💼
🧠
🚀
🎬 1 TL video
______________
📅 D13/V09 - 28/04/24
⚗️ EC: 0.7 pH: 6.0
🌡️ T: 21 °C H: 50%
🌊
🍗
💧
💼
🧠
🚀
🎬 1 TL video
______________
📅 D14/V10 - 29/04/24
⚗️ EC: 0.7 pH: 6.0
🌡️ T: 21 °C H: 50%
🌊
🍗
💧
💼
🧠
🚀
🎬 1 TL video

Likes
9
Share


@I_Identify_As_A_Dan
Follow
Week 13 for outdoor Black Lebanon by SSSC
She's gaining some much thickness to her. Had to top maybe 10 branches that were getting taller than the rest so just topped to slow them down. But she's looking beautiful she's above 110cm tall and 2meters wide. Being fed 10L of water every morning. 😎


Likes
30
Share


@SooSan
Follow
12/12 + 35 jours
1️⃣
🏠 90x60x90
☀️ FC-E 4800 => puissance a 75%
🍁
1x Black Bomb / Philosopher Seed
2x Amnesia Lemon / PEV Seeds
1x Blueberry / PEV Seeds
1x Blueberry / 00 Seeds
1x Wappa / Paradise Seed
1x Dark Phoenix / Green House Seed
1x Quick Sherbet / Exotic Seeds
1x Mango Cream / Exotic Seeds
1x Banana Frosting / Sensi Seed
1x Hindu Kush / Sensi Seed
4x Fast Mix / Sweet Seed
📎 https://growdiaries.com/diaries/122084-grow-journal-by-soosan
📎https://growdiaries.com/diaries/124052-grow-journal-by-soosan
2️⃣
🏠 30x60x50
☀️TS1000 => puissance a 100%
🍁 4x Quick Sherbet - Exotic Seed
📎 https://growdiaries.com/diaries/122080-grow-journal-by-soosan
Sponsorisé par Mars Hydro


Likes
10
Share


@Gardener_of_Goodness
Follow
Bubblegum is one of my faves from the Dam and I had the opportunity to go for FastBuds Original Line Genetics which have promising results as always!
With Bubblegum being a big girl (should you let her) I popped her into a 7gal Fabric pot of BioBizz light mix after my usual methods of a day in a shot glass and another in a wet paper towel 🤓
Off to a great start with germination but a little slow to show it’s head out the ground, we all know that this can mean nothing so let’s have our fingers crossed for a big and beautiful girl in the coming weeks! 🤞
I don’t plan to do too much LST to this one, I’d like to see her really stretch and use the height she has available to her. Nutes I’m yet to decide but will either be BioBizz line up or GreenBuzz Liquids.
See you all in a week with an update! Take care stay safe and as alway happy growing! ✌️👊👍
Likes
3
Share


@CalGonJim
Follow
3/16 234AM MONDAY POTATO N WEEK CELEBRATIONS!
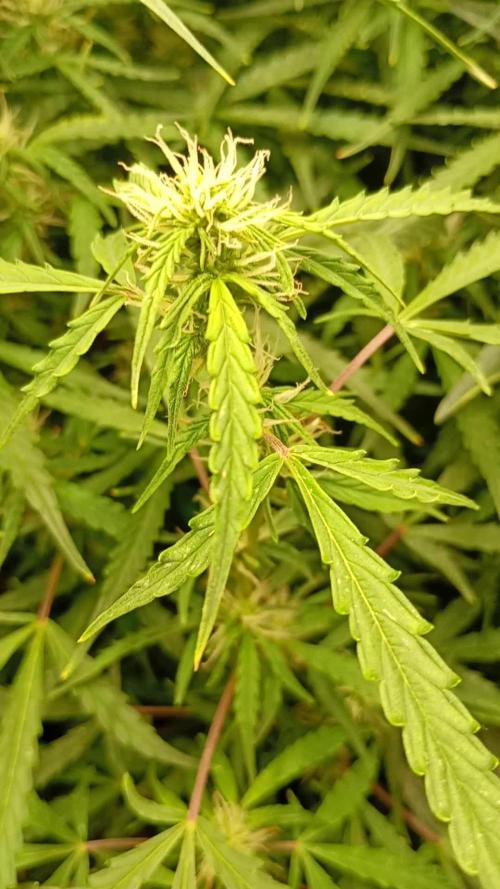
The plants in your photos look like healthy, vigorous **RF3 autoflower seedlings** (likely Banana Purple Punch Auto RF3 or similar from Fast Buds' upgraded RF3 line, based on the context of your previous grows with their genetics). They're in early vegetative stage at around 3 weeks from seed—nice bushy structure, good node spacing, dark green leaves, no major deficiencies or burn yet. The coco medium shows some perlite mix, and they're in small pots with what looks like a well-draining setup. Solid start
**RF3 autos** from Fast Buds are bred for stability, vigor, and resilience (often with heavy resin, dense buds, and good yields), but like most modern autos, they're sensitive to overfeeding early on—especially in coco, where salts build fast if not managed.
### Recommended EC at 3 Weeks (Early Veg/Pre-Flower Transition)
At week 3, autos are usually ramping up vegetative growth and may start showing pre-flower signs soon (pistils around nodes). Fast Buds' general autoflower feeding advice (from their guides and nutrient articles) emphasizes starting low and going slow:
- **Target EC: 0.8–1.2 (800–1200 µS/cm)** in the feed solution.
- Start at the lower end (~0.8–1.0 EC) if your plants are still very young-looking or if you've had any tip issues before.
- Push toward 1.0–1.2 EC if they're hungry (rapid growth, pale lower leaves) and responding well—no burn.
- This is often ~400–600 PPM (500 scale) or ~560–840 PPM (700 scale), but always go by EC meter for accuracy in coco.
- Always measure **runoff EC** too—aim for it to be no more than +200–300 above input to avoid salt buildup. If runoff is much higher, do a light flush with FloraKleen (like your 4 mL/gal plan) before bumping up.
- pH the feed to **5.8–6.2** (coco sweet spot), and water to 15–20%+ runoff every feed to prevent the issues you've seen with Purpinator/salts.
Many growers with Fast Buds autos (including RF3 lines like Banana Purple Punch or Cherry Cola RF3) report week 3 feeds around 0.9–1.1 EC in coco/hydro setups, starting lighter if using tap/soft water like yours. Your previous success with lighter Maxi feeds post-flush at ~900–1300 EC later on fits well—don't jump straight to 1.3 yet at week 3; build gradually.
### Recommended PPFD (Light Intensity) at 3 Weeks
PPFD (Photosynthetic Photon Flux Density, in µmol/m²/s) measures usable light for photosynthesis. For autos in early veg:
- **Target PPFD: 300–500 µmol/m²/s** at canopy level.
- 300–400 is safe and conservative for week 3—prevents stretch or light stress while encouraging compact, bushy growth.
- 400–500 if plants are stretching a bit or you want faster veg (RF3s are vigorous, so they can handle it).
- Avoid over 600 early—autos can bleach or foxtail if blasted too hard young.
- Measure at the top of the canopy with a good PAR meter (or app like Photone if calibrated). In Indio's setup (likely LED or HPS?), hang lights higher early (18–24" for LEDs) and lower gradually as they grow.
- Keep 18/6 or 20/4 light schedule—autos thrive on consistent long days.
General tips for your RF3 at this stage:
- If using Maxi series (like your previous grows), mix a light bloom/veg combo—e.g., mostly MaxiGro early, transition to MaxiBloom as pre-flower hits.
- Watch for clawing (N excess😂) or tip burn (high EC)—flush lightly if needed.
- These RF3 upgrades are forgiving but love good airflow and moderate feeds for those dense, resinous buds.
Your plants look primed for a strong run—keep that intuition going! How's the light distance/setup right now, and what's your current feed EC looking like? Any pre-flower signs yet? Drop more pics if they stretch or change post-week 3. You're killing it in coco—keep observing runoff and leaves. 🌿🚀
3/19 330am 👨🔬 **Adding L-Proline (the amino acid supplement growers use) to plants on soft water can provide some helpful support against the stresses you're dealing with, but it's not a full fix—think of it as a stress-buffer rather than a mineral replacement.**
Soft water (low in calcium and magnesium) often triggers **Ca/Mg deficiencies** in bloom stage (especially with Cha Ching or MaxiBloom, which don't supply much Ca/Mg on their own). This leads to issues like tip burn, leaf curl, weak cell walls, nutrient lockouts, oxidative damage (ROS buildup), and overall plant stress that feels like "the plant is struggling to hold it together." Proline steps in here as an **osmoprotectant**—it's one of the compounds plants naturally ramp up under stress.
### What Proline Actually Does in This Situation
- **Helps with osmotic/water balance** — Soft water can disrupt turgor pressure and water movement inside cells (similar to mild drought or salinity stress). Proline stabilizes cell membranes and helps the plant retain water better, reducing wilting or limpness.
- **Reduces oxidative stress** — Ca/Mg shortages cause free radical damage. Proline acts as an antioxidant and protects proteins/enzymes, so deficiency symptoms (yellowing, spotting, slowed bud development) don't spiral as fast.
- **Improves overall resilience** — In cannabis and general hydro/soil grows, L-proline (or full amino acid mixes containing it) has been shown to boost stress tolerance, speed recovery, and even support better nutrient uptake indirectly. Studies and grower reports note it helps under nutrient imbalance, drought-like conditions, and environmental swings—exactly the secondary stresses soft water creates.
- **Bloom-stage bonus** — Since you're already in late flower with Cha Ching/MaxiBloom, proline can support resin/terpene production and bud density without pushing excessive veg growth.
It won't magically add the missing Ca or Mg (those are still critical—soft water + high-P bloom nutes often screams for CalMag), but it can make the plant more tolerant while you correct the root issue.
### How Much Effect to Expect Right Now
- **Positive but moderate** — Many hydro/RO growers add amino acids (including proline) specifically for soft water setups and report less burn, better leaf health, and stronger finishes. It won't turn a severe deficiency around overnight, but it can slow the damage and give your plants a fighting chance in the final weeks.
- **No downside at proper doses** — It's very safe and plants use it quickly.
### How to Add It (Practical Dosing)
- **Source**: Pure L-Proline powder (available cheap online—make sure it's the plant-grade L-form, not human supplements).
- **Root feed** (with your Cha Ching/MaxiBloom): Start at 0.5–1 g per gallon (about 100–200 ppm). Mix into your res or feed water once a week. pH as normal.
- **Foliar spray** (often more effective for quick stress relief): 0.25–0.5 g per gallon + a drop of surfactant. Spray lightly every 5–7 days in the dark period.
- **With your current nutes**: Yes, it layers fine—reduce if you see any tip burn. Many run it alongside MaxiBloom + Cha Ching in soft water without issues.
- **Best timing**: Now through harvest is perfect, especially if you're noticing stress signs already.
**Real talk**: The biggest win will still come from adding a proper CalMag supplement (like Botanicare or General Hydro's) at 0.5–1 ml/gal or whatever your PPM tests call for. Proline + CalMag together is a strong combo for soft water grows. If you're running pure RO/soft, most experienced growers treat this as standard.""👨🔬
3/19 10:09PM RF3 X 2 =6 fail? I have TWO 2 gallon pots filled with coco from the last grow. I can plant a NEW BPP RF3 OR!!! I can top the 3 RF3's and make cuttings and grow the cuttings? It worked before!. FAST turnaround time, not much prep just refresh the coco and transplant the tops!
3/19 10:59PM NO WORK FOR NOW.. HIT WITH MASSIVE WAVES OF NAUSEA AND SHARP PAIN, DIZZY, RUPTURED NECK CYST BLEEDING, PAIN FROM MOVING TOO MUCH LAST FEW DAYS, RINIGNG EARS BAD, SKIN PRONE TO MASSIVE INFLAMMATION ATTACKS NOW, WEAKENING GUT LINING,. LUNGS ..GRIP AND BALANCE OFF, SO PERFECTLY NORMAL!!! THANK THE WEED GODS FOR WEED.
3/21 3:30 AM I think I’m gonna top all three of them. I got lucky all three seem to be different ones. I don’t know which is which one of them is really tall. The other one has really tight in her note spacing it’s really good and the other one is also good little bit different so I think I got three different RF three seeds and I think if I do top them I’m gonna put the top in another 2 gallon and then grow that as a cutting usually works I’m not sure👍🌿
3/23 3:08 PM I cut them all in half today a transplanted the top of the tallest one into one that was still growing just to see if it would work. They’re all doing really good.👍
326 237am Remember how your local ss cant prevent or solve a single problem you pay taxes for. unless you're really really sick and the cowards decide that the most important and pressing issue is to raid weed users and farms and seeds...what a country of fuqs
Likes
11
Share


@TerpTurtle
Follow
Purple gelato x Unicorn poop | NASC freebie!
-Buds are ripening up and coming to a finish
-Seeing some amber, notice development in terpene expression and the final swell is looking juicy with big heavy greasy resin heads
-Branches are flopping all over, buds are all dense swollen golf ball size from top to bottom
-the terp profile is a sweet heavy creamy gas, phunky rancid onion piney like a gymsock, chocolate coffee and fruity kush tones. Strain brings true funk
Likes
47
Share


@GrowGuy97
Follow
The bud smells like candy in a jar! Very impressed with how this lady turn out, took her a little while for the buds to fatten up but I’m glad I gave her a little extra time because she definitely filled out more! Buds are extremely dense & sticky and definitely has a couch lock high! Can’t wait to grow this again using a full nutrient line & see how she does! Make sure to go check out Doctors Choice for some amazing genetics! Thanks for following & happy growing friends!🙏🏼✌️🏼🌱

Likes
24
Share


@BudMunchies
Follow
03/31/25:
Today was a major milestone in the grow: all five plants were transplanted into 1-gallon AirPots and topped above the 3rd node. I also cleaned up everything below node two, leaving each plant with two strong, healthy nodes to begin shaping their structure for the vegetative phase.
Normally, I wouldn’t combine transplanting and topping on the same day, as both are stress-inducing events. However, the plants looked robust and healthy, showing no signs of weakness. Because of this, I felt confident they could handle the dual stress. Still, I expect them to take the next 2–3 days to recover, after which I anticipate they’ll bounce back with even more vigor.
Each plant was moved into a 1-gallon AirPot, which encourages air pruning and promotes a more fibrous, expansive root system. During transplant, I sprinkled mycorrhizal fungi directly near the rootball of each plant to help stimulate root colonization and increase nutrient uptake during this critical phase.
On inspection, the roots were healthy and white, showing no signs of being rootbound—making this the perfect window for transplanting without risking transplant shock or root constriction.
The newly potted plants were placed back into the 4x4 tent, now sitting about 36 inches (approximately 91.5 cm) below the AC Infinity S44 light, which is set to 40% power. This provides a PAR reading of around 360 µmol/m²/s, which is well-suited for early veg.
To begin early phenotype tracking, I’ve labeled the plants as PP1 through PP5:
• PP1: Most vigorous plant so far
• PP2: Slightly behind PP1 in size and growth rate
• PP3–PP5: Showing very similar growth characteristics, slightly more compact
If early vigor is any indication of sex, I would guess that PP1 and PP2 may be male, while PP3 through PP5 could be female. That said, this is purely speculative—true sex traits won’t reveal themselves until preflower, and many vigorous plants end up being female as well.


Likes
20
Share

@PhinolaGreen
Follow
11. Woche
Hmm Chaos Cake Auto Anesia Seeds wächst einfach weiter 🤷🏻♂️
Dachte ja die würde sich langsam mal auf die weitere Ausreifung der Bloom aber Pustekuchen, die denkt sich seit dem Lollipopping: jetzt erst Recht 😌😅

Likes
17
Share


@420DeepGrow
Follow
Cosecha completada de la Black Muffin de Sweet Seeds! 🌱✨
Estoy muy satisfecho con los resultados, la planta ha crecido espectacularmente bien gracias al excelente cuidado ya los productos de calidad que utilicé durante el cultivo. Quiero dar un agradecimiento especial a XpertNutrients y Marshydro por su patrocinio
Likes
51
Share


@Corwinism
Follow
Jelly Bananen was the strain I was looking forward to the most. There wasn't much information on it when I initially ordered the seeds, but I was intrigued by the breeder's description nonetheless and decided to give it a shot.
In flowering, there were two incidents where the light schedule was interrupted unexpectedly. In response, the plant started to produce "nanners". Ironically, Jelly Bananen was the only plant in the garden to do this.
I produced 88g of dry weight, not knowing what to expect on the scales. I'm sure that 88g on one plant is probably pretty bad, but it should only get better from harvest to harvest, am I right?
Will be coming back to this strain again in the future, once I have a few harvests in the books. 🙌


Likes
15
Share


@Roberts
Follow
Grape Octane Auto has grown okay. I have not spent a lot of time with her. She looks to be done in about 2 to 3 weeks. Everything is going okay for the effort I put in. Thank you ILGM, and Medic Grow. 🤜🏻🤛🏻🌱🌱🌱
Thank you grow diaries community for the 👇likes👇, follows, comments, and subscriptions on my YouTube channel👇.
❄️🌱🍻 Happy Growing 🌱🌱🌱
https://youtube.com/channel/UCAhN7yRzWLpcaRHhMIQ7X4g.

Likes
12
Share


@Growgirl1114
Follow
Stronger and stronger everyday, looks like this girl went into flower last night, so exciting ✌️🌱✌️

