
Likes
Comments
Share


@SlickCityOrganics
Follow
I wished that I could've done things a little different but the end result was fiiire! Taste like Peaches when you give it a nice 4 week cure. Wish that I could've yielded more. But experience will overcome all my flaws. But it will only get better.


Likes
42
Share


@Gabarram
Follow
Day 29 since I first saw her cotyies...2nd day of Week 5 and the little Dr. shows growth at what seems to be a quicker rate. I'll envisoning some colas from LST and perhaps I top one or two of those just to get more colas, whatever it takes to fill the damned net. Well of course these are just plans. Continue fertigation twice a day., inflow 1200 and run-off 1000 units of EC.
Day 30 (10/10/2019) just fertigate her for the first time in the day, inflow and run-off are normal concentrations for the stage of growth.
Day 31 One month and a day already... the plant has shown herself very stubborn, growing very slowy but healthy, I'll tame her eventually.
Day 32 (12-10-2019) the little Dr seems to have kept up the growth pace, I see her growing remarkably more vigorously...👌
Fertigations, twice a day, getting 1200 uSm/cm in the run-off.
Day 33 (13-10-2019) When I get an extra buck I'll change the extraction fan, Temperature is getting high inside the tent for this time of the year. 450 W (real power) from DIY led lights raise the temperature quite a few degrees in a 0.80x0.80x1.60 m tent.
Day 34 last day of the 5th week. She's doing fine.

Likes
17
Share


@maelxich
Follow
Saw spidermites setting up camp on the dark side of the plant on 1 bud site. There was no sign of them anywhere else. This plant is becoming more trouble than it’s worth and I’ve decided to chop her early after.

Likes
1
Share

@Fischi_420
Follow
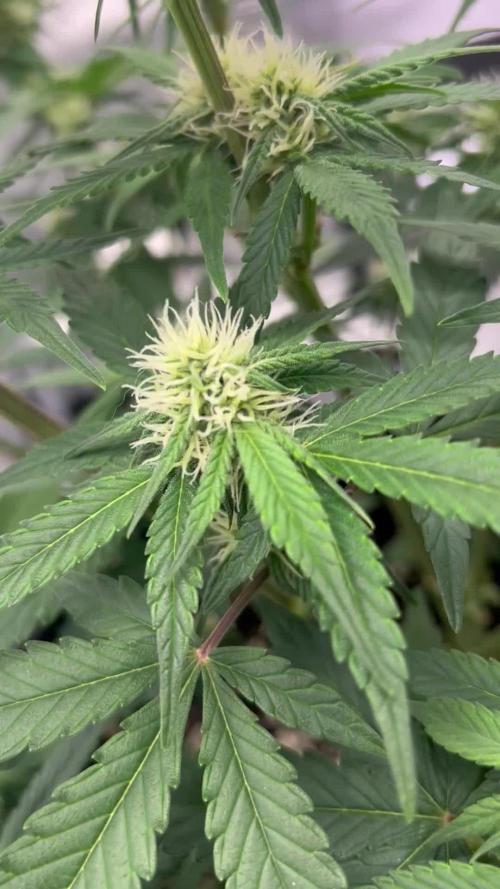
Lemon Cherry Cookies – Flowering Week 2 🌸
The plant is now fully into flowering. Bud sites are stacking up nicely and the white pistils are shooting out strongly. She’s still growing bushy and filling out the tent well.
📌 Training:
•
Lollypopping next Week
📌 Feeding:
• 1 ml/L Bio-Grow
• 2 ml/L Bio-Bloom
• 1 ml/L Top-Max
• 0.5 ml/L CalMag
• 0.5 ml/L Alg-A-Mic
Leaves look healthy and lush, with a nice green tone and just a light tip fade – exactly where she should be in this phase. Nutrients are being absorbed well, no visible deficiencies or stress signs.
Likes
25
Share


@Eric_Bud
Follow
Es ist alles gut gelaufen, ich hatte keine Probleme mit Ihr. Ich konnte viel lernen und werde beim nächsten Run mit neuer Lampe das neue Wissen anwenden. Danke das ich dabei sein durfte und ich werde nach der Trocknung das Ergebnis Updaten.
In harmony with the plant

Likes
1
Share


@Bucktown420
Follow
1 more week to go can't wait everything is fading nicely,and chunkin up big time

Likes
7
Share


@Aleks555
Follow
We’ve officially entered week 7 with our FBA 2503 from 42Fast Buds, and the transformation is impressive—our girl is now in full bloom! After a smooth and steady vegetative phase, the flowering stage is progressing beautifully. The decision to experiment with a 12/12 light cycle for this autoflowering strain has proven to be an interesting choice, and so far, the results are encouraging.
The plant stands tall and strong in its 10-liter pot, with a well-structured shape thanks to early LST. The climate remains stable with daytime temperatures reaching up to 30°C and an average range of 27–28°C. Humidity levels are consistently between 60% and 65%, which has supported healthy growth throughout the cycle.
We continue to feed her with Xpert Nutrients, and the impact is clearly visible—dense flowering sites, vibrant foliage, and a healthy overall appearance. The aroma is starting to build, and the buds are forming with great structure and frost.
So far, this grow has been a pleasure, and week 7 marks a crucial point where everything starts coming together. We’re excited to see what the final weeks will bring!
Processing
Likes
13
Share


@Canadian
Follow
She has been suffering from excessive nitrogen and has been little bit difficult to flush them out she has been on 2 week of water only diet and now she's bouncing back from the access nutrients . growth has been very good and in the video is the last plant that appears the other are just part of my outdoor grow.

Likes
28
Share


@Grow_N_Smoke
Follow
I feel like I'm doing something wrong when it comes to the end of flowering. I've seen harvests with nice green leaves but for some reason my leaves are always yellowing and burnt by the last couple of weeks.
I usually just chalk this up to harvesting time fade/fall coloring but I wonder if it's something I don't have right in my nutrients.
Either way I only have about a week or 2 left of feeding, im going to implement Liquid Koolbloom the last week of feeding. The last 2 weeks of these girls I'll flush with just ph balanced water.
Day 60 should be around January 8th which is my expected Harvest date so this will be my "New Year Harvest". Needless to say, I'm super excited!
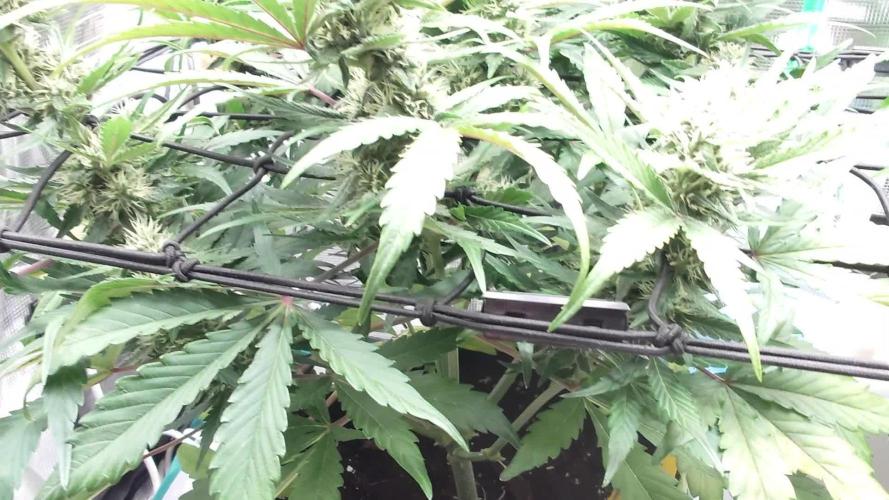
P.S. I added in another layer of netting to help support the really heavy buds forming. They feel super solid and thick as well as extremely sticky

Likes
23
Share


@Gordy
Follow
Week 6(Bloom):
My vacation was hell for my poor plant 😥 I set up a 7 gallon bucket with a pump and timer. I didn’t test it before I left… The bucket was lower than the plant so I’m assuming once the pump kicked on the rest of the water siphoned into the plant. So she probably took the entire 7 gallons of water on day 1 and staved the entire time I was gone. When I came home she was sitting in about 2 inches of water. The entire tent was flooded. She looked like hell, leaves were showing signs of some deficiencies I haven’t seen before.
I let her dry out for 2 days. It was tough to do, but I wanted to make sure that there was enough air to the roots after that much water for so long. I gave her a full does of nutrients. I really hope she bounces back from this.
With all of that happening she still has matured quite a bit, the buds have sized up a bit. I feel this setback of a week will really affect my yield. Better luck next time I guess, and no more vacations…
I should have taken pictures of it immediately following my return, but it was really hard to stomach. I didn’t want to really show that off. But my current pictures make it look pretty decent. If you look close at the buds in the picture you can really see the damage done.

Likes
25
Share


@Grow_for_Happiness
Follow
Germination, that says it all!
#2 (ghost OG) and #3 (gravely Ghost) popped tails in 24 hours
#4 (sour Ghost Kush) popped tail in 48 hours
#1 (ghost Beach)popped, but seed did not fully crack and taproot got stuck. I did not notice in time and it died. Dropped a second seed on day 4 and germinated in 24 hours
Each seed planted in damp soil once taproot popped. Soil moistened with 250ml per pot in germination area. Voodoo juice in water and Dynomyco in soil blend.

Likes
9
Share

@Gewaltmann
Follow
Ja wie auch bei der runtz, die zuckerblätter sind stark trichomen besetzt. Und hier hatte ich beim lollipoppen wie erwartet etwas mehr Arbeit. Ebenfalls habe ich hier ein paar kleinere untere doch kräftigen bads wegschneiden müssen.
Da das Licht reinbringen, durch Sägeblätter entfernen super funktioniert hat, brauche dich auch gefühlt unten sehr rum sehr wenig wegnehmen.
Mittlerweile hat man vom Geruch her eine doch würzige dumpfe Note die am Ende doch leicht fruchtig ausläuft. Ich bin weiterhin gespannt wie am Ende die was aussehen und wieder Geschmack sein wird.
Und der Vergleich unter den beiden Pflanzen und Sorten ist sehr interessant und sehr schön im Video sichtbar. Auch hier haben die buds richtig viel Potenzial schön dick zu werden. Aber vom Gefühl her bis zum jetzigen drücken muss ich sagen, die werden minimal luftiger werden als die von der runtz.
Likes
68
Share


@I_and_I
Follow
I had fun with this barneys gorilla zkittlez, although it seems like it was ready around 7 weeks, its as if the plant has been in the early stages of self seeding when I've harvested on day 54~ of flower.. Can't think any other reason why this would've happened
Anyway overall the bud is 95% amazing, just a slight sadness at the miniscule seeds forming close to the stems in the centre of some buds that takes away from the taste a little
Likes
24
Share


@AutoCrazy
Follow
Week 10
Week 3 of Flower
Well … bud sites are on the scene. I love the nice open structure of this plant. The stretch has been pretty wild! She is being a bit crowded to the back of the tent now because of the explosive growth of her tent mate (Mimosa EVO).
I can’t wait to see this lady stack on bud now. 😎🔥
Cooler internals:
600 ppm
1.2EC
5.9pH-6.1 (it swings a bit over 3 days)
65 F Solution Temp.
Onward 😎🍻

Likes
39
Share

@Cyrusdavirus
Follow
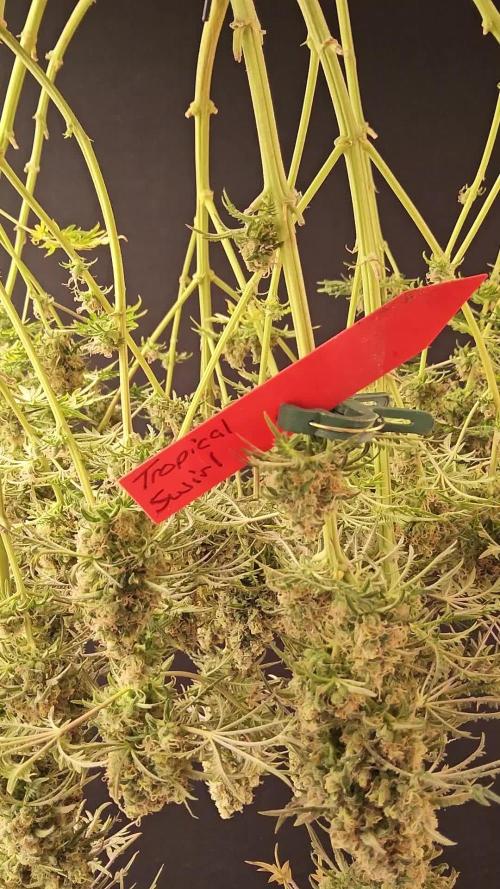
This is final harvest week in the growroom
Plants are coming down all around me. As always I strip the plants down and put them back under the lights for a few days then I cut them down a hang them by the toes until around 20% humidity which is still a little wet but I like to start the sweating early so it slows the drying down a little and starts the cure
Thanks for stopping by and for following along with me on another grow... Cyrus
Likes
61
Share


@PEAKYPLANTERS
Follow
hey grow friends .... finally my time seems to come .... these beautiful little girls seem to tell me, every day that passes "smoke us" "smoke us" .... bitch bitch guys .. it doesn't seem true .. the dream of a lifetime ...
MY FIRST SEED
MY FIRST GERMINATION
MY FIRST GROW
MY FIRST LAMP
MY FIRST VEGETATION
MY FIRST FLOWERING
WHAT A CHILD SATISFACTION
9 out of 9 .... AND EVEN IF I DON'T HAVE ABUNDANT COLLECTIONS FROM A SINGLE PLANT FOR ME ALREADY AND A SUCCESS TO COMPLETE 9 OF 9
I cultivated it very sparingly and in the end I was repaid quite well ... this and the second week of flush .... fuck how long they take to dry with the led :(


Likes
41
Share


@Tubington9
Follow
Week 10 Day 1 Stardawg is continuing through flower nicely and I will be adding the final nutrient to her mix with Bud Boom by Future Harvest to really help her bulk up in her final couple weeks.
Week 10 Day 2 Added trichome photos with the loupe that arrived today.
Likes
7
Share


@Whitemexican27
Follow
Nothing wild this week. Just making small adjustments with the light. It's a bigger light than I'm used to so just keeping an eye out. 2 seedlings had the shell attached after 5 days so just used some small tweezers and gently got em off. Everything is as normal as you can expect in the first 7 days. Will start adding a little grow big next week.
Likes
8
Share


@GuniGugu
Follow
- BioBizz Light Mix soil
- BioBizz Nutrients used according to their schedule
- stopped LST
Likes
50
Share


@GMSgrows
Follow
Sleepy Joe is in her final week. Been an enjoyable grow. Not the biggest flowering plant. Took awhile to get going, but she created some nice hard little bugs. These little bugs are so heavy, branches are bending like the larger ladies.Will be easy trimming. Looking forward to trying this stuff out.
