


Likes
Comments
Share


@CanadianFillmore
Follow
Overall very happy with this plant grow. She was by far the hungriest of the four plants in this grow, but she still developed nicely, loads of sticky sweet smelling buds. Will update in 2 weeks, after the first smoke.
Update! Smoked the first buds from this harvest, the smoke was smooth, light berry/fruit taste, it will get stronger as they cure in their jars. Overall, I am happy with the plant, the bud product and quality. She's not a super heavy indica, but she can still pack a punch!

Likes
66
Share


@Neo09
Follow
Since 18.6.➡️12/12
⚠️I love thoose clones, the
are really fit and strong⚠️
Bluebery pancake's became ADVANCED NUTRIENTS - Sensi Bloom, BigBud, Budcandy and Nirvana


Likes
15
Share

@Kevs_Best
Follow
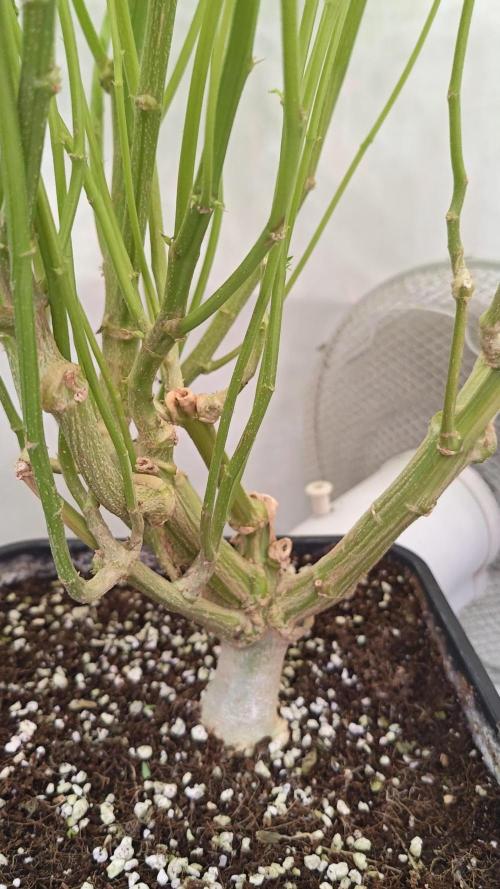
Blütewoche 1 – Start | Crimson Clay Clone 🌸
Blütewoche eins beginnt – und der Wechsel ist klar sichtbar.
Die Pflanze reagiert sofort auf den Photoperiodenwechsel: Die ersten Stretch-Bewegungen setzen ein, neue Spitzen drücken nach oben und die Struktur richtet sich langsam auf die kommende Blütenphase aus.
Dieser Run basiert auf einer ursprünglich gereveggten Mutterpflanze, die aus einem feminisierten Seed von Wizard Trees selektiert wurde. Nachdem der Phänotyp im ersten Run identifiziert wurde, wurde die Pflanze erfolgreich revegged und anschließend als Mutter weitergeführt.
Die Vegetationsphase dauerte etwa 2,5 Monate.
Während dieser Zeit wurden mehrere neue Mutterpflanzen und Klone gesichert, um die Genetik langfristig zu stabilisieren und zukünftige Runs vorzubereiten. Erst nachdem die nächsten Backups gesichert waren, wurde die ursprüngliche reveggte Mutter schließlich in die Blüte geschickt.
Man merkt dieser Pflanze die lange Vegetationsphase deutlich an:
Kräftige Verzweigungen, stabile Hauptstämme und viel gespeicherte Energie im gesamten Aufbau.
IPM & Pflanzenpflege
Während der gesamten Vegetationsphase wurde konsequent nach dem Athena Plan gearbeitet.
Stack und IPM wurden regelmäßig zwei bis drei Mal pro Woche angewendet.
Aufgrund eines früheren Kontakts mit Spinnmilben wurde das Präventionsprogramm bewusst konsequent gefahren und die Dosierung zwischen minimaler und maximaler Empfehlung gehalten, um stabile Bedingungen zu gewährleisten.
Die Pflanze hat sich dementsprechend sehr sichtbar entwickelt – dichtes Blattwerk, kräftige Struktur und eine stabile Gesamtvitalität.
Natürlich wurde während der Vegetationsphase die Grow-Formel statt Bloom verwendet.
Aktuelles Schema zum Start der Blüte
• tägliche morgendliche Bewässerung mit der Standard-Nährlösung
• Stack + IPM alle drei Tage
• dieses Programm wird voraussichtlich bis maximal Ende Blütewoche drei weitergeführt
Gerade während der Stretch-Phase ist das Ziel, die Pflanze weiterhin stabil zu halten, Stress zu minimieren und gleichzeitig ein konsequentes präventives Schädlingsmanagement aufrechtzuerhalten.
Gesamtbild – Start Blüte
Die Pflanze startet massiv in die Blüte.
Kräftiges Blattgrün.
Saubere Blattspannung.
Stabile Struktur mit viel gespeicherter Energie aus der langen Veg-Phase.
Die Grundlage ist gelegt.
Jetzt beginnt die Phase, in der Stretch, Budsite-Bildung und genetischer Ausdruck der Crimson Clay Genetik sichtbar werden.
Blütewoche 1 hat begonnen.
EN – Flower Week 1 | Start
Flower week one begins – and the transition is immediately visible.
The plant reacts quickly to the photoperiod change: early stretch movement starts, new tops push upward, and the structure begins shifting toward full flowering mode.
This run originates from an originally revegged mother plant, selected from a feminized Wizard Trees seed. After identifying the phenotype during the first run, the plant was successfully revegged and maintained as a mother to preserve the genetics.
The vegetative phase lasted roughly 2.5 months.
During this time several backup mothers and clones were taken, securing the genetic line and preparing for future runs. Only after those backups were established was the original revegged mother moved into the flowering cycle.
The extended vegetative phase is clearly visible in the plant’s structure:
strong branching, thick main stems and significant stored energy throughout the canopy.
IPM & Plant Care
Throughout the entire vegetative stage the plant followed the Athena schedule.
Stack and IPM were applied two to three times per week.
Because of a previous encounter with spider mites, the preventative program was maintained carefully, keeping the dosage between the recommended minimum and maximum range.
The plant responded extremely well, developing dense foliage, strong structure and overall healthy vigor.
Naturally, during vegetative growth the Grow formula was used instead of Bloom.
Current schedule at the start of flower
• daily morning irrigation with the standard nutrient solution
• Stack + IPM every three days
• this program will likely continue until the end of flower week three at most
The goal during the stretch phase is to keep the plant stable, minimize stress and maintain consistent preventative pest management.
Overall impression – Start of Flower
The plant enters flowering with strong momentum.
Healthy deep green color.
Good leaf tension.
Stable structural framework with energy built during the long veg phase.
The foundation is set.
Now the phase begins where stretch, bud site formation and the full genetic expression of the Crimson Clay phenotype start to appear.
Flower week 1 has begun.

Likes
5
Share


@lasonda
Follow
Harvest day! I think it could have been harvested a week earlier, but I preferred to wait. In my opinion, the fertilization plan I used could have been improved; maybe next time, however, the yield was excellent. As soon as the drying phase is complete, I'll post the weight of the dry buds.

Likes
Comments
Share


@519growgirl
Follow
Beautiful Dank flowers.
No aphids.
Minimal bud rot outdoor grown.

Likes
1
Share

@birdmountain
Follow
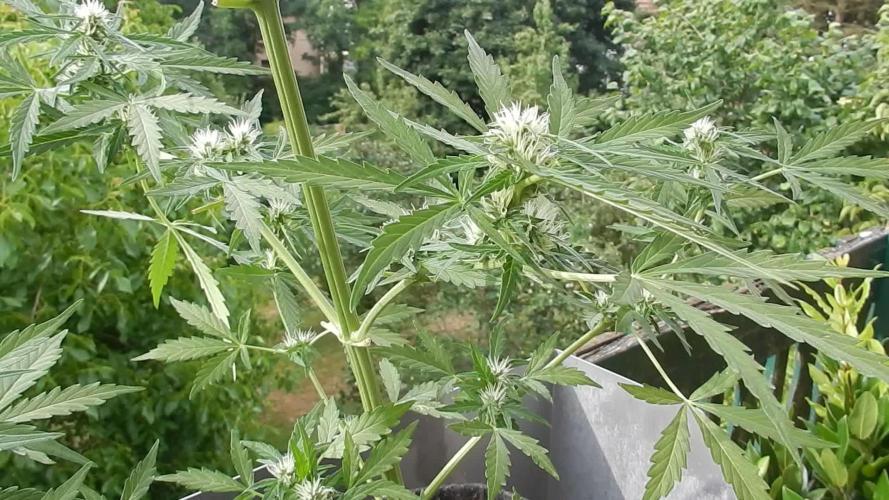
Die ACB XL stellt langsam das Höhenwachstum ein und beginnt mit der verstärkten Blütenausprägung. Ansonsten wurden nur ein paar der ganz großen Fächerblätter entfernt um möglichst viel Licht an die Blüten kommen zu lassen. Ob der Bananenschalensud funktioniert wird sich zeigen, bisher jedoch sieht es ganz gut aus.
Vielen Dank für euren Besuch und noch eine schöne Grow-Woche!
---
The ACB XL slowly stops growing in height and begins to produce more flowers. Apart from that, only a few of the very large fan leaves have been removed to allow as much light as possible to reach the flowers. It remains to be seen whether the banana peel decoction will work, but so far it looks quite good.
Many thanks for your visit and have a great grow week!

Processing
Likes
15
Share


@MG2009
Follow
09/26/2020
She is almost done, I gave her a little trim most trichomes are milky still some clear I think about a week before she is done.
Hope she gets fat!
Likes
36
Share


@AlexHeadHunter
Follow
Day 8/3. (8 for Jack and 3 for Lemon)
- HELP! Jack started having problems. Someone tell me why this is happening? After the transplant, I poured 100 ml of water. 100 ppm, pH 5.6. Added Root stim, 1 drop per liter.
Tonight watered light solution (GHE): micro- 0.5 ml/l, gro- 0.5 ml/l, bloom- 0.5 ml/l, diamond nectar 0.5 ml/l. 380 ppm, pH 5.8. Volume- 200 ml. Watering divide twice. Morning and afternoon.
Added to coco perlite. Proportion 1/4.
- Lemon is fine. I didn't do anything with lemon
Day 9/4.
- Jack feels better. The problem has stopped and growth continues. I think this problem was due to overflow.
- For Lemon prepared his first solution (BioBizz): gro- 0.5 ml/l, bloom- 0.5 ml/l, diamond nectar(ghe)- 0.5 ml/l, microbiological fertilizer- 1 ml/l. 330 ppm, pH 5.8. Volume- 100 ml.
- Both plants are sprayed with a solution of BioBizz.
Day 10/5.
- Jack is fine. Did not do anything
- Lemon is fine. Did not do anything
- Both plants are sprayed with a solution of BioBizz.
Day 11/6.
- Jack Solution: micro- 0,8 ml/l, gro- 0.8 ml/l, bloom- 0.8 ml/l, diamond nectar- 0.8 ml/l. 550 ppm, pH 5.8. Vol- 200 ml. Watering divide twice. Morning and afternoon.
- Lemon solution: as in the last watering.
- Both plants are sprayed with a solution of BioBizz.
I start to remove cups from them so that they get used to low humidity.

Likes
29
Share


@Ultraviolet
Follow
The number of points on a cannabis leaf is primarily influenced by genetics, the plant's maturity, and environmental factors.
Grape Guava is an Indica Hybrid. Hmmmm
Genetics: The plant's genetics are the most important factor in determining the potential number of leaflets. Sativa-dominant strains are more likely to develop leaves with a high number of leaflets, sometimes producing 13 or more. In contrast, indica strains typically have fewer, broader leaflets, usually between 5 and 9.
Maturity: A cannabis plant's leaves gain more leaflets as it matures.
Seedling stage: The first true leaves after the initial cotyledons emerge with a single leaflet, followed by sets with 3, then 5.
Vegetative growth: Healthy, mature plants will consistently produce leaves with 7 to 9 leaflets, though 11 or 13 is possible.
Fast growth: A mature plant growing quickly in ideal conditions with plenty of light and proper nutrients is more likely to show a higher number of leaflets.
Environmental conditions: Optimal growing conditions can push a plant to express its genetic potential for more leaflets.
High light: A fast-growing plant with ample light is more likely to develop leaves with 9, 11, or 13 leaflets.
Stress: Environmental stresses, such as unusual lighting schedules, can sometimes cause mature plants to produce leaves with fewer leaflets than normal.
Blue light causes stomata, the pores on plant leaves, to open by activating a signaling pathway within the guard cells. This process involves phototropin photoreceptors, which initiate plasma membrane H+-ATPase activation, pumping protons out of the cells. This creates an electrical potential that drives potassium (K+) uptake, causing guard cells to swell and the stomatal pore to open, allowing gas exchange. Foliars applied in strong blue 430nm with 4000hz tone. 20min dose prior to application.
In essence, you're seeing a combination of the infrared light reflected by the plant, which the camera perceives as red, and any residual visible blue light the plant reflects, which results in a purple hue.
DISCLAIMER 01: All ideas expressed on this diary are for entertainment and general information purposes only. There is no advice on what an individual should or should not do. Any response made by anyone after hearing this communication is their interpretation and is their responsibility. Ideas expressed by this diary should not be treated as a substitute for medical advice or professional help. If expert assistance or counselling is needed, the services of a competent professional should be sought.
DISCLAIMER 02: All materials in this video is used for entertainment purposes and fall within the guidelines of fair use. No copyright infringement intended.
DISCLAIMER 03: This website/diary is not officially affiliated with Alan Watts or his estate. The content presented is inspired by Alan Watts' teachings and philosophy, shared with the intent to motivate, inspire, and support personal growth. The voice used is a synthesized voice and does not belong to Alan Watts. The goal is to respectfully share his timeless insights in an inspiring way, with no intention to deceive or misrepresent. All opinions and interpretations expressed are solely those of the creator and do not represent the official views of Alan Watts or his family. For a deeper understanding of his work, please refer to his original writings and recordings.
You can explore more of Alan’s work here:
📚 alanwatts.org
Likes
9
Share


@pzwags420
Follow
On day 1 I adjusted the PH of the rez up to 6.2. I increased average ppfd to 972, with the highest ppfd on a top at 1500 ppfd lets see how she reacts and if she likes the intensity I will keep it steady till the end if not back to lower ppfd again.
On day 6 I changed out the rez and ph to 6.2. Buds are growing and putting on weight very compact buds.

Likes
4
Share


@LittleBigTrees
Follow
Second week of flower and I defoliated again.
There are small bud sites starting to form at the end of week two flower.
The apple fritter has fascination which is making the stems grow interestingly with lots of bud sites.

Likes
25
Share

@HinduGod
Follow
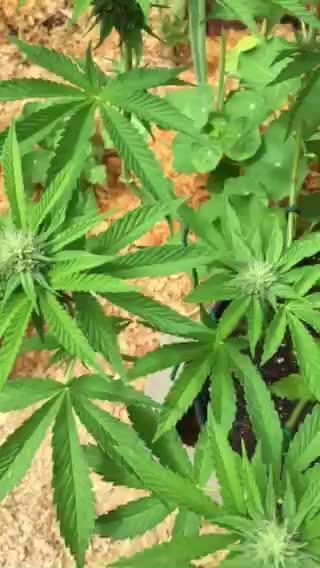
WOW LOOK AT DAT!!! DAT PLANT HAS BEEN IN RECOVERY MODE SINCE DAT MASSIVE DEFOLIATION AND BUD SITE REMOVAL!!!! DIS WEEK DA PLANT SHOULD START GETTING BACK ON TRACK!!!! I ASK MY LOYAL DISCIPLE @Susquihanna TO PRAY FOR DIS DAT WOULD BE VERY VERY GOOD!!!!!!😎
Likes
15
Share


@CornishFarmer
Follow
--- Day 50 ---
22/06/2021
Shes really happy in the new tent, I'd officially say we're in preflower / flower now 😄 I'm watering 4L and she's really loving it.
I've watered her again with 4L of 23C, 1500PPM, 6.0PH water with the above nutrients
--- Day 51 ---
23/06/2021
Things are looking really good, flowers are coming in nicely, she's still growing and most of the low quality leaves have fallen off 😁
I've watered her again with 4L of 23C, 1500PPM, 6.0PH water with the above nutrient
--- Day 52 ---
24/06/2021
Shes really happy, everything is going great. I measure her and she's 32" tall now 😄
I've watered her again with 4L of 23C, 1500PPM, 6.0PH water with the nutrients above
--- Day 53 ---
25/06/2021
Nothing really to report, she's still growing good. The flowers and coming in more and more, they're everywhere now.
I've watered her again with 4L of 23C, 1500PPM, 6.0PH water with the nutrients above
--- Day 54 ---
26/06/2021
Yet again, nothing much to report. She's still really happy everything is going well 😄
I've watered her again with 4L of 23C, 1500PPM, 6.0PH water with the nutrients above
--- Day 55 ---
27/06/2021
Pistils are growing alot, they're starting to get quite long, there's more and more flowers popping up everywhere.
I've watered her again with 4L of 23C, 1500PPM, 6.0PH water with the nutrients above
--- Day 56 ---
28/06/2021
She's really happy. I'm glad I got the bigger tent and the new Extractor, it's really needed and working well. Nothing much to report, she's getting bigger and more and more flower spots are showing up 😁
I've watered her again with 4L of 23C, 1500PPM, 6.0PH water with the nutrients above


Likes
60
Share


@Secretflower
Follow
Hello my friends,
...May 17, 2022....Day N°65..
...Flowering day N°10...
My two Feminized Royal THCV are fine and beautiful, they are monster plants, they stretched about 30cm.
#1...100cm
#2.. 100cm
I give them water with a tablet of Easy Bloom tablet from RQS Organics Nutrients.
The HST working very well.
They are under a MarsHydro TSW 2000 at 50% of power and at 40cm of the canopy.
www.royalqueenseeds.com
www.mars-hydro.com
Thank you very much for passing by.
Wish you the best with your green projects, peace.
See you soon 💨💨💨

Likes
28
Share


@Scandic
Follow
Tough start for plant A outside with bad weather. Plant B, C and D also out now
Sprayed with Canna Cure
Processing
Likes
7
Share


@918gardens
Follow
Week 2 flower just did a nice Defoliation ak47 stayed short but oh well other 3 looking good starting to flower nice 7 more weeks to go lol
Likes
30
Share


@Fatnastyz
Follow
Week 4 Flower
6-5 Day 52 from seed.
Bit slow on this week updating.
But she hasn't missed a step, even if I have!
She smells great! I'm really digging the gas and stink from her. Already got my mouth watering 🤤.
Top dressed flower girl 1/4 cup poo and sprinkled a little mykos in with it, watered with recharge Sunday, reg water on Tuesday. Took my ecowitt to 14% in 2 days. After a full water. 😁
Opened the tent for air. Last week vpd has been between 1.5-1.6. moved up from 1.3-1.5. She seems to be ok with it so far!
Likes
5
Share


@Big-Daddy
Follow
25.9.
Vor ein Paar Tagen hat die Pflanze trotz Dünger begonnen, Farbe zu verlieren. Das bedeutet für mich das wir aufs Ende zugehen. Seit drei Tagen bekommt sie nur Wasser, doch die Verfärbungen sind schon klar zu sehen. Die Stempel bewegen sich in die richtige Richtung, was deren Farbe betrifft. Da der Indica Anteil hier scheinbar höher ist, gehe ich von maximal 9 Wochen Blüte aus. Das heißt, ab heute zwei Wochen.
Update 30.9.
Die Blüten gehen von der Form in eine gute Richtung.
Die Trichome sind sehr weit. Wird auf jeden Fall ne knusprige Angelegenheit. Mein goldenes Stück 💩
Likes
56
Share


@Master_weeda
Follow
Bonjour à tous les padawans et les maîtres jedis
Pour cette semaine 3 au jour 19 ma plante fais 21 centimètres et son septième noeud apparaît je décide donc de pratiquer un LST sur ma plante.
Pour ce j'utilise du fil de fer galvanisé que je plante directement dans le substrat en faisant attention de ne pas endommagé les racines car n'oublions pas que ce qui pousse dessus pousse aussi dessous.
Jour 17 je pulvérise du une solution composé d'une cuillère à café de savon noir mou (marque briochin) dilué dans un demi litre d'eau en prévention d'éventuels nuisibles.
Pourquoi le savon noir mou ?
Savon noir : quelle utilisation pour le jardin ?
Le savon noir est un produit naturel dont les propriétés nettoyantes sont connues depuis l'Antiquité. Utilisé pour l'entretien de la maison et pour les soins corporels, ses vertus antibactériennes et insecticides en font un allié précieux pour le jardinier bio.
Le savon noir est fabriqué à partir de potasse et d'un corps gras de type huils végétale comme l'huile d'olive, de lin ou de maïs.
Produit naturel et biodégradable (s'il ne contient pas d'additifs, comme cela peut-être parfois le cas), c'est un très bon produit nettoyant, pour les sols, la cuisine, la vaisselle, le linge, etc... Très polyvalent, il est également économique, comparé aux multiples détergents classiques du commerce.
Le savon noir se trouve sous forme de pâte molle et brune ou sous forme liquide, dilué avec de l'eau. C'est du savon noir liquide dont on se sert généralement au jardin, car son utilisation est plus simple. Il s'achète dans les magasins bio ainsi qu'en grandes surfaces ou jardineries.
Attention : la recette du savon noir de ménage et celle du savon noir utilisé en cosmétique ne sont pas forcément les mêmes ; les savons noir de ménage (multi-usages) peuvent contenir davantage de potasse afin d'améliorer le pouvoir dégraissant (irritant ou desséchant pour la peau), voire même certains additifs chimiques.
Au jardin, ce sont en priorité les propriétés antiseptiques et insecticides du savon noir qui sont utilisées.
Le savon noir liquide est utilisé pour lutter contre les pucerons, les cochenilles, les araignées rouges, les aleurodes, les psylles et autres thrips. C'est un insecticide de contact ; il tue les larves et nettoie le miellat qui englue les feuilles.
La recette de l'insecticide à base de savon noir (mou pour ma par marque briochin) est simple à réaliser : une ou deux cuillères à café de savon noir mou (briochin) diluées dans 1 demi litre d'eau tiède (dilution à 5 %) ; une fois la préparation refroidie, pulvérisez-la sur les plantes atteintes, en prenant soin de ne pas oublier l'envers des feuilles. À renouveler 1 à 2 fois si nécessaire, pour être totalement débarrassé des indésirables.
Comme il est de mise pour la plupart des traitements, ne pulvérisez pas la solution à base de savon noir en pleine journée, sous le soleil (ni sous la pluie !) ; procédez le matin de bonne heure ou patientez jusqu'à la fin de journée, lorsque les températures sont en dessous de 20°C.
Jour 18 Je corrige mon LST suivant la pousse de ma plante ...
Pour ma par c'est la manière dont je procède mais petit rappel de la technique du LST
Quand commencer à appliquer la technique LST ?
De nombreux cultivateurs commencent la manipulation dés que les plantes possèdent entre 3 et 6 nœuds ou une paire de feuilles. Durant cette première étape de la croissance, le tronc encore flexible est pliable sans risque qu’il ne se casse, même si au fur et à mesure du développement de la plante il sera de plus en plus difficile de le plier. Nous pouvons continuer à guider la croissance des branches durant toute la culture, même durant la floraison, ce qui pour cette étape représente un grand avantage face à la taille, qui n’est pas du tout recommandé une fois que la formation des têtes commence, cela stressera en effet la plante, ce qui aura pour effet de retarder la récolte.
Comment appliquer la technique de guidage LST
Si nous sommes prudents, la flexibilité naturelle des fibres du cannabis permet de plier leur tronc et branches avec une relative facilitée, même durant la floraison des plantes.
En utilisant une corde fine, nous pouvons accrocher la pointe de la plante à la base du pot par exemple ou à un tuteur que nous aurons planté dans le substrat. Nous plierons le tronc avec précaution et nous le fixerons avec la corde, à partir de là, nous pouvons augmenter progressivement la tension de la corde, chaque jour un peu plus, jusqu’à obtenir la position souhaitée. Soyez attentif à la réaction de la plante, essayez de ne pas appliquer trop de pression sur la corde et rappelez-vous que la flexibilité des branches peut varier d’une plante à l’autre.
Pour obtenir de meilleurs résultats, il suffit de suivre quelques règles simples. Pour commencer, nous devons choisir une corde fine mais pas trop pour ne pas blesser les troncs au fur et à mesure qu’ils grandissent et qu’ils deviennent plus gros.
Nous pouvons utiliser des crochets en plastique souple ou de n’importe quelle autre matière flexible pour éviter d’endommager les plantes. Spécialement en intérieur, utiliser des cordons en plastique de couleur (voir les diaries de @Silky) est très pratique pour voir facilement les accroches et faciliter le travail au milieu du réseau formés par les cordes, les tuteurs, les mailles ou les supports que nous aurons dans la culture. Bien entendu, en culture extérieure et surtout en guerilla nous ferons juste le contraire et nous utiliserons des matériaux de couleur qui n’attirent pas l’attention pour que notre jardin reste discret.
Pour stresser les plantes au minimum, la mieux est de réaliser ces manipulations le soir ou juste après que les lampes en intérieur s’éteignent, ce qui leur permettra de se remettre durant la nuit. Normalement, le jour suivant nous pourrons observer comme les pointes des branches que nous avons pliées se dressent de nouveau vers le haut à la recherche d’une source de lumière.
Que la force soit avec vous💪
