





Likes
2
Share


Likes
3
Share

@Elemental
Follow
0.1) Observação Geral
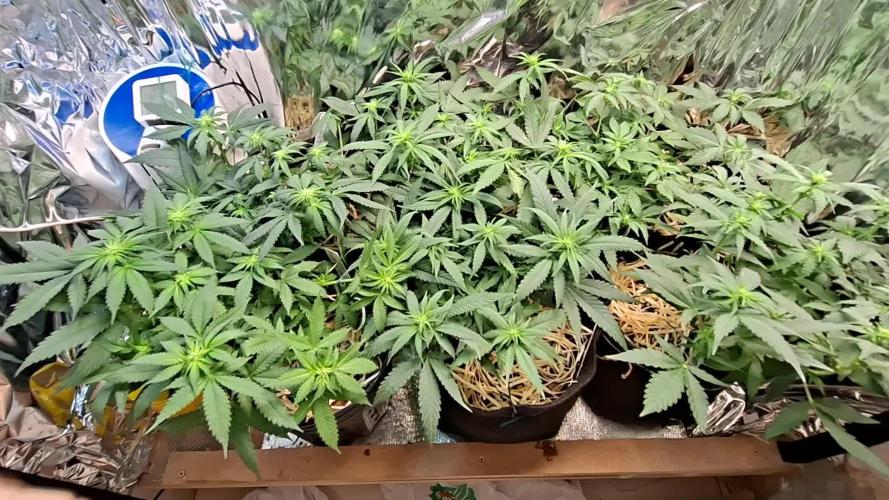
Todo o cultivo foi conduzido com monitoramento constante e ajustes precisos de intensidade luminosa (DLI e PPFD), temperatura e umidade, garantindo condições ideais em cada estágio do desenvolvimento.
1) Substrato e Nutrientes
O cultivo foi realizado utilizando água mineral com pH balanceado durante todo o ciclo.
Fase vegetativa: fertilização com BioGrow.
Floração: alimentação com Flowermind.
A mistura do solo foi composta por 50% de substrato reutilizado, rico em nutrientes do cultivo anterior, e 50% de novo solo (proporção 70/15/15), resultando em uma base equilibrada e fértil.
2) Germinação – 19 de agosto
As sementes foram germinadas utilizando água mineral + peróxido de hidrogênio em copinhos de gelatina individuais. Permaneceram por 24 horas na solução líquida, seguidas de 24 horas no escuro total sobre papel toalha umedecido com a mesma água, dentro do mesmo recipiente. Os copos foram abertos apenas a cada 12 horas, em ambiente de baixa luminosidade.
Todas as sementes germinaram com sucesso.
As sementes com raízes de aproximadamente 2 cm foram transferidas para vasos de 1 litro, com adição gradual de substrato conforme o crescimento das plântulas, prevenindo o tombamento dos caules.
3) Fase de Plântula
a) Conduzida sob lâmpadas de 35W e 50W dentro de uma caixa de papelão personalizada, equipada com coolers e exaustor para controle de temperatura.
b) Aplicação de FORT (enraizador) em uma rega, após o aparecimento do primeiro conjunto de folhas com cinco pontas.
4) Topping – 10 de setembro
Foi realizado o primeiro corte apical para incentivar maior ramificação e uma distribuição mais equilibrada de energia.
5) LST (Low Stress Training) – iniciado em 13 de setembro
O treinamento começou três dias após o topping, com amarrações graduais dos ramos para promover a abertura do dossel e melhor penetração de luz.
6) Transplante – 27 de setembro
Transplante realizado para vasos de 4 litros, com rega leve e adaptação gradual à nova base de substrato.
7) Início da Floração (Troca para 12/12) – 6 de outubro
O fotoperíodo foi ajustado para 12 horas de luz e 12 horas de escuridão, marcando o início oficial da fase de floração.

Likes
6
Share


@Acidjj
Follow
AK 47 is not an auto so that was binned. But actually it was good because it was far too cramped. 2 plants tops next time.
Added in overdrive as its 2 weeks out from breeders harvest timeline. The GSC really needs to fatten up in these last few weeks, not pleased so far seeing as it is in hydro with perfect ph the whole time. The glue and gorilla cookies are amazing. VERY thirsty averaging 2-3 litres a day of strong 1600 ppm nutes. It’s on a two a day watering cycle now.
terpinator, rezin, overdrive, sumo active boost, nirvana added mid week. I was using bud factor X but it’s now so expensive it’s out of production so switched to terpinator. Ppm is a little high in the hydro but no burn or issues so far. Just a few heat stress curls on leaves. Should end up with very sticky buds with all those added.


Likes
35
Share


@Pietcandwcbucket
Follow
Slipped up with ph fluctuation - nutes was 2 high - adjusted daily last 4days.
Very happy with the girls recovery!! WILL ONLY KEEP 4 OF THE BEST
Im documenting all of this. 1xnew critical orange punch cracked will place in sponge tonight.. Will hopefully be a perfect run with info I'm gathering from other 6..WATCH THIS SPACE.. PLANNING NG ON SPINNING HEADS

Processing
Likes
15
Share


@ThePotFactory
Follow
All looking good, I was hoping that the buds would get a bit fatter, but for the amount of light that I've got I'm starting to guess they wont get to the size of a pint glass hehe. Non the less I'm happy with what I've achieved this first grow, still 2 or 3 weeks on thees girls I'm assuming. Reduced the PK 13/14 to 5ml/10l for on last feeding with it. The girls are taking a lot longer than expected as they was meant to be 9-10 weeks long but i don't they will be that short now haha.
Peace.
Charlizard😎👽
Likes
16
Share


@MountainFlowers
Follow
Final Report:
Grow:
The plants has grown very beautiful and healty without pests and diseases. They grown bushy and with medium height during all the life cycle.
I had try to use LST in third veg week but i did't made correctly and after that i dicided to return to grown normally without any particolar tecnique.
I used a littel more fertilizer then mine usual and that made the plants grown fast with only a littel bit of leaf margin burn which I solved by decreasing the quantity.
In the first two weeks of flowering stage the plants started grow not to very tall (except for one) and the number of the branches increase, in this phase i only defoliated when the fan leaves turn yellow in late stage.
During all flowering stage the flowers grown but they remained very soft, they turned dense and bigger in the last weeks and this time i waited until almost all of them were mature before harvest the plants(I waited a littel more respect OG Kush CBD).
I changed the taller plant from one grow room to another(in the sixth week) when she became too high and she couldn't stay more in the smaller grow box(nothing changed in the enviroment between the two boxes).
Equipment and grow box:
The enviorment of grow box has been optimized every stage with the right temperature, umidity and air flow.
Vegetative temp/umidity --> 23-29 °C/45-55%
Flowering temp/umidity --> 20-26 °C/40-50%
The air flow was created by two pc fans and one big fan.
Harvest:
This time the plants were full of dense buds but the lower branches had many fluffy flowers(i used them to make some hash) but the result not change too much .
The result of this grow is amezing compared to my old expiriences.
I harvested the flower and i made a fast curing process after i washed the crop and i let them to dry with a fan on it.
After five days a take the branches which were to dry and i did the final trimmig before put all the harvest in a open jar for finishing to dry.
I collected all the leaves, fluffy buds and trimming scraps in a bag and i let them dry.
I harvested the taller plant before the other two because she had matured earlier(with the OG Kush ladies).
Later i put the bag in the freezer and when i collect and dried all the scraps from OG Kush and Dandoverde Haze i did some Ice-O-Lator hash.
I used 250g of trimming stuff and i made 11.50 g of hash, I had use a set of 5 bag and i take the resin from the 160µ - 120µ - 73µ- 25µ bags.
I pressed all the resin in a great block of tasty strong hash.
Always better every time 😊💪
Total harvest ---> 126g only of dense buds and 11.50g of hash.


Likes
10
Share


@TiRobotProds
Follow
Bonjour à tous nous sommes à la semaine 7 de végétation, elle se développe bien.


Processing
Likes
9
Share


@High_Grade_Dadli
Follow
A bit of nute burn od on feeding dem girls getting loud
Likes
23
Share


@RazzleMatazzle
Follow
I'm slowly running into the problem that the RUNTZ is just getting too big. The buds could be developing a bit better. I was really unsure whether the seeds were just the feminized variety, but they are definitely automatics. It's really insane how well and massively the genetics grow. It's just crazy!

Likes
3
Share

@GrowHero420
Follow
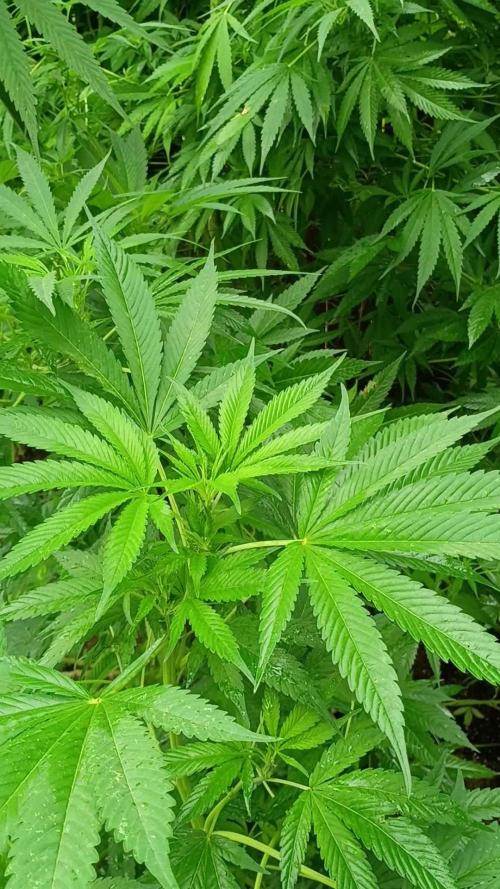
Amazing Growth right before they bud.Rain and dailing in the nutrients is really paying off finally.Alot of work but definitely worth the wait.
Likes
6
Share

@Northfork
Follow
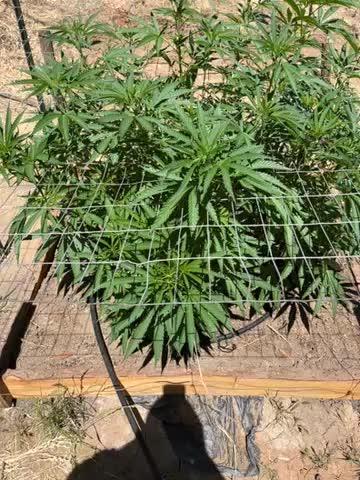
Week six for the Apple fritter continues to grow great no problems. The bugs are interfering with the temperatures haven’t interfered with this growth rate either couple hundred degree days out here so far but the apple fritter said nothing bad happened to it his truck and ride along 65 inches wide I believe by 55 inches wide 54 inches tall Got boogie brew this week and pure protein and soluble seaweed happiest can be growing great .
Likes
9
Share


@TheUsualSuspect
Follow
Went a bit ocerboard with the nutes last feeding, touched on >900ppm and they looked like they need a light flush down to 600ppm and start over from there.

Likes
15
Share

@tsf_homegrow
Follow
🇩🇪
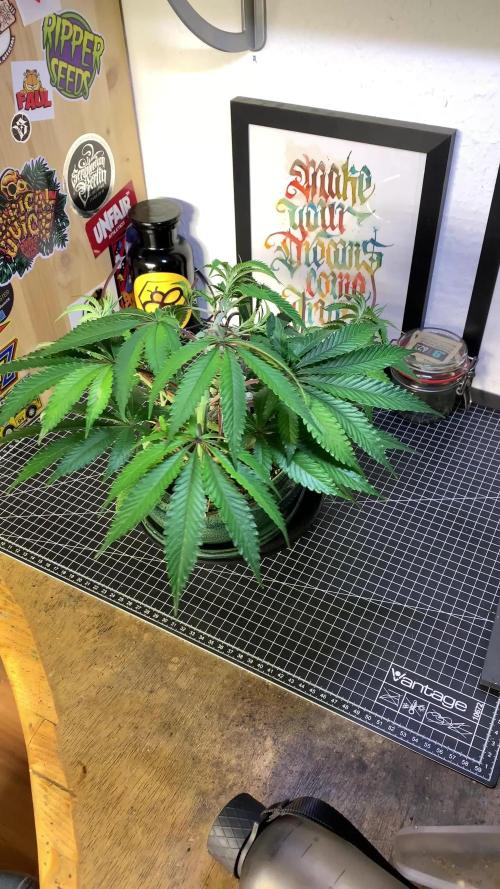
Die letzten Tage waren wir etwas aus der Spur. Sie hing etwas durch da ich nicht optimal gegossen hatte. Ich hab einen kleinen Teil der Wurzeln weiter frei gelegt und sie weiter und Form gehalten. Entscheiden das oben am Haupttrieb noch 4 weitere Seiten Trieben entstehen dürfen. Und dann wird es langsam auch Zeit sich Gedanken zu mache sie in die Blüte zu schicken. Aber ein paar Wochen darf sie noch wachsen. Happy growing💛✌️
🇬🇧
We've been a bit off track the last few days. She was drooping a little because I hadn't been watering her properly. I've exposed a small section of the roots and kept her in shape. I've decided to allow four more side shoots to develop at the top of the main stem. And then it will slowly be time to start thinking about putting her into flowering mode. But she can continue to grow for a few more weeks. Happy growing! 💛✌️


Likes
54
Share


@TheCannaProphet
Follow
~ AirCube Active Oxygen Ebb/Flow System sponsored by GrowAce, featuring Strawberry Gorilla Auto by FastBuds ~
Well guy's and gal's here we go again on another exciting Autoflower run together! This time will be different as I will be doing a 'Hydroponic' run utilizing the AirCube Active Oxygen Ebb/Flow System by GrowAce, who were kind enough to sponsor me for this run, so it should be interesting to see what results I get and have some fun along the way!
•Let me first tell you about this 6 Pot Ebb/Flow system from GrowAce:
"The AirCube system is the one and only Ebb & Flow grow system on the market that combines the benefits of air pruning with a fully automated Ebb+Flow system! With the AirCube's proprietary fabric pot in bucket design, this system is guaranteed to outgrow any other Ebb + Flow system on the market. The results speak for themselves- grow MASSIVE roots that result in MASSIVE fruits!
Air Pruning- Air Pruning only happens with fabric pots. As the roots reach the fabric walls of the pot, they penetrate and grow into the breathable fabric. Once penetrated, the roots are exposed to air, which causes the tips of the root to dehydrate and naturally prune themselves. This natural pruning process forces the roots to grow tons of lateral fibrous feeder roots. This results in a plant that utilizes the entire root zone and fills the entire pot with tons of roots. These fibrous feeder roots are incredibly effective in uptaking water and nutrients, resulting in a plant that grows healthier and more vigorously!
Oxygen Benefits- Without oxygen, nutrient absorption cannot occur. On a molecular level, oxygen is needed to transmit nutrients across the cell walls and into the roots of a plant. With the AirCube's proprietary bottom lifted draining design, the system actively draws all of the water out of the bucket pulls vital oxygen into the root zone.
Maximum Versatility with Any Grow Medium: The AirCube System is the only system on the market that allows you to use any growing medium you like. Use coco coir, soil, peat moss, perlite, vermiculite, hydroton, rockwool or any other medium you wish! This system is the most versatile Ebb and Flow bucket system in today's hydroponics industry.
Temperature Control- with the fabric pots constructed with highly porous polypropylene fabric, heat dissipates easily and effectively. Unlike standard plastic pots, heat isn't trapped in the root zone. Heat in standard plastic containers can reach temperatures of up to 125 degrees. When this type of heat is trapped and unable to escape, it can damage your plant's health and limit the potential of your harvest. Growing in the AirCube System, plant roots grow cooler, healthier, and more vigorous.
Largest Pots in its Class- this system features 5 Gallon grow buckets, the largest pot size of any other ebb and flow hydroponic system in the market.
Modular and Expandable- start with 6 grow buckets and expand up to 36 grow buckets with the optional 105 gallons PopTank reservoir!"
For my medium and nutrients I decided to also switch things up from my regular Organic runs, going with Plagron Nutrients and Root Royale 70/30 Coco/Perlite. When filling the fabric pots with medium, I first added just under a gallon of horticulture perlite from Nor-Cal as a base layer to ensure good drainage and then filled the remainder with the Root Royale.
•Now for one of my favorites, and award winning strain from my friends at FastBuds... Strawberry Gorilla Auto:
I'll be running Strawberry Gorilla Autoflower which is a 55/45 Sativa/Indica Hybrid. "ATTENTION ALL! Due to our continuous efforts in evolving our breeding process, we are proud to confirm that our Strawberry Gorilla Auto has now become one of the most potent autoflowers in the world! Paving the way to our recent success where she ranked on top & brought home the gold at the very first American Autoflower Cup in California. Moreover, she proved that not only modern autoflowers can compete with photoperiods, but they can even beat them in their field. At the most recent edition of the Farmer’s Cup and competing against various photoperiodic strains, Strawberry Gorilla Auto took home the title of 'Highest Combined Terpenes' in the highly sought-after 'Home Grow Hash' category, with an impressive 97.163 mg/g total terpene content! Our exceptional genetic selection's crowning Strawberry Gorilla Auto strain is a spectacular hybrid known for producing yields of up to 600 gr/m2 in 70 days. This is a very manageable grow that can reach heights of up to 150 cm - due to its magnitude we recommend it for more experienced growers, as a huge plant may be a little overwhelming for first-timers. This show stopping sativa heavy hybrid is perfect as an all day smoke, producing a taste bud tingling, pungent berry and diesel terpene-rich flavor combo that leaves you with a grin from ear to ear, a perfect choice for those looking for a day-and-night autoflower! "*
*References: GrowAce.com, 2fast4buds.com
______________________________________________________________________________________________________________________________________________________________________________________________________________________________________________________________________________________________________________________________________________________________________________________________________________________
The Setup:
• AC Infinity 4x4 tent
•AC Infinity Cloudline T6 Exhaust Fan w/ Controller 67
•HLG 650R w/UVA Bar *** For some reason GD does NOT have a listing for the USA version of the 650R so I selected the closest match to it.
•AirCube Active Oxygen Ebb/Flow 6 pot System
•TrolMaster Hydro-X Controller for light
•AutoPilot APC8200 co2 controller fed by a 50# tank
•16" Hurricane oscillating fan and 8" floor fan
•Tent cooling via filtered outside air delivered by AC Infinity Cloudline T6 fan
•BlueLab instruments: PH Pen and Truncheon Nutrient Meter
______________________________________________________________________________________________________________________________________________________________________________________________________________________________________________________________________________________________________________________________________________________________________________________________________________________
Weekly Updates:
10/18- Well here we go into the first real week for the Strawberry Gorilla Auto's from FastBuds!
I've got the AirCube system dialed in now and the plants have responded beautifully! I've upped the nutrients to 650ppm's and am running the PH at 6.0-6.2 @ 74℉. Tent temperatures are running 73/80℉ during lights off/on, RH is being maintained @ 65%, and co2 levels at 1150-1300ppm's. I upped the output of the HLG 650R to 65% via a TrolMaster Hydro-X Controller, and have it hung 28" above the plants.
10/20- Yesterday, I drained and cleaned the reservoir and 'brain bucket', then refilled the system with 60L of well water to which added the following: 100ml each of Plagron Cocos 'A' & 'B', 30ml of Plagron Power Roots and 45ml of Botanicare CalMag+, and 3 tbsp. of Plantonics Amino Bliss amino acids for a final level of 650ppm's. I then checked the ph and adjusted to 6.0 @ 74℉.
I have also set the GrowAce AirCube system to 'Auto' mode and have it set for three 15min feedings a day, six hours apart, beginning two hours after 'lights on'.
10/22- All three Strawberry Gorilla's are looking really good now with great color and vigor. They all have their forth leaf set emerging now and their node spacing is fairly tight currently. With the girls doing well, I'm primarily concentrating on maintaining a consistent environment in the 4x4, paying close attention to temperature, RH, co2 levels and VPD.
The three times a day feeding schedule with Plagron nutrients ( Cocos A & B, Power Roots) continues @ 650ppm. I am also checking the reservoir before each to monitor and adjust the PH and nutrients when needed. I have noticed that after each feed the reservoir PH climbs 0.9of a point to 7.0, so I have been adding 30ml of Safer Grow PH Down which brings the PH down to 6.1.
10/24- Today I drained, cleaned and flushed the AirCube reservoir and 'brain bucket', then filled it with 70L of 74℉ well water. After filling I added the Plagron nutrients separately and also began adding in Plagron Royal Rush.
The feedings of Plagron nutrients continue three times daily, and I'm monitoring the reservoir before each, adjusting the nutrient level to 650-700ppm @ 5.9-6.2 ph. The tent environment has remained dialed in with the VPD averaging 1.40kpa over the last seven days.
The Strawberry Gorilla's are responding well to the feeding schedule, and are also tolerating the increased light output which I now have set to 80% along with setting the co2 levels to 1100-1400ppm.
There goes another week for these beauties and the upcoming weeks promise to be exciting as these girls really take off! See you there!😎❤️
💚 Thank you for checking out my passion in life! Please visit as often as you wish and I hope you enjoy this journey as much as I know I will! Grow what you love, Love what you grow!💚
Likes
22
Share


@elevensixty6
Follow
This is my third attempt at my first successful grow, my two initial tries failed from not being aware of needing to add CalMag to RO water and was using Coco... Either way, germination began April 2nd using the paper towel method and bottled spring water, tap roots were long enough to be planted by the 4th. Planted the Blueberry into a solo cup with just Happy Frog, and the Wedding Cake Auto into a 5 gallon fabric pot with mostly Ocean Forest but a solo cup sized amount of Happy Frog were I planted the seed just to get it started without nute burning the seedling. After planting the seeds into the soil I watered each with about 20 mL daily of RO water with around 200ppm's of CalMag and they're doing great.

Processing
Likes
124
Share


@CRiSPrGrow
Follow
Auto cous kush is just coming onto it's own, making plant matter and working overtime in that slightly cold medium. I added aloe as a rooting agent, tried to ph it down to 6.5 using lemon juice (not doing that again lol?) and ended up catching the start of pH shenanigans so i started applying an amino acid spray onto the soil (not the plant!) . using my kelp extract concentrate at 1ml a L in my 250ml spray which means a 1/4ml , that gets sprayed once onto the plant. gonna top off the pots next watering. in soil ppm went from 360 to 420 , vpd went from 0.8 to 1.1.