


Likes
3
Share


@Ieiogrow94
Follow
Eccoci qui...
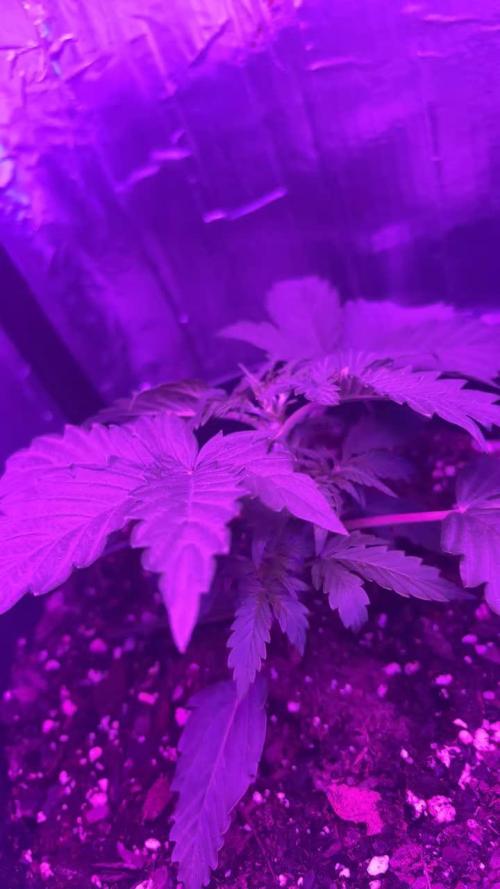
Per problemi di lavoro ho tardato un pò la pubblicazione delle foto, la piccola è molto vigorosa ed emana un forte odore.. Già si può vedere la resina che si inizia a formare sulle cime in alto...
Sono estremamente soddisfatto della sua crescita finora e sono sicuro che mi riserva sorprese, odore veramente intenso.
Grande genetica, nonostante ha avuto una carenza siamo riusciti a recuperare ed ora produce tantissima resina, mi ha alzato le aspettative in lei ed ora si punta al raccolto.
Grazie a tutti per il supporto, NON VEDO L'ORA DI RACCOGLIERLA 🔥🌲❤️

Processing
Likes
8
Share


@Canadian_Bud
Follow
30-7
Well i'm a hoping she produces like her cousin did. I know Patience!!
It's been so humid in the house the dehumidifier has been producing constant RO water at 22PPM. So far no leaks in the new system🙏
This is an interesting CBD we will see if a new location in the room makes a difference this go around.😎

Likes
57
Share


@DeepWaterGrower
Follow
🗓️ WEEK 8 / DAY 50-56
⚡ Light: 30 cm / 150 watt;
⌛ Schedule: 18/6;
🌡️ 24.5° C - 65% RH average;
📑 PH 6.1 - EC 2.3;
🌱 Phenotype #1 is forming beautiful flowers, for two weeks I have been rotating the plants 180° every 3 days, so as to make the buds that would receive less light also swell. Height: 48 cm;
🌱 Phenotype #2 just stopped stretching and begins the flowering stage. Height: 55 cm;
⚙️ Fan, extractor and pump ON 24/0.
👯♀️ As you can see in the pics, I have other seedlings in my grow-box, here the diaries if you want to take a look:
- White Widow (GHS): https://growdiaries.com/diaries/198827-green-house-seed-co-white-widow-grow-journal-by-deepwatergrower
- Opium (Divine seeds): https://growdiaries.com/diaries/206602-divine-seeds-opium-grow-journal-by-deepwatergrower


Likes
8
Share


@S3LB5T
Follow
😎 Ahuuu,
siebente Woche und sie wachsen und wachsen, trotz hoher Luftfeuchtigkeit ist nirgends Schimmel zu finden. Was mich sehr glücklich macht. Das bekämpfen der hohen Luftfeuchtigkeit ist gar nicht so einfach, zumal die Temperatur nicht optimal zu regeln ist für einen guten VPD Wert.
Es ist noch viel zu tun und ich freu mich drauf.


Likes
18
Share


@Staffedition
Follow
Привет друзья. Моей растихе сегодня 88 дней.
Растение пришло в себя.
20.10 буду переводить на цвет.
Начал применять LST технику на 19 дне и продалжаю применять её через день, а 18 августа добавил ДЕФОЛИЗАЦИЮ
С 20.08 ДЕФОЛИЗАЦИЮ делаю каждые 3,4 дня
С 20.08 LST технику делаю каждые 4.6 дней
На сегодняшний день влажность 54%
5.09 заметил высокий Ph 7.9
С 48 дня Ph не ниже 5.8
На сегодняшний день Ph 6.0
Начал кормить с 60 дня Canna Terra Vega
PPM 450
Погладитель влажности хорошо справляется со своей задачей. Рекомендую
Всем мира и добра!
Не забудь поставить лайк❤️, если понравилась как прошла неделя
И читайте наш TELEGRAM: https://t.me/smail_seeds
#Smail_Seeds😃#Fast Buds


Likes
2
Share


@High_Grade_Dadli
Follow
So far so good she is loud but the volume ain't cracked up yet...until nxt week happy growing
Likes
20
Share


@Cannabis_King
Follow
The ladies are happy and if they are happy that means good flower at the end of this long journey

Likes
12
Share


@HinduGod
Follow
WOW LOOK AT DAT!!!! PLANT HAD SOME CARNAGE DONE TO IT DIS WEEK!!!! IT WAS ALSO GIVEN SOME ORANGE PEEL,EGGSHELLS AND WORM CASTINGS AS A TOP DRESSING!!!!! SUN GOD AND RAIN GOD WORKING TOGETHER DAT IS VERY VERY GOOD!!!!😎
Likes
Comments
Share


@Robom069
Follow
Day 75/76
everything is going to grow together so the compounds the way they should and i dont get bugs or overstimulated effects
so it should be a pretty good harvest in 2 months

Likes
5
Share


@AK1210
Follow
This lady is growing in height at an astonishing rate, the buds sites are already chunky and coated in tricomes.
I'm glad I topped this lady when I did as otherwise she could have reached a hight that would certainly give the neighbors something else to moan about. 😀

Likes
7
Share


@sellem
Follow
Trouble in Paradise! Both experiencing all kinds of trouble. BUT theyre growing and swelling!
I put the blame solely on me, i overwatered in the early weeks and really havent had much time to take care of them in time. Also started flowering nutes way too late.
Im happy with both of their forms though! small and bushy, thats how i like them. Sad that the deficiencies had to happen, but oh well, theyre gonna pull through i hope!
i downed water to 2L from 2.5L just because it takes really low for them to dry out in between and i wanna get fresh batches of nutes in more often. 2L is also enough to get a tiny bit of runoff so no dry spots or anything. Will see how they like it!
due to deficiencies, i skipped giving them 2ml/L of bloom and went straight to 3, also added a good dose of calmag.
Didnt defoliate besides really effed-up leaves.
See you next week!
Likes
28
Share


@CrystalMeph
Follow
So this was quite the week...I was looking over our set up, and making sure Grandma has everything she needs when she says "it seems to me that we need a vegetation cabinet." Turns out she had all the supplies too. Cracked me up...so I ended up building a nice little veg / drying cabinet. You'll see it in the second Meph run diary, was too busy to get some shots today. 😅
She doubled in size from last week, super happy with the progress. She's under a combo of flouro and LED in the new cabinet and LOVING it. Started ramping in nutrients slow and steady, keeping the c02 around 600-800ppm while I finish up the environmental control in the new cabinet.
I realized that Mephy, might be a flight risk...so I made her a pen. 😂 ...also removed any confusion on her breed. Yeah, I nerded out a little. #prusagang #piggydankfarms
Hope everyone had a great week, and all the competition ladies are stellar! Until next week...time to go play on the farm. ✌️🌱


Likes
Comments
Share


Likes
24
Share

@SebastianFastBuds
Follow
Week 5 – Beast Mode & The Big Flip!
This week I set up a timelapse to capture just how vigorous these ladies really are — and it didn’t disappoint! 🌱 The tallest Lemon Cherry Runtz even surpassed the Papaytons, though to be fair she’s sitting right in the sweet spot in the center of the tent. I also bumped up the light a bit, and the response was instant. Big thanks to SANlight, AC Infinity, and Autopots for keeping this jungle happy.
Some of the girls figured out that there’s basically an endless water source waiting under their pots, and in search of it they threw down insane root systems. You can tell they went into full-on beast mode.
This time I’ve been home for almost a month straight, so I could keep a daily eye on the propagation tent. It paid off: the first clones of all four strains rooted within 6–10 days! They’ll be kept safe until we find out which phenos are the real winners.
Before flipping them to 12/12 on 19.08, I pulled each cultivar out, gave them a clean topping, and prepped them for flower. Since they were so big already, I skipped cloning the tops and went for side branches instead — they root faster, which is crucial in summer when cloning isn’t the easiest game in my setup.-äpl-.lp0üß0
Meanwhile, the moms I sent to the flower tent are already flashing their first pistils — can’t wait to show you how those develop. The rest will have to stay in the 4x3 for now until the flower run is done in 3–4 weeks, so I went hard on them: lollipopped, defoliated, topped — the works. For now, the goal is to keep them compact and healthy until it’s their time to shine.
The real fun is just beginning… stay tuned for flower! 🔥💚