The Grow Awards 2026 🏆 


Likes
Comments
Share
@Jacks_Pot
Follow
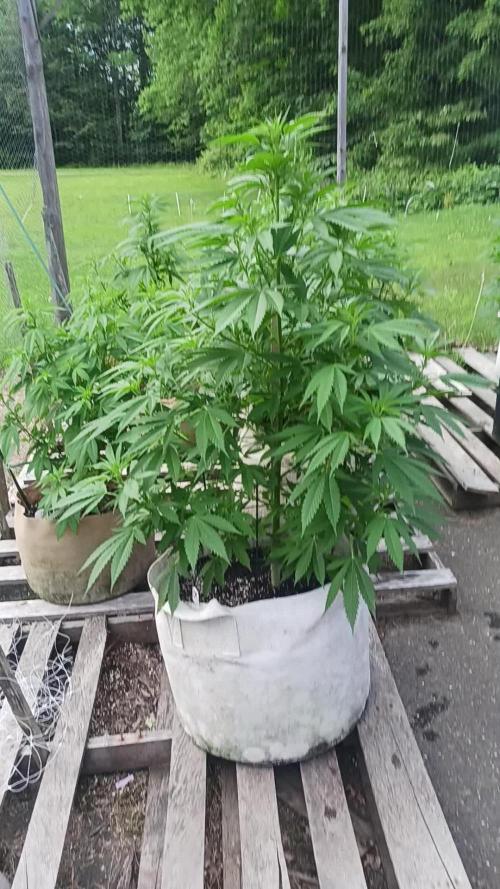
The 4th week of 12/12 went without any issues.
Flowering is going on nicely and lots of white pistels are filling up the canopy.
They still grew a little but the biggest stretch is over.
This week the Runtz were fed once (ph 6,4 – ec 1,63) and on other days I gave ph adjusted tapwater (ph 6,4 – ec 0,5)
or nothing if the airpots were still moist enough. Next week I'll start giving them some pk 13/14 for extra phosphorus and potassium
and Remo nutrients Magnifical for some more calcium & magnesium.
I've noticed that the left and right Runtz have a bit less green in their leafs and I think overwatering is the issue.
Gonna give these ones less water and I'll see what the Magnifical will do.
Temperatures stayed between 19 – 24 °C ( 66 – 75 °F) and humidity between 46 – 59 %
I've raised the power of the airfan from 40% to 55% to lower humidity levels
and next week a dehumidifier will enter the grow tent to lower levels even more.
The cobs were lowered to 56cm (22 inch) and dimmed to 284 watt.
See you next week! ✋
Do you want to grow this strain?
👉 https://www.zamnesia.com/6000-zamnesia-seeds-runtz-feminized.html 👈

Likes
19
Share
@sirstickyfingers
Follow
Day 31 flower wk 5
Welcome to frosty town. Sour diesel has shown up tot he party bringing snow holy crap. This was the plant that has been the dwarf the whole time all through veg and even the first cpl weeks of flower. This girl stretched and started stacking the trichomes. It smells like your in a tiny 5x5 room with ppl peeling oranges. Sour diesel buds are small but im hoping they stack on some weight in the next 30days
Northern lights are my ideal bud structure, fat cone buds just stacking and also starting to get frosty as well. I think Northern lights is gonna be my big producer.
Grandaddy Purp. I can tell this girl is slow grower. Shes starting to stack and has good internodal spacing but is taking her time and will likely be the last one in the tent
This stage of growing is exciting but kinda on autopilot as im just watering every other day and just letting them do their thing


Likes
37
Share
@Smoking_Joe_Frasier
Follow
Week 8: Flowering Stage
Rising Temperatures and Weather Challenges
The temperatures are expected to rise slightly this week, but intermittent thunderstorms and heavy rain are also forecasted. This unpredictable weather presents a challenge, but I remain hopeful for continued growth.
Snail Attack
I had been leaving the plants outside overnight, but during a late-night check, I found three giant slugs feasting on my Gorilla Cookies buds. These damn snails just won't give up. I'm seriously considering installing some kind of automatic deterrent system.
Feeding and Watering Consistency
The amount of water and nutrients remains unchanged. Each plant continues to receive 3 liters of nutrient solution in their 11-liter pots to prevent salt buildup and ensure optimal growth.
Growth Observations
Banana Purple Punch and Blue Dream: Both strains seem to have halted their vertical growth. They are now fully focused on bud development.
Tangie: This plant is still vigorously growing with new shoots appearing everywhere. Tangie seems perfect for low-stress training (LST) and could probably handle a well-timed topping without issues. I had to do some light defoliation to make sure everything receives enough light.
Gorilla Cookies: While it’s not growing as aggressively as before, it is concentrating on flowering. Despite this, it continues to gain some height.
Looking Ahead
As the flowering stage progresses, I'm eager to see how the plants adapt to the changing weather conditions and how they continue to develop. Despite the challenges, the plants are showing resilience, and the buds are looking promising.
Update 18.07: Pest Problems
Bad news, growmies. During my daily inspection today, I discovered some unwelcome pests. Some leaves on all the plants had white or silver dots, which I suspect are caused by thrips. The Banana Purple Punch plant was particularly affected, with numerous black dots on the top buds, likely aphids. I had to remove two small buds 😞.
To combat this, I brought all the plants inside for a thorough shower and removed any affected leaves. I then sprayed them with a light neem oil solution, taking care to avoid the buds to prevent affecting their taste. The Banana Purple Punch plant has been isolated to prevent further infestation.
I'm open to any advice or suggestions on how to handle this situation more effectively. What else do you think I should do?
Update 21.07
The heat has been intense lately, with temperatures soaring to around 31°C (88°F). Despite this, my garden is showing remarkable resilience. After battling thrips and aphids, my plants are bouncing back. The Tangie, Blue Dream, and Gorilla Cookies no longer display any signs of thrip damage on their leaves. It seems the light neem oil solution has done the trick.
However, my Banana Purple Punch remains a bit of a mystery. This strain appears particularly sensitive to nutrients, even though all my plants receive the same care and feeding. While the other plants look lush and vibrant, the Banana Purple Punch shows some troubling symptoms. Some leaves exhibit early signs of nitrogen toxicity, while others curl upwards with no apparent nutrient burn at the tips. Additionally, the large fan leaves are yellowing. Despite these issues, the buds are frosty and thriving.
I recently checked the trichomes and found that most are still clear, even on my Blue Dream, which already has a promising main bud. It's clear that patience will be rewarded with this beauty 😍

Likes
87
Share
@beenSlayin
Follow
What I thought to be a cal deficiency at first glance appears to be rust fungus or leaf septoria, but nothing rubs off of the spots, which confuses me. I freaked out and tore the hell out of the plant my buddy left on my doorstep, stripped all the freakin spotted leaves. I'm hesitant to toss it, dont know why, I did notice spots on 2 other plants, barely, bastard being one of them. Ill be keeping a great hawk eye on them, ready to pluck anything I notice with a rust spot or toss that one plant out of there if I see too much appear. I need to grab some neem oil as well. Maybe I shouldn't run the tent sealed anymore, as I think it could be a big reason for the fungus. I never let humidity get over 60 and I had pretty decent air movement, but they are squeezed in there. I'm freaking scared.
Nothing rubs off these spots. My run off PH has been low which makes me think calcium still. Guess I'll do some big-time flushing.
Flushed all with 6.8 water until run off reached 6.5, roughly 10-12 gallons each. I'll l feed them tomorrow. Usually, I flush around day 45. I was trying to see if i could get away without doing so, with that scrog n all.
Whew, I was trippin out there there, after reading n shit I got thinking the worst, should've stuck with my original diagnosis. I'm sure they'll be ok.👍
Zipper broke off the tent the other night, so it's now "sealed" with a red blanket🤣
Likes
25
Share
@herewegrow
Follow
Ordered a scale the other day so should have some more numbers tomorrow! Not going to sample anything until I get the scale, then I'll update with some more details.

Likes
18
Share
@Wahalan
Follow
Valeurs sûre la gorilla blue
Couper a Flo +68
Je repasserai après séchage et curing


Likes
4
Share
@pzwags420
Follow
On the 5th week of flowering day 1 the girls are chugging along, growing bigger by the day and smelling excellent :). On day 5 the girls are putting on a lot of weight. I'm very excited about harvest:). On day 7 The girls are doing well. I had a small clog in my bluat system on one of my carrots. I have fixed the clog by massaging the small pipe that was clogged. it has been tough using powdered nutrients with this system as there has been a few clogs. I will be switching to water soluble nutrients with drip clean to keep lines clear on my next grow. I just need to make it through the next few weeks to harvest :)

Likes
10
Share
@eldorado1977
Follow
I was planning to trellis net this tent, but unfortunately I’ve had to water these with a lot of runoff as I had a lot of buildup in the soil. The Recharge magic powder fucked my PPMs all up so I switched back to just the Pure Blend Pro and a little kelp/humic juice every 4 waterings or so. Anyways, I don’t have a convenient way to get rid of runoff right now so I need to take the plants out to water. so I can’t trellis. I have some drain trays on the way so maybe that’ll help

Likes
145
Share
@Kynareth
Follow
Day 81 update - as you can see at microscope pictures the buds are near to be ready for the harvest. I will stop watering for the next 24 hours the 2 biggest plants to be harvested at the weekend on days 82-84.
The other one i will wait a bit more to madurating proccess.


Likes
13
Share
@Hawkbo
Follow
Purple Lemonade , Gelato 1&2, LAK 2&3 are all just about done theyll be coming down over the weekend or early next week. T26, Pineapple Express, Mexican Airlines, LAK 1, 6 Shooter Blue Dreamatic and Cream Cookies are all on the flush but will need a few more before chop. This tent reeks up the whole block it's pretty intense skunk in the driveway right now. There will be one more update I'm guessing for most of these before the harvest update. This was the most successful autoflower crop I've had in a long time I think theres some really good quality buds on some of these. I'll put the video up now and as I go thru the pics theyll be uploaded so if your interested come back tmm for the pics.
Likes
11
Share
@masterofsmeagol
Follow
7/6 Plants looked great thos morning. I WATERED A GALLON to the 50 and split one between the two tens. Top of the bags are still moist amd they still have some heft. I'm hoping this will at least carry me 48hrs. These are BIG plants and the wind goes right through those bags and dries them out. I'd rather have that though than worry about overwatering. I noticed some minor deficiencies on a couple plants so it's time to start the nutes. Calcium I'd guess. Just a beginning stage but it's time. Next feeding they'll get some food too. I'll still monitor during the day to make sure they ront dry out. It's amazing how fast they come back after they dry out but it stresses them.


Likes
10
Share
@thevalar007
Follow
Clones looking surprisingly good. The mother plant they spawned from was destroyed in veg due to gnat infestation from poor conditions on my part, however clones were taken while she was healthy and thriving. Sorry for the pic quality, the tent is getting crowded during the stretch and it's hard to get single shots of 1 plant because of the trellis. Lesson learned for me personally, stick with 1-2 different strains per tent up to a 4x4.
Likes
17
Share
@Joni2017
Follow
Hello again, Growdiaries community! 😎
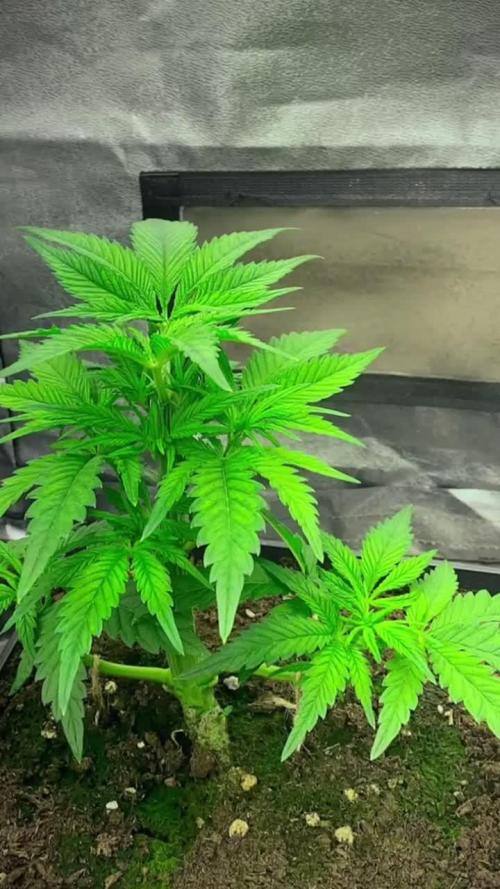
We have reached the end of the vegetative stage with my Critical, and I couldn't be happier with the results. This week has been entirely focused on preparing the 'engine' for the explosive flowering phase that begins this Sunday.
📏 Evolution & Structure: The plant is now 20 cm tall. After the intensive training last week, she has spent these days consolidating those 4 main colas. The canopy is perfectly flat, and the secondary shoots are receiving direct light thanks to a final strategic cleanup.
✂️ Applied Techniques:
Selective Thinning: I performed a cleanup in the center of the plant. By removing internal leaves and small shoots that were shaded, I’ve guaranteed total light penetration and better air circulation around that massive fasciated stem.
LST Maintenance: Adjusted the ties to keep the structure wide. No more topping from now on—I want those 4 heads to stretch vertically!
💧 Watering & Nutrition (The Big Jump):
Volume: Increased to 1 Liter of water per session.
Water Temperature: Always watering with lukewarm water (approx. 21°C) to avoid thermal shock, which is vital when growing in an outdoor terrace setup.
Fertilizers: Stepped up the dose to 2 ml/L of Bio-Grow. The plant is responding with a deep, healthy green and zero signs of stress.
🌤️ Bunker Environment (Terrace Setup):
Temperature: Stable at 27°C with lights ON. Even though external temperatures drop to 1-2°C, my 'closet-within-a-closet' system keeps the minimums at a safe 18-19°C.
Lighting: My QBK1500PLUS (150W) is running at 100% in Veg mode, kept at a 60 cm distance to encourage that final pre-flowering stretch.
Aroma: A very noticeable 'fresh green' scent fills the tent every time I open it!
Next Step: This Sunday is the BIG DAY. I’m switching the timer to 12/12, activating the Bloom switch (adding the Red/IR spectrum), and getting ready for the legendary Critical stretch.
The structure is ready, the nutrition is on point, and the bunker is prepared. Let the flowers come! 🌸
Thanks for following! Happy growing! 😉👍
Likes
47
Share
@Mrs_Larimar
Follow
Monday,March 1st.
Second Week of Flower starts.
Those Plants growing like Masters, Drinking around 0.7l each Day
Only Benefical Drinks, because they sit in amended Soil
( EASY BOOST ORGANIC NUTRITION)
I was watching them very carefully, because they moved into abigger Tent,
with Double amount of Light.
But it seems to be allright for them. Looking gorgeous, green and Happy
Likes
31
Share
@Sider79
Follow
Another hot week in the 30s but obviously they like it due to the amount of growth considering ,really just 19 days in growth and two days germination. Is this normal for auto flower growth?

Likes
12
Share
@valiotoro
Follow
One with a topping the other one just LST both huge yield!🦖
For the smell its cookie dough,lemon & diesel🍪🍋⛽️
Super sticky buds 🤩
Processing
Likes
41
Share
@Teamdirtbag2
Follow
They are all doing great.
I cleaned my resivor and forgot to turn the valve back on. In less than 24 hrs my boy starts wilting ( he is such a pussy ). Other than that things are good.
My light decided it was tired and wanted to quit working. It is 3 years old, but I barely used it. I have a spare, but anyway its time to shut it off. They are getting about 14 and 1/2 hours of sunlight. The longest day of the year was on Friday. Its almost like it knew. 😂🤣😂🤣
They should already be outside in the final pot..... but I'm behind. They should be 5 feet +.... but I'm behind. My boy is the tallest at 43 inches and the shortest girl is 36 inches. I will transplant into 25 gallon hard plastic pots.
This grow will be slightly different this year. Somehow I will make it happen. I'm thinking of cramming them into tomato cages, and seeing what happens. I'm not even sure if I'm going to top them. I am just going to play it out and decide later, or not decide. I'm sure it will have some ups and downs.

Likes
Comments
Share
@Cherry_kai
Follow
Je précise que la dozy cookies n’est qu’une plante sur 3 de la tente
Trichomes 5% ambre, j’aurais pu laisser 5-6 jours de plus mais je vais récolter le lendemain
Grosse odeur gazy frais légèrement sucré/citronné
Likes
5
Share
@KiweeBudfe
Follow
This Gorilla bomb is come from cloning.
In veg. stage, she was trained by using LST at the early veg. stage and then using ScrOG net and a little HST on some stem (Super cropping).
Now flowering stage, she was lollipop 1 week before I'm flip light cycle from 18/6 to 12/12.
