
Likes
Comments
Share


@CampaCavallo
Follow
Buongiorno e buona SPANNABIS a tutti gli amici amanti della CampaCavallo 🍀💐💚🍀🍺🥦🎉🎉🎉
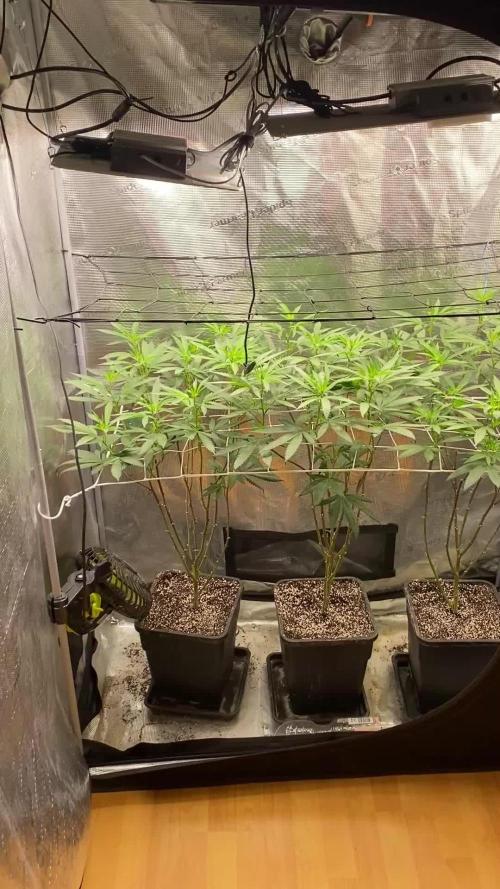
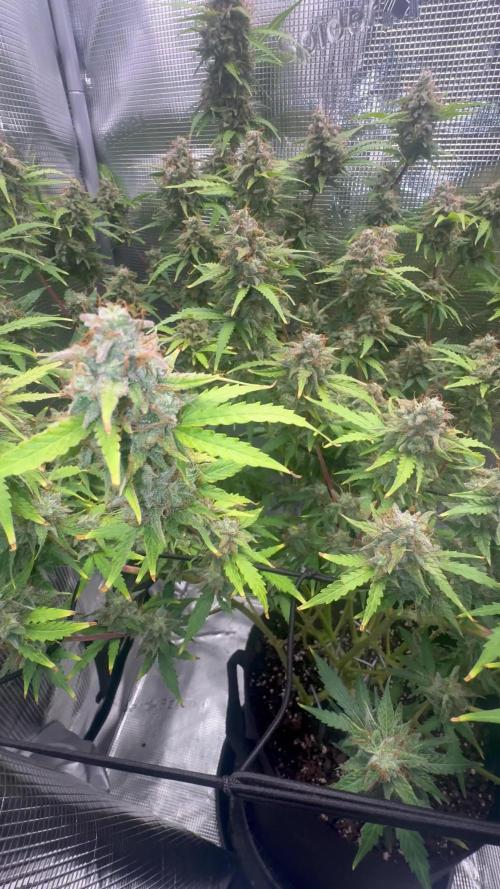
Vediamo la mitica CRITICAL LEMON ⚡🍋 gonfiare i suoi bei bud sotto il solito vigile controllo di TENT-X 🤖 by TROLMASTER 🔝
L'alba ed il tramonto impostate tramite Tent-X Sembrano proprio piacere alla giovane ragazza.💚🌞

Likes
43
Share


@Jack_Greenstalk
Follow
Increased the amount of nutrients in the feed this week and got a little bit of burn on V, Nemo handled it no problem! removed the yellow spotted fan leafs as part of general defoliation for this point in flower. Continuing to pluck and tuck, meaning removing extra fan leafs (plucking) and bending tallest colas back under the scrog (tuck). shooting to keep all budsights 18 to 22 inches from the light to prevent burn and allow healthy development. I can see where proper distance has been kept best development has occured.

Likes
25
Share


@Kakui
Follow
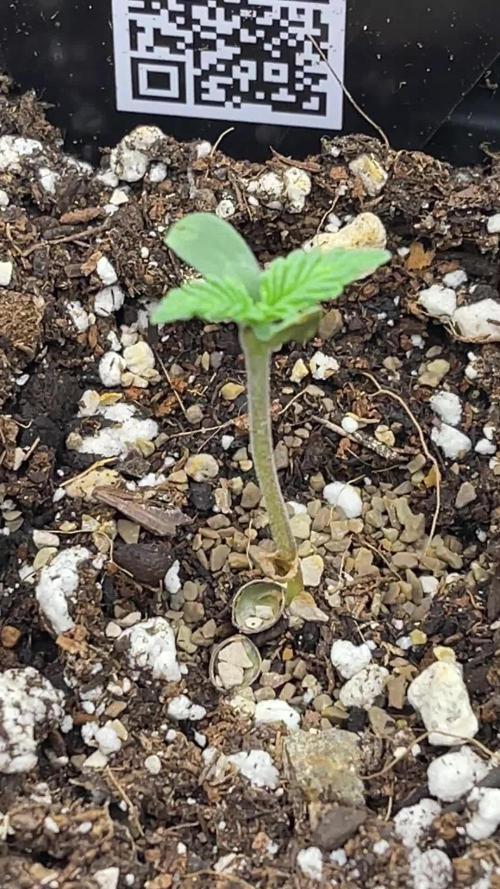
Dia 1 de vegetación
Veg1, cuando empiezan a crecer las primeras hojas de mas de un dedo/puntas considero que han dejado de ser plantulas, y han comenzado la vegetación. Entonces, les he dado su primer alimento con nutrientes muy suaves(micro, grow y bloom) en una EC de 0.5, con pH de 6.2, ademas de seguir inoculando la tierra y raices que vienen desarrollando con voodoo juice, tarantula y piranha, con 1/2 de fuerza.
Veg2, riego con 0.3 EC y pH 6.1, desde el primer riego están creciendo más rápido.
Veg3, riego con 0.6 EC y pH 6.0, primer riego con suficiente agua para obtener drenaje, el drenaje midió 1.2 EC y 6.5 pH, todo ok.
Veg4, nada hoy.
Veg5, riego con 1.2 EC y pH 6.2, se usó Sensi CalMag en este riego @2ml/litro por un poco de amarillo en el nuevo crecimiento, B-52 también.
Veg6, siguen creciendo bien, al parecer se corrigió lo amarillo en las hojas.
Veg7, riego con 0.7 EC y 6.0 pH, drenaje de 1.1 EC (ok) y 6.6 pH (un poco alto), siguientes riegos serán con pH 5.8. Subí la luz y bajé su intensidad para que las plantas estiren un poco antes del transplante, las raíces de la más pequeña estaban ok, la más pequeña fue sacrificada, ya van quedando 11 de las 9 plantas finales.
Ahora a esperar que se desarrollen suficiente(3-4 sets de hojas verdaderas) para hacer transplante a la maceta definitiva de 18 litros.

Likes
Comments
Share


Likes
2
Share

@Tripz88
Follow
They are still seedlings so there’s not much we’re doing except for keeping them moist and making sure everything’s OK as far as the VPD’s humidity and temperatures.

Likes
2
Share


@UrbanBoer
Follow
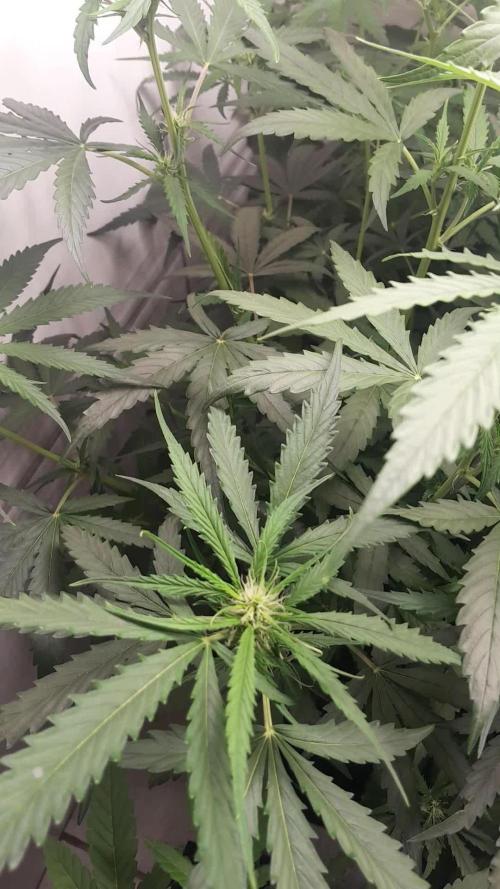
This Gorilla, has went ape.
All I need to do now, is nurse it to harvest, to get bigger buds,I want dense nuggets. But more than having nuggets, I need it’s potency to be on deadly level, I want smokers to crash after smoking. Or I would only get that if I was growing Gorilla Glue.
Likes
14
Share


@Growin_Ish
Follow
Day 56
Pulled about 10 leaves that were showing some deficiency. It's an 86 day strain so it's not fade. Top dress is supposed to last 2 weeks, it's been 11 days so she is hungry 3 days early. She was hungry earlier than expected on the last top dressing as well. I will top dress tomorrow. All flower nutes, no castings.
Day 57 From Seed
Top dressed with 5Tbls of Flower Girl and 1Tbls of Tomato & Vegetable nutes. Watered in between 6.0 & 6.5 PH. Water had a heavy dose of Fish Sh!t.
Day 60
Top dressed 2Tbls of Garden Lime with 5.5PH water. The Garden Lime raises soil PH by .5, hence the lower PH water. At least I hope that's the way it works. Trichomes are developing, still no smell.
Day 61
Watered with organic coconut water and spring water 50/50 PH between 6.0 and 6.5. Preparing Roots Organic Bloom tea for Day 65.
Likes
3
Share


@Mr_nugs_lover_David
Follow
She looks beautiful, she's a beautiful autoflowering plant, very sweet aroma just like perfume. Love her, she's 100% healthy and producing very tasty flowers. Let's see how she keeps developing


Likes
Comments
Share

@hassehujasse
Follow
Driving to harvest through German AutoBahn
Aceleramos al cosecha


Likes
3
Share

@Jardineiro_Br
Follow
A Planta reagiu super bem ao LST desenvolveu muitos galhos que estao botando botões, galhos forte e.grossos para alimentar belas flores . Esta com uma boa altura devido a predominância sativa.
Likes
21
Share


@420DeepGrow
Follow
Gracias al equipo de Kannabia Marshydro XpertNutrients y Trolmaster sin ellos esto no sería posible.
💐🍁 Amnesi K - Lemon:
La Amnesi-K Lemon es una semilla formada a partir de un trío de reyes, la Amnesia, la Lemon Skunk y la Jack Herer. Este matrimonio de tres dio lugar a una gran sativa que, con tonos dulces, terrosos y muy cítricos
🌻🚀 Consigue aqui tus semillas:
https://www.kannabia.com/es/semillas-marihuana-feminizadas/amnesi-k-lemon
💡TS-3000 + TS-1000: se usaran dos de las lámparas de la serie TS de Marshydro, para cubrir todas las necesidades de las plantas durante el ciclo de cultivo, uso las dos lámparas en floracion para llegar a toda la carpa de 1.50 x 1.50 x 1.80.
https://marshydro.eu/products/mars-hydro-ts-3000-led-grow-light/
🏠 : Marshydro 1.50 x 1.50 x 1.80, carpa 100% estanca con ventanas laterales para llegar a todos los lugares durante el grow
https://marshydro.eu/products/diy-150x150x200cm-grow-tent-kit
🌬️💨 Marshydro 6inch + filtro carbon para evitar olores indeseables.
https://marshydro.eu/products/ifresh-smart-6inch-filter-kits/
💻 Trolmaster Tent-X TCS-1 como controlador de luz, optimiza tu cultivo con la última tecnología del mercado, desde donde puedes controlar todos los parametros.
https://www.trolmaster.com/Products/Details/TCS-1
🍣🍦🌴 Xpert Nutrients es una empresa especializada en la producción y comercialización de fertilizantes líquidos y tierras, que garantizan excelentes cosechas y un crecimiento activo para sus plantas durante todas las fases de cultivo.
Consigue aqui tus Nutrientes:
📆 Semana 3:
Ha sido una buena semana, ella ha dado un gran cambio en su lugar definitivo 😎.
Se le ha aplicado un tratamiento insecticida con agua + tierra de diatomeas ( 1 cucharadita por litro de agua), también se le aplica un tratamiento fungicida con una infusión de cola de caballo para evitar futuro moho.
A partir de ahora se riega manualmente con las dosis recomendadas por el fabricante.
https://xpertnutrients.com/es/shop/


Likes
Comments
Share


@akroaster
Follow
closing out this harvest with the best yield yet, and excited to put round five in the dirt mid january.
this harvest was focused on trying to split the grow types to maximize yield and get one more plant in the box.
very excited to get wet weight friday night!


Likes
10
Share


@CaptainHook
Follow
Nothing interesting to say...
I just added some Humic Acid Plus and Growzyme to my More Roots from Green Buzz in my Terra Soil Mix with every watering.
🎼 The plants just woke up into this world, so to celebrate their birth and welcoming them as the princesses they tend to become, I decided to play some Prokofiev's Peter and the Wolf & Tchaikovsky's Swan Lake on a Bluetooth speaker during each watering or simple courtesy visit I made. Yet notice that Rossini's Barber of Seville & Vivaldi's Four Seasons was used as a booster during the second part of the week.
Likes
148
Share


@Natrona
Follow
Frostbanger Plants 1-6
First thank you if you actually look at all these pictures that I photobomb with each week. Documenting six plants on a tester strain to provide ample information regarding the new strain characteristics takes a lot of time, work, and effort. I am so frustrated with Grow Diaries system doesn’t load pics or videos without error.
When I load pictures, I am systematic and load every picture on that plant together, each video that I load first on the pictures identifies the plant pictures that follows.
However, Grow Diaries puts the videos first, moving the picture out of order. I know which pictures of plant parts go with each plant, but with GD shuffling my pictures around good luck everybody else. This week I had so many errors uploading simple pictures that I had to go back and reload them. You may see multiple duplicate pics this time due to these system errors. Sorry about that but at least they are there.
I will not do this level of photographs and diary support again.
Week 11 June 1-7 FLOWER 6
Nutrients : 3 gal
GH Micro 7,5ml
GH Gro 0ml
GH Bloom 23ml
CalMag 7.5 ml
Elm Bloom 15ml
6/1 PH 6.62 PPM 646, temp 67 2 ltr each
6/3 PH 6.6, PPM 493, temp 68 2ltr each
6/5 PH 5,84, PPM 580, temp 68.5 2ltr
6/3 Defoliation
6/4 weekly pics & vid
As aways, thanks for visiting, for the likes and most of all growers’ love and support because I surely haven’t gotten any from @Fast_Buds on this grow.
Stay green, growers love 💚🌿my friends.
💫Natrona💫


Processing
Likes
43
Share


@GrowerGaz
Follow
Saturday 18th day 18 of 12/12
The jacks toe jam was looking a little hungry so, i gave it a pint of Bac PK booster and bloom stimulator. For the rest I will use biotabs pk compost tea and molasses, when the time is right. More tying down for the rest and some defoliation. I also added some nematodes on the 12th as I have a couple of little gnats buzzing about. Apart from that, I have just been carrying out daily checks for any buglife and any signs of male parts.

Likes
2
Share


@SolitudeCorners
Follow
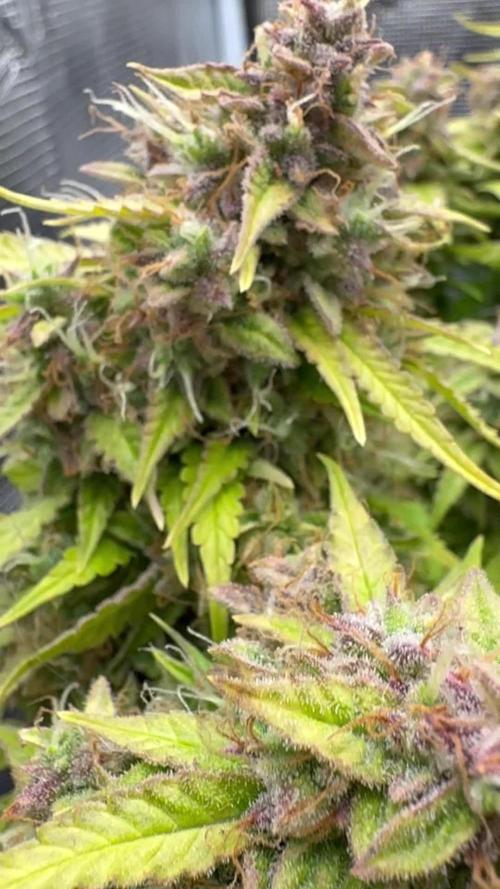
We’re deep into Week 8, and Blue Banana Cream is stacking up beautifully. Trichomes are looking frosty, covering the buds in a thick, sticky layer—definitely a strain that’s going to shine post-cure.
The aroma has intensified compared to earlier weeks, now pushing out a stronger creamy, fruity scent with a slight gas undertone. Every time I open the tent, it hits harder. The buds are swelling up nicely, transitioning from airy to more mid-compact density. Pistils are still mostly white, meaning it’s got a bit more time before it fully ripens.
One thing I’ve noticed—the branches are starting to lean from the weight, so some light support might be needed to prevent them from bending too much in the final stretch. I’m keeping temps at 18-20°C and humidity around 55-60% to ensure a proper finish.
With harvest around the corner, it’s just about watching those trichomes shift from clear to cloudy/amber and letting this one reach its peak.