
Likes
Comments
Share


@Coopmc
Follow
Now the strawberry throwing flower fast to!!
These plants are insane!!

Likes
27
Share


@GrowInger420
Follow
This week was very good plants look great. Flews are gone🙏 ✌️✌️
Buds grow perfect. I am very surprised, that they go so good. Hope they will stay healthy till the end.


Likes
2
Share


@Madeofstardust13
Follow
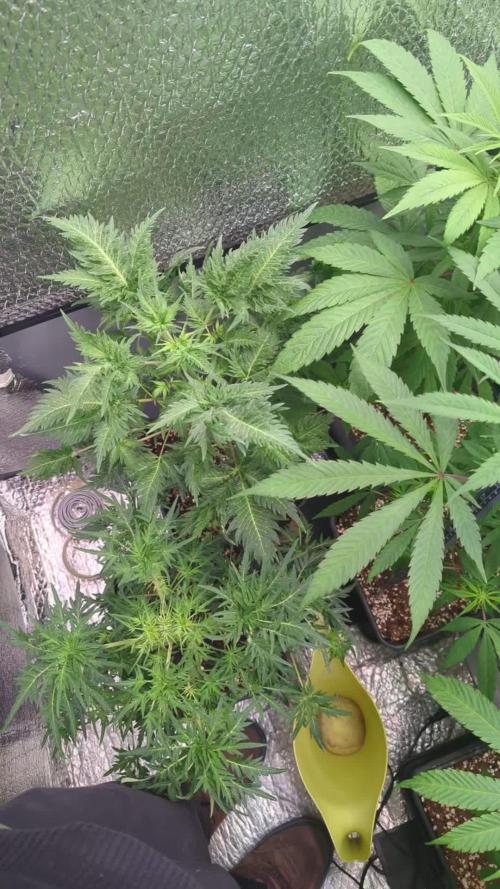
Week 2 of Flower- Plants have been getting defoliated as needed. They have also been fed Mother Earth bloom (x2) & Cal-Mag each feeding. All are reacting well. No light stress.

Likes
2
Share

@MiyaguiOkPolilla
Follow
Hola amigos 😁
Vaya vaya, estas fotografías fueron tomadas apenas 5 días de 12/12 y se ven fenomenal, si estructura se comienza a ensanchar un poco y el ápice asoma ya brotes abarrotados 😎

Likes
1
Share

@Krautis_IndoorFarm
Follow
Der Grow ist Gestartet 01.03. mit der Keimung. Nach 20 Stunden bei 28 grad zeigte sie ihre Wurzel.
Heute ist der 4.3 und sie hat ihren Köpfchen gezeigt.

Likes
30
Share


@valiotoro
Follow
Hello everyone week 2 of flower has passed for this Skywalker haze auto 💥
Mars hydro SP-6500 75%
have a great day and wish you all happy growing 😎👨🌾🏻

Likes
11
Share

@RockoCalenberg
Follow
Die 7. Woche beginnt nach dem Umzug endlich im Zelt ⛺ .
📏Die beiden messen jetzt ca. 50 cm .
Nach dem toppen dürfen sie jetzt gerne etwas in die Breite wachsen ↖️↗️
Likes
Comments
Share

@SirNutalot
Follow
She looks good after the high stress
But sadly there was one hermie
He or she have to go ...

Likes
61
Share


@UnorthadoxDude
Follow
Hello and welcome to week 10. We join Queen Citronella after a week of high drama at the palace. She was poisoned! Dun dun duhhhhh. The royal food taster has already been executed, but her majesty is displeased still and on the warpath. She has recovered, much scabbed on her skin, but her new growth is coming in healthy.
Lets see how week 10 goes for her royal highness. She and I will see you tomorrow.
Day 64: Fertigated 5l.
Day 65: Fertigated 5l. Her majesty have grown 2cm to 50cm.
Day 67: Height 52cm. Not much of a stretch here now. Unsure what the prognosis is. For the first time today she smells like super lemon haze.
Day 68: Fertigated 5l.
Day 69: Nothing to report
Day 70: Her majesty has recovered well from the serious nutrient toxcitiy I subjected her to for 2 days. However I do think I have given the plant a fairly big setback. I wonder if her stretch is already over. That would honestly suit me perfectly well for this grow. Her tent is too small for her.
Likes
43
Share


@OrganicPower
Follow
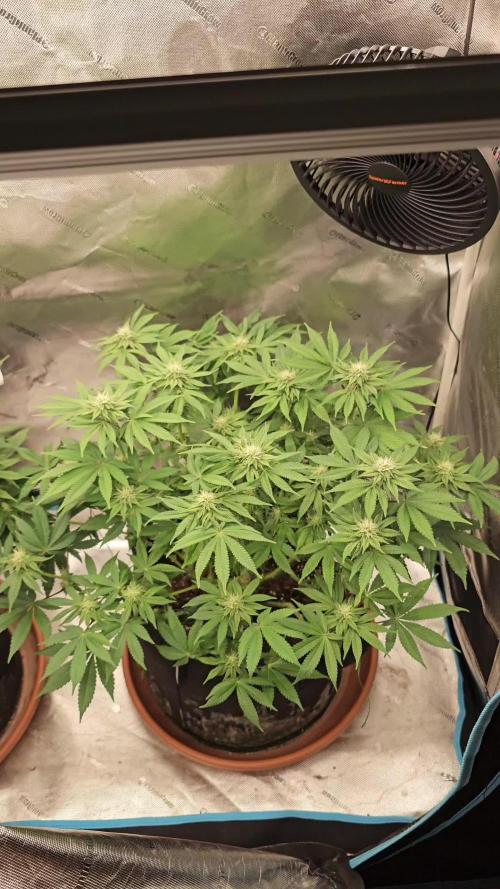
Week 5 flower. This one just grows slow. Slowly filling in. Very frosty, but not a nice smell. Hopefully the flowers end up tight, hard, and smelling great. Lights are at 12-14” from canopy, and plants are taking it well. Blumat drip still working, and hand watering once a week with Gaia Soluble Seaweed Extract 0-0-17. Not going to top dress anymore as these 30 gallon pots have lots to offer still and this plant is using nothing really. Thanks for views!

Likes
60
Share


@Professor_Chaos
Follow
Beginning of week..
Damn she is a very nitrogen sensitive bitch! I really hope she starts to thicken up some.. I think it hurt the yeild some.. Unless she thickens up nicely. It's not as bad as I've seen other nitrogen toxic plants.. With every single leaf cupped or clawing downward.. But the top leaves are pretty clawed.. And even alot of the sugar leaves throughout the plant.. Damnit.. Also, I've noticed that she is actually using up nutrients like FastBuds said.. The runoff has been coming out alot lower than it is going in.. I guess they weren't bullshitting me lol.. Blah whatever.. Damnit, I really hope I didnt fuck this up 🤦🤞🤞🤞
Almost mid week...
So I'm using a Brita pitcher with filter for my tap water.. It doesn't do much lol.. Some, of course.. But I'm also using a very cheap filter in it.. Wal-Mart brand.. Which sucks.. But that is helping bring the TDS of nutrient solution down from 1000 PPM - 1100 PPM to about 850 PPM - 900 PPM.. Just regular tap water from 240 PPM - 260 PPM down to 180 PPM - 190 PPM.. Like I said.. Some.. But not much. I'm not sure if there should be any changes to the plant if the nitrogen toxicity is cleared out.. I went ahead and did a nice flush to get all that shit out of the medium.. It should have helped.. Still going to keep the FloraMicro down.. I really hope this doesnt hurt the yield or taste!!!! I'm assuming she should be close to about halfway thru flower so she should have time to recover before flushing and harvesting.. Will be updating with pics tomorrow! Oh.. And I also lowered the light to 14 inches from the canopy.. Well.. To the tallest cola lol
Mid week..
She is still maintaining herself.. The trichomes are so beautiful!.. Been keeping the PPMs a bit lower than I think I should.. I think Calcium deficiency is popping back up.. I think I'm seeing some new spots pop up.. Not too bad.. And it could just be from when I was flushing a bit at the beginning of the week.. Havent changed the amount of CalMag so I imagine that's what it's from. But other than that and the nitrogen toxicity, she is doing good!
Next day (Merry Christmas!🎄)..
So the trichome heads are still normal (not purple like I thought).. But the trichome stems(?) are purple. So fucking gorgeous.. But I can still see that the trichome heads are clear/milky/amber.. There are already quite a few milky! Damn.. Maybe FastBuds actually means 9 - 10 weeks from seed! Lol.. The colas are starting to fatten up a bit.. So I'm happy! I really enjoy the narcotic effect so I'm gonna harvest when there are quite a bit of amber trichomes.. My Lemon Berry from ETHOS had not many amber.. And the high is very paranoid like lol.. Dont get me wrong.. I love the high.. But paranoia is definitely there lol.. So I'm trying to avoid that with this girl!
Later that night...
So after running a couple gallons through the Brita pitcher filter (with Wal-Mart brand filter), the TDS is coming out around 150 PPM!!! Ok.. So not bad lol.. Works MUCH better than I figured it would! NICEeEeEe... Lol.. But as for the love of my life (lol not kidding).. She is starting to swell for sure!.. Still think she's gonna be a little airy tho.. But she shouldnt yeild small!
End of week..
Not seeing any new clawing.. Starting to see more spots.. I mean, they are super bad.. But there are alot throughout the girlie.. So as I've been feeding, watering, feeding, watering, etc... I've noticed the runoff PPM aren't as high as they normally would be.. This could be why the spotting is happening.. Not sure if these spots are from Calcium.. Magnesium.. Or even something else.. It's kinda hard to tell.. But honestly I'm not too concerned about them.. She is not TOO too far from harvesting.. Haven't began to flush yet.. But I think that may be happening very soon.. Maybe 1 more week of weak feedings and then 2 weeks of flushing.. I am definately seeing plenty of cloudy trichomes.. And some amber now.. I will be trying to get some pics of the trichomes next week for sure! They are so pretty! This is one finicky bitch for sure! But now that I know her issues, it should make it quite easier to avoid the same issues next time I grow her! Still very happy with this girl!... On to the next!!!...
Likes
2
Share

@gr3g4l
Follow
Semana de lavado, regando cada dos días solo con agua de ósmosis inversa.
Esta semana continuaron mostrando un cambio de color más acelerado.
At 59 days they already showed a high percentage of amber trichomes, more than enough to harvest before 60 days.
A simple, uncomplicated grow, the plants are truly rewarding, not so much for the quantity of trichomes as for their growth, yield, and aroma—an aroma that suggests it will be delicious, possibly earthy, sweet, perhaps pine, or who knows, maybe even a hint of citrus, lemon. Something along those lines. What I can say for sure is that it smells terrible; it wouldn't be recommended for grows that want to go unnoticed.
After 61 days, harvest and dry inside the closet.
Likes
4
Share


@Chubbs
Follow
What up Fam, these ladies are progressing nice. I'll be giving them a defoliation this week as I know the preflower stretch is coming soon. These have already started stretching upward and looking phenomenal. Stacking great, showing zero signs of issues.
All in all Happy Growing.
Likes
1
Share


@Dumbo42069
Follow
Just gonna stick to water only from here on out assuming there’s only a few weeks left , seen some other diaries end week 9 or 10 ..
Will continue to post a picture for the group each day and like a close look at each one individually at the end of the week
The smallest one is now 14 inches tall lol I have no idea... update 17 inches now
Day 53 trimmed up the interior of front left because it was just a tangled mess of stacked leaves but got some space and light now
Day 54 made a ghetto dry box so I could dry a couple if they need to be cut earlier than others

Likes
8
Share


@FirstTime97
Follow
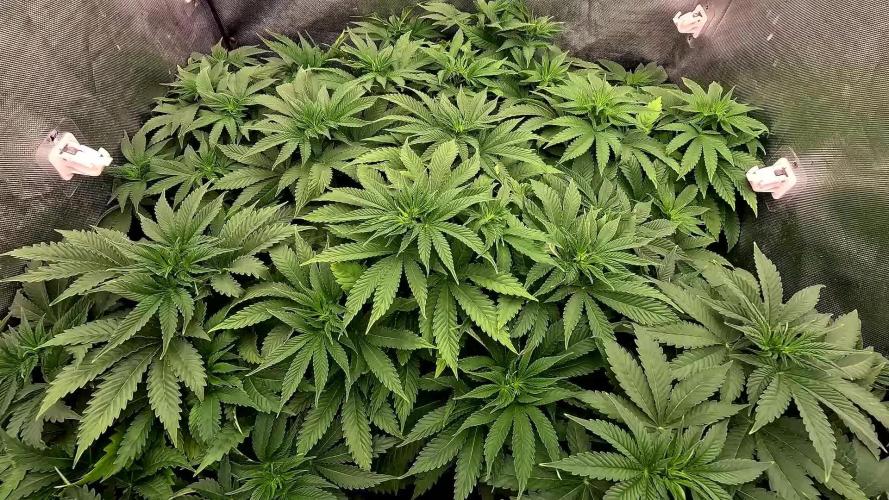
Second week of nutes given on Saturday nice bit of growth from the plants really stretching n reaching out now soaking up as much light as they can quite a few deficiencies showing been giving 1ml calmag ontop of the nutes on the bottle per litre of water , very cramped 1 plant taken out the tent to create abit of space currently 45 in there 2.4m x 2.4m would only recommend putting 36/38 plants it top capacity in 7/9 litre pots
Likes
26
Share


@GroloCup
Follow
We'll call this the beginning of week 1, she's up and growing. The MegaCrop should push her growth a little and really get her off on the right foot. Debating topping or LST, not sure how this one's gonna play out, but I'll see how fast she make a vertical move before the final decision is made. Thanks again to Zamnesia and Plagron for the opportunity to grow some dank buds!

Likes
Comments
Share


@HideAndFly420
Follow
Day 29, giving structure to ghe little baby, trying to multiply branches and giving some attention to the topped one.
Day 30 fertisilisation today. Next time just water. LST is still in the middle
Day 32 31/10 dinner at 100% now and pushing hard with grow, just watering without fertilisation this time and lamp higher for 2 cm. Stretching a little bit before passi into flow, next 7/8 days of veg
Let’s see what’s happen

Likes
30
Share


@RastaGrow
Follow
The plant grows Gorilla Soil pour only water. Let’s see what comes out 🍀🙏🏻

Likes
18
Share


@bono420
Follow
DAY 53
Had to take out of the room the Amnesia XXL hermaphrodite; cant take the risk of turning the rest into males too.
DAY 54
FUUUCKKK!! The wind dropped a piece of heavy wood onto the plants!!!
1 of the Moby Dick was totally broken. Some branches of the neighbour plants were affected too.
So that's 2 plants lost at the moment (the hermaphrodite and the broken one).
Day 56
Two days after the tragedy. Had to reorganize the room to prevent similar accidents in the future 🖤😢 Saved the most I could but definately this stressing event will influence the plant’s development.
Also, considering taking out the claw leaved plant, which has signs of hermaphroditism (FML again 😫).
Hope these 7 make it till the end.
PS: Also, there’s 1 Moby Dick which has no signs of flowering at day 56, cant figure out what’s happening with it. I’m starting to think that it’s an Regular Feminized seed instead of an autoflowering.

Likes
23
Share


@420DeepGrow
Follow
Gracias al equipo de Kannabia, Marshydro, XpertNutrients y Trolmaster sin ellos esto no sería posible.
💐🍁 RS11:
Las variedades de marihuana son cada vez más grandes y mejores, y la Rainbow Sherbet #11 de Kannabia ha llegado para revolucionar tu mundo con su extraordinario contenido de THC del 30% y sus terpenos increíblemente deliciosos. Con una genética 70% índica, esta descendiente de la Pink Guava y la Sunset Sherbet ofrece muchas características interesantes, como su espectacular belleza. Sus cogollos a veces adquieren una tonalidad azul y brillan con una gruesa capa de tricomas, por lo que parecen piedras preciosas cannábicas.
Germina las semillas en exterior o interior, y prepárate para quedarte con la boca abierta. La Rainbow Sherbet #11 no necesita muchos cuidados para producir plantas robustas y vigorosas. Incluso los principiantes podrán conseguir un buen botín cuando llegue el momento de la cosecha, y los cultivadores que ya tienen experiencia no tendrán problemas para hacer que sus plantas rindan al máximo. Con un poco de LST podrás maximizar su producción, y tras 9 semanas de floración en interior conseguirás alrededor de 450-500g/m². Al aire libre, esta variedad puede generar hasta 500-600g por planta.
El nombre de esta variedad augura un montón de sabor, y la Rainbow Sherbet #11 cumple con creces. Sus cogollos tienen un aroma extremadamente complejo que convierte cada fumada en un viaje aromático. Las fragancias que más destacan son las afrutadas (principalmente a cerezas y bayas), así como las cítricas. Esta mezcla va acompañada de unos matices terrosos y especiados y de un toque de pino. Tras unas cuantas caladas, los efectos de la Rainbow Sherbet #11 aparecen con toda su fuerza, potenciando la alegría y la creatividad, calmando el cuerpo y la mente, y ayudándote a olvidar las penurias del día.
💡TS-3000 + TS-1000: se usaran dos de las lámparas de la serie TS de Marshydro, para cubrir todas las necesidades de las plantas durante el ciclo de cultivo, uso las dos lámparas en floracion para llegar a toda la carpa de 1.50 x 1.50 x 1.80.
https://marshydro.eu/products/mars-hydro-ts-3000-led-grow-light/
🏠 : Marshydro 1.50 x 1.50 x 1.80, carpa 100% estanca con ventanas laterales para llegar a todos los lugares durante el grow
https://marshydro.eu/products/diy-150x150x200cm-grow-tent-kit
🌬️💨 Marshydro 6inch + filtro carbon para evitar olores indeseables.
https://marshydro.eu/products/ifresh-smart-6inch-filter-kits/
💻 Trolmaster Tent-X TCS-1 como controlador de luz, optimiza tu cultivo con la última tecnología del mercado, desde donde puedes controlar todos los parametros.
https://www.trolmaster.com/Products/Details/TCS-1
📆 Semana 1:
Ha sido una buena semana, ella ha dado otro gran cambio en su lugar definitivo 😎. Ha salido un fenotipo muy diferente, las hojas son totalmente diferentes al resto de sus parientes y de las otras, me gustaría sacar un esqueje .
La carpa está ocupada al 75% y comienza una floracion explosiva gracias a @Marshydro y @Xpertnutrients y @Trolmaster con esta gran genética 💪.
A partir de ahora se riega manualmente con las dosis recomendadas por el fabricante.

Likes
16
Share

