


Likes
Comments
Share


@mulch
Follow
7/21/17: They got their watering today. They drank as much as usual. It was MUCH easier feeding out of an 10 gallon container with a spigot. I kinda wish i got the 20 gallon one as that would mean only one mix, but the 10 is fine. I left everything sit after PHing to stabilize, and the runoff looked normal.
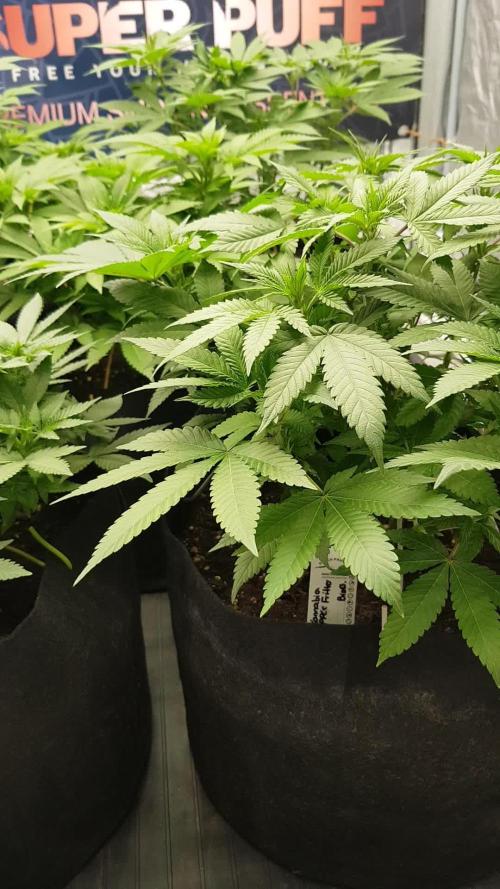
Pix posted of potential calcium def on speed bud #2 and the kush. The kush looks somewhat different, but maybe I just caught it earlier. Used full Strength CalMagic with 1/2 nutes. I also PHed slightly higher in the 5.9 range to make sure the calcium was available. I didn't expect potential lockout at 5.7-5.8, but looking at the chart Calcium needs slightly higher PH so I hope this takes care of it.
I tightened down the original LST in case watering the coco dislodged it, very little. I may start some leaf LST soon to provide the lower canopy more light. We shall see how they look at lights on and decide.
Not sure how much further LST to do, because I believe we have our first sexing, as I noticed 2 fine hairs (i think) on NLxBB. Pic posted. Next feeding, any ladies showing their privates will get late stage veg feeding. I may even switch the runts to that feeding even if they haven't shown sex yet. I may even do full strength, as if anything, these plants are showing deficiencies with not even a trace of burn, and if I am going to get any volume out of the yield, I need to start pushing because they aren't that big right now.
I have been told LST is not so good when the plants start to flower. I have also been told that autos will continue veg growth for about 2 weeks after sex before they actually start putting energy into flower, so if that is the case LST would still be appropriate during this late veg? Anyone with any experience on this matter?
The smell is getting much stronger. During feeding this morning, i left all the tent doors open and went to preparing and other things. When I reentered the room, the smell was QUITE noticeable outside of the tent.
I also got my new EC meter. it expresses EC in terms of like, 500, 1500, 2000, etc. It looks like PPM but it is not, it is a very detailed EC reading. So, in the previous example, it should be read as 0.5. 1.5.. and 2.0 EC.
I had a TDS pen, but I got it free, unexpectedly, when I switched to a Pur water filter. I figured it as a novelty and they were just bragging. It ended up working reasonably well when I tested faucet vs distilled and nutes, so I have been using it, but since it was an unspecified PPM scale, it seemed wiser to be more accurate with no confusion EC.
For the record, the TDS pen from Pur pretty much matched EXACTLY with my new fancy EC meter, which means the Pur water filter works as well as advertised and it took my 150-200 tap water to 0 every time. I certainly have been happy with it for my drinking water.
7/22/17 I am starting to think about more frequent feedings because man do they look perky today, after yesterday's feeding. I really want the advantage of massive root structure that wet/dry cycling provides, but these plants respond well to food. I continue to ponder.
7/23/17 : the good news, we are REALLY growing. I think I have the VPD managed. not under control, but managed. its going to cost me a fortune in AC bill, but I think I got it figured out 18 out of 24 hours of the day. the other 6 are completely out of my control and it is what it is.
the bad news... the damage on the kush never did quite look like cal def (speed bud #2 DID look like cal def). i think i saw an aphid. aphid damage looks like what I saw. i crushed it instantly, then regretted crushing it before positively IDing it. either way, a trip to to the hardware store for a pressure sprayer cuz tonight before lights out, its a foliar spray of neem oil and sm-90, followed by a dusting of diatomaceous earth. gott a handle this before budding, and we already have at least 1 lady for sure showing her privates (NLxBB).
So, far my 1st impressions for my 1st grow ever can be summed up by the phrase "I didn't know I would need to know how to juggle to get this job!"
I'm actually having fun, but I am starting to get get cash fatigue throwing money at each new problem.
Granted, I had the neem oil, diatomaceous earth, the DE duster, and the SM-90 already in reserve, but I had to go out AGAIN and grab a pressure sprayer and distilled water.
it's not like its expensive, but it adds up. I know the payoff is coming. every time I open that tent and smell it, i can tell the payoff is coming. so much to learn, so many little obstacles to overcome. i am glad i enjoy it. i would hate to do this if i didnt actually enjoy it, like if it was a job. it fits neatly into a challange/recreation area, as far as growing. It's not too easy nor too hard. but it IS demanding.
at what i make an hour, it is likely cheaper to buy it. but i truly am enjoying this. you can't buy that. this plant is teaching me a ton already. patience, being the major one
i really am enjoying it. i wish i was better at it, but that will come with time...
speaking of time, the time lapse is SICK the last 3 days. you are going to have to wait until the end of the week, but trust me, it is fascinating. i wish i could do that part better, more professional, but my focus is on the plant. the time lapse is just bonus
and remember, it is VERY cheap to do time lapse. if you want to do it yourself, it will cost you $50 or so for the basics. you gotta do some computer work, but its not hard. i can help. it may be minor, but its something i can contribute. i am enthralled with the footage. i am SO glad i did that. plus i can monitor temps and humidity real time anywhere from my phone with proper port forwarding.
since there has been 0% burn, i am VERY tempted to do a full early veg feeding (700pm) before i transition to 1/2 late veg feeding until flower. gonna sit on this, but i likely will push them just to see if they can be pushed, and if so, which strains...
again, enjoyment =D
a little more LST, main stem
hopefully it will help with the bud cuz its gonna fuck with the time lapse
7/24/17 About a half hour before lights out I sprayed them with 1 part sm-90, 5 parts water, and 1 ml per gallon of need oil. This morning Speed Bub #1 had a brown mark on it. I am hoping these marks aren't pests at all, but light burns from draps of water. Only time will tell. I will spray them again tonight or tomorrow, but this time 10 minutes or so before lights out just in case. I have not dusted with diatomaceous earth yet, as I am not convinced I have an infestation yet. Does the brown spot in the new pics look like anything specific to anyone else?
7/26/17 Not much to report. They are growing steady. Still, most not sexed. I am starting to think the stall at the beginning wasn't stunting, but a root network taking hold. I am also starting to think this time limit of autoflowers lacks the urgency that some people speculate.
For instance, the speed buds should have started flowering in the 3rd week. We are almost done with week 4 and they aren't even sexed yet, but growing fine, if not slightly small for this age. I suspect autoflowers DO have an internal timer, but that timer may not be as strict as some think; the timer may take into account environment and adjust itself. I don't know, but I haven't seen anyone using 7 gallon pots for autos, so this early stall and late sexing may be unique to this situation, and may support my theory that the week they apparently did not growing on the time lapse, that there were roots going nuts. That would spell out environmental factors, no?
I was going to feed them today, but the bags are still so heavy and the tops arent even all dry yet, so I am going to wait a day and go into late veg feeding at lights up tomorrow. Not sure, but I think it's time, wet/dry cycle or not. I will of course, monitor them but they look beautiful.
One mistake I made for sure that I won't make again is not fiilling the pots to the top. Not only did I create unnecessary shadows, but the leaves are now pushing and folding on the sides and I have to manually make sure they are straight and getting sufficient light. Practice makes perfect, I will do better next time.
A few of the plants are getting some more spots. In my opinion, it is either damage from the neem treatment, or def because they are hungry. Still no evidence of bugs.
I was looking for the plants to tell me they were hungry because they look so healthy and the bag is heavy, so I will take this as their message for sure and feed them at lights up tomorrow. Either way, the plants still look great and are growing like weeds. I did wait long to feed them, so this is expected.
Later in the day tomorrow, when they perk after watering, we will do their portraits for the week and get this weeks time lapse uploaded.
Yeah, I am pretty sure it's calcium. It's a bit worse than I thought, so will for sure get on lights on feeding. I either need to increase calcium in the feed, or feed them more often. I guess it's time to move to more aggressive feeding, at least that is what they seem to be telling me. Normal 1/2 strength feed given more often.
7/27/17 They were fed today, late veg nutes. Will provide details in week 5.
I was going to take photos today, but spent almost 8 hours in the ER to be told that I was as healthy as a teeny bopper. That compliment is going to hurt a whole lot when that bill comes in.
Of note, I have raised the LEDs 2 nights in a row and the smell is getting much thicker.
Anyway, I am exhausted, and have to work tomorrow, so I will take their portraits a little late tomorrow and get the time lapse up before opening week 5.


Likes
9
Share


@Chronicbastard
Follow
These girls are really bushing out and they starting to have a nice smell.

Likes
13
Share


@GrandmasBoy2021
Follow
I had a fun experience growing this strain. She started out strong and finished pretty strong! The buds are covered in THC and smells sweet. The only thing I would really do better next time is trying not to nutrient burn her as much as I did towards the end. I also experimented with harvest time and came to the conclusion that the it's best to harvest a few weeks after their recommended time if you want denser buds (in my opinion). I do wish the buds were a bit more dense but I'm not a pro grower and that could be the reason for that. It's all a learning experience. It could be the strain because I'm going a Gorilla Cookies (FastBuds) and those buds are huge and don't have as many leaves. Overall I'm blessed with the outcome and I'm going to enjoy the perfectly dried buds soon :D
I hope you all enjoy the little videos and music! haha I've only grown one plant before this which resulted in less than an eighth of bud so I'm beyond happy to say the least lol
Let me know if you have any questions regarding growing and for some possible tips! Happy growing Growmies!
Likes
4
Share

@IslandTerps
Follow
Strain: Fast Buds – Gorilla Melon
Grow Type: Indoor
Pot Size: 5 Gallon
Medium: Peat Moss & Perlite
Nutrient Line: Athena (Bloom)
Week 7 Update
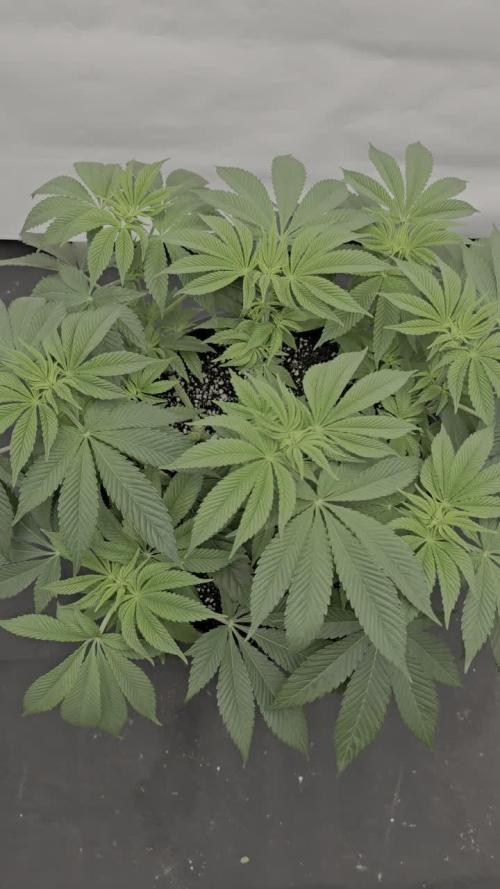
She is such a beautiful plant I really outdid myself with this 8-manifold. Her structure is everything I was hoping for! She shot up nicely during this first week of flowering and looks strong all around.
No deficiencies or signs of stress she’s taking her nutrients perfectly. I’ll be clipping any big fan leaves that block bud sites we’re looooooking for full coverage 😎.
Feeding
1.9 L Athena Bloom nutrient mix (steady from this point).
Indoor Climate Conditions
Temperature: 18–26°C
Humidity: 45–55%
VPD: ~1.3–1.8 kPa
See y’all next week! And don’t forget to use my discount code ISLANDT for 15% off your next order at Fast Buds!
Likes
12
Share
@Bluefinger038
Follow
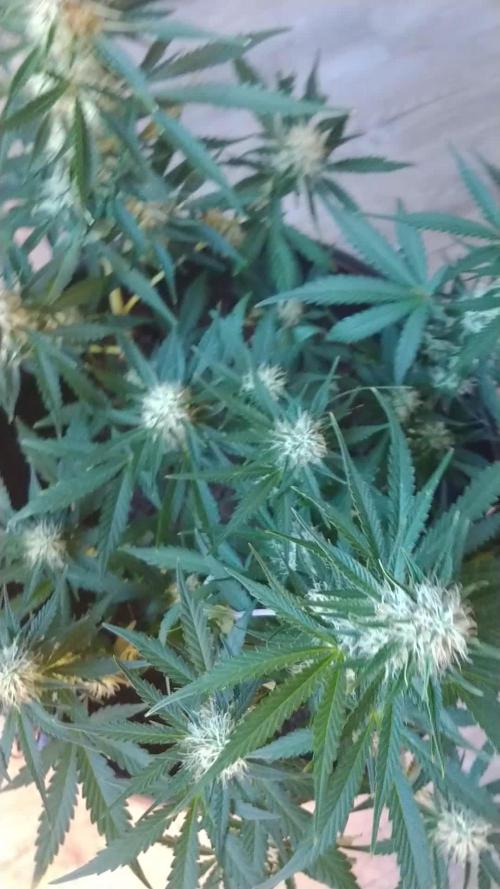
My god what a Week🧐😔😁 I had some stress over the plant, the lower leaves where getting yellow, and brown spots. I removed the top layer of the soil, because I found al those tiny white little flea's. They are gone, @ least the majority of them. Then I had a water leakage in my Pot. The soil was rock hard, because the roots, I guess,,
Al of the above, is solved,, but time will tell..😀😬

Processing
Likes
5
Share


@crouch74
Follow
I can see that she is happy with her new light. She is healthy, growing pistils and stopped reaching up for the light after setting up a stronger one.
The smell is getting a bit stronger than before but still reasonable.

Likes
19
Share


@soloczek
Follow
Gets the tent for herself now 🤭
Starts to foxtail but I react in time, the UV light was to low.



Likes
12
Share

@GERGrowDesigns
Follow
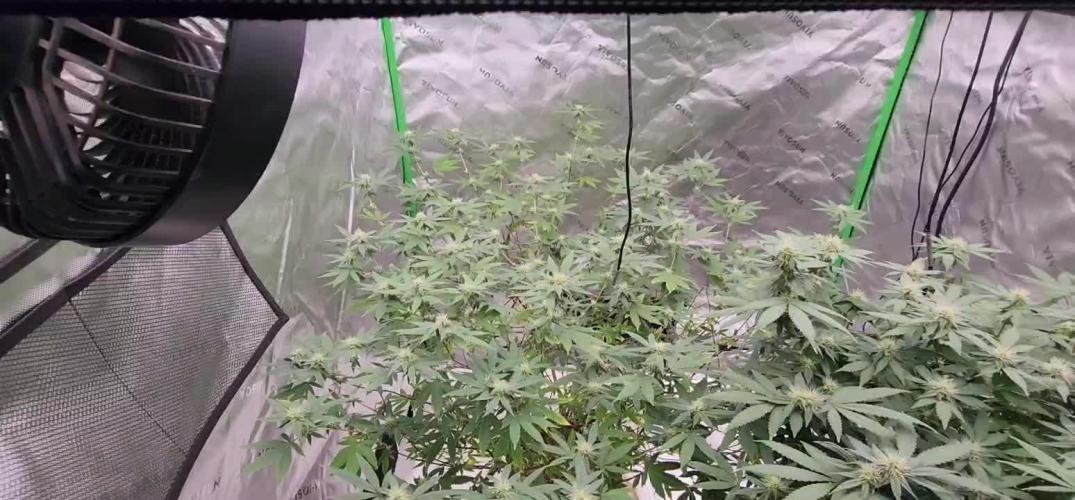
Welcome to Flower Week 1 of Kannabia Apple Fritter BioBoost Edition
Need a Fail-Safe Germination and Express Flowering?Kannabia Makes It Easy with BioBoost, Sproutly and Its Fast Genetics . More informations to find at The Kannabia Blog on GrowDiaries.
Check out Kannabia Seeds with my link [https://www.kannabia.com/de?ref=61966] and grab the germination device or the strains I used . Trust me – it’s worth it for sure !
Get another 20% Discount at all products using the code [GGD] at the checkout.
For this Project , I’ve chosen the Feminized Photo Strain Apple Fritter BioBoost :
Here’s what I’m working with:
• 🌱 Tent: 120x60x80
• 🧑🌾 Breeder Company: Kannabia Seeds
• 💧 Humidity Range: 60
• ⏳ Flowering Time: 63 Days
• Strain Info: 24%THC
• 🌡️ Temperature: 26
• 🍵 Pot Size: 20
• Nutrient Brand: Hy-Pro
• ⚡ Lights : 600W x 2
A huge thank you to Kannabia Seeds for allowing me to try my Best with this amazing collection from Photo Strains they managed to Sponsore . Big thanks for supporting the grower community worldwide! Your genetics and passion speak for themselves!
Let’s grow together – and don’t forget to stop by again to see the latest updates!
Happy growing!
Stay lifted and stay curious!
Peace & Buds!
Likes
2
Share


@Palto86
Follow
semana 9 desde germinación. solo utilizo esos fertilizantes. no mido ph. no mido ec. agua directa del grifo. la mas alta mide 110cm y la mas pequeña 90cm. utilizo unas alzas para elevar las mas pequeñas y dejar el cultivo en un mismo nivel.
no utilizo defoliación. ni podas. solo un poco de lst.
el panel led es DIY. lo fabrique yo con 9 led citizen clu 048 corriendo a 50w cada uno. 3 temperaturas de color distintas. (5 led 3000k, 3 led 2700k, 1 led 3500k)


Likes
14
Share


@TheBudWhisperer
Follow
Week 5 of flower and stretch has been excessive in these F1 testers. Buds have been slow to develop and supercroppibg of 3 tops was necessary to maintain canopy consistency. The hollow stems are a good sign of things to come but I will say I was hoping for much better bud development. Perhaps unrealistic with this sativa dominant cross but still. I guess as long as the buds are fire, we’re prepared to deal with less overall yield.
The system continues to perform admirably. It’s one major drawback is having to recirculate through an additional drainage pump. The cheap bilge pump we wired into the tray failed and flooded out a portion of the basement - my fault really as I knew the pump was crap and should’ve changed it earlier. Still can’t get past how much more simplistic a gravity dependent system is but despite that - I have no complaints about this equipment and it will get regular use regardless of any future set up changes. Alls good in da hood y’all👌🤟
Strain details
She’s a mix of a particularly strong Northern Lights, crossed with a Spicy Bitch sativa hybrid. The hope is that we’ll be able to combine the overtly narcotic effects in the NL and mellow it out somewhat with the quality daytime sativa effects found in the SB.
Both strains feature numerous grower qualities. Both parents possessed vigour and resiliency, the SB particularly colourful in late flower. These beans were the product of a shotgun breeding run that presented an unexpected opportunity so there’s quite a bit of testing that should flow from the various F1’s we’ve produced.


Likes
35
Share


@GODSGIFT_2005_JM
Follow
🍼Greenhouse Feeding BioGrow & Bio Bloom
⛺️MARSHYDRO
The ⛺️ has a small door 🚪 on the sides which is useful for mid section groom room work. 🤩
☀️ by VIPARSPECTRA (models: P2000 & XS 2000)


Likes
11
Share


@sellem
Follow
Done.
Harvested ALL on Day 72 - one LCC was very heavy on amber trichomes, one BPP and one LCC were what i consider optimum, and one BPP was VERY milky, like peak potency. very few amber. Interested to try them all!
Total Drying time was 7 Days for both LCCs and 8 Days for both BPPs.
I decided to do my first proper dry trim. For two plants i hit the spot and could just shave off the remaining leaves. For the other two it was much more of a hassle.
They already smell way better than my previous runs where i dry trimmed. Also the colors are awesome for both plants that purpled.
Smoke review will have to wait some time. Right now, all of them are curing.
Likes
13
Share


@Pungolian
Follow
Rolling along, still fighting bugs , pm, catapillars, who knows what else! Monterey BT and Lost Coast Plant Therapy are my weekly ipm plan. Working ok so far. Another month and we will be there….fingers crossed….
