The Grow Awards 2026 🏆 


Likes
13
Share
@cookingwithninja
Follow
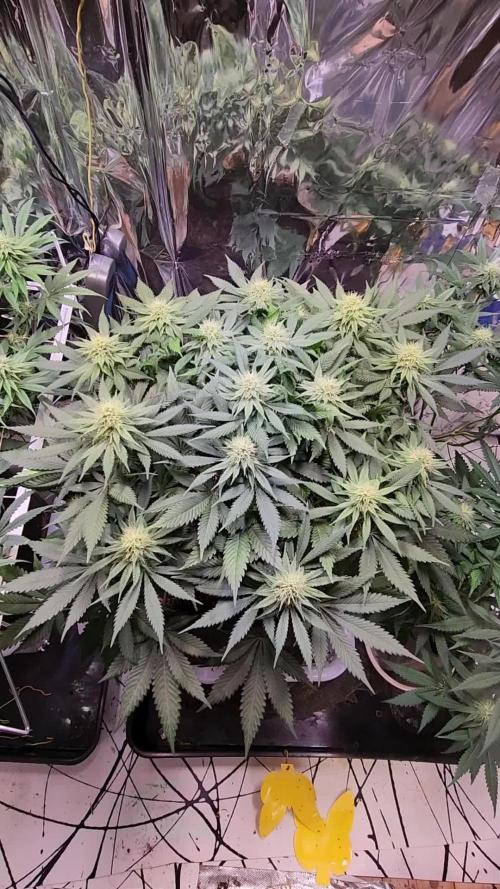
Week 6 day 1 video
Week 6 day 4 video
I’m still pushing very hard with carbs every watering, humic acid, soluble n, soluble pk, microbial mass, b+, fishshit. Already tried testers for lowers. Very potent hits harder than a pen. Feels like 30-40% baked for 1-3h per j, different phenos. Not harsh just testers dried for 0:01:15, checked seeds and developing for 2-3 weeks
Likes
1
Share
@Lanek
Follow
very easy and pleasant lady. Recommended, I didn't do much, some training, some defoliation, not much. It smells beautiful, has beautiful colors, hard and large flowers and a very fast lady

Likes
38
Share
@Snakeking
Follow
G Z 1
In first week of flower
G Z 2
In 3rd week
G Z 3 first week
G Z 4 in first week
G Z 5 in second week of flowering
G Z 6 also in first week should i count their weeks like this or consider all at first week of flowering?
I am not good at flowering stage before!
But i have hope for this gro


Likes
10
Share
@WEEDOOR
Follow
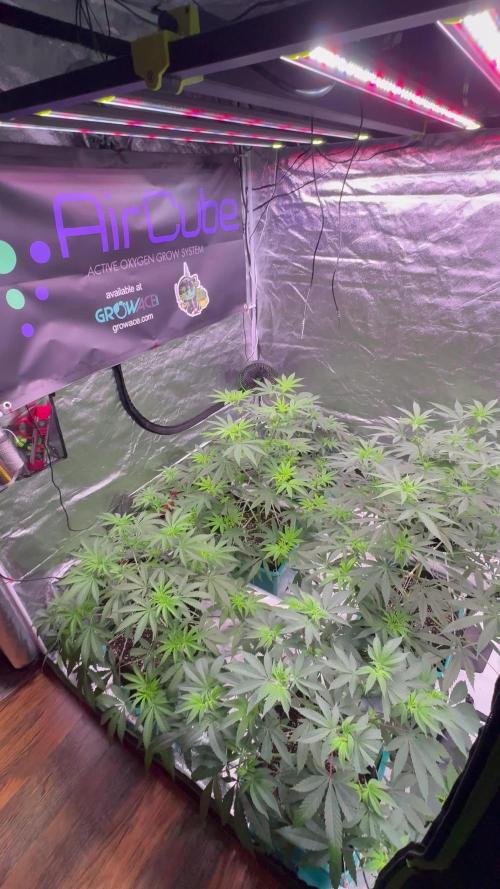
Everything is going well, the plants grows fast and got a good size.
The temperature are starting to get higher, I hope I will manage it.
Likes
73
Share
@Roberts
Follow
Lilly X White Widow is doing well under the Spider Farmer G5000/UVR40 lights. I just changed the light times to 12/12. I will be doing a solution change to a blooming nutrition in a few days. Everything is looking great. Thank you Athena, Spider Farmer, and Ripper Seeds. 🤜🏻🤛🏻🌱🌱🌱
Thank you grow diaries community for the 👇likes👇, follows, comments, and subscriptions on my YouTube channel👇. ❄️🌱🍻
Happy Growing 🌱🌱🌱
https://youtube.com/channel/UCAhN7yRzWLpcaRHhMIQ7X4g
Spider Farmer Official Website Links:
US&Worldwide: https://www.spider-farmer.com
CA: https://spiderfarmer.ca
UK: https://spiderfarmer.co.uk
EU: https://spiderfarmer.eu
AU: https://spiderfarmer.com.au
G5000 Light Amazon Link:
amzn.to/4643esa
UVR 40:
https://www.amazon.com/dp/B0BR7SGTHS
Discount code: saveurcash (Stackable)

Likes
7
Share
@Chubbs
Follow
420Fastbuds
What up, fam. Weekly update on the Photoperiod Femenized strains. GorillaMelon,RainbowMelon,
LemonManderian,LemonPaya,PapayaSherbet, and some FastFlowering GG4/Sherbet.
For just putting them outdoors 3 weeks ago, they've adjusted to the heat like a dream mid 90's and tripled in size. To think there's probably 4 more weeks of veg. These are going to get big. I might have to raise up the greenhouse or make it a convertible. I'm still just feeding well water, probably 2 liters, each straight from the hose daily. All in all Happy Growing

Likes
3
Share
@Oldwied
Follow
For the first time, I tried working with enzymes in the irrigation water. These are supposed to break down dead roots and plant material in the soil and make it available to the plant as food. I'm curious to see how it goes.
After the first three weeks of light changeover the flower transformation is done. Now it is the right time for defoliation and lollopoping.
In case of creamy the defoliation was sorely needed. I removed 6 weaker branches. That was the right decision, because I found two pollen sacs on a branch in the shady interior of the plant.
Five days later, I couldn't find any more male flowers, so I hope the problem is solved.
Light Power: 100%
Day 72
Flower day 29
Photoshooting
Defoliaton
Day 68
Flower day 25
Lollipopping

Likes
37
Share
@Schnabeldino
Follow
_____📅 Week 5 | 📅 Day 29 - 35 | 27.05 - 02.06 ______
27.05.25 | Day 29 🌞💧
🔸The ladies moved into the big tent on the 29th day after I had cleaned it and hung up my new lights.
🔸A&B is developing superbly, all branches are equally developed and grow evenly. She is doing wonderfully with the LST.
🔸I only work with hooks and occasionally with clips, but I've often broken branches with them so I prefer to use hooks hehe :D
01.06 | Day 34 💧
🔸 1500 ml
🌡️🔆= 23-24°
🌡️🌜= 18-19°
💨 Hum. = 65%
🔦 PPFD = 500 umol 18/6
🔦⌚DLI = ~ 32
_________________________________________________________________________________________
Equipment to use:
💡 Light: 2 x Sanlight Evo 4- 120 on 50%
⛺ 120 x120 x 180
🍯 Pots: 18 liter pot
🌱 Soil: Bio-Bizz light mix
💊 Nutrients: Advanced Nutrients
💧 Water: Tap Water 0,5 EC


Likes
10
Share
@DarkXenator
Follow
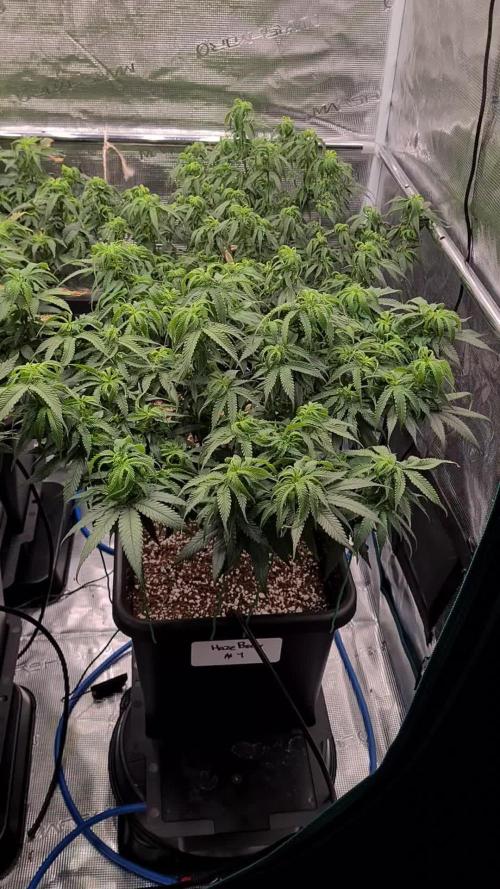
Growth is starting to explode
On week 3 of my feeding program from green planet
Startin to get thick
Likes
Comments
Share


Likes
24
Share
@Rit031
Follow
This week still raining.........
Fertilizer this week
1) Monopotassium phosphate (KH2PO4) 45.7 grams with 500 ml of water + Mono-ammonium phosphate (NH4H2PO4) 45 grams with 500 ml of water. Mix both together and use only 5 ml per liter of water.
2) General root stimulants 1 ml per liter of water.
3) 4 eggs mixed with 1 tablespoon brown sugar + 4 tablespoons curd. Mix together.then lived it for 1week .Then used 2.5 ml per 1 liter of water.
4) Calcium nitrate {Ca (NO3) 2} 3.5 grams, mixed with 1 liter of water, set aside. Prepare a mixture of 3.5 grams of magnesium sulfate and 3.5 grams of boric acid mixed in 1 liter of water. Then mix all 2 liters of liquid The ratio used to put plants is 3-5 ml per 1 liter of water.
5) EDTA chelate 1 ml per 1 liter of water.
6) 0.5 grams of amino acids per 1 liter of water.
7) Bat manure.


Likes
7
Share
@DrewbieDoobieNoobie
Follow
When you don't get what you want you get experience, This was a lack luster grow in that I was really expecting a huge yield with the scrog. but the facts are, it was my first time with this strain and sativa dominate as well, the light died the over feeding in late flower and not letting the plant tell me when it was done and in my opinion chopping to early made the perfect storm 3 LBS. wet they dried for 10 days at 70F and 50% RF and all that water weight went with it,
SI#1 1lbs 4 oz wet
SI#1 56gm buds
50gm larffy trim
SI#2 1lbs 2 oz wet
SI#2 26gm buds
41gm larffy trim
SI#3 1lbs 3oz wet
SI#3
20gm buds 42gm larffy trim
TOTAL 3 lbs 9oz wet
TOTAL 102 gm buds 133gm larffy buds


Likes
5
Share
@Organic_G
Follow
War eh nur ein Experiment, wie sich die Pflanzen bei 4 h direktem Sonnenlicht verhalten auf dem Balkon.
Ertrag ist dem entsprechend gering & die Dichte der Blüte fehlt, sehr sehr Fluffig aber der Geruch/Geschmack erinnert an 2014er Vibes.
Also Smoke Qualität ist super und die Wirkung sehr klar & clean. Werde die Sorte sicherlich nochmal im Zelt ausgrown.
Likes
3
Share
@BLAZED
Follow
Week 13 (9-9 to 15-9)
9-9
Temps: 18.8 to 27.6 degrees
Humidity: 48% to 67%
Watering: Both 600 ml.
Decreased the light intensity from 50% to 40%
10-9
Temps: 19 to 24.2 degrees
Humidity: 51% to 58%
Watering: Both 500 ml.
Dry Weight #1 3.2 kg. #2 3.4 kg.
11-9
Temps: 16.5 to 22.5 degrees
Humidity: 50% to 62%
Watering: Both 500 ml.
Dry Weight #1 3.4 kg. #2 3.6 kg.
12-9
Temps: 18.5 to 23.6 degrees
Humidity: 50% to 55%
Watering: Both 500 ml.
Dry Weight #1 3.5 kg. #2 3.9 kg.
13-9
Temps: 19.9 to 23.1 degrees
Humidity: 49% to 59%
Watering #1: 1000 ml. #2: 500 ml.
Raised the light to 65 cm distance of the top canopy.
Dry Weight #1 3.5 kg. #2 3.9 kg.
14-9
Temps: 19.5 to 23.4 degrees
Humidity: 50% to 60%
Watering: Both 500 ml.
Dry Weight #1 4.0 kg. #2 4.2 kg.
15-9
Temps: 20.5 to 24.7 degrees
Humidity: 54% to 61%


Likes
8
Share
@The_Bearded_Grower
Follow
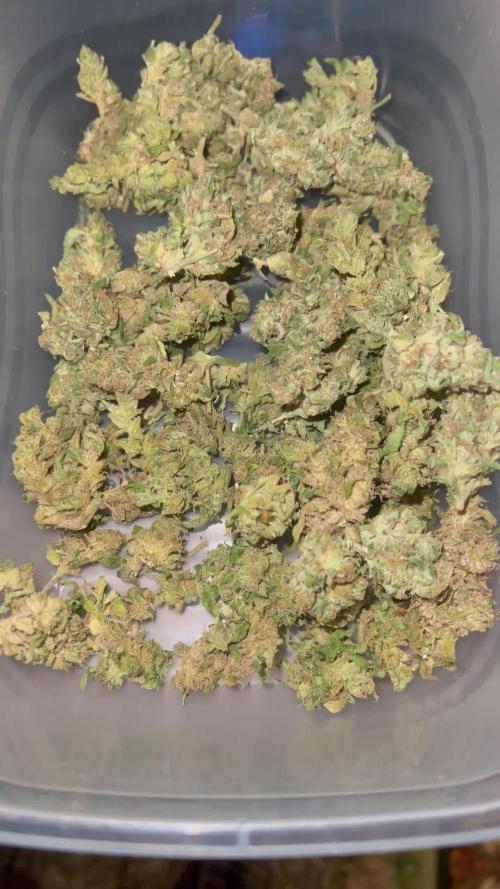
man for a 6 in tall plant she gave me a ton of bud im working on getting microscope pics.
hope this grow helps ppl to do it right and enjoy the pics as i put my harvest into curing.
until next time Keep Your Stick on The Ice0