The Grow Awards 2026 🏆 


Likes
Comments
Share


Likes
14
Share
@eldruida_lamota
Follow
Que pasa familia, vamos con la primera semana de crecimiento de estas Gorilla Zkittlez Auto de FastBuds.
Tiene muy buenas reseñas y pues me animé a colocar 5 plantas.
Las 5 semillas una vez germinadas son plantadas directamente en macetas de 7 litros y salieron las 5, 100% de éxito en el ratio.
La tierra que utilizamos que está en la publicación anterior es top croo al mix, aparte alimentamos nuestras plantas con Agrobeta.
Por supuesto el ph se mide en cada riego y se mantiene en 6.2, regando cada 48 horas e intentando mantener la humedad un poco alta al principio.
Las próximas semanas vamos viendo cómo avanzan.
Mars hydro:
Code discount: EL420
https://www.mars-hydro.com/
Agrobeta:
https://www.agrobeta.com/agrobetatiendaonline/36-abonos-canamo
Hasta aquí todo, Buenos humos 💨💨💨

Likes
14
Share
@CURATI_DA_SOLO
Follow
Hehehe che dire! Pe so che le.foto.si commenti o da sole! L'odore di vaniglia e qualcosa di allucinante! Dopo 14 giorni di lavaggio (10 con flawess finish e 4 solo acqua a 200ppm) ha preso un colore autunnale stupendo! Tra tutte sicuramente salta molto all'occhio....gli ultimi due giorni l'ho lasciata denutrita in modo che capisse che stesse arrivando la sua fine ed oggi ha ricevuto il suo colpo di grazia 😔..... Pulita completamente da ogni tipo di foglia di zucchero il peso complessivo (senza rami e rametti) sono di 334g...molto molto soddisfatto del risultato e del prodotto finale! Pe. Sto che da me adesso fa caldo e non riesco a fare scendere la temperatura di più la sera per darli un colore un po' più violaceo...ma forse era un fenotipo proprio così, ma non mi interessa il colore onesto, l'importante e il risultato finale e sono veramente molto contento! Grazie infinite a fast Buds per l'opportunità che mi dà ogni giorno facendomi coltivare le loro genetiche e spero che questo diario possa essere di aiuto a qualcuno...un altro ringraziamento va sicuramente alla parte più importante del progetto, il pubblico! Tutti voi in parte avete contribuito a ciò motivandomi con i vostri commenti e like! Ringrazio infinitamente tutti quanti di cuore! Ciao a tutti al prossimo progetto! ( A breve💪🏼) 🌱🍄🌈
Processing
Likes
7
Share
@x_grower
Follow
Last week plants were looking super healthy and responded very well to the second topping so I decided to flip the light schedule few days later. They already started stretching and the smell is noticeably enhanced.
Likes
61
Share
@UnorthadoxDude
Follow
Hello and welcome to week 10. We join Queen Citronella after a week of high drama at the palace. She was poisoned! Dun dun duhhhhh. The royal food taster has already been executed, but her majesty is displeased still and on the warpath. She has recovered, much scabbed on her skin, but her new growth is coming in healthy.
Lets see how week 10 goes for her royal highness. She and I will see you tomorrow.
Day 64: Fertigated 5l.
Day 65: Fertigated 5l. Her majesty have grown 2cm to 50cm.
Day 67: Height 52cm. Not much of a stretch here now. Unsure what the prognosis is. For the first time today she smells like super lemon haze.
Day 68: Fertigated 5l.
Day 69: Nothing to report
Day 70: Her majesty has recovered well from the serious nutrient toxcitiy I subjected her to for 2 days. However I do think I have given the plant a fairly big setback. I wonder if her stretch is already over. That would honestly suit me perfectly well for this grow. Her tent is too small for her.

Processing
Likes
8
Share
@CecilioJardinero
Follow
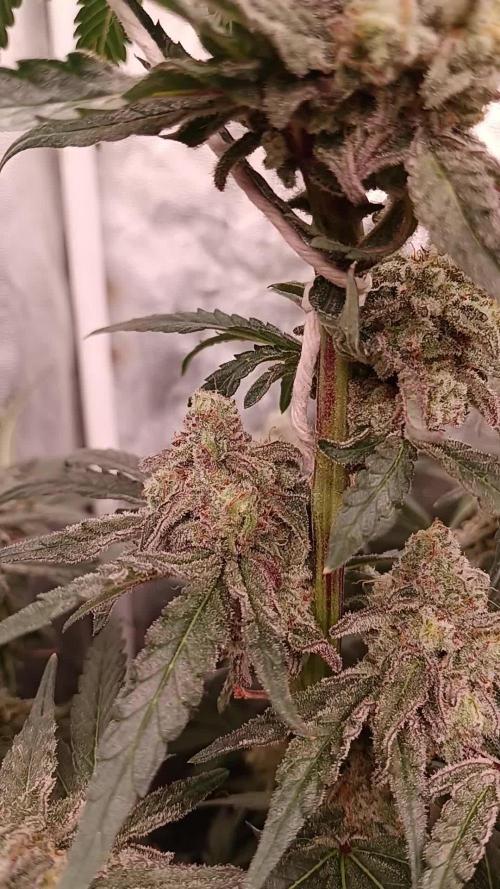
Segunda semana de floración para nuestras #kriticalbilbo de @genehtik_seeds 🐷🌱🌺🍒.
En esta semana aplicamos solo base de floración así preparamos nuestras plantas para la segunda dosis de #bigone de @topcrop 🕶️🤠.
En las fotos se puede apreciar un ejemplar especial de la Kriticalbilbo, tenía un brazo creciendo al mismo tiempo del central sufrió un ataque gatuno y la dejó gravemente herida, gracias a la habilidad del jardinero se logró amarrar y salvar, ahora es la más hermosa de las #kriticalbilbo con más de 8 brazos engordando a full 🕶️🤠😁
Comentarios y sugerencias les leo siempre... 😇
Recuerden seguirme en instagram como @Cecilioeljardinero.


Likes
5
Share
@CanarianGrow92
Follow
Week 2 for our gorilla cookies 🍪 from the fastbuds family
All looks good and the buds are forming real quick, we continue for now with master root and master bloom, next week we start to add some more addictives
Some plants had a little to much nutrients but we corrected the dosis and continue with a little less bloom nutrients! For the rest all good!!
Processing
Likes
3
Share
@Intence
Follow
Trimmed them, everything is filling in nicely. See signs of nuet burn flushed them and they reacted nicely. Soil has poor drainage need more perlite or change the soil next time.One plant is almost finished compared to the other 2. This is partly due to air flow. Need to get another circulating fan.
Seen some fruit flies will need to deal with these so they dont eat the flowers.
Lights are close to the plants but I can not move them any further away. With a few weeks left this might cause a problem. Will have to keep an eye on it.
I will have to, for the next grow, change how I set up the tent.
Uploaded video of plants to show the progress on all 3 sharks.


Likes
2
Share
@goatpharms
Follow
Apologies for the lack of updates — she’s looking super healthy! Buds are really packing on weight now, rock solid, colpurfuk and the smell is absolutely out of this world.
She’s honestly one of a kind.
Will update again soon — looks like she’ll go another two weeks or so.

Likes
3
Share
@OldskoolHed
Follow
Always a huge yielded and a heavy hitter. Name is true to the effect. A little tough to get back ahead if you get deficient so remember she eats a lot. My favorite strain, have had the cut for over 2 years.


Likes
9
Share
@OrioloOG420fallagrossa
Follow
Very few hours of sun because that period rain all days and i had to out them in a room with artificial light from an ordinary bulb that didnt make them grow obviusly but avoided fading. The little one is still in difficult situation it wasnt growing.

Likes
4
Share
@UrbanBoer
Follow
Talk about a mission accomplished, dam you Lamby… you had me excited at one point when I thought you were an auto, but to my shock, you are a regular, you just have a long ass flowering window… at least unlike her sisters within the 4th cycle, she did not reveg she just focused on flower, the buds are bulky and firm, scent is amazing, you would mistake her for a cheese strain. I should not be disappointed by the plant’s size! Because I planted her during winter, and all outdoor or greenhouse(unless you have a GH that is climate controlled), do not grow as big as the would during spring or summer season, and due to this factor, I only got 59g of wet bud. But I have faith the other ladies will produce a higher yields.
Last I smoke this strain was earlier late summer or early Autumn, and from smoking to growing now harvest, I wish I am blown out the water with this strain, it’s time to conduct that questionnaire. Or even better go to an established cannabis club, and get them to samples bud, and ask for a review.


Likes
9
Share
@Scottydarkmoonbuds
Follow
Wow this past week my house has been smelling so good! This strain is really great and is now one of my favorites, I'm not a big haze person but this is something different entirely from your regular hazes. This is truly so sticky and so stinky it's crazy. I can't wait to try it after drying and curing.
Likes
16
Share
@PoshGrow
Follow
Welcome to Ultimate Auto Grow by PoshGrow!
🍀 Week #4 2020 September 21st. - 28th.
General Info:
When planted: 2020 September 1st.
Week: 4
Days: 21 - 28
Last Update Day: 2020 September 26th.
Plants:
4 x OG Kush Auto
3 x Amnesia Auto
5 xAlaskan Purple Auto
2 x Blueberry Auto
1 x Northern Lights Auto
Total: 15 girls.
NOTICE: Check week 1 for full equipment list!
UPDATE: I got 8 ltr. Or 2 gallon Spear&Jackson Pressure Sprayer to help me with watering.
Comment:
Welcome boys and girls to Season #2 by PoshGrow! So alongside my 1sq. meter tent I got my new 2nd tent and setup. So at this time i will be running 2 tents.
Ohh, this week and the end of week 3 was rought... I ran into a gnats problem in week 3, read more there. The way I "solved" my problem was a huge mistake, creating bigger problems. Gravel I put on top of soil kept moisture inside the pots, so I manage to over water my plants. NEVER PUT GRAVEL ON TOP OF YOUR SOIL! 🤦♂️ NEVER 😂 Big shoutout to guys who answered my question in week 3! Thanks for your help and support!
So I remove all gravel and let all pots to dry completly before next watering. They bounced back very fast. Also I did LST training on them and manage to break up that one girl which had biggest over watering issues. Shit happens I guess... Btw its one of Amnesia strains.
I will update more info how girls responded to training next week.
Stay tuned and happy growing! ✌️

Likes
3
Share
@timbarin
Follow
Dec 22
She got cleaned up and tied down. Moving back into the tent with net on to avoid growing up. She looks healthy and will make a recovery from the cleanup
