
Processing
Likes
Comments
Share


@Purkle
Follow
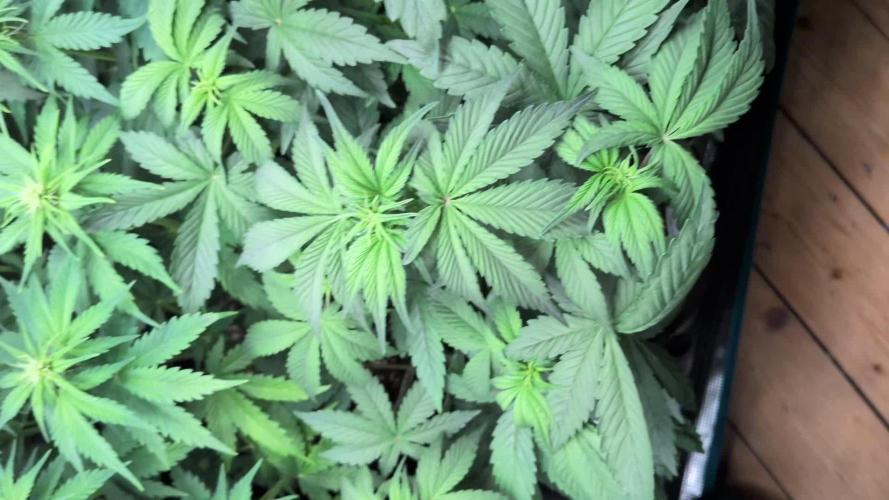
Things have been going well as I continued to train the stretching girls to the side of the pots, bending and adding ties where needed.
Pheno 1 started showing signs of over watering showing droopy leaves as well as what I think is either nitrogen, magnesium or iron deficiency. I'm leaning towards a iron deficiency since the yellowing is on the newest growth at the top.
I think this was caused from giving her too much top amendments in her last feed causing a pH imbalance.
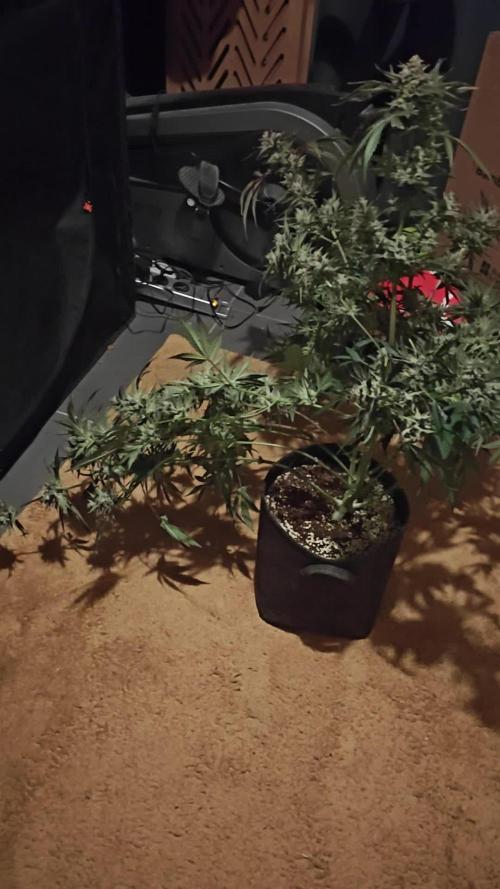
What I would usually do is just give her a little flush if this is the case but instead I decided to repot her and the other Pheno into their last 19 litre/4 gallong pots as both were drinking pretty quick and I wanted to avoid over watering again.
The rootballs looked beautiful when I transplanted them so I was pretty happy with their progress!
This round I've ditched the coco as I had way too many issues with it in the past, including knats and PH issues. In this round I've gone with Biobizz light soil which I added some fish blood and bone, earthworm castings, bat guano and then watered with water and liquid seaweed. I love organic growing :).
I do intend on using Coco again but I'll need to do some research on some trusted brands. If anyone has any suggestions please let me know!
Pheno 2 is showing signs of recovery but I'd love the input from others about what the deficiency could be?
I got my new bubblebags today which is making me want to flip to flower so I can get to harvesting and making some bubble but I'm going to be super patient this round. I want these girls to fill up as much of my 4 x4 tent space as possible.
Until next week!
✌️

Likes
Comments
Share


Likes
3
Share

@therealgrowmie
Follow
What’s up, Growmie! 🌱🔥
Since it was getting crowded in the grow space, I defoliated for better ventilation and lighting. I kept it conservative — not more than 10% of the leaf mass. While at it, I kept an eye on future bud sites and rerouted a few twigs with some LST using bonsai wire. Still looking good! 💪
Stats so far:
💧 Watering: 1,5L every other day
💦 Humidity: ~70% RH
🌡️ Temp (lights on): 26–28°C
🌡️ Temp (lights off): 20–22°C
📈 Avg. VPD (lights on): ~1.0 kPa

Likes
8
Share


@Wackytabacky_420
Follow
🚨 Durbin Thai/Cinderella 99 week 6 update 🚨
🚨 week 7 of veg!! 55 days old!! 🚨
So this is a clone I received on Jan 31st. She has been transplanted from a solo cup 2 a 5 gal pot. She had 2 be topped in her second week of rooting do 2 the top frying from to much light in young clone stage. Since the topping this lady has come 2 life!! She has been defoliated 4 times! Most recent defoliation 3/27! She spent her first month feeding just off nutrients in fox farm soil. On 3/2/22 I gave her her first Gaia Green trio feeding!! She has exploded with growth since!! This Saturday coming up she will get her 2nd Gaia Green feeding.
💡 Grow Sponsor💡
@marshydro_amazonled
@marsnier
#marshydro
#TSW2000
Marshydro equipment--
Marshydro- 4x4 grow tent
Marshydro- Tsw2000
Marshydro- 6" inline exhaust fan with digital temp and humidity sensor
Marshydro- 6" carbon filter
Marshydro- 6" Black duct line
Other companies in this grow-
@foxfarmsoilandfertilizer - 100% ffof
@gaiagreenorganics - Organic fertilizer
@inkbirdofficial - WiFi temp control
@madmanplant- 6" Tent shelves
@levoit.id - WiFi humidifier
Thanks for checking out my grow!! See u next week!! Best of luck and Happy Growing!!🌱💚💨🔥🔥🔥🙏🏻🤟🏻💪🏻
Likes
12
Share


@Jays_Not_Here_Man
Follow
Week 8, and my custom fit SCROG has been installed! ❤️
At Day 50 I separated my 7 gallon girls and my 5 gallon girl. Once done, I began the very easy process of adding my “floating” SCROG. I use ratchet straps, just like the ones that come with lights to secure the four corners of the screen to the top of my tent.
This allows me to adjust the screen height as necessary when 1) first installing and 2) once the full stretch of flower has occurred, I can tweak it a bit to balance the canopy as best as possible. It’s not 100%, I still get some over achievers, but I find it useful as another option.
I like to do a major defoliation before I set the ladies in. Typically till this time, I have done almost no defoliation, just LST and some HST techniques. I adjusted the ladies placement to allow growth out all sides of the screen, set the screen height and began tucking and bending. The defoliation and bending allows light to penetrate all those side shoots that would have amounted to nothing, and they become top shoots as they grow up and form an even canopy.
I don’t like to weave, it can damage the new shoots and cause growth problems, but the goal is to get as even a coverage as you can while allowing for plant growth in all directions.
Once complete, I will give the girls about a week to recover and grow those new shoots. I like to have about 80% coverage of the screen, before I change my light cycles to flower 12/12… and if they are healthy and strong. I’ll decide this weekend if it is time ❤️👊🇨🇦😎 Happy Gardening!

Likes
6
Share

@ChubbyBudBros
Follow
harvested on day 74. The buds were so heavy and dense that all side branches just flopped over.

Likes
156
Share


@StarLorr
Follow
Helloing 👋🏻friends and visitors.
Welclone to my Clone diary🙃
Buds got a bit chunkier since last week,
Spotted more amber trichomes, probably gave their last feeding today and will harvest later on this week.
Feeding:
Tue 02Jan 3L each w/Flawless pH'd 6.5
Fri 05Jan 3L each w/Flawless pH'd 6.5
Mon08Jan 3L each w/Flawless pH'd 6.5
_____________________________
Thanks for stopping by, likes and comments are appreciated.
Keep on growin!
Keep on tokin!!!
😙💨💨💨💨💨


Likes
8
Share


@TeamBudz
Follow
Extremely easy to grow. Heavy feeder. Great Yield. Definitely recommended

Likes
26
Share


@Ilovekush17
Follow
Purple punch is still hanging. Added blackstrap molasses to the gmos beginning of 9th week since the flip. They are getting fat.
Trimmed the purple punch after drying for 13 days at 60 RH-60°
Likes
5
Share


@Scrublord
Follow
starting to show how much frost is there. its been so fun to watch. honestly my frostiest plant yet. its like a jolly rancher candy grape with chemical smell

Likes
11
Share


@IndoorOrganix
Follow
They've started to grow their first sets of leaves and although temperature was a little higher than I'd liked they're coming along nicely. You can see the difference from just three days growth and then 3 days afer that! Adding a small amount of bio canna vega and molasses.
Likes
14
Share


@Cannibalgardens
Follow
Boy this plant has been going a slow and steady race so far I can't wait to see how reacts to bring put into a bigger pot. The growth is a great green colour and she hasn't been lacking anything . Looking forward to next week and seeing how the growth has come along .. cheers and thanks for checking out the grow..
Likes
2
Share


@Cannabot
Follow
My apologies I think I was behind a week on this diary,anyways definetly smell the blueberry with this strain.Chunky nugs ,not the tallest plant but really dense.
Likes
4
Share


@Franco123
Follow
the plant and at the end of this week only water and ice 4 days and then 3 without water and then I cut it and leave it to dr

Likes
6
Share


@BrainStorm22
Follow
Semana 1 Floracion
Comenzamos con este diario donde dejaremos un respaldo de lo que fue el desarrollo de estas nenas que van como avión
Ph 6.3
Ec 1000 bases + 400 cal mag


Likes
8
Share


@eldruida_lamota
Follow
Familia, ya actualizamos otra semana más de floración.
Tercera semana de floración de las Blue Spider de Zambezaseeds que sobraron de algún envío y la verdad que respondieron fenomenal después de 2 años.
Tienen un buen color están creciendo bien y desarrollando las flores correctamente.
Que más puedo pedir si en verdad va sobre ruedas este proyecto.
Agrobeta:
https://www.agrobeta.com/agrobetatiendaonline/36-abonos-canamo
Mars hydro:
Code discount: EL420
https://www.mars-hydro.com/
Las maximas de temperatura no superan los 25 grados y las mínimas no bajan 20, así que no me puedo quejar.
Los niveles de humedad también son los correctos van entre 50%/65% de humedad relativa.
Por supuesto el Ph lo estamos dejando alrededor de 6.
Hasta aquí es todo, buenos humos 💨💨💨.

Likes
5
Share


@hi_bengal
Follow
Another week down I think I've already defoliated before about to bit em again this strain can take alot of stress as with most mephistos I've grown.

Likes
4
Share


@Naujas
Follow
77 days!!! wow she looks fantastic, the girl is maturing her flowers, they are growing very quickly :) I am going on a 5-day vacation now, so I think I will be very surprised to see her when I get back:) I am giving her advanced nutrients macro with 6.3 ph water, I think she has about 2-3 weeks left until harvest, good luck to everyone:)
Likes
29
Share


@Gc_Dank_Aus
Follow
These ladies were a treat to grow and even better to smoke, looking forward to my next run 👌🤙