


Likes
Comments
Share


@farah4weed
Follow
#Day 123
#Week 6 flowering 💐
Oh my God, it's the 6th week of flowering
The smell of children is crazy.
This week I used advance hydroponics overdrive supplement at the rate of 2 mg/liter because it is really high quality.
Thank you for your comment🙏🙏🌷🌷


Likes
19
Share


@Mazgoth
Follow
I’m using 40L water with flawless finish and flushing with this product,let it sit for about 8/10 hours and flush one more time with only fresh water.Repeat one more time after the soil is completely dry.

Likes
9
Share


@DeepRootsGrowTrees
Follow
TRIPPLE G by ROYAL QUEEN SEEDS
Week # 17 overall
Week #16 Veg
No issues this week she looking good looks like she is about to start to flower!! Stay Growing!!
Royal Queen Seeds TRIPLE G

Likes
16
Share


@DreamIT
Follow
-Sponsored by:
💫PARADISE SEEDS💫-💡VIPARSPECTRA💡-💐GREEN BUZZ LIQUIDS💐-🛠️WEDRYER🛠️
8/7 After several days of Growdiaries making it difficult for me to write and respond to comments, I found that I can still update the journals. I apologize to everyone for the non-replies but I have replaced the main email and the email to confirm the account never arrives, and Growdiaries' customer service seems to be non-existent.
10/7 everything is going well, nothing special to add🤘🦄
12/7 everything is going well, it already presents itself as very indica
__________________________________________
Personal advertising (contains affiliate links)
__________________________________________
🦄 winners and holders of the most prestigious awards, since 1994 they offer genetics of the highest quality! Anonymous shipping!
✅https: //bit.ly/Paradiseseeds_
__________________________________________
Did you know that Green Buzz Liquids fertilizers are 100% vegan? A complete line of products ready to give the best to each of your plants!
__________________________________________
Personal advertising (contains affiliate links)
__________________________________________
🦄 winners and holders of the most prestigious awards, since 1994 they offer genetics of the highest quality! Anonymous shipping!
✅https: //bit.ly/Paradiseseeds_
__________________________________________
Did you know that Green Buzz Liquids fertilizers are 100% vegan? A complete line of products ready to give the best to each of your plants! Visit the site and see my journals to see how they work 🦄
🤯 And with the code "dreami t" you will immediately receive a 15% discount on your purchases
✅https: //bit.ly/GreenBuzzLiquidsPro
__________________________________________
👀 Are you looking for a good lamp to start with? 👀
🌞Viparspectra has something more than the others, take a look at their site.
⏩ Use "GDVIP" for an extra discount or "DREMIT3" for an extra 5 %% discount
👀 Search for it on Amazon
✅Amazon USA: https://amzn.to/30xSTVq
✅Amazon Canada: https://amzn.to/38udUVe
✅Viparspectra UE: bit.ly/ViparspectraUE
✅Viparspectra USA: bit.ly/ViparspectraUS
______________________________________________
🌈 Tired of blowing on your weed hoping it dries quickly? Check out the Wedryer website! You will find a well-made accessory that will help your weed dry in just 8-10 days without the annoying risk of finding mold or other annoyances! (no affiliate links)
✅https: //bit.ly/Wedryer_
______________________________________________
📷🥇Follow the best photos on Instagram 🥇📷
https://www.instagram.com/dreamit420/
Backup
https://www.instagram.com/dreamit4200/
🔻🔻Leave a comment with your opinion if you pass by here🔻🔻
🤟🦄💚 Thank you and good growth 💚🦄🤟

Likes
10
Share


@MadeInGermany
Follow
Hey everyone 😃.
This week she has done great 👍.
It was done again on all the drifted topping and sprayed one last time with neem oil so that the last trips are finally gone 😁.
We haven't had any pests for so many years and all of a sudden we have such little shit parts 😅.
This week it was poured twice with 1.2 l of water.
GHSC enhancer was added during a pouring (1 g per l)
The tent was cleaned every day this week and the plants were checked for health.
The humidifier is filled once a day.
Next week I will decide how I will continue the training because I have space again in the flower tent 😀.
Until then, I wish you and your families a good start into the new year 2021 🙏🏻.
Stay healthy and let it grow 🍀
You can buy this Strain at :
https://www.zamnesia.com/de/5165-zamnesia-seeds-kalini-asia-feminisiert.html
Type:
Kalini Asia
☝️🏼
Genetics:
Black Domina x Purple Kush
👍
Vega lamp:
2 x Todogrow Led
Quantum Board 100 W
💡
Bloom Lamp :
2 x Todogrow Led
Cxb 3590 COB 3500 K 205W
💡💡☝️🏼
Soil :
Canna Coco Professional +
☝️🏼
Fertilizer:
Green House Powder Feeding
☝️🏼🌱
Water:
Osmosis water mixed with normal water (24 hours stale that the chlorine evaporates) to 0.2 EC. Add Cal / Mag to 0.4 Ec Ph with Organic Ph - to 5.5 - 5.8 .

Likes
13
Share


@Drawer
Follow
Removed some buds that weren't getting any light, I ran into some issues regarding mold and that is most likely due to the fact that the RH % of my tent goes up to 70/80% at night.
I've removed all mold I could see (2 branches) and I am keeping a close eye on them, I've placed a new tower fan and another small adjustable fan in the tent for more airflow, my dehumidifier is coming in 2 weeks (around the time this grow is finished..)

Likes
17
Share


@cultivars
Follow
AUGUST 24 to AUGUST 30, 2024
Sunrise 07:05, sunset 20:50 for total daylight of 13:45 hours.
Specimen continues to push upwards, gaining approximately 13cm in height over the past week. Plant is taller than anticipated and planned for, which could present some difficulties as it's getting into the oscillating air circulation fan's wake. Was surprised to see the continued stretch, but there were two days of high heat that may have been the trigger, or, it may have been the result of defoliation and pruning, or it was simply the plant's final push, or a combination of all those factors.
It appears to have crowned, or is close to being fully crowned, and as such I undertook a fairly heavy defoliation to improve airflow through the bottom of the plant, and strategically removed leaves in the upper canopy to improve light exposure.
Fungus gnats did regain their hold, and so I decided to top dress with Bacillus Thuringiensis Israelensis (delivered via pulverized Mosquito Dunks) in an effort to kill larvae, treated with Soil Pest Defense (Neem Oil, Castile Soap and Yucca Extract) and replaced Bug Scan Yellow Sticky Traps at soil level. Effects were pretty immediate, but I will need to stay on top of this. Would like to cease use of Neem Oil in the soil, so considering acquiring some beneficial nematodes to combat the pest issue.
Overall, specimen and its' "neighbours" in the greenhouse are doing well, and filling the room. When accounting for the bench and containers, tops of plants are over 152cm (5ft) from ground level. It is making management a little more challenging, and proving to be more difficult to find good angles to photograph (the space is pretty much filled up).
The scent of citrus, skunk and spice emanating from the greenhouse is building, and at times quite strong. Still appears to me to be on-track for ripening the week of October 14, 2024.
Day 120 - n/a
Day 121 - Drip watered 5.0L of plain rainwater with pH of 6.7
Day 122 - n/a
Day 123 - Defoliated specimens, focused on removing leaves from lower parts of the plant to improve airflow (lollipop), pruning hidden or non-producing branches, and strategically removing select upper fan leaves to improve light exposure and airflow.
Day 124 - Top dressed with pulverized Mosquito Dunk (1/4 unit per specimen); 1.5L drip watered with plain rainwater in the morning; Hand watered 2.0L of Soil Pest Defense Drench in the afternoon; Hand watered 1.0L of plain rainwater about 30 minutes after soil drench; Replaced Bug Scan Yellow Sticky Traps (1 unit per specimen, cut in half and rested at soil surface on two sides; With defoliation from yesterday, room air flow seems adequate, after increasing speed of lower fans.
Day 125 - n/a
Day 126 - n/a
Next week, planning to feed the rhizosphere with Compost Tea and continue efforts to control fungus gnat population.

Likes
102
Share


@Hashy
Follow
Light settings
12/12 on at 9.00am off 9.00pm
Light power= 62% 150w
Radiator settings
LIghts on
Turn on if temp drops below 23c
Turn off if temp goes above 23c
Lights off
Turn on if temp drops below 19c
Turn off if temp goes above 19c
Dehumidifier settings
LIghts on
Turn off if humidity drops below 60%
Turn on if humidity goes above 60%
LIghts off
Turn off if humidity drops below 62%
Turn on if humidity goes above 62%
Extractor settings
temperature 24c with 1c steps
Humidity 54% with 2% steps
Max speed 9
Min speed 4
VPD aim 0.8-1.2
Wednesday 1/3/23 Day 36
Autofeed 5 15 minute runs
Water 10L Ec=0.21 Ph=6.5/7.0
3L left
Roughly 2.3L each.
#3 no runoff
7.15pm Lowered light 3cm
#3 DLI= 31.4
Thursday 2/3/23 Day 37
10.00pm
Extractor settings
temperature 24c with 1c steps
Humidity 54% with 2% steps
Max speed 10
Min speed 5
Friday 3/3/23 Day 38
Autofeed 5 15 minute runs
Feed 10L Ec=1.73 Ph=6.3
2.5L left.
Roughly 2.5L each.
#3 run 0.3L Ec=3.78 Ph=5.8
Saturday 4/3/23 Day 39
5.00pm
#3 Height= 40CM Dist= 30CM DLI= 37.9
Lifted lights 3 clicks and Lst and defoliate
Sunday 5/3/23 Day 40
Bit of Lst and scrogging
Monday 6/3/23 Day 41
Autofeed 5 15 minute runs
Feed 12L Ec=1.78 Ph=6.3/6.3
4.5L left
Roughly 2.5L each.
#3 no run
#3 DLI=38.0
#3 showing signs of light stress.
Lifted light
#3 Height= 38CM Dist= 38CM DLI= 28.6
Tuesday 7/3/23 Day 42 (Day 14 flower)
Radiator didn't come on when it should have. It was cold today and I don't understand why the sensor didn't trigger the Radiator.
#3 Height= 38CM Dist= 38CM DLI= 28.6
The 2nd week of flower has gone well. I have tried to keep the canopy of the overall grow as level as I can, the only problem with running different strains is they all have different traits and grow at different speeds. Nearer the end of the week the weather started getting cold again so the radiator is going to be working a bit more over the next week or 2.
#3 Gorilla Cookies FF is just mega, she has been stretching so much throughout the grow and has 90Deg bends all over, a snapped main, a few damages sides but not as fucked as the main and she is still doing champion. Its been hard work keeping her the level of the others but she has a shit load of space, way more then the other 2 strains.
Power used for week
Light
(1.77+1.84+1.84+1.84+1.84+1.83+1.84)=12.8Kw
Extractor
(0.19+0.24+0.25+0.27+0.31+0.31+0.41)=1.98Kw
Fans
(0.48+0.47+0.47+0.47+0.47+0.48+0.48)=3.32Kw
Dehumidifier
(0.69+0.65+0.0+0.01+0.6+0.02+0.69)=2.66Kw
Radiator
(3.3+3.98+3.38+3.16+3.8+3.31+4.07)=25.0Kw
Water pump.
(0.02+0.0+0.02+0.0+0.0+0.2+0.0)=0.24Kw
Total for the week=46Kw
Back in a week.
Thanks for stopping by.
Likes
28
Share


@Endzo
Follow
Girls well into pre-flower. Saw some nute burn from last feeding so backed off and just watered with ph balanced water and small dose of calmag. Small defoil of the bottom fans and small off chutes.


Likes
10
Share
@Miketama
Follow
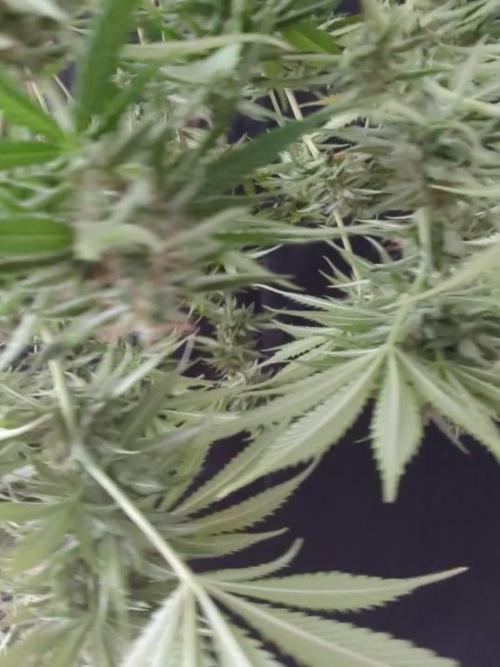
Day 86 ❄️ Northern Lights Auto – Harvest Update (Fresh Frozen & Dry)This specific plant was grown all by itself in its own pot (unlike the other pot where I had 2 plants sharing the space)
Total Wet Weight: 190g
Dry Flower: 91g of unexpectedly dense buds have been set aside for a traditional dry and cure for smoking.
Fresh Frozen: 65g of prime material went straight into the freezer for a future bubble hash extraction run.
Waste: The remaining weight was trim and non-resinous fan leaves.
Final Thoughts: Totally surprised by the incredible bud density on this run! I am extremely satisfied with the results of this cycle, especially considering the dialed-in light hours and my setup focused on recycling the soil and organic nutrients. Can't wait to see how the dried flowers smoke and how the fresh frozen performs in the wash.

Likes
3
Share


@BLAZED
Follow
Week 8 (5-8 to 11-8)
5-8
Temps: 22.1 to 27.8 degrees
Humidity: 42% to 60%
6-8
Temps: 22.5 to 28.1 degrees
Humidity: 52% to 65%
7-8
Temps: 23.8 to 27.7 degrees
Humidity: 41% to 64%
Watering: Both 1500 ml.
Defoliated the plants and did some mainlining with wires.
Dry weight #1: 2.7 kg. #2: 2.6 kg.
8-8
Temps: 21.7 to 27.9 degrees
Humidity: 41% to 64%
9-8
Watering: Both 1500 ml.
Dry Weight #1: 3.2 kg. #2: 3.0 kg.
10-8
No info.
11-8
Temps: 22 to 28.1 degrees
Humidity: 50% to 63%
Likes
22
Share


@BruWeed
Follow
☘️04/01 - Empieza su decima semana en etapa de flotación.
☘️Ya le empece a agrega Top Wash para poder hacer mas rapido el proceso de lavado de raiz.
☘️En dos dias le voy a volver agregar mas agua asi se termina de limpiar por completo.
☘️Su desarrollo hasta el momento viene bien sin ningun problema.
☘️Tengo pensando que el 10/01 ya la voy a poder podar para empezar con su secado.
☘️En estos dias seguire subiendo mas imagenes de como llega a su etapa final.

Likes
48
Share


@Truro
Follow
Will definitely grow again. Harvested some earlier than others, really tried to get an idea of how much of a difference what point of the harvest window you harvest makes to the effect. Very high quality genetics - big thanks to Barney's Farm! 👌

Likes
18
Share


@xtchill
Follow
Done a bit of defoliating and pulled them down a little.
Bit of a mess bit she will bounce back.
Hopefully.haha

Likes
6
Share


@Comfrey
Follow
I missed to take some fotos ore a video. So I chooses to show where the soil is made: in Comfreys garden. Unfortunately I‘m not allowed to grow there my weed. It‘s a community garden with privat owned ground but with a lot of neighbors. The German law allows to grow cannabis in your own garden for private use but not in a private garden situated in a community garden club (Kleingartenverein). But anyway I’m lucky because we have a very sunny balcony, too. Next week more fotos…

Likes
22
Share


@ButterfliesLittleFarm
Follow
Hello Diary.
The fifth week of flowering is over, and Fat Banana is slowly completing its cycle. Ten more days and we have a harvest. 😍
The “farm” is a real jungle, her roommates Haze Berry Auto have grown quite big but I think Fat Banana Auto will be leaving the “Farm” sooner. 😀
All the larger leaves on the plant have turned yellow and got pretty big brown spots, is it due to some problems caused by my treatment or is Fat Fat Banana just coming to the end of its cycle? I'm not entirely sure. (lack of experience) 😏
The flowers themselves look healthy, and smell like the finest sweets. The sweet-fruity scent overwhelms me as soon as I open the box. 😋
The flowers are compact and very sticky, as far as I can see now, it will be a good harvest. 💪
As we approached the end, I stopped adding nutrients and watered only with water to which I only regulated p.H. at 6.4.
In my case, it's a reduction because my house water is around 7.5 - 8.1 p.H, so I use Plagron's Lemon Kick for the descent, which does a good job. 👌
Here's what the week looked like.
15/11/2020 - Day 52.
Watering. Only water, without any nutrients with regulated p.H. at 6.4
Temp / Humidity on the farm - 25.5 degrees and 47% humidity.
18/11/2020 - Day 55.
Watering. Procedure as three days earlier.
Temp / Humidity on the farm - 25.2 degrees and 48% humidity.
19/11/2020 - Day 56.
Photographing plants. As always, on the last day of the current week I am taking photos of “my little farm”. 😉
That’s it for this week, a little more and I will enjoy the fruits of the effort these past weeks. Thanks to everyone who takes a look at the diary and I hope that this information will be useful to someone. See you soon. 🙌
Likes
Comments
Share

@LittleBigTrees
Follow
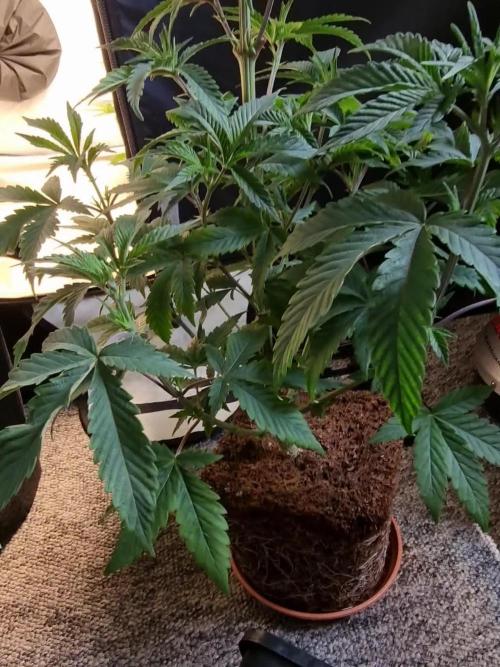
They are 8 weeks old now, I repotted them into 16l fabric bags ready to flower.
I took some cuttings incase it's worth growing again.
Put some direct into a pot of coir and others in a cup of tap water (refreshed every couple of days)
Let's see which if any roots first.
Likes
Comments
Share

@BigHeadChief
Follow
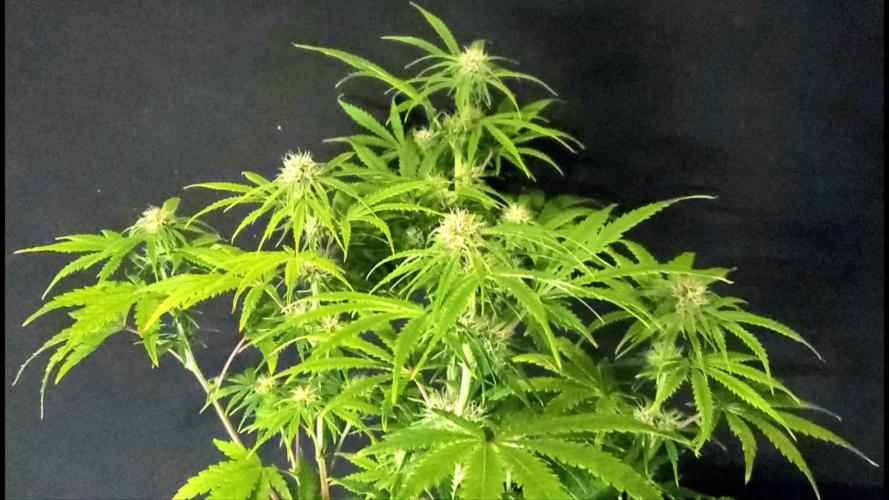
She didn't like the toping done at week 3 at all! She it's by far the shortest in the tent.
She does make up for her size by how pretty she is. Already peach/off white pistills she is going to be a beauty!
Like her size she doesn't drink much .5 gal every day and she's fine!
Likes
1
Share

@CheeRz
Follow
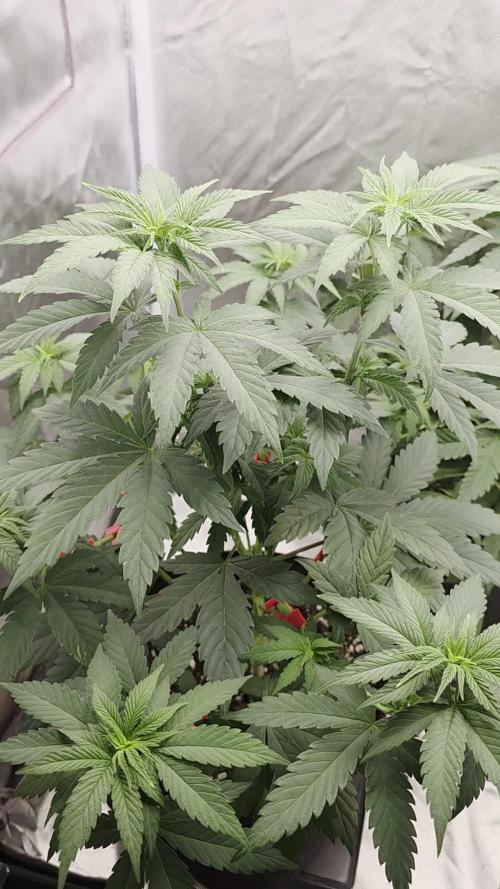
We flipped the switch and changed the light cycle to 12 hours. Both lemon ladies are doing pretty well, as is the development. Let's hope for a big harvest!
Likes
1
Share

@WalachianGrowinDiary
Follow
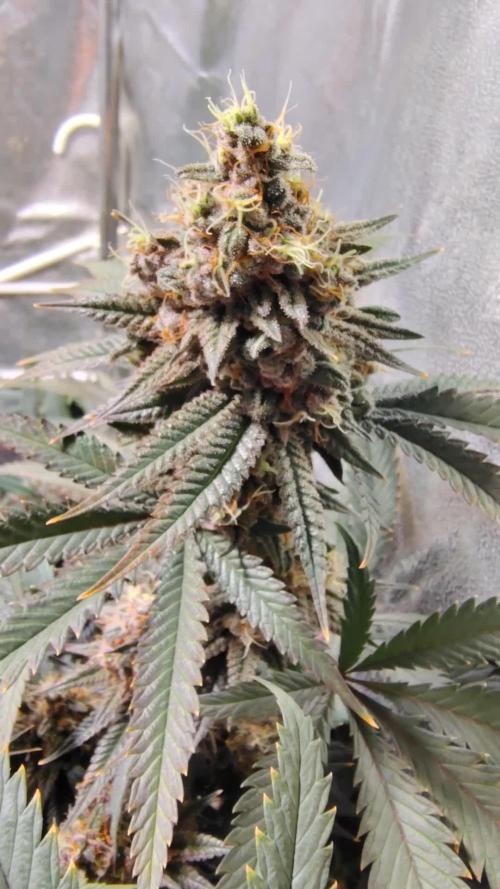
Forget to take videos of week 7-8 of flower . Here Is last week day 58 of flower .