
Likes
Comments
Share


@Roberts
Follow
Mandarin XL auto is doing good. I had to give tge solution a nutrition boost early week. It just was not strong enough for her. She is doing good. She is ready for a solution change very soon. I was hoping she would start transitioning first to go to blooming nutrition. Everything is looking good beside that nutrition problem. Thank you Medic Grow, Gen1:11, and Ganja Farmer. 🤜🏻🤛🏻🌱🌱🌱
Thank you grow diaries community for the 👇likes👇, follows, comments, and subscriptions on my YouTube channel👇. ❄️🌱🍻
Happy Growing 🌱🌱🌱
https://youtube.com/channel/UCAhN7yRzWLpcaRHhMIQ7X4g

Likes
38
Share


@Green_Mountains
Follow
A lot going on this week!! Feeding 3 quarts every Sunday and Wednesday at this point. I did a light defoliation on Monday and did a more thorough defoliation on Friday! I opened up a lot of bud sights and it shows in the pics from late in the week!!
I just turned the fan and carbon filter on. Temps are currently holding at 73-74F and the humidity is between 43-45%. I'm very happy with that!
I hope to keep them both happy!!
Enjoy!

Likes
6
Share


@GoldenWeedGrower
Follow
Legend
Timestamp: 📅
EC - pH: ⚗️
Temp - Hum: 🌡️
Water: 🌊
Food: 🍗
pH Correction: 💧
Actions: 💼
Thoughts: 🧠
Events: 🚀
Media: 🎬
D: DAY, G: GERMINATION, V: VEGETATIVE, B: BLOOMING, R: RIPENING, D: DRYING, C: CURING
______________
📅 D50/B13 - 04/06/24
⚗️ EC: 1.0 pH: 6.0
🌡️ T: 24°C H: 60%
🌊
🍗
💧
💼
🧠
🚀
🎬 1 TL video
______________
📅 D51/B14 - 05/06/24
⚗️ EC: 1.0 pH: 6.0
🌡️ T: 25°C H: 60%
🌊 15L
🍗 CalMag, Bloom A-B, Bud Candy, B-52, Big Bud
💧
💼
🧠
🚀
🎬 1 TL video
______________
📅 D52/B15 - 06/06/24
⚗️ EC: 1.0 pH: 6.0
🌡️ T: 25°C H: 60%
🌊
🍗
💧
💼
🧠
🚀
🎬 1 TL video
______________
📅 D53/B16 - 07/06/24
⚗️ EC: 1.0 pH: 6.1
🌡️ T: 25°C H: 80%
🌊 4L
🍗 CalMag, Bloom A-B, Bud Candy, B-52, Big Bud
💧 pH-
💼 Added pH- in order to keep the water on the lower side for a while
🧠
🚀
🎬 1 TL video
______________
📅 D54/B17 - 08/06/24
⚗️ EC: 1.0 pH: 6.1
🌡️ T: 25°C H: 80%
🌊
🍗
💧
💼
🧠
🚀
🎬 1 TL video
______________
📅 D55/B18 - 09/06/24
⚗️ EC: 1.0 pH: 6.1
🌡️ T: 25°C H: 70%
🌊15L
🍗 CalMag, Bloom A-B, Big Bud
💧
💼
🧠
🚀
🎬 1 TL video
______________
📅 D56/B19 - 10/06/24
⚗️ EC: 1.0 pH: 6.1
🌡️ T: 25°C H: 70%
🌊
🍗
💼
🧠
🚀
🎬 1 TL video


Likes
10
Share


@biggreens420
Follow
been a great week for cookies shes turning into a nice Bush did some more defoliation and lst removed some lower nodes tried opening her up as much as possible will be dropping silicon and adding buddy next week thanks for reading happy growing guys

Likes
112
Share


@Tazard
Follow
I will run Top Booster for 1 week then switch to Top Shooter for the remainder of flower.
I wasn't expecting the extra 10" this past week. The only thing that is keeping up with Acid Dough (out of 4 other varieties in the scrog) is the pure sativa I put in the back corner!
Acid Dough is a monster, even though the other 4 varieties were started 3.5w before the Acid Doughs they cover 6.5 sqft of the 16 sqft of the scrog. Oh btw the acid dough are 3/10 plants in the
Scrog.
8/16 added a second trellis for support. And some more Acid Dough bud shots.
8/18 💥 the Acid Dough's directly under the light are sprouting Trichs (small yet). They are up to drinking about 4gal a day water and eating nutes even faster.
Likes
11
Share


@CampExotic
Follow
Starting week 2 and the bud sites have come outta nowhere. Got some LST hooks in but I’ll take them out soon. Gonna use more CalMag but besides that she looks cool!
Changed the nutes to flower nutes of course. Adding some new LST to see what happens.
So far the buds are growing and expanding. Went from one cola to many. Not sure if I’ll remove the hooks yet

Likes
5
Share


@BudXs
Follow
Super busy with a move and a big garden reno. Sorry, this is the only update for this week
Likes
132
Share


@rhodes68
Follow
11/22 Day 9
Time to transplant into the one gallon intermediate pots, increasing feed ppm slowly.
Feed set to 5ml/gal ea Cocotek A/B 370ppm after water adj
Into the veg tent 5ml Kangaroots given as a one time for transplant
Feed upped to 450 ppm
11/25 Feed changed to 600ppm
11/26 Feed to 780ppm
11/28 End of the week and things are good. The smallest plant isnt stunted just a different pheno (grr) 😜
Transplanting in a day or so
Likes
1
Share

@Naujas
Follow
28 dienos!!! Prasideda žydėjimas;) Mergaitė auga - šią savaitę naudojau LST, nes ji pradėjo greitai kilti :) Taigi, viskas atrodo gana gražiai:) Pamatysime, kaip ji keisis :) Bet manau, kad ji bus graži, skani, stipri:) Sėkmės visiems.
Likes
31
Share


@LockDownGrow
Follow
Everything has gone really well up till now ,
She is start too show the beginning of pre flower , I wasn't expecting that for a couple of weeks so not sure if this is normal ? But she is growing fast and strong ,
I picked of a few select large leaves that where coving the side branches , but very minimal , mabey one or two leaves of each plant , and also pulled down the branches too help with light getting down into the center of the girl ,


Likes
9
Share


@burnercorona
Follow
She's a healthy lady. No issues this week. I did switch up the lighting this week.


Likes
71
Share


@Nor_Cal_Kannabliss
Follow
Aug 16 : Didn't get to it.. Sorry
Aug 17th : Holy SHIT balls batman... These things are flipping huge!.. Even "Tiny" Cookie isn't doing half bad! But my word.. About a week or so left I imagine before these are just about done.. Can't wait to see how they finish!!
Augh 18th : Snuck in a Few Closeups of the #1 Cream Cookies. Enjoy.
Likes
25
Share


@RastaMouse
Follow
All going really well so far they popped out the ground and doing there thing I ordered a co2 bag that should be here in a day or so, and apart from that I m happy no signs of bugs or deficiency’s

Likes
12
Share


@Eauderay
Follow
Changed HPS light for a Leds one. This Voost Leds are really good for veg and on low setting, let's try it on full for El Patron!
Just added handful worm castings and half of bat guano.
I really started to enjoy looking at her flowering, long stretch and immature buds in formation, calixes are not many but those are bigger the norm, and hair are short.
I like big Calyxes and short hair! 😁
That is it, thank you for following!
Likes
8
Share


@FirstTime97
Follow
Week 7 seems to be going fine from my house and then I go to the grow 🤣 well fukc me I’ve ran into few problems let um get abit too dey for their liking the week leading up to Christmas / gave um a good feeding with week 7s nutes and peeled back abit of the fan leaves to get more light around , humidifier broke on us didn’t notice for 2 days so tent was 70 percent humid when gone to check , new humidifier replaced and back on track as I said earlier peeled back a few fan leaves think maybe a few too many plants started showing signs of stress soon after again these are autos and I think it could of stunted if not heavily affected the end product also we noticed about 3 weeks into this grow we had way too many plants in the tent starting to see the effects off that now a lot of nonsense on the lower branches and only really the top Lola’s getting the light and the mass , all the same seed bar 4 plants and very differnt plants all in all , definitely not a strain that’s been mastered about half are tall and spaced out and the others are short and very stacked from my own eye I’d say the shorter and more stacked buds will be the ones bearing more fruit the taller ones look very skinny and airy still

Likes
Comments
Share

@theChimp
Follow
The entries in this journal are derived from daily voice memos recorded throughout the grow. A large language model (LLM) assisted with transcription and editorial organization, while all observations, measurements, and cultivation decisions were documented during the grow itself.
──────────
Introduction
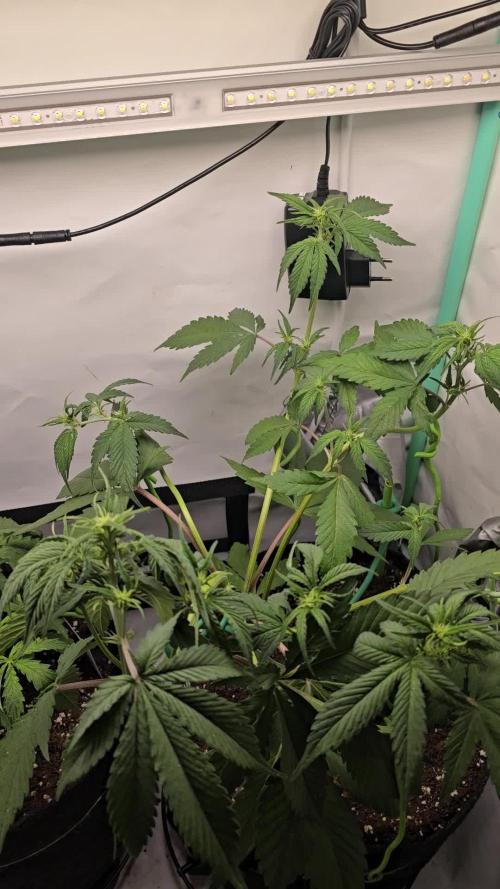
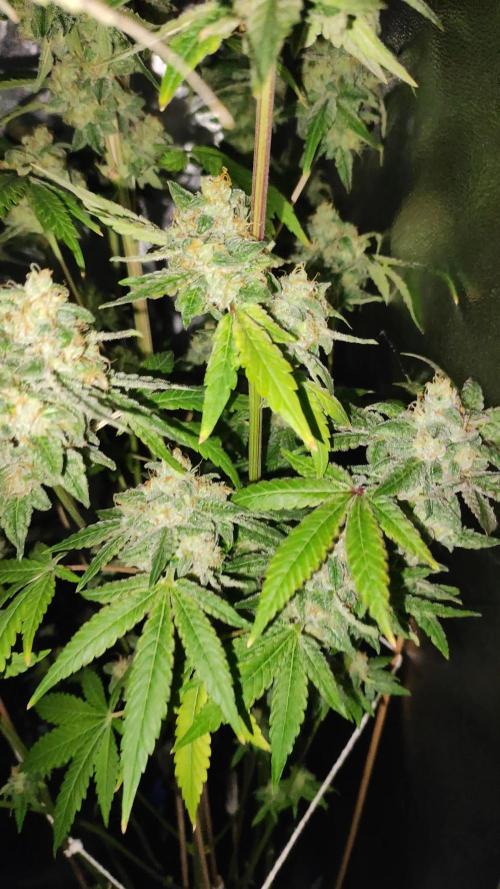
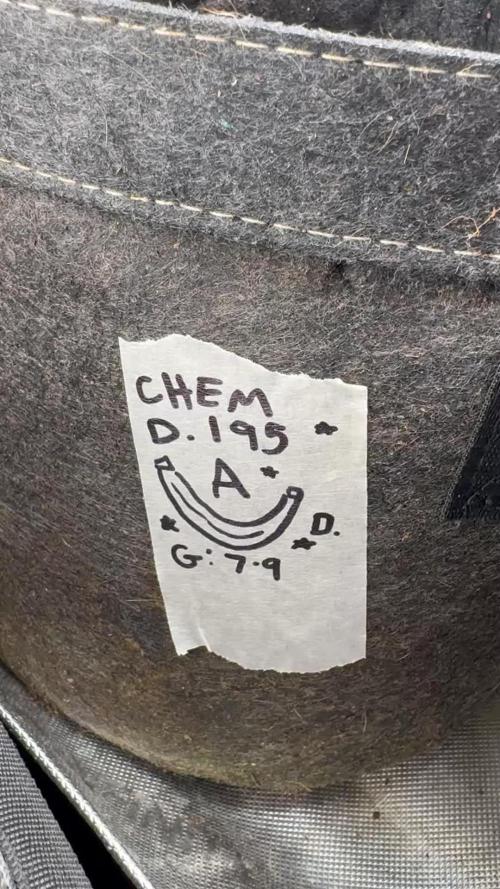
This journal follows an unreleased experimental autoflowering cross from ETHOS Genetics combining Chem D 195 with Banana Daddy Auto. As an experimental line, considerable phenotypic variation is expected, making this an especially interesting cultivar to document from germination through harvest.
──────────
Germination & Early Seedling
Diary Summary
This seed was germinated on July 9 using the paper towel method before being transplanted directly into its final 3-gallon fabric pot. It immediately stood out by producing one of the longest and most vigorous taproots of any seed in this run before planting. Despite that unusually advanced development, the transplant was successful, and the seedling established quickly without signs of stress. By the end of this first week, the plant had successfully developed its first true leaves.
──────────
Environmental Summary
Average Temperature: 74.0°F
Average Relative Humidity: 69.7%
Average VPD: 0.87 kPa
──────────
Germination Method
The seed was placed between damp paper towels inside a sealed resealable plastic bag before being transferred onto a seedling heat mat inside the clone tent. Germination temperature averaged ~80°F.
After several days, the seed cracked and produced an exceptionally long taproot. By the time it was ready for transplant, the emerging seedling had already begun pushing visible green growth from within the shell, making it one of the most vigorous germinations observed during this round.
──────────
Seedling Development
The unusually long taproot translated into a rapid and healthy emergence following transplant. Within the first few days, the seedling broke the surface and established healthy cotyledons before quickly producing its first set of serrated leaves.
Early irrigation remained intentionally conservative to encourage root expansion while maintaining adequate moisture around the seedling. Approximately 75 mL was applied during establishment, followed by 150 mL later in the week as the root zone continued expanding. Water was directed around the seedling rather than directly against the stem whenever possible.
Likes
23
Share


@Chi_K24
Follow
This strain of Kings kush is a smelly one, I still can put my finger on the terp profile yet. Almost a kushy herby dank is all I can describe atm.
Growing these plants, I would suggest pruning every second node once you get her into flower since the bugs tend to push up against each other and may cause bud rot. Say ontop of defoliation and try to qork on them on a daily basis rather than lolipoping.
Another key thing is to keep rH in range during flower, I will recomend to set it to 40-50rh in flower. Also if you are growing outdoors, Be sure to cover them up during rain when in flowering, I uses a transparent tarp for the last 5 weeks of flower. Save my plants from 9 huge rain events during the last 5 weeks, my plants would of died from br.
This strain had some decent cold resistance also! She stay alive with with few events of temps getting down to 4 deg c.


