The Grow Awards 2026 🏆 


Likes
Comments
Share
@DeepRootsGrowTrees
Follow
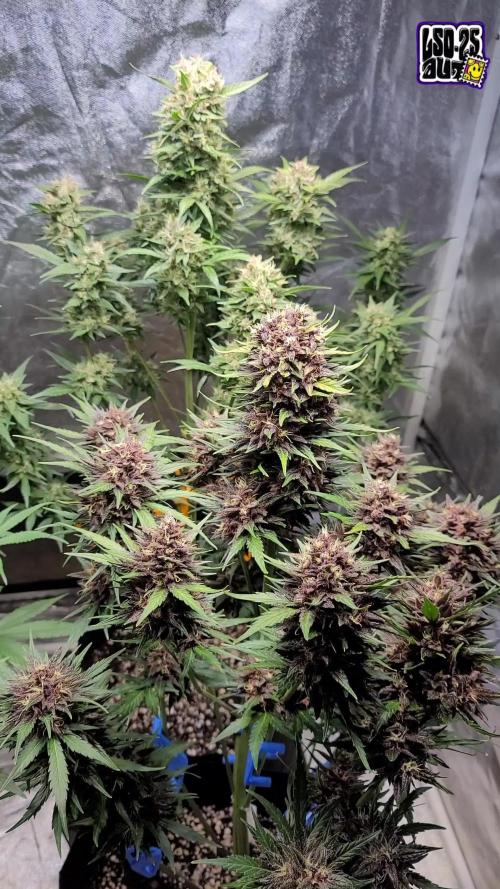
TROPICANA COOKIES FF / FASTBUDS
WEEK #17 OVERALL
WEEK #9 FLOWER
This week all is well no issues this week she's looking good buds are dense and covered in trichomes she smells sweet. Stay Growing!!
Thank you for stopping by and taking a look it's much appreciated!!
Thank you FASTBUDS!!
TROPICANA COOKIES FF/ FASTBUDS


Likes
48
Share
@AsNoriu
Follow
Day 57. Statement :
Even with hard beginning - thats my best run ! Zamnesia is AMAZING !!!
With veg hiccups, they still bushout to really nice plants in less than 7 weeks. Now Blue Dream is targeting my roof, Kalini Asias are thick as f@ck. Runtz very dense plants, thought they would be a bit bigger ...
They drink every 36 hours, hard to keep up with work, but i do my best not to screw up with them ;)
This week : feed, water, water. Defoliation too !!!
Day 59. That game - "who will reach sealings" - I don't like !!!!
Moved lights two days ago ... Soon i will need axe for my roof !!! ;)) That Monster Blue Dream is insane !!!
Hope will do heavy defoliation in two days, maybe this will shock her ;))) other plants keep up with her and canopy is even without all three Blue Dreams. Huge plants.
Day 60. Video is showing how less space is left, but they just keep climbing !!! ;))
Day 61. Thinking to defoliate all girls tonight, but maybe i will do it after next watering. Had to reposition them, loads of branches need to be chopped, some didn't see light for last two weeks( Curly, looks like sh$t, will never reach light). Girls are too big for my setup and i really hope it will be enough light and HEIGHT for them...
And so Defoliation has started !!! Hope everything will go fine !!!
All done !!
With the thought " WHAT HAVE I DONE !!!!??????!!!!!" i go to try to fall asleep ;)))
Happy Growing !!!
Likes
10
Share
@Gruschel_Muschel
Follow
Purple Punch am 26.12.2024
Tag 49 / 14.02.2025
Meine Purple Punch steht schon in der 7 Woche, ein großer Erfolg für mich.
Habe mit Bio Bloom und Bio Grow in der letzte Woche sie gedüngt, das Ergebnis kann sich sehen lassen.
Heute, wird Acti Vera, Alg A Mic und Bio Heaven in das Gießwasser hinzu gegeben.
Feedback:
Ich bin überaus voll zufrieden wie meine Pflanze sich entwickelt hat, ich denke die gute Erde und der Dünger von Biobizz hat ein großen Teil beigetragen. Ich werde mal schauen wie die Pflanze in der 8 Woche aussieht.
Ich nehme gerne Ratschläge von der Community an.


Likes
Comments
Share
@Lollogrower
Follow
Ciao a tutti, sembrerebbe crescere veramente bene!!! Le cime iniziano a crescere sempre di più.
E' veramente una pianta meravigliosa, facile da coltivare e per il momento non sembra presentare alcun problema.
Sembra apprezzare il calore e la luce del sole.
Buona coltivazione a tutti👊👊👊
Hi everyone, it seems to be growing really well!!! The buds start to grow more and more.
It is truly a wonderful plant, easy to grow and for the moment it does not seem to present any problems.
It seems to appreciate the warmth and light of the sun.
Happy cultivation everyone👊👊👊

Likes
44
Share
@Cogollo_eu
Follow
**Encontrarás la traducción a español al final de la descripción**
From/Desde: 12/04/19 || To/Hasta: 18/04/19
From day/Desde día: 50 || To day/Hasta día: 56
You can find the Money Maker Diary here:
** Podéis encontrar el diario de las Money Maker aquí:**
https://growdiaries.com/diaries/25667-gorillamakingmoney-gorilla-vs-money-m
-----IMAGES & VIDEOS-----
I'm sorry for not having a tlapse video this week, i slaved the cam onto my 60x60 tent to record the first growing week of another plants, next week i will return with more tlapse videos.
-----WEEK SUMMARY-----
To have a visual size of the plants take into consideration that the SCROG net it's fixed 24 cm abobe the top part of the soil.
There's something i want to correct and remark this week. About the question i asked some weeks ago on growers help, about the plant with decoloring problems (Photos 7 & 13), where i've choose the defoliation answer as the correct one. Watching the plant today, I would say that it can be an excess of co2 in the roots caused by a co2 tablet that I used during the first days of growth. You can notice how the part of the plant in the back does not present de decoloration it have in the front.
Also remarking what i've told last week, i must say the SCROG is not a true SCROG, as some colas begin below others, and also colas are of different heights among all plants. Anyway i'm very happy on how everything is going. And insisting again, I have very very few experience growing cannabis, this is my 3rd grow, 2nd indoor, and first time with photo-period at indoors, and of course is the first time too i'm trying to apply growing technics on a serious way. I really don't know if i'm doing things right or wrong.
-----WATERING CALENDAR-----
13/04/19 - 1.250 ml with all week nutrients -(Sensizym, bloom stimulator, bloom nutrition & amino complex) @ PH6.4 & 1.3 E.C.
17/04/19 - 1.250 ml with Silica Power, Pro Active, Bloom Stimulator, Bloom Nutrition, Sensizym & 5 drops of Amino Complex @ PH6.5 & 1.3 E.C.
*****ESPAÑOL*****
-----IMÁGENES Y VÍDEOS-----
Siento no tener vídeos timelapse esta semana, he esclavizado la cámara en el armario de 60x60 para grabar la primera semana de crecimiento con otras plantas que tengo en el.
-----SUMARIO SEMANAL-----
Hay una cosa que quiero corregir y remarcar esta semana. En sobre la pregunta que realicé hace unas semanas sobre la planta que tenía una decoloración (Fotos 7 y 13), en la que escogí la respuesta de la variegación. Viendo la planta a día de hoy, yo diría que es un exceso de CO2 en las raíces causado por una pastilla de CO2 que usé durante los primeros días de crecimiento. Al fijarse bien se ve como la parte trasera de la planta no presenta las decoloraciones y sin embargo la frontal si.
Para tener una idea más o menos certera del tamaño de las partes de las plantas, tened en cuenta que la red está fija a 24 cm de la parte superior de la tierra de los tiestos.
También remarcando lo que dije durante la última semana, he de decir que el SCROG no es un SCROG real, ya que las colas no empiezan desde la misma altura ni son de la misma altura, ni las plantas son de la misma altura. Pero yo estoy muy contento con como va la cosa, vuelvo a insistir que es mi primera vez con foto-dependientes indoor, mi segundo armario indoor y el tercer cultivo de mi vida, y por supuesto la primera vez que aplico o intento aplicar las técnicas de cultivo. Lo estoy intentando realizar bien y de manera eficaz, pero realmente no se si lo estoy haciendo bien o mal, yo simplemente me lio y veo como responden las plantas.
-----CALENDARIO DE RIEGO-----
13/04/19 - 1.250 ml con todos los nutrientes semanales -(Sensizym, bloom stimulator, bloom nutrition & amino complex) @ PH6.4 & 1.3 E.C.
17/04/19 - 1.250 ml con Silica Power, Pro Active, Bloom Stimulator, Bloom Nutrition, Sensizym & 5 gotas de Amino Complex @ PH6.5 & 1.3 E.C.

Likes
125
Share
@Regenwurm
Follow
Die 9 Blütewoche ist erfolgreich abgeschlossen!
Tage der Wachstumsphase = 32 Tage.
Tage der Blütephase = 63 Tage
Wachstum h in Blütewoche 9= 0 cm
Blütenbildung: Hoch
Die Mutationen nehmen ihren Lauf! Die Pflanze (Blüte) wächst und wächst und wächst.....
Wenn ich es richtig recherchiert habe handelt es sich bei ein und derselben Pflanze um mehrere Mutationen
Im Einzelnen...
Mutation 1= strähnige Blüten (wie bei der Dr. Greenspoon öfter mal vorkommt)
Mutation 2 = Gigantismus (doppelt so viele DNA Ketten wie regulär)
2 mal in dieser Woche mit Purolyt Mischung 1:25 besprüht
Lichtstärke: 85 %
Lichtabstand: 36 cm
Std Tag/Nacht: 12/12
Temperatur Tag: 25-26,5 Grad
RLF Tag: 55-61%
Temperatur Nacht: 20-21 grad
RLF Nacht: 50-55 %
VPD Wert: ca. 0,90-1,1
PH Wert Wasser/Düngelösung: 6,5
EC Wert: 1,3
Ventilator Oszillation: Stufe 2
Befeuchter: aus
Entfeuchter: mit Steuerung an
Zusätzlicher Entfeuchter: 1 Stk außerhalb vom Zelt im Raum
Bewässerung: 1* Wasser PH 6,6 EC 0,1/ 5 * bewässert mit Dünger mit den o.g. Mengen
Purolyt Besprühung: 2 mal
Controlling: Grow Control
Dünger: Greenbuzz Nutrients
Licht: Pro Emit Vollspektrum
Abluft: EC Carbon Active 750 m3 gesteuert/PrimaKlima 480m3
https://greenbuzznutrients.com/de/
Danke an Greenbuzz
Ihr bekommt 25 % Rabatt bei der Nutzung des Codes auf der GB Homepage
https://greenbuzzliquids.com/de/shop/
Code: GD42025
(Mindestbestellwert 75€)

Likes
9
Share
@HUMO_Cultiva
Follow
Update of Goofiez 2 !! It’s incredible this strain is so strong and fast grow !! Stay tu ed


Likes
29
Share
@For2itous
Follow
Cut out some more leaves & flushing both plants. The purple plant is close to being cut down with the green probably needing an extra week or so. The smell is so good right now 😤 can't wait to see how it is after cure. Man I wanna smoke some rn 😂 Happy growing 🌴


Likes
22
Share
@elevensixty6
Follow
This being my very first seed to harvest grow I would say it was a good outcome but definitely room for improvements to be made.
Total Yield was 61 grams of smokable buds
- 26 grams of popcorn/smalls
- 35 grams of quality buds
Also had about 52 grams of shake which I plan on making using to make edibles and a solid pile of kief.
The Blueberry is already looking much better but I blame the density issues on having to flip into 12 hours of light for the Blueberry to go into flower.


Likes
8
Share
@Jays_Not_Here_Man
Follow
18 weeks from seed to harvest. Love 34 street seeds, quality genetics for a fair price. These garlic cookies showed no disease or pest issues, no mold or powdery mildew. Easy enough to grow, no surprises, no super stretch in flower, but I would recommend training or SCROG to control them. Pungent Pine is what I am callling this smell, over 800 grams wet weight. They are hanging to dry in my tent as I write this, 60 %RH and about 71 degrees of freedom units! Can’t wait to try it out 🇨🇦❤️🌱😎💨


Processing
Likes
31
Share
@NorCal311
Follow
👉👽11/17/19 - After two days of heavy defoliation, there were signs of a little stress. Mostly leaf dropping. Not much but, different than before. Gave a feeding of 2 cups of each solution.
Solution #1
A+B
Silica Blast
Solution # 2
Terp
Candy
Bud
Sweet
Sens
Cal
Overdrive
11/19/2019 - I noticed a couple more white fly's tonight. I have used my UV/Ozone bulb tonight for 30 min two times. I also hung 2 more sticky pads. Lets see what happens. Had to hold my breath (because of the ozone) as I took the pics.
11/20/2019 - 2 cup feeding of each solution. Saw a couple flies but not as many. Going to run the UV/Ozone bulb again tonight.
11/22/2019 - 2 cup feeding of each solution. Flies seams to be dead. Ran the UV/Oz again for 30 min and this seems to bee a good time over several days to kill the little bugs.
11/24/2019 - Well, have one girl that got a little fucked up from the extreme defoliation and was a little dehydrated. She re bounded nicely after some tasty treats. I think she will be the one that just hangs on to harvest


Processing
Likes
32
Share
@Dunk_Junk
Follow
So she sprung up during the week!!
Lets see what she does. I'm in need of a sativa strain at the mo.
Likes
14
Share
@Jazzvet
Follow
This week was very well, the girl showed her first pistils and she's stronger and healthier than ever, so:
Day 30 sprayed with bioprotect
Day 31 watered with 3l of water with 6 ml of bh, bg an a-v
Day 33 The first pistils are appearing sign that blooming phase has begun.
Day 34 water with the mix
Day 35 I've turned on the dehumidifier trying to decrease the humidity and starting to defoliated some lower leaves, 3/4 leaves per day stress the plant to much.
See you next week
Happy growing
Likes
18
Share
@Cannaguy
Follow
Topped all 4 plants once they developed 4 nodes, will be training branches out this time to open up the middles of plants
Likes
5
Share
@deltabravo
Follow
She spread her wings this week. Lower leaves widened and color deepened. I added more Bio365 around her base to support the stretch and keep her rooted. No top dress. No sprays. She’s growing in silence, absorbing the rhythm of the light. Every new node a sign she’s preparing.
No water was added this week, and the self-watering reservoir was maintained.