The Grow Awards 2026 🏆 


Likes
Comments
Share


@Greenswansea
Follow
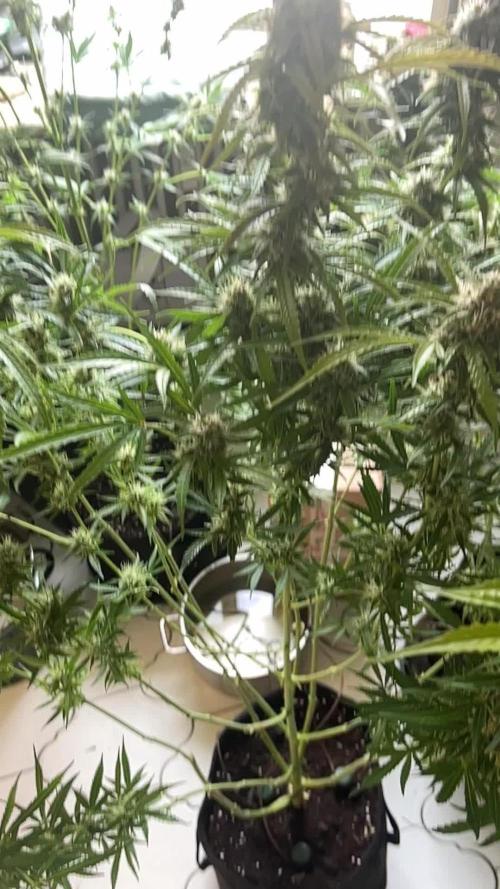
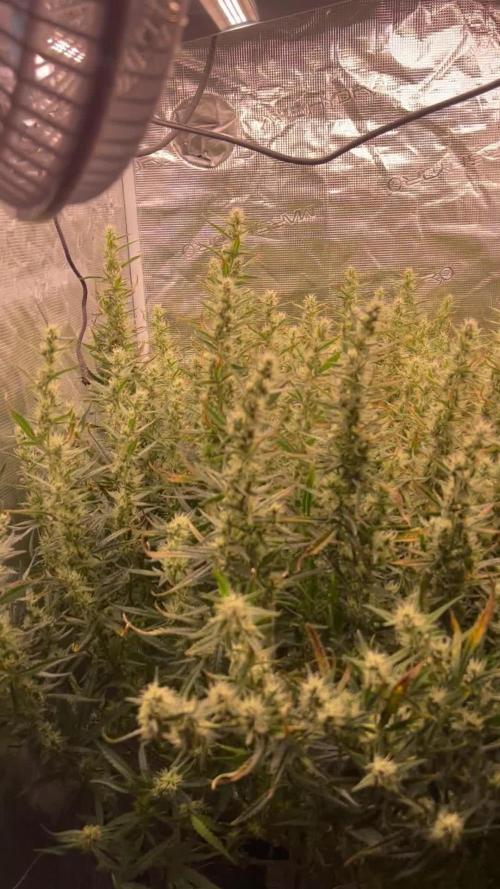
Decided to up the top max this week as we are coming to the end. Let see if they will fatten up some more. No signs of stress or nute burn. Plant looking beautiful!
We really appreciate you visiting the grow. Remember to like and leave a comment below. Happy growing 💚👌
Likes
2
Share


@Amboss
Follow
Shape Day … take many Leafs off
Think 2 Weekend maybe
I made a big mistake with her
Her neighbour plant is 30cm bigger and Gas Late veggie period. I give the bigger plant water on the leafs and it fall ob the Main Cola of the smaller plant. Budrod. I Must cut 1 Cola off
Likes
7
Share


@Adam22
Follow
Day 28 week 4 of flower plants looking good I dropped a 3L water bottle on a string which snapped a whole branch from the bottom 😳 on right plant 😭
Likes
2
Share


@Greenthumby
Follow
First Day of Week 7 , here WE go...
Its my First Indoor Grow, Growbox 180x60x60 120W Growlights ...
3 Ladys , 85 cm Griselda, 75 cm JLO, 60 cm Kim K.
Think the Girls lookin good for this Time.
Still no Issues in the Plants. Only, I need a bigger Growbox, cause there are not enough Space for 3 Plants, think next Time I will Go for ONE Big Lady.
Likes
13
Share


@DaddyPrime
Follow
7/26 sorry bout the flash in the pictures
7/27 idk if its because shes smaller than my other plants but she seems to love this heat wave we are having, atleast alot more than my bigger plants, she looked hungry for nitrogen with those leaves so I fed her
7/29 gave her some nutes again. She's on add plant in the way she grows, she's short and takes her time but she's thick too. Not in the vine type way like a sativa but idk I cant wait to see how she produces
7/30 shes so top heavy its kinda sexy
Likes
80
Share


@Roberts
Follow
Pure Ice cream clone is doing great. Super top heavy. I just switched her to ph water today. She is starting her fade. She has a strong sweet creamy smell just like the mother plant. She is actually finishing up pretty fast. Smells strong and looking good. I have the light turned down the last two week to stop it from getting too warm in the canopy. Smells like it worked well. Thank you Pure Instinto, and Spider Farmer. 🤜🏻🤛🏻🌱🌱🌱
Thank you grow diaries community for the 👇likes👇, follows, comments, and subscriptions on my YouTube channel👇. ❄️🌱🍻
Happy Growing 🌱🌱🌱
https://youtube.com/channel/UCAhN7yRzWLpcaRHhMIQ7X4g
Likes
50
Share


@Mr_Motalovah
Follow
Hello Growers and Tokers! 👋 👩🌾 🧑🌾.🔥💨
As soon as I walk into my grow room I can smell them and when I open the tent it's a slap in the face.
Though it's a lovely slap it isn't gentle, it's a 'where've you been?' slap. A 'welcome to Caramel city' slap. 😂😂
Jokes aside. This strain's aroma has me "Enamorado".
Pictures taken day 42 of flower.
The Green Sensation seems to be doing it's job.
Buds are really starting to fatten up fast and are looking very very luscious.
I should have started using it in week 4 so I'm a week late on that. *Made a little reminder for the next run.*
I can't seem to get a good shot of the buds but i'm working on it. Let's see if for next week I can get a good close up.
In flower I water with nutrients in every feed and every 10 days or so I water with only water and Enzymes to help break down the old roots, gives life to the microorganisms, helps out the new roots and helps to prevent root rot. It's great if your using mineral nutrients as there's times where those minerals stay stuck to the roots and can cause root burn.
I use alga based nutrients so I don't have a problem with that but I like to use it, I've noticed a great difference im flower before and after using.
We're getting closer and closer to harvest. 😬
"Sooo exciiited" (In Kevin Hart voice)
If you like the content check out the other strains sharing the tent. 😃
I'll catch y'all next week.
Take care out there!
One love Growers & tokers!
Likes
19
Share


@GoldenWeedGrower
Follow
Legend
Timestamp: 📅
Measures: 🛠️
Water: 🌊
Actions: 💼
Thoughts: 🧠
Events: 🚀
________________________________
📅 D50/F11 - 12/10/23
🛠️ EC 1.3 (stable) pH 5.5 (raised) -- pure water
🌊 RES Changed 💦💦💦
💼 Made some LST on the little one. No more work on the bigger
🧠 I'm going to change the water within today and run it for 12-24h and then put only bloom nutes
🚀
________________________________
📅 D51/F12 - 13/10/23
🛠️ EC 1.3 (by set up) pH 5.5
🌊 New water, calmag, bloom A and B and B52
💼 Removed all LST constraints on the big one. Some spouts removed from the little one. Some defolation
🧠 All training was removed now I will let her grow normally
🚀
________________________________
📅 D52/F13 - 14/10/23
🛠️ EC 1.0 (falling) pH 6 (rising) -- EC 1.3 pH 6.1
🌊 No water added. Added Big Bud and Bud candy to raise EC until 1.3
💼 LST and defolation on the little one. Made Timelapse video.
🧠 She's eating a lot: very good
🚀 The little one is sprouting out the first petals
________________________________
📅 D53/F14 - 15/10/23
🛠️ EC 1.1 (falling) pH 5.2 (falling) -- EC 1.45 pH 5.4
🌊 Water decresed a lot. Added 4L and Bloom A-B - Calmag and a little of Rhino Skin (silica)
💼 LST on the little one, some defolation on the big
🧠 I would like to have only nice big fat buds, so I need to work on this goal
🚀
________________________________
📅 D54/F15 - 16/10/23
🛠️ EC 1.5 (rising) pH 4.7 (falling) -- EC 1.4 pH 5.4
🌊 Water decresed a lot. Added 6L Bloom A-B and lot of Calmag
💼 Only a little defolation
🧠 Next time, no calmag at all
🚀 By mistake I added a lot of calmag so to balance I have to add lot of water and now the pot is completly full. Keep in mind there is a lot of Calmag in it
________________________________
📅 D55/F16 - 17/10/23
🛠️ EC 1.5 (stable) pH 5.2 (rising) -- EC 1.2 pH 5.4
🌊 Added pure water and a little of silica (Rhino skin)
💼
🧠
🚀 Some leafes tips are burning, so I'm going to go back to 1,2, trying to have a good pH range
________________________________
📅 D56/F17 - 18/10/23
🛠️ EC 1.2 (stable) pH 5.7 (rising)
🌊 No water neither nutes added
💼 Little defolation
🧠 Maybe the Thrips from Granada come out and infected Marlene. I will spray also her tonigh
🚀 Some symptoms of insects like leaves bitten
Likes
39
Share


@wheedtobeus420
Follow
Day 48. She’s huge!!! Eating like a beast. Drinking like there’s no tomorrow. I’m stoked for her she’s getting hard to move around. Heavy girl impressive.
Likes
Comments
Share


@GothBotanical
Follow
The autos continued their steady vegetative push this week, with larger 5–7 finger leaves developing and noticeable daily growth. Canopies began to fill out, giving the plants a stronger, bushier appearance compared to the previous week.
On Aug 26, the pots were watered thoroughly, and beneficial nematodes were applied as a preventative step against soil pests. This was the first pest management measure of the grow.
The environment stayed stable overall. Temperatures stayed warm but within a healthy range, and humidity hovered in the target veg zone.
By the end of the week, the plants looked vigorous and healthy, with no signs of stress or deficiency. They are well-prepared for topping and early training in the coming weeks.
Likes
3
Share


@DannyGNYC
Follow
Today I stared to bottom water feed with my ac infinity self watering pots
Likes
30
Share


@coyote2thick
Follow
I’m lightly defoliating each and making sure my bud sites are exposed. Everything seems to be swelling up nicely.
Likes
69
Share


@Crazyweedpt
Follow
Week 9
Started this week flushing with plain water 4 times my pot size then followed directly with a 1ml per litre mix of Cal Mag and 75% recommended nutrient mix pH to correct value in order to treat deficiencies showed last weeks! I assume it was a PH issue... even so, i increased also the distance from my lights!
The buds of pot1 seems to have fatten a lot and looking at overall progress of this girl i might harvest the top buds in a few days and leave the rest of plant to mature. Slower development on pot2, this one have huge space betwin internodes and i´m dissapointed with the small size of her buds so far !
The smell are delicious (subjective i know but i love it 😅) and it´s getting very strong 💪!
Likes
82
Share


@BigBadLion
Follow
Hey guys!
Another week and another update!
At the end of this week I decided to finally start with the main lining and I won't lie... I was extremely nervous haha 😱 but I believe I did it well, without any major issue! I also decided to move the small 4th plant into a new home and it seems she will like the extra space!
This week I also didn't feed my babies as I over watered them 😞 but they still showed some great progress! So I suppose it wasn't that bad! 😊
Soon I'll update the next week, which is also ready and has even more timelapses!
Thanks everyone! :D
Likes
58
Share


@MadeInGermany
Follow
Flowering day 23 since time change to 12/12 h.
Hey everyone ☺️.
The plants develop beautifully even if they are very small in this experiment, especially the front ones 😂👍.
Compared to the grow before when I did a scrog with the same genetics in the same system, there is of course much less leaf mass here.
But this time I wanted just such little trees for testing purposes 😃👍.
This week the entire water is changed again like every 12-15 days approx.
From then on I will also go up to EC 1.3 because the flowers are starting to form well :-).
More follows in next update. Stay healthy 🙏🏻 and let it grow 🍀🍀
You can buy this Strain at :
www.Zamnesia.com
☝️🏼☝️🏼☝️🏼☝️🏼☝️🏼☝️🏼
Strain
Gelato clone from mother (Zamnesia )
☝️
Genetics: Wedding Cake x Gelato x Gelato 33
👍
Vega lamp: 2 x Todogrow LED CXB3590 COB 55 W
1 x Sanlight S2W 62 W
💡
Flower lamp : 2 x Todogrow LED CXB3590 COB 55 W
1 x Sanlight S2W 62 W
💡 ☝️
Grow Aero System : Growtool 0.8
☝️
Fertilizer:
Canna Aqua Vega A + B , Canna Aqua Flores A + B , Rizotonic, Cannazym, CANNA Boost, Pk 13/14, Canna Cal / Mag, Canna Ph - Grow, Canna Ph-Bloom
☝️🌱
Water:
Osmosis water mixed with normal water (24 hours stale that the chlorine evaporates) to 0.2 EG. Add Cal / Mag to 0.4 Ec Ph with ph- to 5.2 - 5.8
💦 💧
Likes
12
Share


@GREENPHOENIX6262
Follow
*Week 5 of flowering*
Mimosa 1 & 2 are progressing accordingly, 0 signs of deficiencies.
Though both plants are coming along fine Mimosa 1 is lagging a little behind but not a cause for concern.
Water/Nute feeds have increased and the light cycle remains the same.
Mimosa (2) appears to have shrunk in size but that is incorrect, Main colas were tied down to trellis.
Likes
10
Share


@420DeepGrow
Follow
Gracias al equipo de Zamnesia, Marshydro, XpertNutrients y Trolmaster sin ellos esto no sería posible.
💐🍁MAC 1:
La MAC 1 es una variedad muy solicitada, creada originalmente por Capulator y distribuida solamente a determinados criadores y cultivadores. ¡Pero ahora ya puedes cultivar este tesoro en casa y disfrutar de sus cogollos densos, jugosos y potentes!
Gracias a su densa copa y vigor, la MAC 1 es una opción ideal para LST, poda apical y otras técnicas de entrenamiento (incluido el lollipopping). Cuando entra en floración, las plantas de la MAC 1 se estiran bastante y una vez maduras pueden alcanzar una altura de 160cm en interior y más de 180cm en exterior. De media, las plantas feminizadas de la MAC 1 necesitan un total de 9-10 semanas para terminar la floración, momento en el que estarán repletas de cogollos índica pequeños y compactos.
🌻🚀 Consigue aqui tus semillas:
https://www.zamnesia.es/10906-zamnesia-seeds-mac-1.html
Código Descuento 20%: ZAMMIGD2023
💡TS-3000 + TS-1000: se usaran dos de las lámparas de la serie TS de Marshydro, para cubrir todas las necesidades de las plantas durante el ciclo de cultivo, uso las dos lámparas en floracion para llegar a toda la carpa de 1.50 x 1.50 x 1.80.
https://marshydro.eu/products/mars-hydro-ts-3000-led-grow-light/
🏠 : Marshydro 1.50 x 1.50 x 1.80, carpa 100% estanca con ventanas laterales para llegar a todos los lugares durante el grow
https://marshydro.eu/products/diy-150x150x200cm-grow-tent-kit
🌬️💨 Marshydro 6inch + filtro carbon para evitar olores indeseables.
https://marshydro.eu/products/ifresh-smart-6inch-filter-kits/
💻 Trolmaster Tent-X TCS-1 como controlador de luz, optimiza tu cultivo con la última tecnología del mercado, desde donde puedes controlar todos los parametros.
https://www.trolmaster.com/Products/Details/TCS-1
🍣🍦🌴 Xpert Nutrients es una empresa especializada en la producción y comercialización de fertilizantes líquidos y tierras, que garantizan excelentes cosechas y un crecimiento activo para sus plantas durante todas las fases de cultivo.
Consigue aqui tus Nutrientes:
https://xpertnutrients.com/es/shop/
📆 Semana 1:
Ha sido una buena semana, ella ha dado otro gran cambio en su lugar definitivo 😎.
La carpa está ocupada al 75% y comienza una floracion explosiva gracias a @Marshydro y @Xpertnutrients y @Trolmaster con esta gran genética 💪.
A partir de ahora se riega manualmente con las dosis recomendadas por el fabricante.


