Likes
Comments
Share
@Tipton
Follow
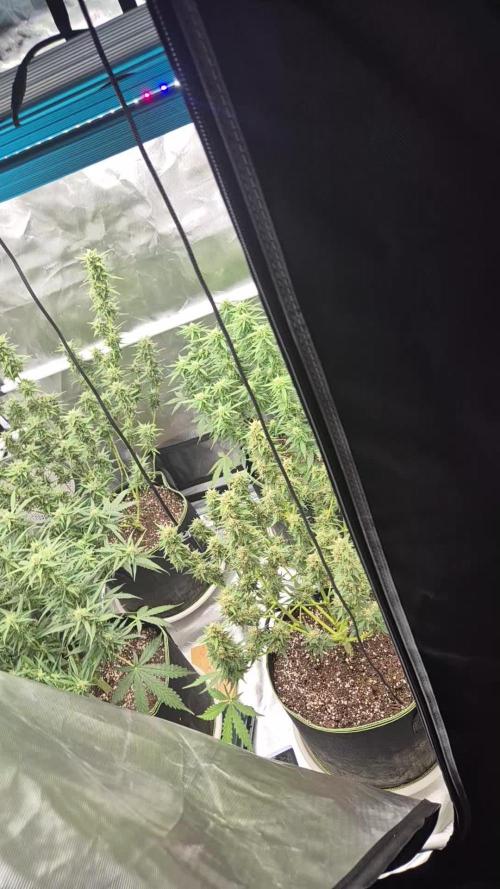
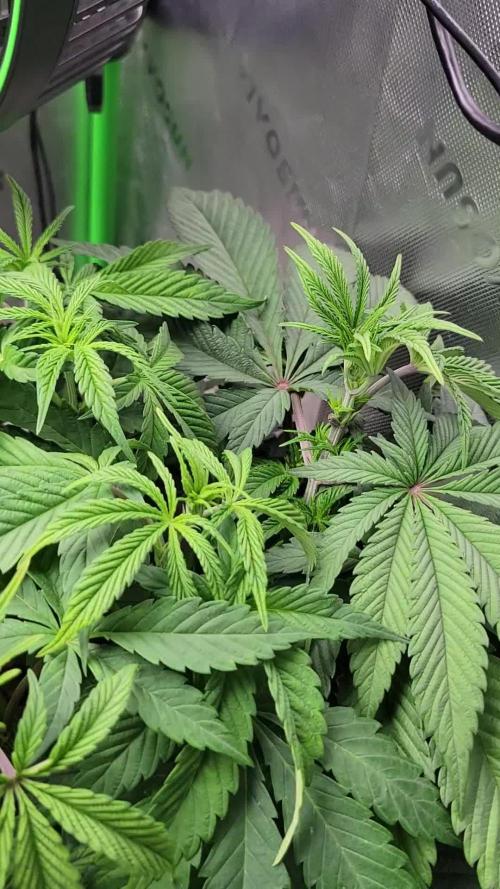
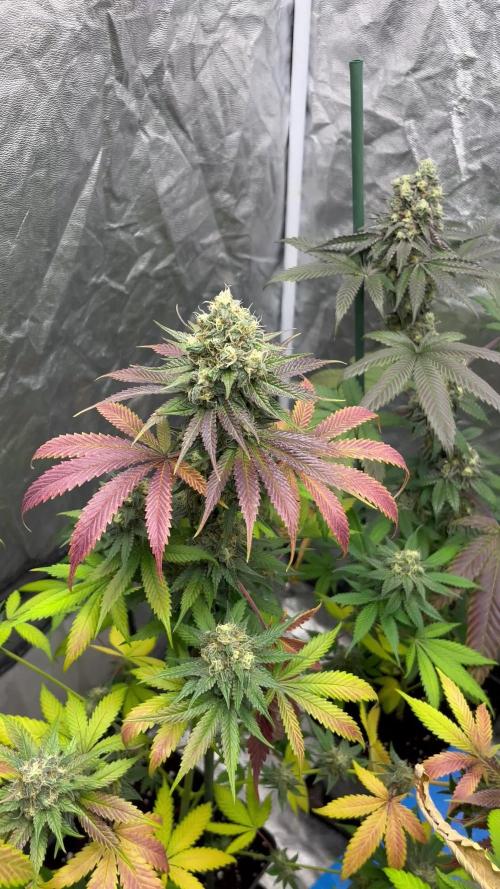
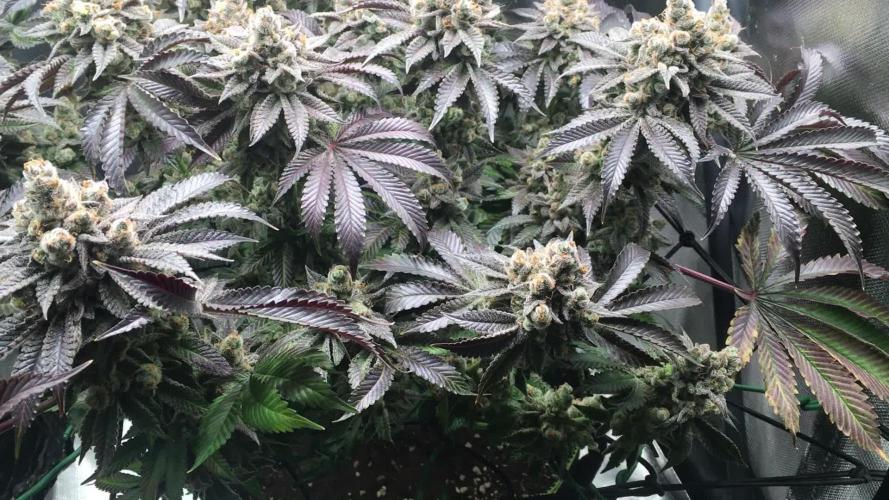
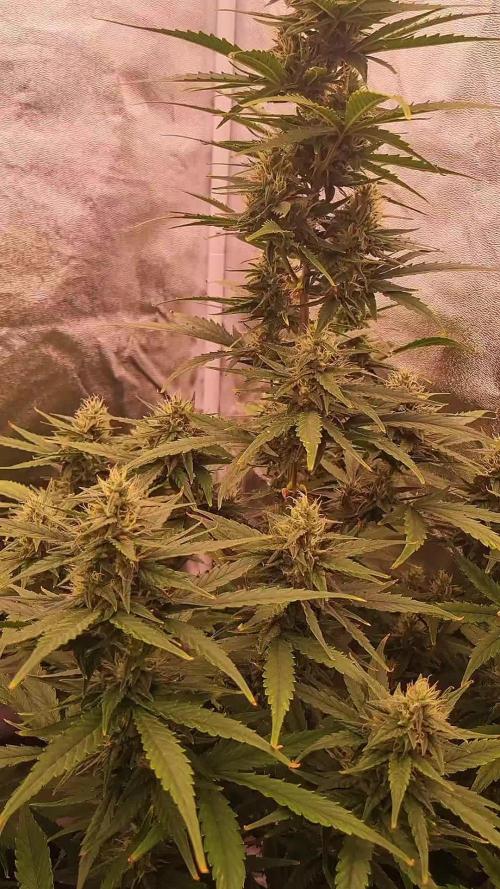
The stretch has gone nuts... Growth has been amazing... Nothing to really complain about besides they're hungry hungry hungry lol
Likes
21
Share
What’s going on lady’s an gentleman. we got the Moab strains going on W/1 in living soil. They where planted into the root riot cube an treated with neem oil to kill off the fungus gnats, they are thriving now. An getting bigger as the day goes. They will be trans planted into the auto pot system at end of this week. Into the 2x4. Under the double UFL3000 mounted on custom frame. Pumping 402w from the wall. Currently both the girls are in the veg/solo cup cabinet under the UF2000 100w light. Currently 60% rh and temps running 79 lights on. Thanks for viewing an happy growing!
Likes
27
Share
@Major
Follow
muy, muy buena semana, las flores se están formando cada vez más y cada vez más grande. Tenía una docena de hojas que se han vuelto amarillas. Creo que espero demasiado para que la tierra se seque. 110 cm en algunas plantas hasta ahora está bien va
Processing
Likes
10
Share
Bueno entramos en semana 3 de flora... pasaremos usar pl booster y esperemos poder pasar led antes que acabe esté cultivo. El calor lo hace insoportable para las plantas están bastante resentidas a ver que tal sale! Salut y força al canut farmers!🔥
Likes
9
Share
Should probably start my 2 week flush at the end of this week but I want to harvest this plant and my other one(which is 2.5 weeks behind) at the same time so I'm probably going to try and push the feeding another 2 weeks until I start the final flush, trying to have this stay in flower for 10 weeks, the breeder says flowering period takes 8-10 weeks so I think I'll still be just fine. This week went well, the plants are slowly starting to fade and colors are starting to come out. Gonna follow through with my original plan and continue feeding lightly for the next week or two until I start the final flush. I also raised the lights a bit this week mainly to help and give more light to my second plant that stretched so much its main cola is hitting the grow light, and also to help prevent any foxtailing from occurring.
Likes
33
Share
@Titoff
Follow
Depuis la fin de la semaine 10, j’avais commencé mon rinçage après avoir observé les trichomes à l’aide de différents appareils, microscope de poche vendu dans les Growshops, microscope à fixer sur son smartphone ou encore les lentilles macro de type Apexel lens 2 en 1.... Les lentilles macro m’ont permis de voir de manières assez aisées que ceux-ci étaient pour la plus pars laiteux, j’avais donc pensé que c’était le moment pour moi, d’entreprendre ma période de rinçage. J’avais lu sur différents sites qu’il fallait effectuer 2 semaines de rinçages afin d’éliminé tous trace de nutriments et d’avoir un weed savoureuse. Je pensais donc que le timing était bon et que mes 2 semaines supplémentaires me donneraient les 15 à 20% de trichomes ambrés mais j’arrive à la fin de la première semaine de rinçage et très peu d’ambré. J’ai donc ce weekend redonné un peu d’engrais, car les feuilles sont en pleines sénescences et la maturation des trichomes demande encore un peu de temps. Un peu perdu, pour être honnête, le contrôle de ce jour montre un stress plutôt bénéfique pour les filles qui vont être à nouveaux rincées. Afin de m’aider au mieux, j’ai commandé l’appareil Higrade analyseur de cannabis que je recevrais lundi, je vous donnerais donc plus de détails par la suite mais cet appareil est sensé nous donné de précieuses données quand coupé, taux de THC, carence, maladie bref un gadget qui promet de belle prouesse à voir donc. Cependant après plusieurs recherches, j’ai appris que l’on commençait son rinçage seulement quand les trichomes devenaient ambrés et après 10 jours de rinçages et après on coupe....
Likes
27
Share
1/20/2023- So much to do pre grow and over the next 16 days, absolute first order of business is that I have to take down my current Grow---TIMBER-- Then I have a list of things I have to get done in order to be ready to start this grow 1 Feb. With that said T - 2 days until start 48 hour Flush T - 2 days until Start 48 hours of Light T - 4 days until TIMBER!!! Items that need to be done before 1 Feb 2023 1. I need to clean the tent out 2. I need to clean the equipment- Proper Sanitization between grows in Hydro is a must!!! 3. I need to get the hole in the ceiling above my tent repaired- For my last grow I had a deep sink installed in my grow room, to make Hydroponics a little bit easier and have a water source in the same room. The seals on the pipes they were installing broke and leaked through the ceiling causing some damage all the way across my grow room, I was already weeks into my grow and couldn't risk them working above my tent and it would have been very awkward positon for them to be working in as well, so have to get this done quickly between chop and germination. 4. I have to install my new light- I was using a Vivosun 4000 and for this grow I am switching up to a Spider-farmer SF 7000. 1/20/23- For this upcoming grow I am working with M/F photo seeds so I ordered 4 Sex determination kits. I recieved my my 4 Sex determination testing kits from Rimrock Analytics today. I will be using these to test my plants at week 2 of Veg so that when/if I take clones I know I am taking them off females. As well as I don't want to accidently pollinate my tent during this grow I am looking for big beautiful buds not seeded buds. :-) 1/24/2023- Harvest of current grow- Started at 2:00pm and finshed wet trim and firt batch into the freeze dryer. 1/25/2023- Next batch into the freeze dryer and cleaning all my equipment for this Grow. T-1 Day until the workers are supposed to be here to fix the hole in the Grow Room. T-3 days until I instll my new Gorilla Grow Tent and my New Light Spider Farmer SE-7000 for this grow. T-7 Days until Start of Germination 1/26/2023- Harvest is done ran through the Freeze dryer and dry tim completed. 1/27/2023- Grow Room repairs completed. Hole is gone Letting the paint dry before I install the new tent. T-2 days until Install the New Gorilla Grow tent and the new Light T-3 days until I put the hydro equipment in the new tent T-5 days until Germination 1/29/2023- Day 0- Final Pre Germination activities Germination Start T-3 days The paint on the ceiling was dry and it was time to finish prepping for Germination. I got the following items knocked off my list. New 4X4 Gorilla Grow Tent is up and ready New Spider Farmer SE-7000 Light is installed- Thanks Moony Grows for the suggestion and for the Code that got me some money off and free shipping (Moonygrows)!! I turned the lights all the way up to max and set the timer to 18/6 0600-0000. I will keep an eye on the temperature and humidity without my plants and see how hot it gets with the new light. I put my Hydro system back together and put in 40 gallons of water into it, time to monitor for leaks the next few days. I Setup my cloning machine for Germination Days 3-11 1/30/2023 let me break down the situation, ROOM in the TENT.. Enough said.. No really I tried putting my exhaust system up in the new tent with my new light, The light is so big corner to corner that it really didn't give me enough room for the lights be be raised, with the exahust hanging the buckets my plants are Starting in are 2 and 1/2 feet off the ground, great for plenty of room for roots but not so great for upwards space for the plant to grow. In a 6' 11 tent with the exauhst in side and hanging that only gave me a little over 4 feet of grow room to play with. My last grow if you saw my diary, anyone could tell I was struggling to keep the buds off the lights. No good, Since space was such an issue I was running my carbon filter inside on the ground but It really needed to be up sucking the heat out not shooting the cool out. With that setup I was sucking air through the filter and pushing it out the tent at a bottom exhaust hole cold out. Wasn't doing me any good for my heat. I was hitting temps of up to 85 degrees. I bought a portable AC unit and have been running it in the grow room to try and keep temps below 85 and I have had to lower the power on my lights during grow also not ideal.. With that said a friend of mine MoonyGrows (Check out his diary) took the time to look at my issue send me a picture of my grow tent setup with detailed instructions on how to suck the air out from the top but putting my filter and fan on top of my tent so no room issue and I am sucking the air out from the top where the heat is instead of pushing the air out from the bottom where the cool is... THANK YOU MoonyGrows For taking the time to help me get this straightened out.. Now I have room and I have the exhausts working right and now my temps with everything at 100% are topping out at 80 this dropped the temp by 5 + degrees at 100% max. T-2 days until Start of Germination Prepped my seed tray with humidity dome Prepped my Rapid Rooter plugs. I Used RO water, and I added a few drops of Hydrogen peroxide to Oxygenate the water. I then PH balanced between 5.7-6.0 the same that they will be getting in the Cloning Machine and when they get to thier final grow pod. I perfere the 5.8x range and I hit 5.84 for these rapid rooters. If you want to see a complete video on the process HowWeedGrow has an amzing video that shows step by step how to do it and explains it better than I ever could including how to plant the seeds. Which I will cover when I get to that step on Wed. https://www.howweedgrow.com/how-germinate-weed-seeds-cannabis-rapid-rooters/ 1/31/2023 T-1 day until Germination Start All set and ready have my Rapid Rooter plugs ready to go have my seeds out.. Have my seed tray warming up tonight. Tomorrow morning right into the Rapid Rooter then strait into the tray. I will spray the dome to start the humidity in there. 2/1/2023 Germination Day!! Let the games begin! 0600am Put the seeds into the Root Riots. And then put the seeded Root Riots into their first home the Seed tray. I have them under the light 24/7. Sprayed the dome 7:30pm Sprayed the Dome to keep humidity going on the dome. 2/2/2023 Day 1 of Germination Sprayed the Dome in the morning Sprayed the Dome in the evening 2/3/2023 Day 2 of Germination Roots are starting to come out the bottom of the root riot plugs and the heads are slowly popping out of Number 4 just below the surface. Afternoon- Number 4 has popped up Evening- Number 3 has popped up as well. Happy Dance!! 2/4/2023 Day 3 - Germination Surprise Surprise Surprise- all 4 have now poked their heads up.. Happy day!! 100% Germination succeeded. Now major milestone to track is how many are female and how many are male. I will take look at the roots this afternoon/evening and see if they have enough root to go into the cloning machine for the next 7 days before they go into their Hydro Pods. Day 3 - Germination - Evening.. Roots looked good and they were tall enough to make it into the cloning machine. Now that they are all in the cloning machine I have switched the lighting to veg state 18 on 6 off. 2/5/2023 Day 4 - Germination - Morning All the Ladies (fingers crossed) looking great stretching nicely and look nice and green, Photo synthesis underway.... UPDATE!! After a very interesting POD cast on FSTS by Dr. Bruce Bugsbee from Utah University, I have shifted my lighting to 24 hours on through seedling and then I am going to shift to 20 hours on the rest of Veg. 2/6/2023 Day 5 - Germination While Checking on my conditions inside the new tent last night, I found that the Humidity was down to 39 Percent. I added an AquaOasis Cool Mist Humidifier, the reason I selected this humidifier is that I needed one that could be turned on and off utilizing my Inkbird Humidity Controller IHC200 that I have my Pro Breeze Dehumidifier currently running with. Root structures are starting to get there about 1/4 of an inch. 2/7/2023 Day 6 - Germination Everything seems on track more roots poking out of each today. They are each getting a little taller as well. Checked in the evening and number 3 was drooping the Root riot plug on the bottome was dry and the roots were not in the water yet. I raised the water just enough that the longest root that was sticking out is now hitting the water. 2/8/2023 Day 7 - Germination Everything looked good while checking in on them this morning number 3 is now full up and no droop again. 2/9/2023 Day 8 - Germination T-2 days until Plant into Forever Pods and we start week 1 of Veg .. :-) Surprising thing to me is that number 1 and 2 were later in popping then 3 and 4 but the roots are growing longer in 1 and 2. 2/10/2023 Day 9 - Germination Number 1 and Number 2 are definitely ready for transplant today.. Based on how they were yesterday and where they are today I am hoping by tomorrow 3 and 4 are ready. Today they look to me where 1 and 2 did yesterday.. I really hope 3 and 4 catch up by tomorrow since.. T-1 day until transplant to new/ final home for grow. Need the roots long enough to have some clay down in the basket to keep the root riot out of the water and only roots in the water.. 2/11/2023 Day 10 - Germination Today they got placed in thier forever Home, 7 days from Sprout and 7 days until Week 1 Start. PPM- 180 this is water out of the Tap Temp Water: 70.7 Temp Tent: 77 Humidity: 40% I have a humidifier going 24/7 to try and bring this up.. I also have Humidity Domes on each plant. 2/12/2023 Day 11 - Germination Sprayed the domes, all are looking good.. Nothing much to do at this phase but Keep monitoring the PH level in the system and making sure they have a comfortable home. T-6 days until Week 1 start 2/13/2023 Day 12 - Germination Sprayed the domes, They were looking a little yellow today so I moved the light down to assist. Nothing much to do at this phase but Keep monitoring the PH level in the system and making sure they have a comfortable home. T-5 days until Week 1 start 2/14/2023 Day 13 - Germination Sprayed the domes, They were looking a little Florissant yellow today, with what looks like slight burn on the tips, I talked with a fellow grower and we agreed that It was probably that I was drowning them, Yes you can drown you plants even in Hydro, but only early on.. :-) It usually happens with the water being too high, which soaks not only the roots but the medium (root Riot plug in this case). I lowered the water from touching the bottom of the pot to about 1" away. This will probably take 3-4 days to resolve. I will continue my daily monitoring. T-4 days until Week 1 start 2/15/2023 Day 14 - Germination Sprayed the domes, continue my daily monitoring they look a little darker green instead of lime green now that I lowered the water levels in the system, so I think that I might have resolved the issue but it will take a few days for recovery to happen. T-3 days until Week 1 start 2/16/2023 Day 15 - Germination I looked in on them this morning, 3 and 4 look like they are doing well and recovering nicely. Number 1 not so much it has brown spots on the leaves, this very well can still be a side effect of the overwatering but I decide to go ahead and add Nutes earlier than I was planning just incase. I was going to wait until Saturday but I think intervention is necessary now especially after drowning them early on. I added 1/2 what I am planning on adding for week 1 start. I also think I am going to adjust my chart to add 1/2 2 days after plant from now on. I don't think it would hurt it to have some Nutes to pull from. .25ml/Gal Calmag = 12.5ml 1ml/gal GH FloraMicro= 50ml 1ml/gal GH FloraGro = 50ml 1ml/gal GH FloraBloom = 50ml T-2 days until Week 1 start = I will drain the system and start it over on Saturday with Week 1 Nutes. 2/17/2023 Day 16- Germination I didn't even want to post today after looking in on them this morning, 3 of the 4 are now showing signs of dronwing.. Brown spots on the leaves, the water levels were still too high.. I drained about another inch out of the tanks.. Will see how quick they recover.. I start week 1 tomorrow and will have to ensure my water levels are at least 1" away from the basket on this round.
Likes
13
Share
cada dia mas glotonas mis bellas, estoy aplicando riego casi día por medio, solo una vez a la semana las abono, el resto solo con agua. hice algunos amarres a los tutores ya que están en pleno crecimiento
Likes
15
Share
@For2itous
Follow
She's got good smell so far. Just did some defoliating almost some lollipoping. Give some nutes but it's been raining so haven't needed to feed as often lol Happy growing 🌴
Likes
12
Share
@Arcadium
Follow
Smooth sailing this week, caterpillars have slowed, they will burrow into the soil to pupate from now until first frost. Next year I'm going to put bands of sticky tangle foot around the cherry tree in Oct, canker moths will emerge in Nov and have no luck getting back into that tree to lay eggs for next year. Top dress of a couple cups of home made compost with 20tbps of Gaia Green AP/PB, 70/30, 10tbps for smaller airpot. Fungus gnatts are always annoying in my smaller pots. Airpots make it fun because now they go in the sides, trying shade cloth which I normally use anyways around the pot. Did some super cropping of the small plant as well, looking good, no signs of flower yet, but I'm sure the pots maxed soon so we'll see. Witnessed the brood of Chickadees in my nest box take first flight, what a sight. Now I have a family of 7 eating those damn caterpillars. Half dose of silica / diablo maxx, and some drip, weekly LCPT spray and that's a wrap.
Likes
241
Share
💩Holy Crap We Are Back At It And Loving It💩 Growmies we are at DAY 42 and she's just killing💀it👌 👉We are in full on flowering , gotta say the pink to redish hairs look amazing , not to mention the frost 👈 even the stems and branches are sticky icky 👈 OMG I LOVE THE PINK PISTOLS 👈 So Shit , I gave them just a tad to much nutes on the first few feeding 👈 But I have since fixed it So I'm still doing some low stress training 🙃 and some defolation 😳 Lights being readjusted and chart updated .........👍rain water to be used entire growth👈 👉I used NutriNPK for nutrients for my grows and welcome anyone to give them a try .👈 👉 www.nutrinpk.com 👈 NutriNPK Cal MAG 14-0-14 NutriNPK Grow 28-14-14 NutriNPK Bloom 8-20-30 NutriNPK Bloom Booster 0-52-34 I GOT MULTIPLE DIARIES ON THE GO 😱 please check them out 😎 👉THANKS FOR TAKING THE TIME TO GO OVER MY DIARIES 👈
Likes
50
Share
@squalino
Follow
Journal de Culture : Mac 1 – "Esprit" (Plante n° 2) – Pleine Floraison / Gonflement ​Date du jour : 09/06/2026 Âge de la plante : J+66 (Semaine 10) Taille actuelle : 134 cm Évolution : +3 cm (Le stretch est enfin stabilisé !) ​Excellente nouvelle cette semaine : la course vers le plafond est terminée ! Spirit s'est enfin posé pour concentrer toute son énergie là où ça compte le plus : la production de fleurs. 📊 État de Santé & Descriptif des Fleurs Fin du stretch : Spirit se stabilise à 134 cm. Un immense soulagement, car la gestion de l'espace vertical devenait critique. La cime la plus haute flirte toujours d'extrêmement près avec la lampe, à environ 15 cm, tandis que le reste de la canopée profite d'une distance de 35 cm. Explosion des bourgeons : Les têtes gonflent à vue d'œil et commencent littéralement à remplir et coloniser les branches sur toute leur longueur. L'allure générale est typique d'une belle Sativa, fine et élancée, avec des empilements de calices très prometteurs. Santé du feuillage : La plante conserve son manteau d'un vert profond et vigoureux. Toujours aucun signe de sénescence précoce à l'horizon, ce qui prouve que le système immunitaire et le métabolisme de la plante sont au top. La mascotte : Spirit la figurine est toujours fidèle au poste, surveillant le pied de sa plante homonyme près des pièges collants jaunes. ⚙️ Paramètres Environnementaux ​Climat & Tente : Les paramètres de la chambre restent stables et stables (24°C jour / 21°C nuit, HR gérée au déshumidificateur). ​Arrosage : Le système Autopot assure l'autonomie en eau de fond, désormais délivrée sans bulle pour garantir un pH parfaitement stable à 6,3. Nutrition & Entretien (Aujourd'hui) ​ Fidèle à son habitude et pour répondre aux besoins de cette grande gourmande, j'ai administré son apport hebdomadaire : 5 ml de Bio PK 5-8 de Biotabs dans 75 cl d'eau (pH 6,3). Appétit vorace : Elle encaisse ce traitement de choc à merveille, demandant son booster régulier pour densifier ses longues rangées de fleurs. 📝 Réflexions du Growmaster ​J'adore l'allure élancée et majestueuse de cette plante. Avec le recul, je me dis que si j'avais eu l'espace nécessaire pour étaler mes deux Mac 1 de manière optimale, elles auraient exprimé un potentiel encore plus dantesque. Cette session me servira de leçon pour l'avenir : il est fort probable que je change de tente lors des prochains cours pour optimiser de A à Z l'espace de ma petite technique locale et laisser les prochains monstres respirer comme ils le méritent. Pour le moment, les sites de têtes se garnissent de trichomes et la structure promet une récolte très généreuse. ​🙏 Remerciements ​Un grand merci à @mia_biotabs et à Mrs_Larimar pour votre présence et vos précieux conseils tout au long de cette aventure riche en rebondissements de hauteur ! Merci également à tous ceux qui suivent l'évolution de la fière "Spirit". ​Placez au durcissement des bourgeons, restez connectés !
Likes
38
Share
Utopia Haze is a rare heavily sativa dominant hybrid (90% sativa/10% indica) strain created through back crossing Brazilian Sativa strains. This tasty little bud took home 1st Place for Best Sativa in the 2008 High Times’ Cannabis Cup and for good reason – with its potent 18-22% average THC level and long lasting cerebral effects, Utopia Haze is one powerhouse smoke. The Utopia Haze high comes on soon after you finish your first toke, hitting you with a strong cerebral lift that infuses you with a sense of hazy relaxation. Type: Feminised/Photoperiod Cultivation: Indoor/Outdoor Flowering Time (days): 70-75 Indoor Yield (g): Up to 650 Feminised Outdoor Harvest Month: October Feminised Outdoor Harvest Month Week: 3rd-4th week Aroma: Citrus, Woody, Pungent, Mint Effect: Cerebral Lift, Hazy Relaxation, Sleepy Welcome Everyone to the Final Entry of my Utopia Haze Grow ! There is so much to discuss ! I have been extremely busy as of late trying to get this Harvest together, but i am happy to have it here for you now ! I Seriously under estimated the amount of time, help from others, and my own necessary skills to pull this off.. and i still kind of screwed it up lol ! But its worth noting i have never actually done this before and trying to document it during....was extremely hard. It is next to impossible to work an iPhone with rubber gloves on ! First I want to discuss everything step by step so before you jump straight into the comments on how the end product is so small in "quantity" Rest assured i am happy with its"quality"...and thats all that matters to me because Life is a journey not a destination! and i have learned so much from this grow that I couldn't be any happy even if i messed some things up :) But at the very least I hope you read through this entry in its entirety with an open mind and focus more on the process, rather than just the outcome! I ran out of Ice & i was only able to wash three times..(normally I've heard you should go sometimes 5-6 washes) Preparation is Key & things will be much better next round :) Photos 1-22 These are pretty self explanatory but for those of you just tuning in now.. this is what happens to a very happy plant when you don't have the necessary tools to monitor key components of growing cannabis.. Ph, as well as EC levels play a very key role in the outcome of your grow lol that being said I was just able to save this plant by purchasing both tools but that doesn't mean the plant didn't suffer because of the prior events.. This was a Huge reason behind me choosing to turn this harvest into what i would consider "Solventless Hash Rosin" from "Ice water extracted Bubble hash". Pictures 23 The idea here is the process of using "fresh Frozen Cannabis" this has been discussed many a time online on such sites as instagram and here on grow diaries as well.. I personally have Never tried the process so i decided to try it out and make a judgement for myself.. Video 24 The Cannabis has now been in the freezer for 72 hours making it very well frozen.. as you can tell i struggled getting it all into the 25u Screen Wash Bag. One thing of note i would do differently is i will de-stem my next batch as i also believe this played a part in the amount of plant matter that escaped through the sieves. Photo/Video's 25-28 The idea here is "ice water Seiving" & especially with the bags that I am using here that are only have screen material on the bottom portion of the bag it is very important to have spaces in-between the screens to allow the water to pass directly through the screens into the bottom bucket with the least amount of resistance.. because the hash is so extremely temperature dependant if it gets warm on the side of the bag.. it will stick there and not make it to the bottom to become use able product.. 29 You do not need to use as much Ice as i used here lol... the idea is to keep everything very cold..i certainly achieved that but at the sacrifice of using so much that i ended up grinding product and producing "contaminants" but in the end they are just plant matter that i would be smoking when i rolled up my joint either way so.. I'm not super disappointed.. But it should be noted that what you want to achieve here is a Layering effect where you have the wash bag between two small layers of ice while the "water current" washes the Trichomes away allowing them to be separated by the screens setup below :) Before Starting the machine you should allow some time (i.e.;10-12minutes pre soak to allow the product to become saturated) before the first cycle. By video 32 I have just ran out of ice lol.. Video 33-34 Here I have a tip for you.. to separate the screens that you sieve through.. cut 5 gallon buckets to stretch them across nice and tight.. it'll make scooping your Bubble that much easier ! i learned this from the many "Frenchy" videos I have watched :) Picture 35 Here in lays the problem for most people.. drying your hash without loosing vast amounts of "Terpenes" whilst also stay ever vigilant against mold ! Thanks to all those videos I've watched on youtube.. id like to think this was one of my most successful parts of this process.. Things to Note; Terpenes start to seriously evaporate at temperatures 68F or 20C you need to stay as cold as possible whilst bringing the Relative Humidity in the space down into the 40-30% to stay away from that nasty mold ! I used my cold storage room in the basement.. with a dehumidifier running to keep the space at 45% RH & staying at a constant 15c. All while spreading the hash as thin as possible across parchment paper, on top of the white screens with a fan moving air across both sides of the paper. Pictures 36-38 These are some macros i took in the middle of my drying session I fell in love with the colour. Yes i know the black spots are plant material but they will get caught when i bag the hash & squish the oil out. Thing to Note; at this stage it is important to ensure you 'micro plane" the hash down as fine as you can whilst staying weary of the temperature... any "chunks" will hold pockets of moisture.. that lead to potential problems..ie; mold ... Picture/Video 39-41 Successfully planed bubble hash ready to be bagged and Squished ! Picture 42 Ive decided to follow Pedro.. from Pedros Grow Room and double bag to be on the safe side so i don't have any blow outs. So thats One 25u bag inside one 160u bag ! :) Pictures 43 This is almost 3 grams of the bubble hash from above, already melting in the bag.. this is where i ran into trouble again lol things started getting to warm in the house and i was only able to get one of the three squish's i did on video :( things started getting sticky. Picture 44 This is basically just a photo of the equipment I'm using; 3x5 LowTemp Cage in the frame I built myself, with a 20Ton bottle jack. Something to note here is this is an older Lowtemp model with only a single heating zone which is which i have it closed here heating Both sides of the press :) As well as the importance of having adequate pressure on your plates.. my rig is very overkill for the size of hash bags..lol Video 45 Here is the lovely press video.. its didn't quite work the way i wanted either lol my directional folding wasn't quite tight enough for a big "drip" :) &the Press was set to 65°c Photo's 46-50 are pretty self explanatory :) I had a blow out.. but still managed to pull an 80% return from the hash once squished...& yes it tasted amazing :) Was it worth it in the end... that could be debated.. for some..i understand..its not your thing, but for those of us that are interested in making our own concentrates.. free from Solvents... I wouldn't make it any other way :) If even ONE of you reading this diary finds it helpful to reference for ANYTHING.....even if its "what not to do" ill consider it a success ! Thanks again for tagging along on this garden adventure.. its been one heck of a journey ! Much Love from B.C. Canada, Until Next time, Cariboo
Likes
170
Share
Bonjour à tous les padawans et maîtres jedis Quel plaisir mes amis tout y est dans ce diarie ! À par le rendement 😁 mais bon ce n'était vraiment pas le but car je me suis rendu la tâche encore plus difficile en tentant l'expérience solo cup challenge avec main-lining sur une autofloraison. Merci pour tout vos compliment votre soutient et votre gentillesse. Je me suis vraiment amusé et j'ai pris beaucoup de plaisir avec ce diarie, mais j'ai surtout beaucoup appris. Que la force soit avec vous 💪
Likes
9
Share
Things are moving in the right direction again. After a rough patch, the plants have stabilised and are now showing only minor deficiencies. I decided to prune the most dysfunctional growth to focus energy on healthier, actively growing tissue and improve overall photosynthesis. That seems to have helped, as new growth is coming in stronger and recovery is underway, though they’re not fully there yet. We’re back on track for now and have also transplanted into 3L pots. The next days will be about monitoring and letting them settle in. Growmie lesson: Sometimes correcting a problem means acting decisively, but recovery still takes time. Removing damaged leaves can help, as long as it’s done carefully and not rushed. Stats so far: 💧 Watering: Every third day 🌡️ Temp: 24–26°C 💦 Humidity: 65% RH 📈 VPD: ~1.18 kPa 💡 Light: ~400 PPFD
Likes
4
Share
Realmente es la 5º Semana, no hemos podido tomar imagenes de la semana anterior... Podemos observar la cantidad de tricomas que esta comenzando a producir. Todavía queda maduración, enseguida la probaremos🍭