
Likes
Comments
Share


@Rizza78
Follow
My first issue with a deficiency happened on 4/20. I’m hoping it was Molybdenum deficiency vs Nitrogen. But added a little base veg in to boost up N in case. Feel free to let me know what you think the issue could be. Seems to be coloring its leaves a week early. But the nugs are looking great and smelling like jet fuel. Putting into fall simulations this weekend. Day 32 on 4/22.

Processing
Likes
11
Share


@Fibro_Witch
Follow
Managed to sex out the males this week, especially easy since the girls were putting out some pre-flower pistils. Moved others around a little using my potato fork and now everyone is in a much better spacing. Bummer that 2 out of 3 were males, but that's ok! The ladies that are left will have more room to stretch. I gave them a little Big Bloom and some molasses.

Processing
Likes
6
Share


@Greenbean15
Follow
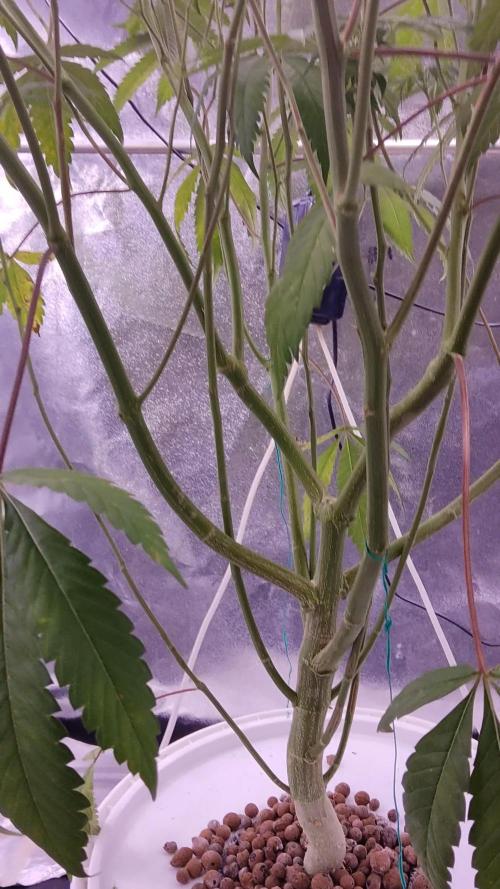
She’s in the small tent now with the more mature PT plant. Once I harvest the PT, this big girl will get the entire 2x3 tent. I think she will fill in nicely and has shown lots of vigor. Nice even tops for the most part with a few smaller branches straggling behind. The PT is almost ready to chop and then it’s this one’s time to shine. I haven’t been feeding her heavily, I may up her nutes soon. The other white widow clone in the larger tent was lollipopped as well as monster cropped like this one was so I’m excited to compare the two techniques side by side to see which buds I like better.
I selectively crossed all female strains with my male plant who is in a separate room from the girls. Branches marked with a green tie are pollinated. The male was originally in the tent these girls are in so I’m hoping I removed him in time. If not I may have some random seeds in these buds. I did spray the tent down between plants but I’m unsure if water really renders pollen unviable.
Regardless, seeds are a good thing... all these girls are in flower because it is my last grow. Here’s to hoping I get decent bud and some neat seeds for the future whenever I am able to grow again. 🌱👩🌾🏼
Likes
12
Share


@SSKNFbyHAZE
Follow
** COST **
TO RUN
- Used previous ⛺️ setup : $0.00
- Monthly electricity : $36.73 <-- other ladies sharing ⛺️
- 1 Gallon Fabric pot : $0.10
- Bonsai wire : Apx. $0.03
- Reused soil from last run : $0.00
FOR NUTRIENTS
- Jadam Microbial Solution : $0.00
- Fermented Plant Juice : $0.00
APPLYING
- JMS : 30ml / 1 Litter
- FPJ : 30ml / 1 litter
TOTAL COST : $36.86
Throughout the week, I give JSM, and fermented plant juice once each ^^
Hope you guys have a wonderful day today ^^v
*** Please Like, comment & share ***
Highly appreciated -----/-----<@

Likes
42
Share


@Jackweed77
Follow
beginning of the fourth week🌻 everything is going well. made another small defoliation🍁 where it was needed. girls 🌱keep eating all the nutrition that my diet is good for them!👍 I'm waiting for the flowers to explode!💚👽
Day 25👍🌻👊


Likes
2
Share

@PEAKYPLANTERS
Follow
Welcome back, brothers of cultivation, here is the moment long awaited by me and this little jewel of mine, the large tent has given us the right space for flowering....we will see beautiful things


Likes
10
Share


@Pggrower
Follow
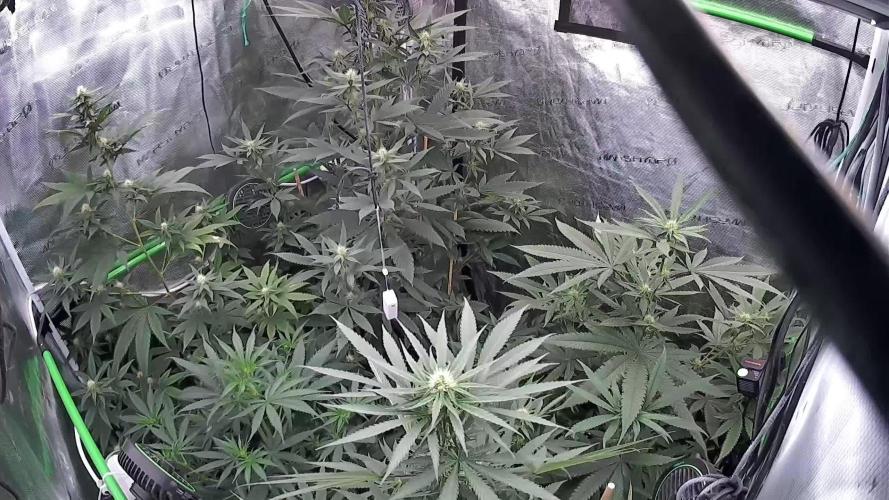
The flowering process isn't it beautiful. I love this stage doesn't matter how the plant turned out in training or in this case the panic moments when they get too tall. 😅 because you start seeing the results of the work that was done. They are all doing well.
Likes
6
Share


@Elemental
Follow
Air umidity is getting high, I'm a little concerned about mold. I took some leaves. Let's try getting to achieve more 15 days till chop it.
Likes
13
Share


@DrDuhboto
Follow
Other than having to remove the Buttercream gelato from the room and harvest it because it went Hermie everything else is going well.
All plants are fattening nicely, air flow is good, there are some sings of cupping on the leaves of Blueberry and Maui Waui,
I rearranged the Scrog and pulled the larger buds lower to help combat this. Cheese has some amber on it already, which lines up well with the timeline for harvest of my last cheese plant which was 15% amber at the start of 8 weeks.
I will let this one go a bit longer if possible so I have a slightly higher cbd version of cheese to go with my high thc batch I harvested last crop.
Blueberry will likely come down a week after that and Maui could go up to the full 10 weeks from what I am seeing.
Added Silica, Enzymes and Molasses to my feeding regimen.
I add the silica to tap water mix it and then put air stones in the resevoir,
I let that sit for a few hours then add my Micro, Gro and Bloom, then add Cal Mag and Sensizyme and Molasses. I use a drill with a mixer attachment to mix it well. This really helps with the molasses.
I find if I add about a tablespoon of fish fert to that mix I end up with 6.5 PH.
Fish fertilizer stinks but the plants love it.


Likes
33
Share


@Mrs_Larimar
Follow
2021-10-17
The Sweet ZZ packing on
They are having Huuuuge Buds, nearly falling over ( 2 of the Plants)
The one of the Pictures is more stocky and has more Flowers, smaller but everywhere
So iam quite fine with those Nutrients
Girls got afeeding today
P.S Pictures looking whacky, next week you get better ones
here are some Codes
Lights:
https://viparspectra.eu/discount/M.Larimar
And for the Fertilisers:
https://greenbuzzliquids.com/en/shop/
Code: mrs_larimar
Likes
8
Share


@Huntress007
Follow
So she is looking amazing 🤩 trichomes are very milky and most of the white hairs are and have turned orange and are curling in! At this point she is ready to begin flushing! Preparing for harvest!

Likes
55
Share


@w33dhawk
Follow
12.04.21 heute is Anfang der 4. Woche nach dem flip bin begeistert von den Ladys sie sind obwohl sie so viel stress mit machen mussten fleißig am blutenstände produzieren die trichom Produktion hat auch gut eingesetzt jedes mal wenn ich die Blätter unters netz schiebe und wenn ich gegen die Blüten komme kleben meine Hände und wenn das passiert verströmt sie einen angenehm cremigen Duft nach zitrone fast schon limoncello artig.......
13.04.21 hab heute mal wieder gegossen und wie immer jeden morgen Blätter unten halten sonnst war nix weiter....
14.04.21 moin leute der trottel des Tages ist wieder da hab mir heute (2 Tage nach dem gießen) meine gedanken gemacht bezüglich des absetzen der dünge Zusätze aufgrund von Green Sensation hab gedacht 4 in eins dann kann der rest ja weg und bin heute mal zufällig drauf gekommen beim Hersteller auf der Homepage zu gucken und siehe da ich trottel hätte sugar royal ganz normal weiter laufen lassen können werde es dann beim nächsten Guss wieder mit einschieben. Hab heute den Reflektor auf ganz weit gestellt damit ich mit der Lampe weiter runter komme bin jetzt heute auf 30cm an die spitzen gegangen und werde am Freitag weitere 5 cm nach unten gehen also auf 25 cm an die spitzen ran fahren da ich bei offenem wing und 30 cm nur 23,5 Grad an den spitzen habe solange die Pflanzen keine Stress Erscheinungen auf 25cm erleiden und die Temperatur stimmt bleib es dann auch auf 25 cm bis zur Spülung...
15.04.21 habe doch heute schon die Lampe auf 25 cm gesetzt bin wieder zu ungeduldig 24std hat der Tag das ist einfach zu lang für meine Geduld 😁 hab sonnst nur wie immer dafür gesorgt das alles an blattwerk sich unterm netzt hält....
16.04.21 hab es heute mal nur laufen lassen und beobachtet was die Blätter so machen muss morgen eindeutig wieder ran und unters netz stopfen 😒😒....
17.04.21 hab heute wieder die Blätter unters netz gestopft sonnst weiter nix los gewesen. Die Ladys halten die 25cm Lampen Abstand ganz gut aus bis jetzt, Temperatur liegt bei 25,4 Grad also noch vertretbar denke ich. Mal gucken was die Ladys bis Montag zum Licht druck sagen, wenn die spitzen heller werden geh ich zur not lieber wieder nen Stück hoch mit der Lampe.....
18.04.21 hab heut das gleiche wie jeden Tag gemacht, ich hab versucht die Welt-Herrschaft an mich zu reißen 😁😁, ne spass bei seite wie immer Blätter drücken und giessen war heut auch dran. Die Woche lief auch wieder erstaunlich gut hab zwar noch ne ganze ecke vor mir mit den Ladys aber ich bin zuversichtlich......


Likes
13
Share


@GrowGuy97
Follow
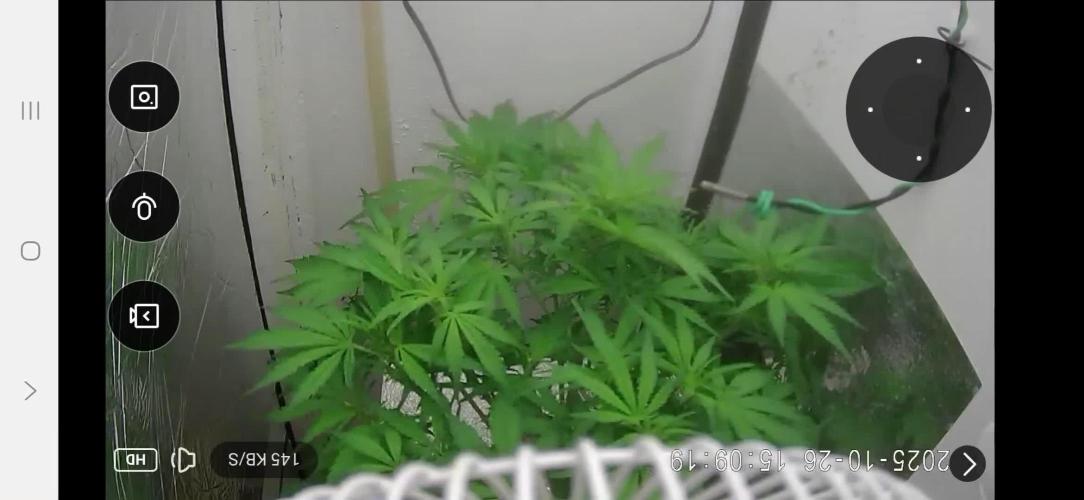
Day 28 - She is growing great, extremely sturdy stock & seems to be taking g nutrients well! She is definitely starting to turn a darker color on top! Very curious to see how this turns out! Thanks for following & happy growing friends ✌️🏼🌱
Day 29 - All is well, purple is starting to come in on the top bud😍
Day 30 - Got watered today with PH at 6.3
Day 31 - ✌️🏼🌱
Likes
2
Share

@Janerussel
Follow
F week 3. It gets really bushy. I had to do a second defoliation. At this point everything seems to go well.
Likes
28
Share


@AlpAge_Cino
Follow
06/07/2024 : almost done, waiting a few days more to harvest the other half.
With direct lighting, lower buds are getting purple too.
I vaped a 5 days dried sample : of course it didn't taste good yet but there was a noticeable fruity touch and a powerfull earthy one. I experienced long lasting light stone effect, quite surprising for me!
I'll recheck after 2 weeks curing.
06/10/2024 : no camera today so sorry for poor quality pics.
I trimmed dried buds and got 43g with a decent amount of kief (from trim then shaked) that turned in 3.2g hash. All this just with top buds...😀
Then I checked BB and saw that every upper buds turned purple so I decided to harvest a second time and let all the green material on the plant for another time.
I removed all fan leaves and biggest sugar ones, debudded and got 176g wet buds (part 2) that went to drier.


Likes
16
Share


@MadeInGermany
Follow
Flowering days 27
since time change
to 12 / 12 h
Hey guys :-)
The ladies look beautiful and are growing very well.
The sweet smell starts to blow through the whole tent :-) .
This week it was watered 3 times with 1l each (nutrients see table above)
Nothing else happened this week. Everything has been checked and verified.
A lot fun and stay healthy 💚🙏🏻
👇🏼👇🏼👇🏼👇🏼👇🏼👇🏼👇🏼👇🏼👇🏼👇🏼👇🏼👇🏼
You can buy this Nutrients at :
https://greenbuzzliquids.com/en/shop/
With the discount code: Made_in_Germany you get a discount of 15% on all products from an order value of 100 euros.
👇🏼👇🏼👇🏼👇🏼👇🏼👇🏼👇🏼👇🏼👇🏼👇🏼👇🏼👇🏼
You can buy this strain at :
https://www.ripperseeds.com/en/feminized/kmintz-feminized-cannabis-seeds
Water 💧 💧💧
Osmosis water mixed with normal water (24 hours stale that the chlorine evaporates) to 0.2 EC. Add Cal / Mag to 0.4 Ec Ph with Organic Ph - to 5.8 - 6.5
MadeInGermany
