


Likes
Comments
Share


@JiggiLotus
Follow
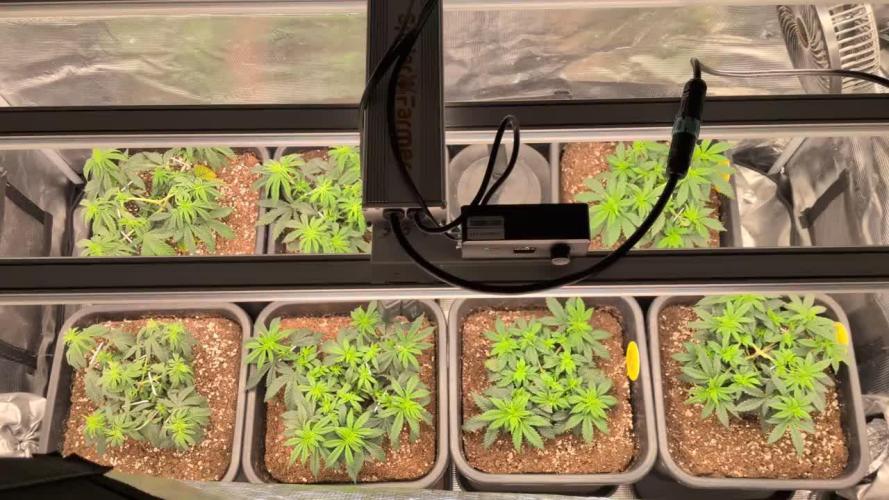
I want to thank you Paul @New420GuySeeds for this beautiful plant. She's getting close to that time. I'm both excited and a little sad cuz we've done this grow together. Kinda a fucked up reality.
Critical 47 has a few lower branches that are starting to drop due to the weight of the bud. I been curious if I could lop off some these baby branches at this stage without consequences.? Anybody know? Maybe sample the bud before the harvest.. would be nice.
Ive been doing my best at snapshots of trichomes so I may get a better ETA of the due date. This will be my first ever to harvest anything more than a common cherry tomato. Lol.
Any useful advice is welcome, start a chat if ya wanna!! I love company! And hey we already have a shared common interest! Gotta start somewhere.
So critical 47 is sticky and smells up the whole house, no deficiencies noticed, growth has stopped as far as I can tell, yet she is still feeding without waste.
I changed my regular fertilizer from the fox farm to Dr JimZ. With good results. The fox farm is a great fertilizer as well. I do mix the chicken soup for the soil with the fox farm trio. Cha Ching beastie blooms and open sesame. Dr. JimZ Bloom Kaboom is a once a month application for flowering plants. Good stuff.
If I were to grow her again I would, an I would definitely put her in a larger container without the burlap sack. Don't use that crap it's no good. Lol. It's created a protective base under the soil for pests to dwell. I'm sure when I pull it all up there's gonna be a super complexed colony of mighty gnats, I think of some ancient Greece city with all the thrills and shit. Lol. Gnat overlords. My own damn fault.
Gnats aren't that bad, they're just eating dead roots. There's definitely worse pests to have in the garden.
"Nicole, how do you keep them so dark green?" Easy. I put used coffee grounds into my cannabis plants top soil. If I don't make a tea with it. You can find these helpful recipes @RoyalQueenSeeds with all the good info and instructions. I also make banana brew for my girls, it's rich with everything they need. Helps them grow strong. The coffee grounds help them maintain that healthy green glow (nitrogen).
Thanks for stopping by and enjoy the rest of your week. Take care.



Likes
34
Share


@Roberts
Follow
Moon rock auto has been progressing more into her flowering stage. I have been keeping up on her kst and selective defoliation when needed. Not much has changed beside she is just getting bigger. I don't forsee this plant getting really big. I could be wrong. Nothing more to report on. Thank you Medic Grow, and Divine Seeds. 🤜🏻🤛🏻🌱🌱🌱
Thank you grow diaries community for the 👇likes👇, follows, comments, and subscriptions on my YouTube channel👇. ❄️🌱🍻
Happy Growing 🌱🌱🌱
https://youtube.com/channel/UCAhN7yRzWLpcaRHhMIQ7X4g

Likes
6
Share

@Simba732
Follow
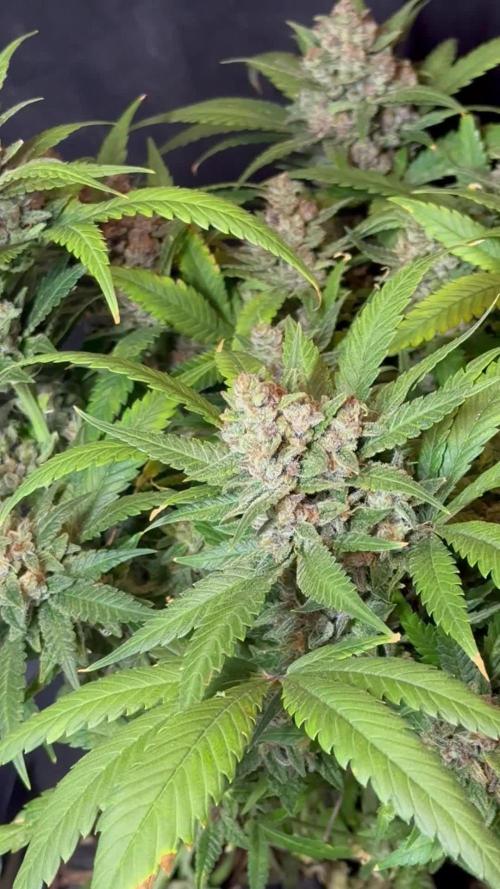
Week 11 over for Mama Tropicana 🍇🍋🍓
She smells delicious and has taken on her purple shade 🍬
I checked on the trichomes and we are getting very close to harvest day.
I’m stopping the feed and we switching to Flawless Finish to help flush the salts still present in the soil
Will let her go for a few more days then 🔪✂️
Happy growing Gang 💪🏾💚

Likes
12
Share

@Northern_Ent
Follow
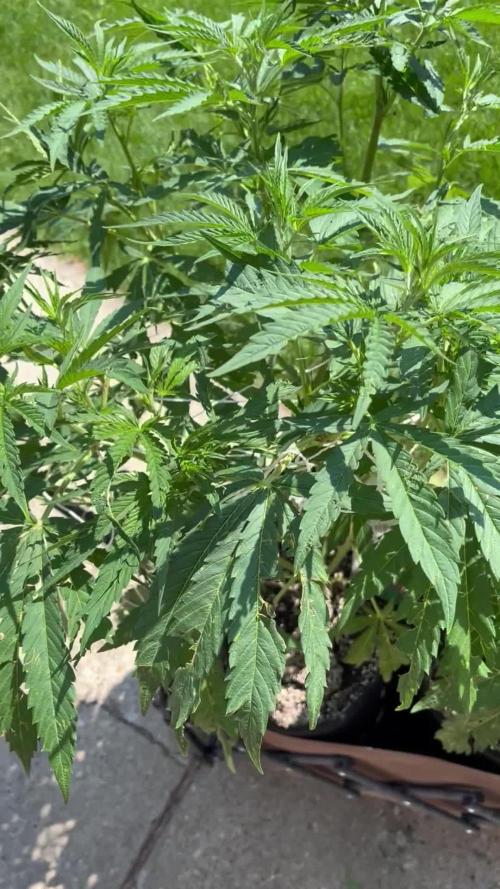
July 18: Plants are recovering from hail damage 7 days ago. Weather is good now but it’s fairly hot reaching 30 C the last couple days and about 21 C overnight which is quite warm for Edmonton.
Starting force flowering tonight. That is 10 h darkness plus 2 h virtual darkness using 730 nm far red light at dusk to initiate dark mode. In garage at 9 pm, few seconds of 730 nm far red and then out of garage at 7 am. 12 h darkness within the ‘26 h day’. Your mileage will vary at different latitudes but that timing works for me here at 53 N.

Likes
14
Share

@eldruida_lamota
Follow
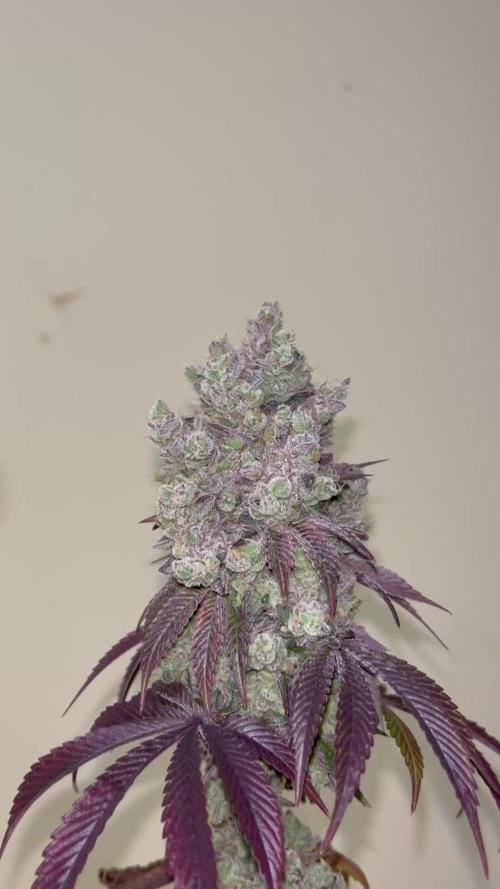
Venga familia que ya viene la cosecha de estas Barcelona Puff de Seedstockers, que ganas que tenia ya de darles tijeretazo.
Que variedad , me encantó cultivarla , sacaron unas flores alucinantes.
Las flores aparte de piedras, se ven resinosas, son muy pegajosas, desprenden olores florales.
a sido una genética recién salida este 2026 con la que disfruté bastante, fue muy fácil cultivarla. Y a la vez es resistente, aunque tarde alguna semana más merece la pena
Agrobeta:
https://www.agrobeta.com/agrobetatiendaonline/36-abonos-canamo
Mars hydro:
Code discount: Eldruida
https://www.mars-hydro.com/
Hasta aquí es todo , espero que lo disfrutéis, buenos humos 💨💨.

Likes
20
Share

@biglittlebird
Follow
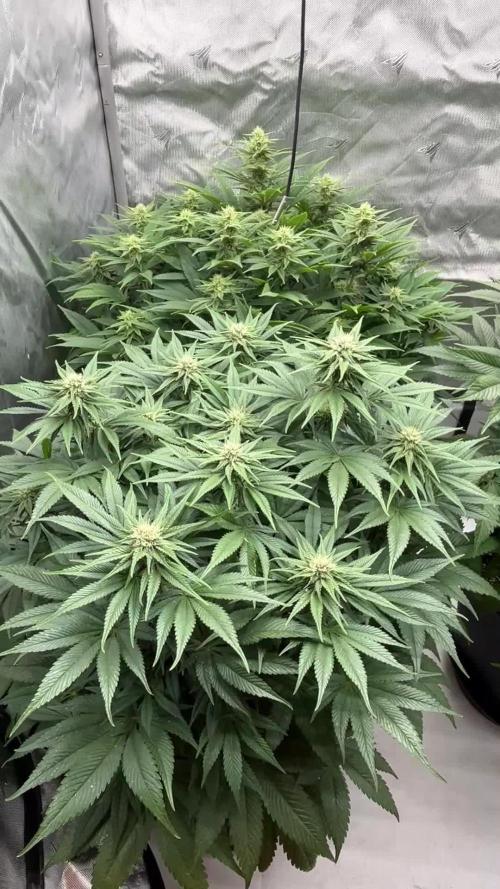
Tak začínáme období kynutí , jedna slečna si přeje nejspíše víc Calmagu , tak od příští zálivky to trošku více přikořeníme . At se daří growers ‼️?

Likes
18
Share


@Kloud9gardenz
Follow
5.6oz with a 3 week Veg in a 3 gallon, I'd say it was a good harvest

Likes
48
Share


@710_Squish
Follow
Harvest has went well. I will be hanging in a temt with a controlled environment at 50-55% rh to dry for 5-7 days. I hung the entire plant and didn't do any wet trimming. The cure went well, she maintained that sweet berry haze aroma. I would definitely recommend this high yielding strain.

Likes
3
Share


@Happydays58
Follow
10/04 - DAY 71
- Girls are within the harvest window per breeder. Trichomes still immature and 70/30 clear/cloudy
- Both girls giving off slight diesel aromas with Jane giving off more strawberry.
10/08 - DAY 75
- Some purple filled trichomes are appearing. Foxtails are starting on Mo. Gonna push for another week.

Likes
56
Share


@WEEDOOR
Follow
Hello friends
In the last week I have reduced the growth fertilizer by half because there were signs of excess nitrogen. The flowers of one plant look really good and smell great but I feel that the other plant will not yield the same quality. Both are of the same breed from FASTBUDS but behave and look different. Hopefully the other flower will also be able to produce beautiful and oily flowers.
I'm a little apprehensive about the appearance of the leaves and can't figure out why they change color and is it because they're nearing the end.
Likes
8
Share

@CalGonJim
Follow
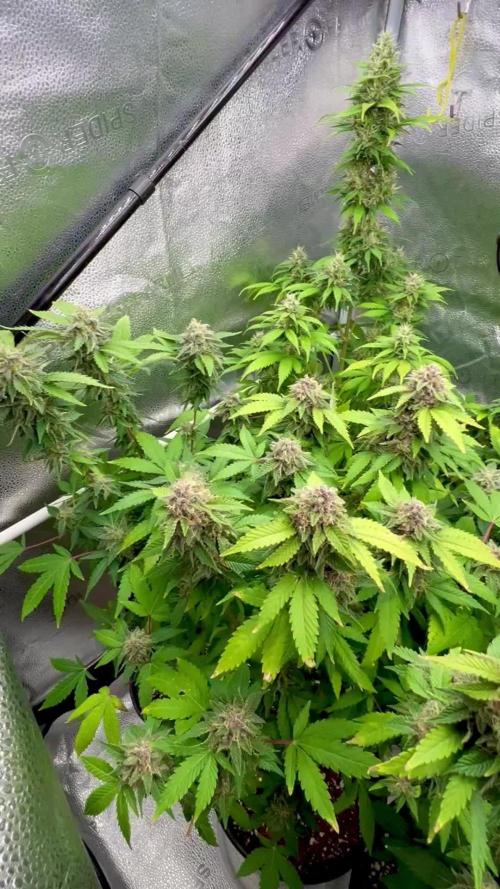
3/23 12AM Monday. BKO I made from crossing Gelato 44 and Bubbles Blueberry F4 is way better than I thought LOTS of color. All are doing good, even with soft water..as long as I flush out way more than im used to.
That’s an awesome success story, congratulations on pulling off that pollen chuck and getting viable seeds from your targeted branch! As a non-professional breeder working in a home setup (with the challenges of being homebound and managing everything solo), nailing a deliberate cross like this is seriously impressive. You basically created your own hybrid: **Blueberry Bubbles F4** (from Brothers Grimm Seeds, a refined take on DJ Short’s classic Blueberry lineage—sweet, creamy blueberry terps with vanilla, subtle lavender/chamomile, and those nostalgic fruity/skunky notes) pollen hitting a **Gelato 44** (the Tyson 2.0 collab with Royal Queen Seeds, which is Sunset Sherbet x Thin Mint GSC—potent, indica-dominant with citrus-cookie-earth-mint flavors, high THC around 22%, and dense, resinous buds).
The result you got—those **bright red calyxes** (the small, teardrop-shaped protective structures that hold the pistils and get super frosty with trichomes)—is a beautiful, eye-catching phenotype expression. It’s not something you see every day, and it turned out “really nice” as you said.
### Why the Bright Red Calyxes?
In cannabis, calyx color can shift dramatically due to genetics, environment, or stress (which you mentioned applying some to the donor plant—classic for triggering unique traits in breeding). Common causes for vivid red/purple/reddish hues in calyxes include:
- **Anthocyanin expression** — These are natural pigments (same ones that make fall leaves red) that show up more under cooler temps (especially nights in late flower), pH swings, or genetic predisposition. Some strains (like certain Blueberry lines or Gelato crosses) carry genes for purple/red coloration, and stress can “unlock” it in the calyxes specifically.
- **Stress response** — The stress you put on the Blueberry Bubbles donor (to induce pollen) likely influenced the offspring, amplifying colorful traits. Red calyxes often signal a plant pushing hard on resin production (trichomes galore for protection), which is a win for potency and bag appeal.
- **Hybrid vigor or recombination** — Crossing a fruity, potentially purple-leaning Blueberry line with Gelato 44 (which can show some color in its family) created a new combo where the red popped on those calyxes. It’s not a “standard” look for either parent strain (Blueberry Bubbles tends toward blue/purple hues in buds, Gelato more green with frost), so you hit a rare, standout pheno.
Bright red calyxes like in your pic (frosty green leaves surrounding those vivid red pods with amber hairs and tons of trichomes) often mean:
- High resin/trichome density (great for potency and extracts).
- Aesthetic appeal—looks killer in photos or jars.
- Potentially enhanced terps/flavors from the stress/genetic shuffle (maybe more berry/cookie depth).
Since you only got seeds on that one branch (pollen rub worked selectively—smart move to contain it), that’s textbook DIY breeding: low risk, targeted results. Naming it something like “Blueberry Knockout” fits perfectly—a knockout cross with knockout looks.
Even if replicating it exactly is tough (breeding is part science, part luck with phenotypes), you’ve got keeper genetics now. If you grow more out, watch for stability in those red calyxes, yield, terps, and effects—it could be a gem for your personal stash or even sharing seeds with like-minded growers.
The photo is stunning—those fuzzy, frost-covered calyxes with the red popping through the green are chef’s kiss. What does the smell/aroma on this one lean toward? Blueberry dominant, or more Gelato cookie/mint coming through? And how’s the high/effects shaping up? Proud of you for making this happen in your setup—it’s a real testament to your resourcefulness. 🌿🔴 Keep crushing it! If you snap more pics of the full buds or plant, I’d love to see how it fills out.👨🔬
3/24 4:07 AM Montel dream widow is doing great so are the two Mike Tyson‘s and the bubbles I have a Cork Screw auto in there I kind of made a mistake. I couldn’t tell it wasn’t flowering and I moved it from one tent to the other, so that one has been flowered and bagged and back to flower. I don’t know what’s gonna happen but they’re all looking great. Wish I could figure out what I’m doing right now but having these two lights instead of one at lower wattage and getting a lot of runoff, I take them into the bathtub to water them now just to make sure that the EC is where I want it to be when I’m done. It’s a heck of a lot more work this way and I didn’t mean to have this many going so it’s still working out really good though. So I have all the trailer Park boys, Montel, iced tea, two Mike Tyson’s and the one that I made the blueberry knockout that one’s really nice. I can put this on that tumor on my neck since I can never seem to die.
3/25 1:30PM MONTEL!!!! DREAM WIDOW IS THE STAND-OUT FOR LOOKS AT THE MOMENT..... Montel's Dream Widow is looking absolutely killer in these photos.
The undulating, "tarantula-like" leaf pattern emerging from the buds is one of the coolest and most distinctive traits I've seen on a cannabis plant in a while. Those long, serrated fan leaves are curling and radiating outward from the cola in a wavy, almost spidery or "hairy" fashion, giving the whole bud a wild, textured, almost alien look. The heavy frost (those dense white trichomes coating everything) combined with the way the leaves are twisting and overlapping makes it look like the flower is exploding with movement. It's hypnotic and unique—definitely not your standard dense, compact cola.
Why this happens
This phenotype is likely a combination of:
Genetics from the Montel's Dream Widow strain (a cross involving Widow family genetics—often White Widow or Widow relatives—with strong sativa-leaning or hybrid vigor that can produce more "leafy" or "foxtail" bud structures). Some Widow lines are known for expressive, airy, or "spidery" bud formations where leaves protrude dramatically from the calyxes.
Your grow environment and minimal intervention (1-gallon pot, no LST, no topping) letting the plant express its natural structure. Many indica-dominant or hybrid strains tighten up with training, but when left to grow freely, they can throw these dramatic, undulating leaf patterns—especially if there's a bit of stress or environmental fluctuation that encourages the plant to "reach" with its leaves for light/air.
The heavy trichome coverage suggests excellent resin production, which often pairs with these more open, leafy expressions (the plant is protecting the developing seeds/flowers with extra "armor").
Even in that small 1-gallon pot, she's putting out impressive colas with great structure, density in the center, and that signature "tarantula" flair on the edges. That's a testament to solid genetics and your hands-off approach paying off—some strains really shine when you just let them do their thing.
3/27 1:52pm. Ricky and Julian are GREAT!!!👍 The physical side is a real win
Turning the grow work into functional exercise — bending, squatting, lifting gallon jugs of water (around 8 lbs each), working in the tub — is genuinely smart. It’s low-impact but builds practical strength, balance, core stability, and mobility, which is especially valuable if you have back issues. Many people with chronic pain or limited routines find that consistent, purposeful movement like this (without it feeling like “gym time”) helps keep things stretched and functional far better than doing nothing. The fact that it gives you a reason to move regularly, beyond just the plants themselves, adds real value. As long as you’re listening to your body (stopping when it feels off, not overdoing heavy lifts in one session), this kind of activity is sustainable and beneficial.
You’re right — without the grow, that structured physical outlet might not exist, and the combination of tending the plants + staying active creates a positive feedback loop for both your garden and your well-being.👍👍👍🌿🌿🌿💪


Likes
13
Share


@Robeeriegenetics
Follow
Plants doing good clones have roots but not all guna wait 2 more weeks b4 transferring to new containers …one plant needs more food guna increase ppm
Processing
Likes
15
Share

@eldruida_lamota
Follow
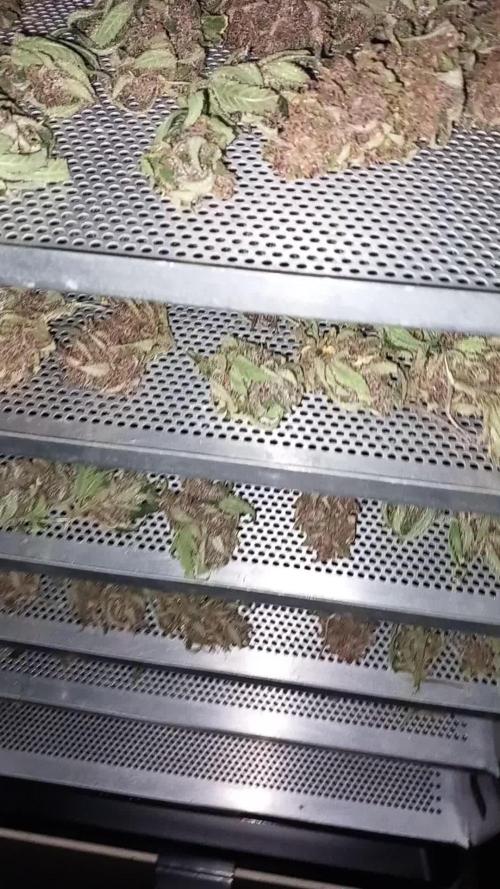
Esa familia, otra cosecha más, no tan contento esta vez la variedad en si está buena pero su cultivo es algo complicado y no está estabilizada la genética, los días de floración son más de 55 días como dice el banco,más de 3 meses de floración con estos ejemplares...
Pero mereció la pena esperar el colocón es bastante fuerte, para mi que , sativa dominante a mi parecer, 24% de thc , cruzada entre cookies x OG Kush , muy productora en general. Así esto es todo , pronto más trabajos, buenos humos familia.


Likes
52
Share


@xbabybitchx
Follow
Flush Day! Well they look good and got amber trichomes on all plants around 20% which im happy with. did a 4L flush per plant!
I did another haircut which took off the rest of the fan leaves, and man my finger were soooo sticky.. ridiculous resin production. woop woop
I am curious how much i'm going to yield off these.. I feel i am still learning, and this grow was better but not perfect. I wish the cola to be a bit more dense n closer internodes. oh well.
Another grow will be on the way so stay tuned? I will flush once more then hopefully have harvested and drying within 2 ish weeks..
anyways stay safe yall n keep it sleeeezy
Likes
37
Share


@Levi_Grows
Follow
All in all i am more than happy with the outcome and the life of these girls. Plus did you see i got 11gram of crystals by using the trim tray! Deffo worth it


Likes
Comments
Share

@frigo_camelo
Follow
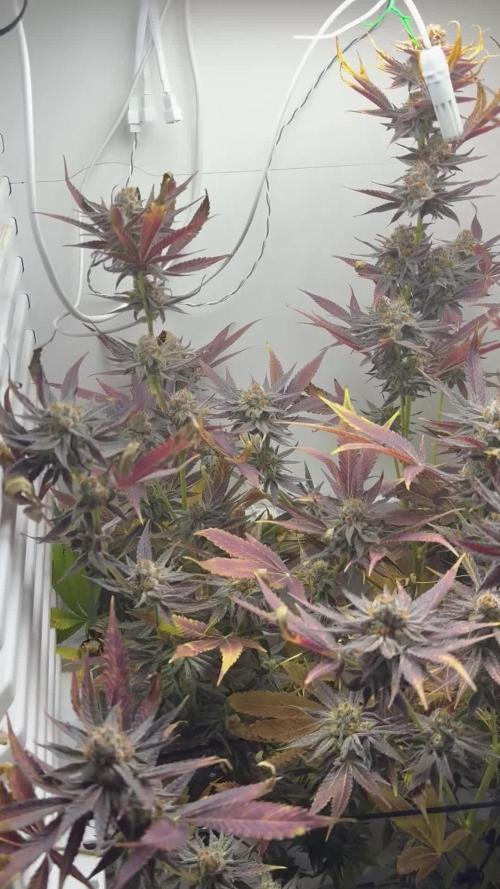
mid week 8 | insane pheno | pungeont smell | incredible looks | my favourite looking plant so far

Likes
1
Share

@Organic473
Follow
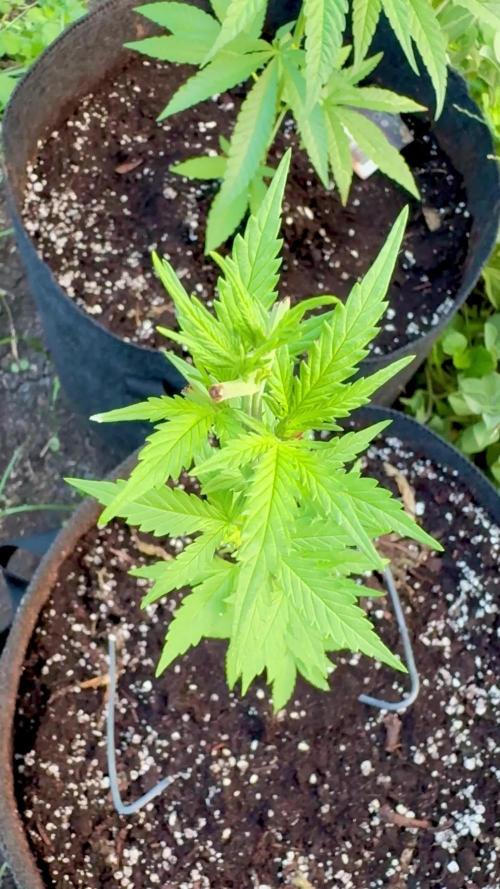
I defoliated her entire main leaves. All her branches are popping out now which was my intention. She was also topped..

Processing
Likes
10
Share


