
Likes
Comments
Share


@Ultraviolet
Follow
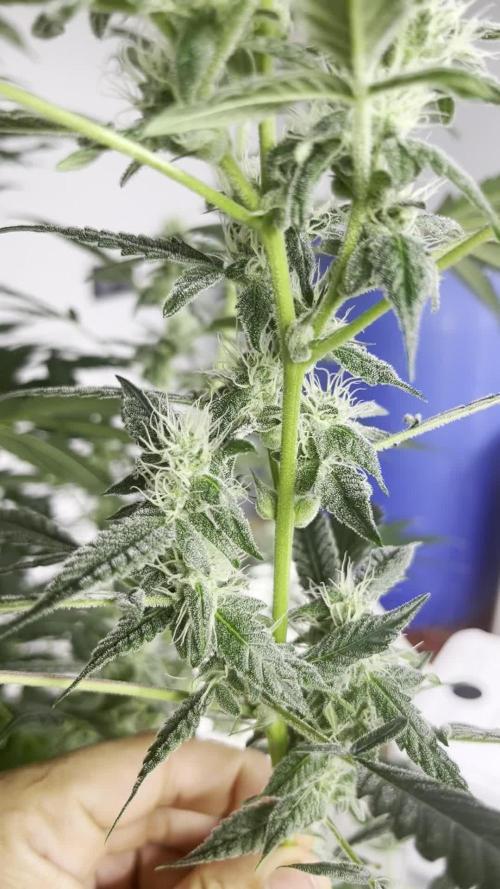
Once again she passes my expectations, late to the show with trichome production. I'm surprised there is purple on the bud, maybe Purpinator does work. I thought I could see hints under the grow lights and thought my eyes were deceiving me, I was just being hopeful. But nah 2 of the 3(under the UV) have developed a beautiful tone of purple. I was never going to bother with a deep freeze but maybe the whole bud will change given conditions, that would be something, fingers crossed. 🤔 was a little skeptical that reducing temps humidity would change density, but it does, buds are solid something I've not been able to achieve before.
Rule of thumb is never to surpass 60% RH in the flowering phase and try to progressively reduce it down to 40% in the last 2–3 weeks before harvest. The plant will react as it seeks to protect its flowers, responding by producing denser buds and a higher concentration of resin. Cannabis plants are sensitive to sudden temperature changes, especially in the flowering stage. Extreme heat or cold can impact bud density and overall yields. In nature as a defense mechanism from cold, the plant sensing sudden dips in temperature will attempt to remove the pockets of air within the bud, it achieves this by compacting itself in doing so to better protect itself from cold snaps which are normally indicators in nature that worse weather is on the way.
Terpene levels are the highest just before the sun comes out. Ideally, you want as many terpenes present in your plants as possible when you harvest. Cannabis plants soak up the sun during the day and produce resin and other goodies at night. The plant is at its emptiest from "harvest undesirables," so to speak,k right before the lights come on.
Freshly cut buds are greener than dried buds because they still contain loads of chlorophyll. However, when rushed through the drying process, the buds dry but retain some chlorophyll, and when you smoke it, you will taste it. Chlorophyll-filled buds are smokable, but they aren’t clean. Slow drying gives the buds enough time and favorable conditions to lose the chlorophyll and sugars, giving you a smoother smoke. How the plant disposes of the chlorophyll and sugars by a process of chemically breaking them down and attaching the decomposed matter once small enough to water molecules, which then evaporate back into the ether. Time must be given to the process to break down the chlorophyll and sugars. Think of it like optimizing the environment for decay.
Plant growth and geographic distribution (where the plant can grow) are greatly affected by the environment. If any environmental factor is less than ideal, it limits a plant's growth and/or distribution. For example, only plants adapted to limited amounts of water can live in deserts. Either directly or indirectly, most plant problems are caused by environmental stress. In some cases, poor environmental conditions (e.g., too little water) damage a plant directly. In other cases, environmental stress weakens a plant and makes it more susceptible to disease or insect attack. Environmental factors that affect plant growth include light, temperature, water, humidity, and nutrition. It's important to understand how these factors affect plant growth and development. With a basic understanding of these factors, you may be able to manipulate plants to meet your needs, whether for increased leaf, flower, or fruit production. By recognizing the roles of these factors, you'll also be better able to diagnose plant problems caused by environmental stress.
Water and humidity
*Most growing plants contain about 90 percent water. Water plays many roles in plants. It is:*
A primary component in photosynthesis and respiration
Responsible for turgor pressure in cells (Like the air in an inflated balloon, water is responsible for the fullness and firmness of plant tissue. Turgor is needed to maintain cell shape and ensure cell growth.)
A solvent for minerals and carbohydrates moving through the plant
Responsible for cooling leaves as it evaporates from leaf tissue during transpiration
A regulator of stomatal opening and closing, thus controlling transpiration and, to some degree, photosynthesis
The source of pressure to move roots through the soil
The medium in which most biochemical reactions take place
Relative humidity is the ratio of water vapor in the air to the amount of water the air could hold at the current temperature and pressure. Warm air can hold more water vapor than cold air. Relative humidity (RH) is expressed by the following equation:
RH = water in air ÷ water air could hold (at constant temperature and pressure)
The relative humidity is given as a percent. For example, if a pound of air at 75°F could hold 4 grams of water vapor, and there are only 3 grams of water in the air, then the relative humidity (RH) is:
3 ÷ 4 = 0.75 = 75%
Water vapor moves from an area of high relative humidity to one of low relative humidity. The greater the difference in humidity, the faster water moves. This factor is important because the rate of water movement directly affects a plant's transpiration rate.
The relative humidity in the air spaces between leaf cells approaches 100 percent. When a stoma opens, water vapor inside the leaf rushes out into the surrounding air (Figure 2), and a bubble of high humidity forms around the stoma. By saturating this small area of air, the bubble reduces the difference in relative humidity between the air spaces within the leaf and the air adjacent to the leaf. As a result, transpiration slows down.
If the wind blows the humidity bubble away, however, transpiration increases. Thus, transpiration usually is at its peak on hot, dry, windy days. On the other hand, transpiration generally is quite slow when temperatures are cool, humidity is high, and there is no wind.
Hot, dry conditions generally occur during the summer, which partially explains why plants wilt quickly in the summer. If a constant supply of water is not available to be absorbed by the roots and moved to the leaves, turgor pressure is lost and leaves go limp.
Plant Nutrition
Plant nutrition often is confused with fertilization. Plant nutrition refers to a plant's need for and use of basic chemical elements. Fertilization is the term used when these materials are added to the environment around a plant. A lot must happen before a chemical element in a fertilizer can be used by a plant.
Plants need 17 elements for normal growth. Three of them--carbon, hydrogen, and oxygen--are found in air and water. The rest are found in the soil.
Six soil elements are called macronutrients because they are used in relatively large amounts by plants. They are nitrogen, potassium, magnesium, calcium, phosphorus, and sulfur.
Eight other soil elements are used in much smaller amounts and are called micronutrients or trace elements. They are iron, zinc, molybdenum, manganese, boron, copper, cobalt, and chlorine. They make up less than 1% of total but are none the less vital.
Most of the nutrients a plant needs are dissolved in water and then absorbed by its roots. In fact, 98 percent are absorbed from the soil-water solution, and only about 2 percent are actually extracted from soil particles.
Fertilizers
Fertilizers are materials containing plant nutrients that are added to the environment around a plant. Generally, they are added to the water or soil, but some can be sprayed on leaves. This method is called foliar fertilization. It should be done carefully with a dilute solution because a high fertilizer concentration can injure leaf cells. The nutrient, however, does need to pass through the thin layer of wax (cutin) on the leaf surface.
It is to be noted applying a immobile nutrient via foliar application it will remain immobile within the leaf it was absorbed through.
Fertilizers are not plant food! Plants produce their own food from water, carbon dioxide, and solar energy through photosynthesis. This food (sugars and carbohydrates) is combined with plant nutrients to produce proteins, enzymes, vitamins, and other elements essential to growth.
Nutrient absorption
Anything that reduces or stops sugar production in leaves can lower nutrient absorption. Thus, if a plant is under stress because of low light or extreme temperatures, nutrient deficiency may develop.
A plant's developmental stage or rate of growth also may affect the amount of nutrients absorbed. Many plants have a rest (dormant) period during part of the year. During this time, few nutrients are absorbed. Plants also may absorb different nutrients as flower buds begin to develop than they do during periods of rapid vegetative growth.

Likes
2
Share


@DeadJoke
Follow
No nutrition for this week as i will harvest them at the end of week 8 of flowers as i am seeing 5% ember on Girl Scout Cookies and 30 or 40% on Green Gelato..


Likes
18
Share

@SundancerS
Follow
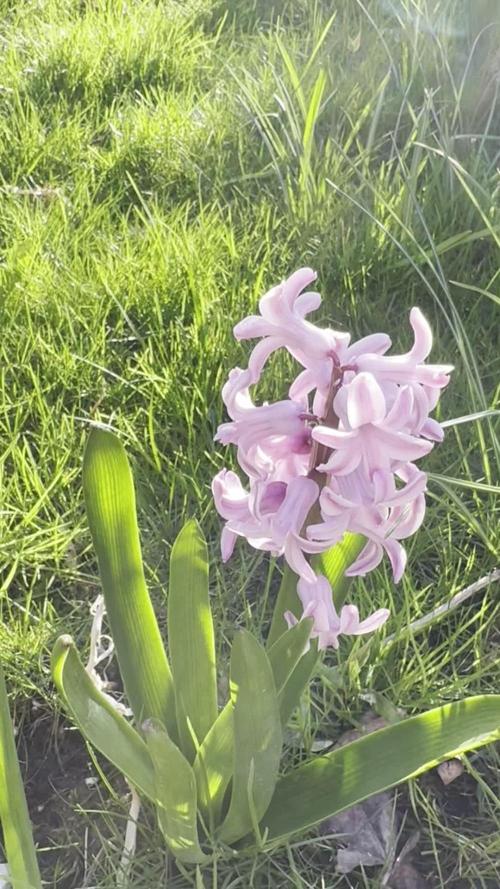
Die Pink Rozay von Zamnesia ist zurück und dieses Mal sind wir fest entschlossen, ihr den Regen zu ersparen! 2024 haben wir sie mit etwas zu viel Outdoor-Charme und leider etwas zu viel Regen gequält. Aber neues Jahr, neues Glück und diesmal geht's besser, und wir sind bereit, der Kämpferin die besten Bedingungen zu bieten. Sie hat uns 4 Tage warten lassen, um dann endlich zu keimen und das war, ehrlich gesagt, ein erleichternder Moment.
Mit 100% recycelter Erde und ein wenig Green House Pulver und Dünger für den einfachen Einstieg, wollen wir es diesmal richtig machen. Die ersten Hürden hat sie schon gemeistert. Die Pflanze hat zwar noch ein bisschen Schwierigkeiten, sich vom Samen zu befreien, aber wir wissen: Sie ist zäh! Eine echte Überlebenskünstlerin, die mit jedem Tag stärker wird.
Wir sind schon richtig gespannt, wie sie sich entwickelt und hoffen auf gutes Wetter und nicht zu viel Regen, ein bisschen Sonne, und dann steht unserem Erfolg nichts mehr im Weg! Die zweite Pflanze für unser Outdoor-Projekt 2026 ist also am Start und wir können es kaum erwarten, zu sehen, was sie drauf hat. Neues Projekt, neues Glück und wir sind mit voller Motivation dabei!😊


Likes
8
Share


@eldruida_lamota
Follow
Vamos familia que ya actualizamos la cosecha de estas zkittelz de Mafia seeds.
Vaya flores que se han marcado repletas de tricomas, parecen escarcha y las flores se marcan aromas bien dulces.
Es una variedad bastante fácil de cultivar pero al tener un periodo de floración algo más largo, hay que estar pendiente de alimentarlas bien, gracias Agrobeta en mi sala es posible.
Temperaturas máximas en 24 y mínimas en 20 y una humedad estable en torno al 36%.
Las mantuve 10 semanas, ya las vi bien maduras y ya tenía tricomas ambar así que les di matarile.
Agrobeta:
https://www.agrobeta.com/agrobetatiendaonline/36-abonos-canamo
Mars hydro:
Code discount: EL420
https://www.mars-hydro.com/
Espero que disfruteis este diario, buenos humos 💨💨💨.

Likes
12
Share

@Mannirumpel420
Follow
Ich habe wirklich Probleme mit ihrer Größe.Ich probiere heute sie mit einem scrog Netz etwas kleiner zu bekommen.Ich habe sie nun doch runtergebunden und supergecropt,da beim Versuch das Netz zwischen 2 Hockern zu spannen einer auf eine pflanze gefallen ist und ein trieb beschädigt wurde.Ansonsten bekommen sie weil sie jetzt so breit sind an manchen stellen wenig licht ab.Sie sollten sich aber wieder etwas aufrichten.
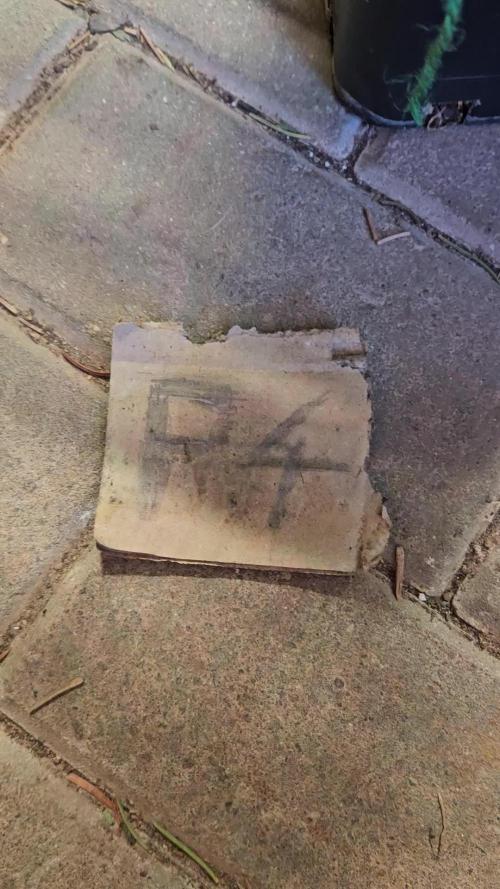
P4 ist ein absolutes indica Monster.Ihr Wachstum ist kompakt und ihre Blätter sind sehr breit. Diese Merkmale machen sie bisher zu meinem Favoriten und ich nahm noch einen steckling,obwohl sie schon in der Blüte ist.Diesem werde ich wenn er anwurzelt reveggen.Es fehlt nur noch,dass sie ihre Trichome entfaltet und man ihren geruch bestimmen kann.
Likes
9
Share


@Mo_Powers
Follow
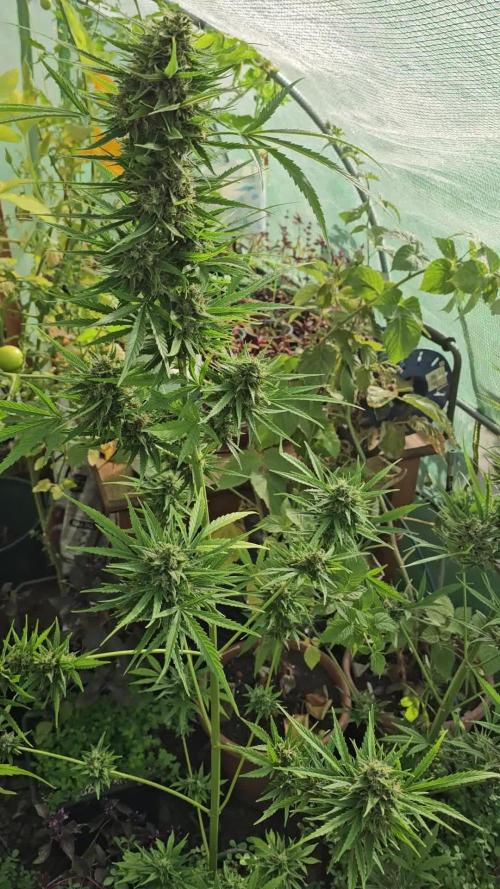
it has really developed very well. it has grown another 20cm. and the flowers are now really coming into their own and are getting thicker and thicker. because of the heat, it has been given calm-a-mag and acti-vera by biobizz. and of course now also bio-bloom.

Likes
346
Share


@Canna96
Follow
This week went pretty well, other than she stretched like crazy and I am now getting worried about running out of vertical space. I also had a few of my bottom leaves get a few brown and yellow spots on them. I did post some pics and asked a question, thank you for the responses, much appreciated! I am thinking about adding my Spyder Farmer LED 100 Watt light into the tent for the nebula auto because it is about 23 inches shorter than the sour diesel. I believe it would only raise my temp about 2 degrees, and possibly lower the humidity by one or two percent. I must say my dehumidifier has been a freaking stud, running 24X7 and not complaining. I should look into adding another unit, it has been in the mid 90's and muggy for about a week. So far I have to say I am super impressed and excited with this setup, the genetics, and with growing this wonderful plant in general. Already planning ahead to my next grow, and what I can do better. I have been enjoying myself and I really appreciate everyone who has taken the time to answer my questions! I am having a blast and am excited to see what this lady will give up in a few weeks!

Likes
25
Share


@Ashbash
Follow
I think that this is as good as they're gonna get. Gonna pull them both down and start a fresh one trying to keep it cooler cos mid 30s everyday is not good. Learned a lot this time, hopefully much better next time! Also took the top off the stardawg last weekend, should almost be smokable now!!

Likes
81
Share


@LockDownGrow
Follow
Well this little girl is forming very much like kush buds would , very dense and thick bud with very few white pistel hairs ,
A very attractive bud too watch form ,
she is packing on bud like there is no tomorrow as you can see from the pics and drinking the pot dry every 3 days of 8 pints ,
the colour from this plant is truly a sight indeed and the smell she is giving off is like a mouthful of blackberry jelly and icecream back when you was a kid ,
i am very excited about this one and cannot wait too try her ,
Likes
5
Share

@UnorthadoxDude
Follow
Welcome to week eleven for Fraya, an Auto Fractal by Divine Seeds.
Day 71 - photographed
Day 74 - photographed
Day 76 - photographed
Thanks to Shogun for providing the nutrition for this grow, and to Divine Seeds for providing the seeds.
If you are not already a part of the cannabis community on X (formerly Twitter), I recommend joining! I have the same username over there.
Likes
23
Share

@Ribemarti
Follow
TREMENDAS PLANTAS ESTAN QUEDÁNDOSE
LAS DE COGOLANDIA 3 EJEMPLARES YA TIENEN ECHO EL LAVADO DE RAIZES,
QUE COGOLLOS MAS DUROS Y GORDOS, LAS HE TENIDO QUE ATAR DEL PESO QUE TIENEN Y HASTA LAS HOJAS GRANDES LLENAS DE RESINA EN COGOLANDIA SABEN LO QUE HACEN
LAS DE BARNEYS HAN SALIDO MUY DIFERENTES UNAS DE OTRAS SE NOTA QUE NO HACEN TEST DE MUCHAS SEMILLAS QUE VENDEN,
EL NUEVO CEO DE BARNEYS NO ME GUSTA PARA NADA ESTOY MUY CABREADO, ESTAS PLANTAS SE IRAN A 90 DIAS
ES UNA BARBARIDAD EL GASTO EN ABONO QUE ESTAMOS TENIENDO, HEMOS TENIDO QUE QUITAR 2 PLANTAS DADO QUE NO AVANZAVA SE HICIERON ENORMES AHORA PONDRE LAS FOTOS
ESTE SERA NUESTRO ULTIMO CULTIVO CON BARNEYS FARM !! YA NOS HAN TOMADO EL PELO VARIAS VECES Y NO QUEREMOS SEGUIR HAVIENDO EXPERIMENTOS EN ESAS SEMILLAS QUE VALEN UN DINERAL Y NO SABES QUE TE VA A TOCAR
Y SI AQUI SE MIDE EL PH LA EC
LA TEMPERATURA ES CONSTANTE NO HAY CAMBIOS BRUSCOS TODO PERFECTO, QUE YA LLEVAMOS AÑOS EN ESTO Y DE LO QUE PONE EN EL PAQIETE A LO QUE VIENE CAMBIA MUCHO
POR NO HABLAR DE LAS SEMILLAS TODAS TODAS LAS PLANTAS QUE HEMOS ECHO CON EL NUEVO CEO DE BARNEYS TODAAS HAN SALIDO SEMILLAS
Y ELLOS SE EXCUSAN EN QUE SON SEMILLAS DE COLECCIONISMO Y CLARO MIRA AVER QUE LES DICES, EN FIN SI NO ES POR EL AIRE AQUI ESTARIA LLENO DE ARAÑA ROJA DEL CALOR QUE HABRIA DENTRO, 90 DIAS SEÑORES 90 DE LOCOS

Likes
23
Share


@Mr_McNasty408
Follow
Day 50 (1/25/21)
Nutes:
Veg A: 3.07 g/gal
Veg B: 2.07 g/gal
PPM: 775
Water temp: 64°F
pH: 5.8
Day 51 (1/26/21)
Heavy defoliation today, I chopped every fan leaf on each node of the main stalk.
Nutes:
Veg A: 3.07 g/gal
Veg B: 2.07 g/gal
PPM: 775
Water temp: 64°F
pH: 5.8
Day 52 (1/27/21)
Nutes:
Veg A: 3.07 g/gal
Veg B: 2.07 g/gal
PPM: 775
Water temp: 64°F
pH: 5.8
Day 53 (1/28/21)
Seeing great growth again, I used a little bit less water to up the ppm
Nutes:
Veg A: 3.07 g/gal
Veg B: 2.07 g/gal
PPM: 800
Water temp: 64°F
pH: 5.8
Day 54 (1/29/21)
Nutes:
Veg A: 3.07 g/gal
Veg B: 2.07 g/gal
PPM: 800
Water temp: 64°F
pH: 5.8
Day 55 (1/30/21)
Nutes:
Veg A: 3.07 g/gal
Veg B: 2.07 g/gal
PPM: 825
Water temp: 59°F
pH: 5.8
Day 56 (1/31/21)
Nutes:
Veg A: 3.07 g/gal
Veg B: 2.07 g/gal
PPM: 785
Water temp: 64°F
pH: 5.8
Processing
Likes
18
Share


@CanadianFillmore
Follow
Week 5 begins! Divine storm 1 & 2 are doing well, however DS2 is a bit hungrier. I believe that was do to her close location to the fan moving air around the bottom of the canopy.
Increased feeding to 5 liters per plant and did some defoliation of the yellowing leaves. Moved the ladies to the other side of the room for the rest of the grow.
Thanks for stopping by 👽🌳🔥


Likes
42
Share


@Ginger_gnome
Follow
Today is official the last day of veg. Turned the light onto 24 hours because I've been running it during the day but now that I've moved it out to my shed that I set up as my new grow space, I want to run it at night when it's colder out.
The plant had a great week of growth as you can tell from the pictures. Plant kicked it into overdrive for its last week and really started to fill up the tent. Unfortunately I didn't think to keep room at the base for watching and now I only have 2 spots I can really water from unless I use a 1/4 cup measuring cup and that'll take forever lol. I'm hoping to have her cropped by Nov.1 to Nov.5 so that I can start using this tent and set up for mother plants. I'll be using a different light then but that's for the next diary.
Well that's all for now so happy growing!!!

Likes
7
Share


@Dpizzle1986
Follow
Tricomes telling me she's pretty much done.. gonna let her go maybe another week.. she's super dense, Budd are hard as a rock..
Likes
6
Share


@Spazmagi
Follow
12/8 - Today is the start of week 10. I actually changed the nutes on this girl yesterday (12/7) because I had some extra time. I tapered her down to 60% strength (down from 75% during the previous week) due to some pH drifting issues. I removed a few errant leaves, but for the most part haven't messed with her much over the last week. She is starting to pack on the trichomes and hopefully will be bulking up over the next week or two before ripening.
Thanks for stopping by the garden, and, as always, Happy Growing!

Likes
12
Share


@ChitownCannaChica
Follow
She picking up speed now! Probably a little annoyed from the transplant. Not sure why she looks yellow in the picks, but she’s the perfect healthy green. ✌️🏻💚
Likes
61
Share


@Dingle_Dangle
Follow
Formerly "Outdoor Spring Failure (Autos)"
───── ⋆⋅☆⋅⋆ ─────
11/06/2021
Day 70 - First day of the 11th week.
Last update before harvest.
Lot of sun but also lot of rain this week. Had to check weather constantly to move the babies in the shelter in case of storm, since I don't want water causing moisture in the buds.
I reported the usual temperatures graph provided by a national meteorological society.
They are so cute.
- DD
( PS. I'm using stupid diary info (lamp distance growing outdoor, nutrient = none, ...) because of how GD algorithm work. Sorry for this. )