
Likes
Comments
Share


@420DeepGrow
Follow
Gracias al equipo de Seedsman y XpertNutrients sin ellos esto no sería posible.
💐🍁 Alaskan Do-Si-Dos:
Alaskan Do-Si-Dos ha sido desarrollada por expertos como una versión mejorada de la siempre popular variedad Alaskan Purple de Seedsman. La introducción de la genética Do-Si-Dos en la Alaskan Purple ha creado un híbrido índica/sativa que aumenta la potencia y el rendimiento al mismo tiempo que mejora el perfil de sabor y sigue siendo versátil en lo que respecta al cultivo en exterior.
La Alaskan Do-Si-Dos está destinada principalmente al cultivo al aire libre y en invernaderos. Las plantas crecen altas y prosperan en climas fríos, templados, cálidos y secos, al mismo tiempo que se desempeñan bien en altitud. Esto no impide que se cultive en interior, pero estas plantas grandes necesitarán mucho espacio. Las plantas muestran una resistencia moderada al moho pero, si se cultivan en interiores, hay que tener en cuenta que son RUIDOSAS, por lo que se beneficiará del uso de filtros de aire de carbón. En exterior, en latitudes septentrionales, la cosecha está prevista para finales de septiembre, mientras que en interior las plantas tardarán entre 8 y 10 semanas en completar la floración. Los rendimientos en exterior son muy altos y pueden superar fácilmente los 750gr/planta, mientras que en interior los rendimientos son elevados, hasta 600gr/m2. Los cogollos maduros tienen una densidad media y mantienen un color verde medio.
🌻🚀 Consigue aqui tus semillas:
https://www.seedsman.com/eu-es/alaskan-do-si-dos-feminised-seeds-sman-aldsd-fem
🍣🍦🌴 Xpert Nutrients es una empresa especializada en la producción y comercialización de fertilizantes líquidos y tierras, que garantizan excelentes cosechas y un crecimiento activo para sus plantas durante todas las fases de cultivo.
Consigue aqui tus Nutrientes:
https://xpertnutrients.com/es/shop/
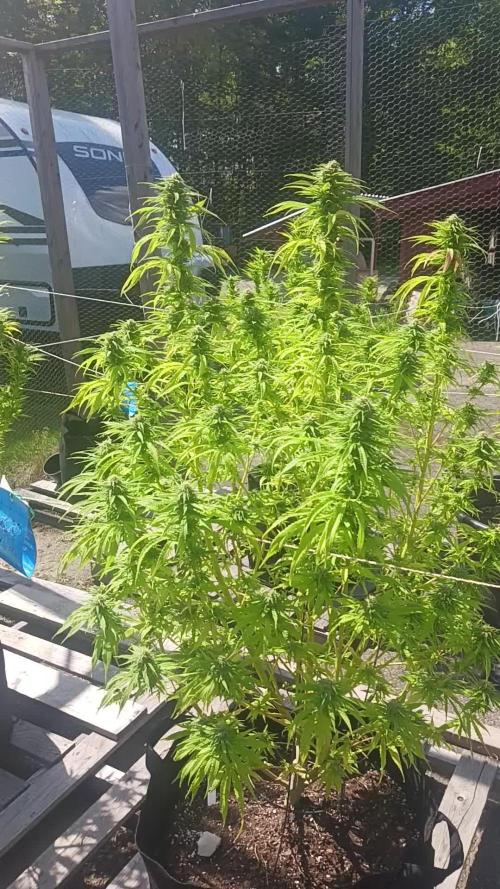
📆 Semana 3:
Muy buena semana, he aplicado un riego solamente con agua de manantial para reducir la cantidad de sales acumuladas en el sustrato y se ha notado una mejoria .
Creo que le quedan unas dos semanas por estirar, parece que va a ser una buena cosecha.
Se mantiene un buen control del cuarto de cultivo gracias a @marshydro y @trolmaster.
Mantengo las dosis de 1/3 de nutrientes recomendados por el fabricante.
Potencia del foco 80%

Likes
34
Share


@Ashbash
Follow
Very slow growing this week (even thought it was a long one as I was counting days wrong) but i think its entered flowering. Its definitely stretched a whole lot. Side branching is pretty nice on both plants so hopefully it'll be a decent yield considering the pot size.
Gonna stick with 10 litre pots now.
Adding in more bloom nutes seems to have helped clear up the spots so i'm grateful for that. Gonna keep feed at this level until the biobizz runs out in a week or two.
Heat is still an issue as you can see from the leaves taking on the classic taco shape. I still have a small 4 inch inline fan that im not using, would that be better for temps than passive intake?
But still, good progress considering it's pushed 40c a couple of times.


Likes
29
Share


@Luv2Grow
Follow
Overall this grow was smooth and didn’t notice any major issues, other than a calcium deficiency early on in flowering. She was a beast of a plant just didn’t get really compact buds with her and she’s definitely got a lot of airy buds throughout. I’m still pleased overall with the grow and want to do another one here soon.
Likes
37
Share

@wolfvb
Follow
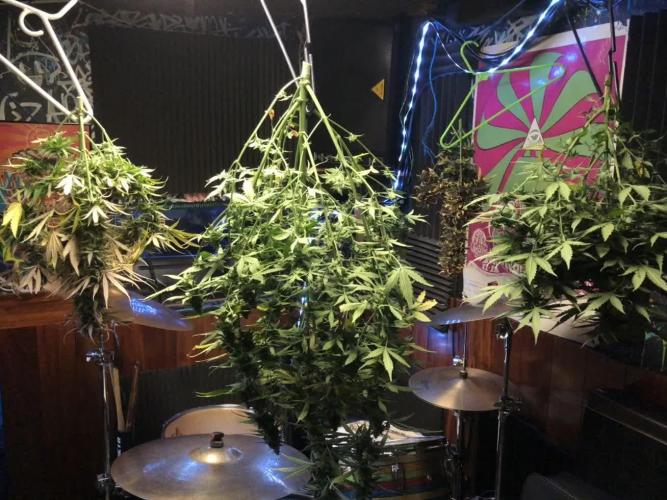
We made it to the finish line and cake is out of the oven and drying, another one has been done.
Thanks everyone for the support and love!

Likes
8
Share

@Sobreruedas
Follow
This week I flipped the photoperiod to 12/12 since the scrog net was already filled.
I also performed a selective defoliation to improve light penetration and airflow through the canopy.
The LED power was increased by 10%, and it’s currently running at around 500 PPFD to support the transition into flower 💡🌸
Now it’s time to let her stretch and see how she responds during the first weeks of flowering 💪🌿

Likes
21
Share


@gr3g4l
Follow
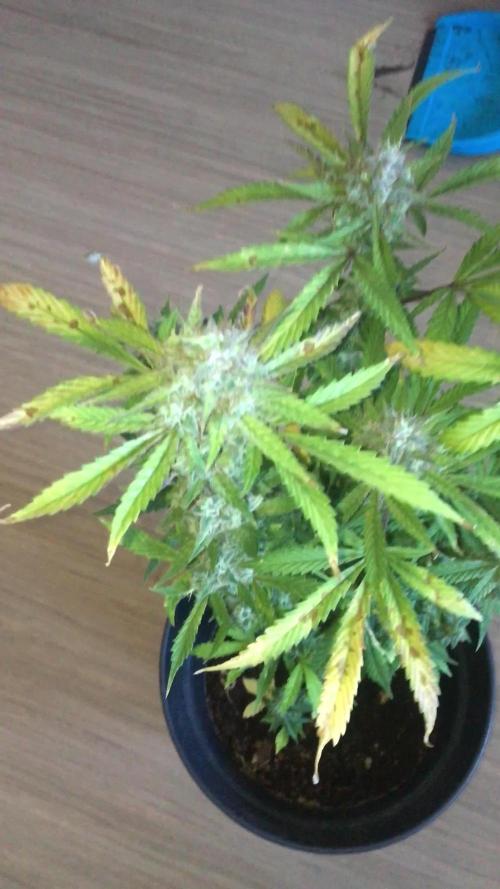
Una semana tranquila sin más.
Serán cosas mias pero no les estoy viendo mucho tricoma, más bien poco. Puede que no utilicé en este cultivo el Delta9 y se note . Aun les queda un mes áprox. por lo que puede que mejore xd.
Cogollos duros como piedras. Algunas ramas ya tienden a caer por el peso de los cogollos.


Likes
9
Share


@RdSkM
Follow
No fueron cosechadas todas al mismo tiempo. Unas empezaron floración primero que otras.


Likes
50
Share


@Igrowneil
Follow
Hey guys and girls this run is sponsored by some brand names , VIPARSPECTRA (LED) ZAMNESIA, GHE , VITALINK and LUMI BLACK (HPS)
VIPARSPECTRA sent me out two budget lights which are on there Pro seriers , these lights to start off with put out mass amount of light for consumption of power draw only being 200watts each of the two lights . They are full spectrum Quantum boards emitting 2k , 5k , IR and deep red
I'm a great fan of this light already and I have only run it to get the room climate stable before running anything after my last run. Was running at 20oc without any hps which is pretty good I don't know over winter will they still hold there temps when it's lights off so investment into another heater wouldn't go a miss .
Total LED power draw 400watts
The soil is canna terra Pro+ soil perlite and coco coir , this soil is very light and will provide massive amount of drainage and will provide plenty of oxygen and allow soil to dry daily allow me to tailor the GHE flora range slighly more to achieve beautiful fall colours towards harvest . This is my frist time using this soil and it seems like really good for autos alot better than there regular soil. There is also some added nutes to start the plants there frist couple of weeks . I'm using GHE BIO ROOTS from seed which I will place in a cup of water mixed with bio root , I'll transfer the popped seed directly into substrate in a jiffy pot until harvest this way we don't stunn the plant will transplant is taken place . Autos are very aggressive in nature so where gonna make that trait come to light.
Started 14-11-21
Use code IGROWNEIL FOR 5% DISCOUNT ON viparspectra lights onto of other discounts
Or become an allfiate
https://www.viparspectra.com/?aff=jursrsaof8&utm_source=affiliate
Use code growitGD for 10% of ZAMNESIA products
Link to the strain grown
https://www.zamnesia.com/uk/5408-zamnesia-seeds-girl-scout-cookies-Auto-feminized.html
Processing
Likes
14
Share


@Mr_Og_GreenThumb
Follow
(Log date week 7, day 49) So this week was a mixed bag, Tuesday started off with me finding a spider web on one of the lower fan leaves on my Hulkberry plant and noticed some bite marks on some of Fat Banana. In my haste to give rid of the spider mites, i caused some minor wind damage to some of the fan leaves on Hulkberry which caused some copper spotting and a stunted Fat banana cola. After i correctly treated both plants for spider mites and wind damage, they both bounced back and started to recover quite nicely.
I also noticed a difference between topping these plants at different times; i topped fat banana when it had 4 cola's but i waited until hulkberry's roots reached to the bottom of my 5gal bucket and she had 8 cola's. A BIG difference in their recovery and overall structure, where fat banana jump out the gate with explosive veg growth and hulkberry struggled for two weeks just to develop it's first set of fan leaves. To now whereas hulkberry is much bigger, greener and bushier than fat banana. Hulkberry has responded much better to the additional stress whereas fat banana has struggled or stalled due to the stressful conditions. All in all wasn't too bad of a week, except for the power going out for a couple of hours on Saturday which raised my grow-room temperature to 90f, i was able to put out a couple of fires this week without any adverse long term effects. I also topped hulkberry on the last day of the week and I'm going to continue to feed them Technfloa at the full recommended strength since they have both responded very well to last week's formula.
as always my pic are in chronological order
Mr. O.G.T
Likes
1
Share


Likes
11
Share


@SackShopG
Follow
I did a 5 day flush and 5 days of 24 hour light before harvest. Dried for 16 days with 60% humidity
Likes
5
Share


@coolesrat
Follow
Still swelling but starting to slow down and swagger. It's kolas are becoming so large that it's really starting to weight down the plants small height and stature.
Trying to get away with not holding it up but I will see how the further biggest kola starts to lower more how it'll end.
I'm starting to lower the feed and get ready for the last 3-4 weeks I'll be giving these plants.
Some more foliage will be removed eventually in the coming weeks and also I'll start to change the feed up a little.
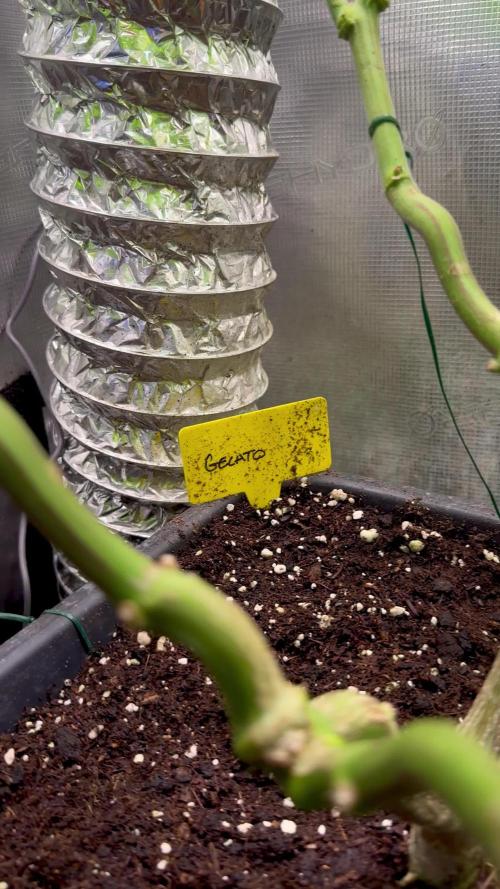
You can really see the difference in the two phenos. One's a lot like a leafy gelato and the other is OG all the way with great dense kolas. I'm expecting the Gelato type pheno to take 9-10 weeks and the OG one seems to be showing it's age more rapidly with it's pistil development and colour change beginning to start while the other seems untouched and continues to shoot newer whiter pistils!

Likes
146
Share


@Natrona
Follow
Apollo is coming along nicely and enjoying new friends, zkittles, gorilla cookies and granddaddy purple. All autos. Godzilla cookies is the runt.
Apollos schedule : Water & feed Tues, Thurs, and Sunday.
Increased TPS to early bloom at 9ml/g and Signal to 3ml/g. I think she could use more fertilizer but I'm gun shy on feeding too much.
I noticed the new leafs are thinner than veg leaves indicating early flower.
No pics on 10/12. My special day.
10/13 pics and video outside before first defoliation. And after defoliation.
Note to reduce impact of stress, I ground up 1 of my B vitamins and dispersed in water after feeding on Friday 13th.
Apollo is strong. Once I did definition you can really see her.
1)Very thick strong stem.
2) Very tight node structure. There was no space between the first and 2nd leaf group.
3) Side shoots almost as thick as the mail stem
4) roots at the soil top. I used MycoBliss in the soil and planting hole.
Friends, Royal Queen Seeds Is offering a discount on purchases
👉**GROWERS20** for 20% 👈
Https://www.royalqueenseeds.com
Link to Apollo
https://www.royalqueenseeds.com/us/56-f1-hybrid-cannabis-seeds
Variety: F1 Hybrid auto
Genetic Background: Lemon x Black Domina x Sugar Mangolia
THC: Very high
Yield: XXL
Height: 55 - 75 cm
Flowering time: 45 - 50 days
Harvest: 75 - 80 days after sprouting
Effect: Calming, Creative, Motivating , Physically Relaxing
Flavor: Citrus, Herbal, Lavender, Pine, Vanilla
Major terpenes: Caryophyllene, Farnesene, Myrcene, Terpinolene
Climate: Short Summers
====================================
Equipment: AC Infinity
CLOUDLAB 844 – Advance Grow Tent 48”x48”x80”
CONTROLLER 69 PRO – Grow Tent Controller
CLOUDLINE LITE 6 - Inline Fan 6"
IONBOARD S44 – LED Grow Light Board 400W
CLOUDRAY S6 – Oscillating Circulation Clip Fan
Carbon Filter 6”
Pots: 5 gallon Air pots
Soil Fox Farm Happy Frog amended with worm castings, dolomite lime and mycorrhiza.
Seeds provided by Royal Queen Seeds Check them out 😎
Https://www.royalqueenseeds.com
Link to the seeds
https://www.royalqueenseeds.com/us/56-f1-hybrid-cannabis-seeds
use Discount Code
👉 **GROWERS20** for 20% discount 👈
Nutrients: Total Plant Solution
>TPS1
>Canopy
>Signal
Amended soil recipe #2 used for soil prep.
https://www.paramountseedfarms.com/super-soil-recipes/
Likes
8
Share


@Whosaysgirlscantgrow
Follow
It absolutely stinks of pineapples in here! They’re looking fabulous! Dripping with trichomes and thickening up day after day! I can’t wait until they’re finished! I think they’re going to taste amazing!


Likes
4
Share

@eldruida_lamota
Follow
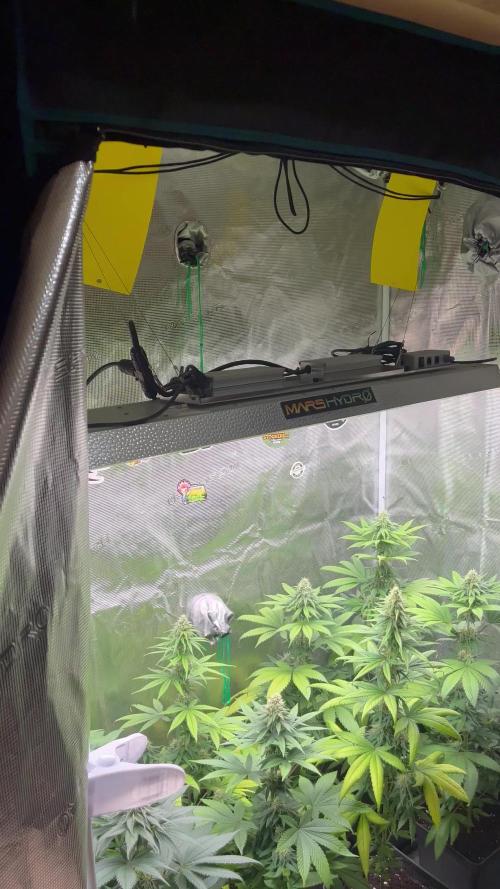
Vamos familia, actualizamos la cuarta semana de floración de estas Terp & Tonic de Seedstockers.
La temperatura que estuvo entre los 24-26 grados y humedad dentro de los rangos correctos.
En cuanto a las plantas las veo verde claro, con carencias debido a viajes y dejadez mis, estiraron bien y ensancharon bastante también.
Se nota que los nutrientes de la marca Agrobeta hacen sus funciones.
Las flores empezaron a formarse, por el momento todo correcto, os dejé también alguna novedad y un cambio en la sala, el nuevo TSW2000, que dará que hablar estos proyectos.
- os dejo por aquí un CÓDIGO: Eldruida
Descuento para la tienda de MARS HYDRO.
https://www.mars-hydro.com
Hasta aquí todo, Buenos humos 💨💨💨

Likes
34
Share


@gottagrowsometime
Follow
Welcome: thanks for dropping by. Be sure to drop a like so I know you viewed and I'll pop onto see what you got a going, or not, it's up to you.
This lady will be ran on a mix of 3 different nutrient brands. I germinated her in La Calavera/Voodoo juice, atlas and La Sirena from Terra Power. Y I called La Calavera voodoo juice you probably wondering. Well here's a little bit of info. So terra power is new, but they are far from new to the understanding of what makes great nutrients, these ppl are the ones who actually make their own nutrients they don't get specialists to do it. For example. Terra Power are the ones who hold the pattens and make some of ANs best products that made them who they are today. They've taken most of ANs line up and perfected it with modern day research with autos/ruderails and leds in mind. They haven't changed 3 core nutes which we all know as Voodoo juice, tarantula and Piranha, yup u read it. These guys are the makers (patten holders) of all that top widely used award winning nutrients. Even if you look at there base nutes what's in them, will blow u away. Have a look for yourself. Led-grower.eu/terra-power/ you'll see a chart with AN product names and an = sign beside it and the corresponding terra power nute that they have perfected upon will be beside it. Also for 70e a L Piranha they charge 50e a L for the exact same stuff just a dif name. There base nutes start as little as 8e. The Piranha and tarantula will be the most expensive as they are the same on AN just not as expensive as 70e. Very excited to see what there 50 billion microbes per 1ml enzyme will do aswel as the bud/resin foiler enhancer sprays, or you can use them in the substrate or hydroponics. Was surprised that the PH was perfect for these 3 nutes it came in at 6 exactly with my new milwalkee meters I can 100% trust the readings. PPM was 627 idk which one did it, as Voodoo juice has no EC value. I was so use to AN products I only remembered to PH/EC test the spray bottle after I did the 4 plants I used all them 3 just for seedlings. Thankfully the PH was perfect and these weren't even their PH perfect nutes which they have not only in their base nutes but they also have a stable PH buffer for hydroponics as PH can jump mad in pure water as the water goes down the stuff that was in the nutes is left behind and causes your PH to rise as it's taking away the ratio of water it was mixed with and in turn increasing the ratio of PH from the nutrients into the water. With mystic green that will be a thing of the past. It's like a ph - + but it'll hold a stable PH when you dry your roots in 15l and say if it drinks 5L that normally means your PH will rise around by a 1/3 or just rise unless you use a - + buffer. Whereas you find your desired PH and then add the stabilizer and it'll keep the PH in that level. Well that's my understanding of it. Read up about them if you are thinking of buying AN look at these as these ppl made AN what it is today. They should work together like a dream as I'm sure their formulas are close just terra powers were made in the past year not 5-10 years ago. I've been dying to try the jungle juice so will be using just them from AN and the rest will be Terra Power Nutrients. (OK, THATS ENOUGH ABOUT NUTRIENTS)
The plant herself is a new strain and hasn't been widely grown yet. So, there's not a big base line to go by and see how far she can be pushed. FB though, is a hardy breeder and gives little in the way of Hermies and so on. I don't have to worry about room or height this time so I'm going to go heavy with LST and train these girls out. I'll top most of them but 1 or 2 I'm going to let it grow natural. Just a bit of LST. Gonna be hands off on this 1 For the first few wks and focus on improving my LST and other skills on my other 13 plants. Will be good to see what the jungle juice trio can do on its own, see what the happens. Expecting big things and yields from these grows.
30/4/22 Veg started. 38hrs in and she's up and going strong. (Update 5hrs after this update plant 2 has popped) Glad I turned the light on last night. For the 1st day the light will go on for 7/7 making sure to give these lil guys a rest is important and as they are autos it won't hurt in the slightest. Something I'm trying out. As if the fems pop up though I'll be then starting the lights on a 20/4, regardless of where all the other autos are at. It's important to get that light cycle in the plant straight away but for autos. A lil rest at the beginning will go a long way. Just until they are showing lil fan leafs or you can wait until they show them and then turn your light on.
Decided to start these 2 on a few nutrients early. I've used Mystical Green, Artios Touch and fire yields all from Terra Power. None of these nutrients have any EC change to the solution. Mystical Green does many things but it's main purpose is to facilitate and stabilize PH allowing other nutrients to continue working in a constant set PH, as PH tends to change when added to soil or if in hydroponics when the water level goes down the PH buffers or ph from each nutrient is left behind and can cause an imbalance in your mix. I use .2 of the trio of jungle juice which changed 100 PPM to 350 or .7EC , very potent stuff. I really can't see using 4ml of each of these nutrients as the EC would be off the chart. Maybe it even out the more you add, idk, very small amount makes a massive EC change. Gave 100ml of 6 new nutrients on top of the low PPM feed they got when planted. I'll feed again in a few days. Maybe 4 and give water in 2 days.
1/5/22 Growing well plant 1 2-3x as bigger than Yday. Plant 2 4x bigger than Yday both will stay on the sane strength nutrients for the rest of the week.
2/5/22 100ml both plants. Tip dried both tops to stop any fert burn/water droplet burn. Same strength from day 1, same 1l mix holding same PH/EC. Very stable.
3/5/22 Plant 2 looking a little pale. Will up EC to 1.5/750ppm. Will upload pic after comes out of dark rest.
Added 2ml biobizz calmag to my new mix will apply this week. Made 1L 400Ppm mix and split into 81L bottles. So it is only about 50ppm if even that.
4/5/22 Both plants are showing light cal mag def. Bit hard to see but it's there. I don't think my jungle juice is high enough. I've added cal mag and will stay the course for the rest of the week and then I'll go her EC to 1.8-2. All plants are close to spliting and breaking off making a new node maybe 2 days off. Or less.
5_5_22 Split has happened on mist of them. Growing strong. Their faces are 6&7.5 cm long and in height 6.5&7.2cm PPF of canopy is around 450-480.
6/5/22 So, it's begun. I've created a negative pressure environment, 1st time, let's see if it makes an impact. On wk 3 onwards I'll be running the intake extraction for 5mins every 30mins and I'll have 2 co2 bags up. If the RH becomes a problem or temp I'll put the extraction/intake back on 100% of the time. The extraction fan/intake is set at a ratio of 2 to 1. (100% extraction 50% intake) making a negative pressure environment, best way to show you have done this, the walls in your tent should bow in lightly.
Same Day. Okay, so this my last update. Going to run fans the same right up until flower and then I'll be sealing up my tent and adding 2 co2 bags. And will be adding a dehuimifier and setting at 45% And it checks every 30mins and if it's gone up it'll turn back on and bring down to 45 or set RH, so no co2 will escape. The temp will be bordering 30-33c and then when they go into their rest window they'll be transferred to to a negative pressure environment with low temps and 45-50%RH. I'll only be able to do this for the 3 weeks of pre flower. And maybe some more, it depends how hard the dehuimifier will be working, but i want dense buds and only way to improve that is by introducing Co2 and then a negative pressure cold environment for terps. Then I'll be putting them back into full negative pressure environment and the Co2 will be useless, again all depends how it's gonna affect my bottom line. That and I only have 2 intake fans. I'll be going into detail about my Co2 adventures the week before I'll be prepping them to be able to withstand high temps, so I'll gradually bring up the temps the last wk of veg 28c max and that way when I push it to 30-32c in pre flower she won't stress as much and then they'll go into 6hrs of 21c, back to negative pressure environment. Should bring the temps down from 30+ to low 20s within a min, so I'm hoping to bring out the terpness.
Will go into details about Co2 and how to create it in a grow tent without spending 4-500euro. You will need a dehuimifier though and 2 20$ Co2 bags. And an reasonable air tight tent.
Thanks for reading this week, this is the last update for this week.
gottagrowsometime
Likes
17
Share

@masterofsmeagol
Follow
9/13 Took the last special Kush today. I had too. Those fucking locusts were eating more and more. At least the trichs looked good. The second plant is straight fire! They're ALL good. I'll have to do the review. Tenth planet is swelling up and trichs are getting cloudier. They are starting to eat the chem dog too but it needs to bulk up and the trichs aren't there yet. Mk ultra natural may be some of the best quality this year. I'm losing SOME to the locusts but it seems they avoid the frostier stuff. At least I'm hoping. This is a great plantvand despite the nugs being so tight and stuff it just needs more time and im going to give it to her. Pink kush is actually look9ng like it might finish. But the locusts have STRIPPED a lot of that. I'll keep an eye on them and keep this uuodated. I got a notification saying congratulations on a harvester diary. I know these outdoor seasons are long but what difference does it make? Hopefully I can still add week later.
9/14 Weather is good bit it's so dry that the locusts are deafening. Thrips are still around and there's not much I can do about it. Looking at the tenth planet I isolated I can see that locusts stripped the middle some and it was stunted from the thrips. The pink kush looks good but I'm losing g some to locusts. The 10th planet, Chem Dog #4 and the MK Ultra I left natural are bulking up and trichs are exploding! Since I safely have some quality cannabis I'm go8mg to let these ride. Unless I continue to lose substantial amounts. Then my hand may be forced. The pink kush is nowhere near ready though. The others would still be good taken now. Smell is strong and I've looked them all.


