
Likes
Comments
Share


@jo69420
Follow
week 5 flower looking good so far, hoping to see the buds slowly stack and get fatter each week.


Likes
10
Share


@Mo_Powers
Follow
the last week has been really sunny again and the temperatures are also constant. she has started to show small blooms. so far she is doing well

Likes
6
Share


@Genussmittel420
Follow
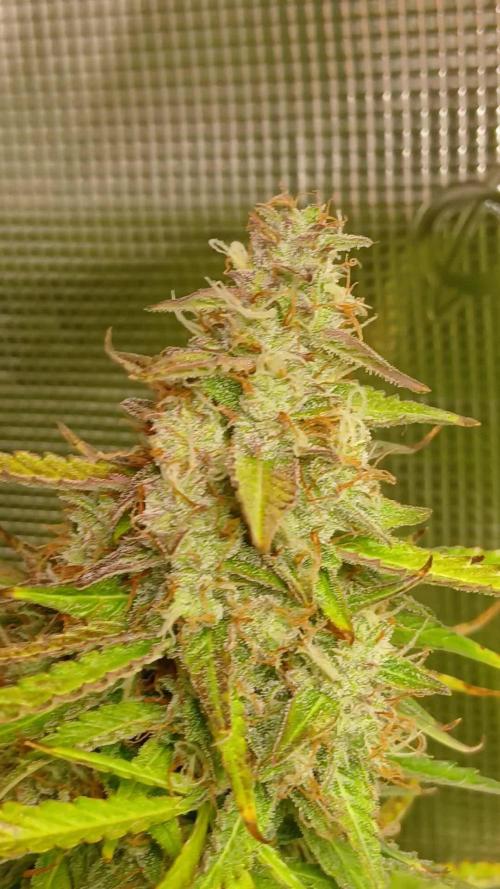
day 2 - week 7 of flower has started and tbh it feels like the flowers are not growing too much at the moment. lets just hope paitience pays out and just continue just as before. she is still being H2O stressed, but not only getting water every other day. if i see her leafs hanging in the day time i also give her a good amount of water so shes not being tortured :)
day 5 - got a new LED light today, so no more shitty NDL pics. also i found brown leaf tips on some sugar leafs and i will give her more water now. at least a little. i think it is caused by too much H2O stress. i will keep you updated on that
day 7 - day 2 i said it feels like the buds aint grow fast enought, but if i compare todays pictures with last weeks i think she is doing just great! still will have to give her at least 1 or 2 more weeks until i can think about harvesting but she looks good in my opinion! because of H2O stress, she got a little more water now and also the tips are just fine and seem to dont brown out any further.

Likes
15
Share


@Siriuz
Follow
Yo guys what's up
I added molasses for the very first time
Take a look, she's doing great
I'm happy for the training we've been giving her and now we are seeing some results
Alright guys let me know what's your advise
I think I'm going to be adding molasses after nutes every two days
********************************
UPDATED 08/03/2021
SHE IS DOING GREAT!
ID SAY SECOND WEEK OF FLOWERING ALREADY
WEEK 11 FROM SEED ' DAY 1 STARTS TOMORROW!
CHECK OUT THE VIDEOS AND PICS FOR BLOOM
TAKE CARE GUYS PEACE OUT!

Likes
17
Share


@MasterKush714
Follow
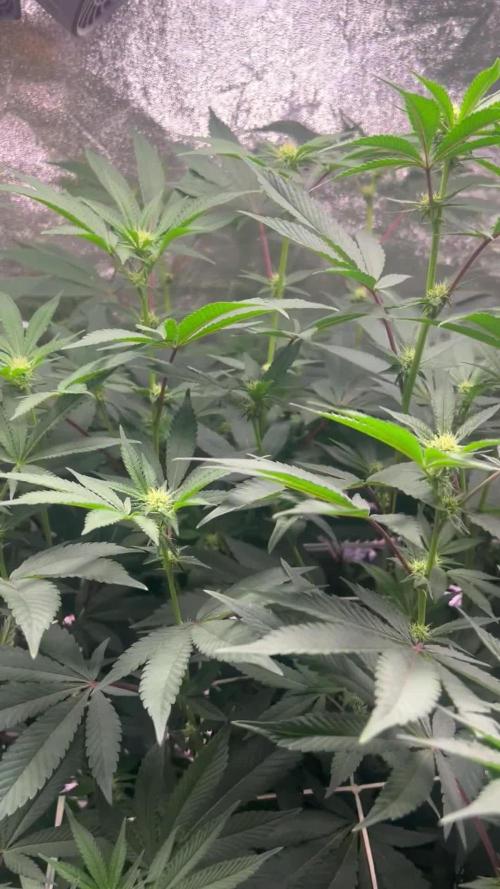
THE BIG UPDATE GANG!!!!!!! ✨✨✨😎👌🌱🥦🌳
So starting the 5th week of veg, the girls are looking really really great, im already moving alot of
the smaller babies out of there which i was growing to help out mama dukes for her garden, gotta
help where we can, so anyways now i have more room, im going to be going to DC for 6 or 7 days
but i have the scheduling set, will be minimal updates as im away but ill try to keep posting and yea
hope all is well with everyone, again as always any and all advice is always greatly appreciated, FYI:
i did start some LST on the plants but i decided to wait a bit longer and use garden wire instead of
steel wire, again all advice is appreciated thanks guys!!!!!!!!!!


Likes
13
Share


@goeser
Follow
I love this strain. Really strong genetics. Nice fruity and og kush like smell. Cant wait to harvest and try them.
Likes
3
Share


@Ogbangbang2981
Follow
this week I was a lil happy because I pollinate my C4matic with a Male pink kush the feminizing spray tiresias mist didn't work the way I thought it would. thank God I had a Male coming up in my outdoor garden...I can already see seeds a little more than I expected, for some reason I only wanted to pollinate 1 bud but got seeds on the main and a few lower buds still happy for that will update images .


Likes
55
Share


@nonick123
Follow
Día 92 (14/04) Riego con 500 ml H2O EC 0,45
Ha bajado algo la temperatura promedio
Día 93 (15/04) Riego con 500 ml H2O EC 0,45
Reviso los tricomas y aún le faltan unos días...
Día 94 (16/04) Riego con 500 ml H2O EC 0,45
Día 95 (17/04) Riego con 750 ml H2O EC 0,45
Tiene mucha sed! El tiempo está loco por aquí! Picos de 27 ºC en abril... 😵💫
Día 96 (18/04) Riego con 1.000 ml H2O EC 0,45
Día 97 (19/04) Riego con 500 ml H2O EC 0,45
Día 98 (20/04) Fiesta de la Cosecha!
Reviso los tricomas y están un 10% ambar, 85% nublados y 5% transparentes
Perfecta!

Likes
37
Share


@Terp1
Follow
06.06.23
Tag 44
Pflanze konzentriert sich nun auf die Blüte. Nun heißt es einfach gießen und warten. :)
- Trichome überall auch auf Fächerblättern und sogar dem Stengel. Die Finger kleben sofort beim LST
UND WIE GEIL DIE DAME EINFACH RIECHT
ich kann es kaum beschreiben
- irgendwie bildet die Dame nur Blätter mit 3 Fingern, ganz, ganz wenige mit 5


Likes
3
Share


@hillbilly705
Follow
it's going good. they had a little heat stress the one day .they bounced right back. getting frosty and aroma is great .next run bigger pots outdoors I am thinking


Likes
7
Share

@Trinidad
Follow
01.07.25 Day 77
On 2 phenos the buds are dense. I think the others are becoming dense. I just need to wait for them to catch up. The smell is so amazing (sweet with citrus) and the buds are sticky. Trichomes look cloudy. Fresh reservoir change out today. I will be flushing after this week. Or if trichomes say other wise. This will be my 1st time flushing

Likes
10
Share


@Sfinxks
Follow
Air pump on 2 plants failed and the plants went kraty for a week. Aiming at 400g now, one sticky beast is almost ready to harvest, Lucky first grow! 👌🏻
Likes
4
Share


@Barcelona_Farmers710
Follow
Simplemente una de las mejores Super Silver Haze o muy parecido que probado! Una pasada de sabores cítricos y terroso a la vez...hay que decir que sabor a Lemon predomina! Una gozada Farmers.
Likes
21
Share


@Hazeberg
Follow
Day 43: I pulled the LED to the most possible height and she keeps stretching, thus I had to bend the main branch with LST clips to keep some distance to the LED to avoid light stress.
Day 44: Today was cleaning day of the reservoir and a new set of nutrients are applied. I'm quite curious how they support her. I also removed some foliage.
Day 45: I noticed some tip burn at the leafs of the main bud. So I checked the PH in the reservoir and noticed, that it is off and adjusted it. I hope this supports her. Also, it might be a bit of light stress, as she is pretty close to the light (~ 25 cm). Nothing else to do today.
Day 46: I refilled the reservoir today. As I noticed, that the PH was off the last time, I lower now the PH from 6.4 to 5.6. This should also support her to consume the nutrients, as I use 50% coco.
Day 47: Nothing to do, today.
Day 48: I removed some fan leafs.
Day 49: Last day of the week. She is really thirsty now. I decided to lower the humidity to 65% to get a VPD of around 1 kPa. Let's see, how this will work out in the next week.
--------------------------------------------------------------
You also like to get some seeds from Fast Buds?
You like a 15% discount?
Just use the following code on your next order: CSYIJC
Happy growing
--------------------------------------------------------------
🙏 Thanks for visiting and follow for daily updates 🌱
Likes
10
Share


@Canadian
Follow
the plans have been doing very well and despite being very hungry they seem to be doing very well I just need to start feeding them instead of once a week probably twice a week because they are very hungry now that they are in full flower mode .
thank you for reading I will continue to update have a happy grow

Likes
67
Share


@420DeepGrow
Follow
Octava semana de floracion, continua el engorde de los cogollos, me pase con los nutrientes a principios de la floracion, pero me di cuenta a tiempo y he salvado la cosecha. La proxima vez será mejor.
📅 Dia 50: Riego con nutrientes EC 450, necesito que se aclare un poco mas.
📅 Dia 51: Descanso
📅 Dia 52: Riego con nutrientes EC 950
📅 Dia 53: Descanso
📅 Dia 54: Riego con nutrientes EC 450, se va quedando limpia, lo noto en el color de las hojas.
📅 Dia 55: Descanso
📅 Dia 56: Riego con agua EC 450
Likes
Comments
Share


@GrowDiaries
Follow
Tropicana Cookies Fastflowering by Fast Buds Genetics
Dark Buds for your darkest fantasies. 28% THC that’ll blow your taste buds off.
Grower: 'Highigan' (from Instagram & YouTube)
Likes
1
Share

@Organic_G
Follow
Wachsen soweit super, kein Top Dressig kein anderen Dünger sonst verwendet, Erde einmal angereichert und läuft Super sind Glücklich.
Hätte tatsächlich nicht gedacht das die das Zelt nochmal so füllen würden wie beim Run zuvor mit 6 Pflanzen aber da haben wir es… werden morgen von unten nochmal leicht entlaubt ansonsten war’s das bis zur Ernte. Nothing to do at this point.
