


Likes
Comments
Share


@BillMonroe
Follow
Last veg pics before flower. Great plant! Watch out, it's quite leafy as the description says.
Potted up from 11L→25L. Long overdue.
Pictures taken in a 3x3 (before defoliation and cleaning the bottom)

Likes
3
Share


@Botanistgardenz
Follow
I’m finally seeing the buds dense up, should be a good harvest in about 4-5 weeks!

Likes
3
Share

@MaltaHerbman
Follow
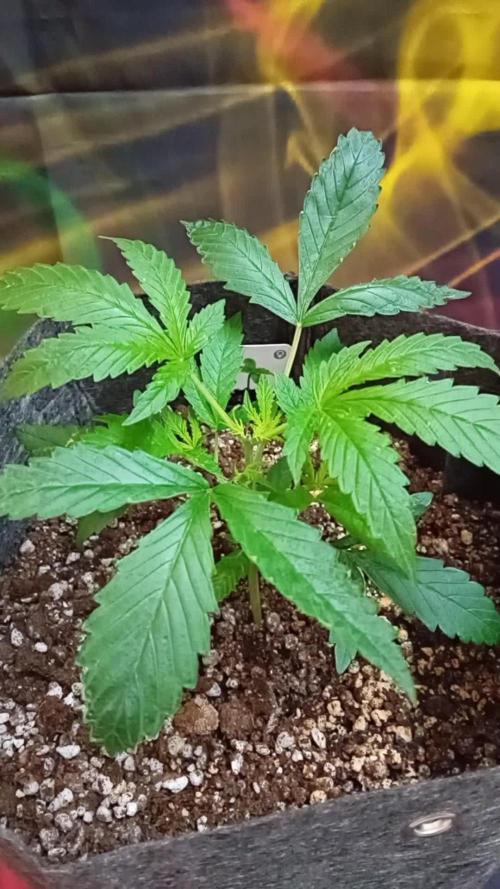
Day 21 Topping.
Day 26 Training.
As 3rd week here and the Pablo Escobar aswering very good,she growing very fast and have done topping.Had add some the ppm too with plagron.Thanks for Watching


Likes
51
Share


@Corwinism
Follow
WEEK 8 (04/18/2021 - 04/24/2021)
Day 59: 04/18/2021
Defoliated some growth from each plant before I installed my custom-built SCRoG net made of: pvc piping, drywall screws, and jute twine for the netting. It’s slightly smaller than the tent, 41”x41” with a second level for another net. It fits perfectly, leaving plenty of room to work around the edges and move the fan around if needed.
Immediately after defoliation and installing the net, I watered using ½ strength Botanicare Hydroguard. Watering was different. I used a battery-powered liquid transfer pump to help water the plants a little faster and more efficiently. Also helps to reach the plants I can’t access as easily in the corner.
I am unable to test/collect any of the runoff at the moment since installing the net, which wouldn’t be an issue by itself, but my saucers are just barely large enough to fit the base of the 5 gallon pots into. I have no way of sticking a pH pen or TDS meter in the runoff. They simply won't fit between the pot and the saucer.
This is extremely unfortunate, as I am now unable to monitor the ppm of the soil with each watering. Will have to pick up some larger saucers soon or think of another solution.
-------------------------------------------------------------------------------------------------------------------------------------------
Day 61: 04/20/2021
‘Tis the season to be medicated. Happy Holidaze!
-------------------------------------------------------------------------------------------------------------------------------------------
Day 62: 04/21/2021
Upping the amount of water going into the pots this watering. Previously I was doing 1 gallon of water per 5 gallon pot. I’m increasing the amount of water to 1.5 gallons. Hopefully that will produce enough runoff for taking measurements. It’s going to be a painfully difficult task to take readings but I really need to know what the condition of the soil is right now. Will not be using any nutrients this time considering the runoff was kind of high when I fed on 4/10. This seems a little risky though since it has been 11 days since a nutrient feed, but I’d rather not burn the plants by blindly adding nutrients. Will return. Hopefully with measurements.
(some amount of time later)
Tap water: 245ppm, 6.1 pH (9 gallons)
pH Down: 30ml
JB#1 - 2730ppm, 7.0 pH
JB#2 - 2290ppm, (pH pen died again on this plant)
AP#1 - 2380ppm, 6.9 pH
AP#2 - 3610ppm (seems extremely high), 7.0 pH
GC#1 - 2320ppm, 6.9 pH
GC#2 - 2340ppm, 7.1 pH
I don’t know what was up with the measurements on the AP#2. The saucers the pots are sitting in are a little small so I think the ppm might have been reading high because the bottom of the fabric pot was sitting in the runoff. Maybe I’m just saying that to reassure myself. Either way, the 3000+ ppm seemed very off.
-------------------------------------------------------------------------------------------------------------------------------------------
Day 66: 04/24/2021
Defoliation + weaving/securing branches through SCRoG.
I'm not 100% sure that the SCRoG was the most optimal technique of choice given the very limited space within the grow tent. Also, I almost feel like I installed the screen a little late. Maybe not? Either way, I have read about them and the potential of increased yields, which got me excited enough to build one to try out for myself. I was aware going into it that there would be some difficulties using a SCRoG. I can no longer move my pots around is the main thing. Not being able to move the pots around has increased the difficulty factor of watering/feeding. I now have to access 3 different sides of the tent to get all 6 plants. I've clipped all the ties holding the branches down from previous LST sessions. There was just no way I was going to spend hours weaving in and out of all the ties trying to water each plant while also dealing with the difficulties of a SCRoG obstructing the work space. That would also wreck my poor back.
From here, things are going to get real exciting. Tomorrow (04/25) I am rescheduling the light cycle to 12/12 to initiate flowering. Another 60-70 days to go, growing buds and packing on trichomes. With that said, I'm excited to have made it through my very first full vegetative cycle. I've definitely made my fair share of mistakes, as expected, but as long as I keep learning from them future harvest will only continue to increase in quality and yield. Thank you for stopping by and checking out the diary this week! All your kind words and encouragement are fuel. Until next time! 🙏


Processing
Likes
9
Share


@Green_Guanche
Follow
Aqui esta mi primer time lapse. No tenia ni idea de como se hacía, así que para lo poco que se, he quedado satisfecho.
La cámara no es de calidad, y al ser una cámara deportiva no tiene un buen enfoque tan de cerca.
Ahora que la planta se ha espigado he rellenado lo que quedaba de la copa para que gane estabilidad.
Intentaré seguir con el time lapse si la vuelta al trabajo me lo permite.

Likes
38
Share


@Ukfarmer420
Follow
Hi guys week 3 now, not much going on, they have grown massive in a week and since being repotted, I started lst today I will let them grow a bit and keep tieing the nodes down as this needs to be a long veg.
Happy growing guys


Likes
2
Share


@OldskoolHed
Follow
Used bud clips to spread the branches out after topping to the 4th node. Doing well and super vigorous. Did some minor defoliation and set up a blumat this week.

Likes
43
Share


@TheBulldozerSicily
Follow
Pronti per iniziare un nuovo ciclo aspettando che queste siano pronte per fumarle... questa sera mi sentirò un po più solo, dato che non andrò a visitare le mie cucciole e non controllero ec e ph... Inizio al più presto.. la pianta é vita!
Likes
2
Share

@eldruida_lamota
Follow
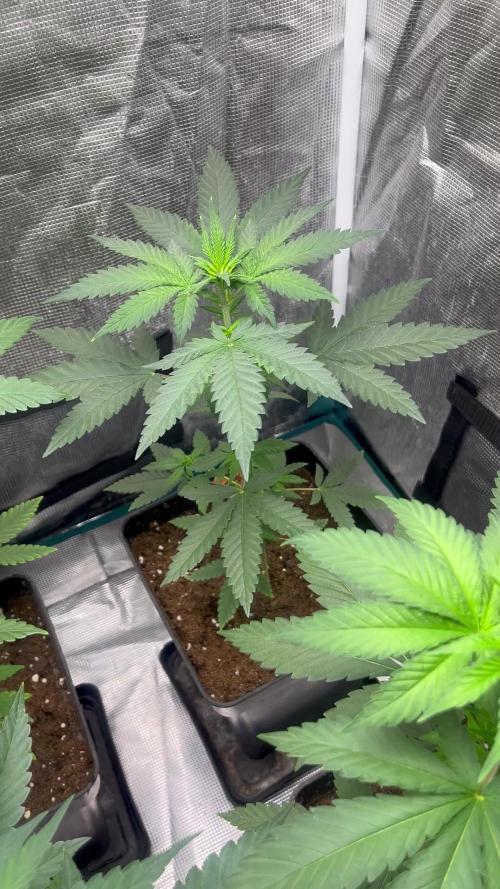
Vamos familia, actualizamos la sexta semana de vida de estas Runtz de MSNL.
La temperatura que estuvo entre los 24-26 grados y humedad dentro de los rangos correctos.
Todavía estamos en el ciclo 16 horas luz, 8 oscuridad, estiraron bien y ensancharon bastante también, el color es verde sano.
Se nota que los nutrientes de la marca Agrobeta hacen sus funciones.
También realicé una poda de bajos que yo si las veo necesarias para explotar después la flor.
- os dejo por aquí un CÓDIGO: Eldruida ,descuento para la tienda de MARS HYDRO.
https://www.mars-hydro.com
Hasta aquí todo, Buenos humos 💨💨💨


Processing
Likes
18
Share


@AuntMeanie
Follow
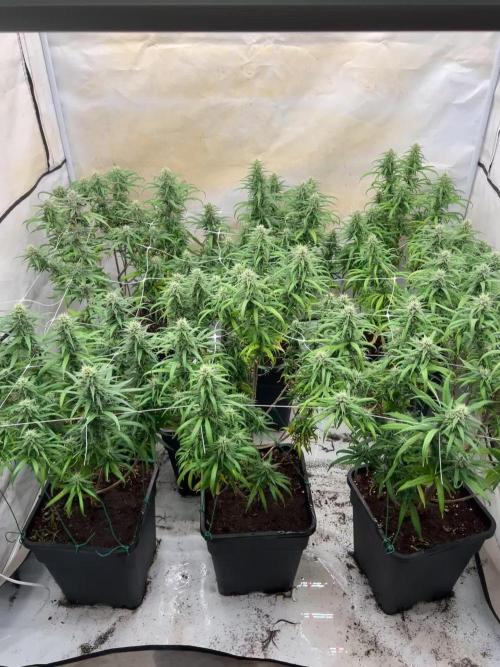
Week 6 starts 12/31/21 but I happened to notice a weird leaf the night before. The Northern Light X Blueberry auto is very dark green and has sharp downturned tips. Which starts down the rabbit hole of google search to see the cause. I decide that is is Nitrogen toxicity caused by underwatering. At this time I was not really paying attention to when I feed them just whenever the pots were light. I watered them I later realize that while it may have started with underwatering it was so many other problems at once. I forgot to check the ppm or ph going in one day last week so I checked them going out. The run off was 2700ppm and I forgot to look up what that meant. I also doubled the strength of the nutes.
1/2 Saturday I flushed all the plants with 5 gallons of fresh water each that read 6.43 ph & 51ppm. I have Fox farm sledge hammer but for some reason I decided to use just water. The run off was consistently 6.2ph and I rinsed until the ppm was about 450 on NB. 250 ppm on Gorilla Glue and Pineapple express. I then decided that since it was nitrogen toxicity from underwatering that I should not starve the plant so I gave her week 1 of flower nutrients from the Foxfarm feeding schedule at 1/2 strength. I did not use Calmag since it's nitrogen was 2 and I didn't add the boomerang because that has nitrogen as a 1 and I thought since this plant has nitrogen toxicity I should skip the extra 3 nitrogen for now. I set each plant up on blocks so air could totally circulate to dry out the pots. Turned the fans on and waited.
1/6 There has been almost no growth since the flush. NB started off at a little over 9 inches and if I stretch her she is 10 at most.
Likes
Comments
Share


Processing
Likes
3
Share


@bk_garbage
Follow
So it has been a bit more than a week since update but the ladies seem to be thru the stretch and budding well now. I think in the next update I'll do pics of the defoliation at week three(upcoming Sunday) I added some drip rings to even out watering between different strains. The Orange blossom gets two water lines pumping it while KK gets one and is still a bit damp. The adjustable drip tips just weren't keeping their settings and Blossom gets thirsty fast right now. They are just part of the floraflex kit for rockwool cubes, but with Coco I find water absorbs/disperses just fine.(I usually use 1/2'' black holes drippers but stepped on 3 of em..)
Ladies are pretty healthy but lacked some N after the stretch here and yellowed some bottom leaves. I gave them a bit of Grow food in this reservoir. Just at 1 part. Micro at 2 parts, and Bloom 3. I really under feed and adjust up if they look hungry usually. I stopped using the Piranha and Tarantula powders after week two so those are on the shelf until the next rotation. But since I see buds I started, I added in the Liquid Kool bloom at .5 ml/l, again thats like 1/8th strength but its plenty. Too much of the boosters and stuff burns quick.
I did a decent job keeping them trained back from the vert bulb this time so haven't crisped up any leaves yet which is great. The plants are about at 24 inches tall after the stretch to keep them under the big double ended. Thats actual height for the Krishna, but the blossom is bent into a bunch of z's to keep it low. These are actually some big plants stuffed in there, so hoping they make some good sized buds.
Got some pics of the bud starts for each plant. No frost yet but it'll start by next week I think. Maybe a week until I pull off any buds that are not the size of a grape yet, and leave the good starts to get extra juice. I'm over trimming under buds since my last overgrown scrog.
Likes
6
Share


@MadeInGermany
Follow
Flowering day 15
since time change
to 12 / 12 h
Hey guys :-)
This week the ladies developed beautifully 👍.
The stretch has started very strongly :-) .
Watering was done twice this week with 1.2 l (see table above for nutrients).
The heating mat does exactly what it is supposed to do, you can see that the ladies are doing perfectly again 😃.
Fresh osmosis water was mixed with tap water in a 100 liter tank so that I would have enough stale water for the coming week 👍.
Otherwise everything was cleaned and checked.
During the check, I noticed that after spraying neem oil 3 times, there were still a few damn trips to see.
I have ordered nematodes for leaf and substrate against tripse.
Then they should finally be gone again 🙏🏻
have fun and stay healthy 💚
👇🏼👇🏼👇🏼👇🏼👇🏼👇🏼👇🏼👇🏼👇🏼👇🏼👇🏼👇🏼
You can buy this Nutrients at :
https://greenbuzzliquids.com/en/shop/
With the discount code: Made_in_Germany you get a discount of 15% on all products from an order value of 100 euros.
👇🏼👇🏼👇🏼👇🏼👇🏼👇🏼👇🏼👇🏼👇🏼👇🏼👇🏼👇🏼
You can buy this strain at :
Clearwater Seeds
Water 💧 💧💧
Osmosis water mixed with normal water (24 hours stale that the chlorine evaporates) to 0.2 EC. Add Cal / Mag to 0.4 Ec Ph with Organic Ph - to 5.8 - 6.5
MadeInGermany

Likes
37
Share


@DogDoctorOfficial
Follow
🌱 Germination Journey with Terpyz Mutant Mentha de Croco 🌱
Hey Grow Fam! Today kicks off an exciting adventure with Terpyz Mutant Mentha de Croco genetics. I’ve got 10 regular seeds ready to sprout, and I’m looking forward to discovering some beautiful female phenotypes—and maybe even a standout male for potential future breeding. It’s been a while since I’ve worked with regular seeds, so I’m thrilled to dive in!
Germination Process Overview:
Here’s a step-by-step rundown of the germination setup and process, with a special focus on the equipment and nutrients that are helping these seeds thrive right from the start.
Step 1: TheCannaKan Germination Pod 🌱
For germination, I rely on TheCannaKan—a device I’ve come to love and trust. It’s designed to create the perfect microclimate for seed germination, and within just 24 hours, the seeds started showing signs of life. By the 32-hour mark, they were all ready to be transferred to the next stage! I can’t recommend this gadget enough for anyone serious about getting strong, early growth from their seeds.
• Why TheCannaKan?
• Humidity Control: Ensures seeds stay hydrated without oversaturation.
• Stable Temperature: Maintains an even temperature around the seeds, so there’s no shock or stalling.
• Enhanced Oxygenation: Keeps fresh air circulating, helping prevent mold and ensuring seeds don’t suffocate.
Step 2: Transfer to Root Riots & Aptus Holland Supplements 💧
Once the seeds were sprouted, I transferred them into Root Riots, known for their excellent water retention and structure that encourages strong root growth. Root Riots also have a pH-balanced, spongy texture that makes it easy for roots to penetrate, promoting sturdy, healthy root systems.
At this stage, I started using Aptus Holland’s Regulator and Startbooster at 1ml/L each. Here’s why I chose these products for early growth:
• Aptus Regulator (1ml/L): Helps strengthen the plants against environmental stresses by supporting cell wall structure. It’s a fantastic choice for giving young seedlings an early boost in resilience.
• Aptus Startbooster (1ml/L): This product provides essential microbes and nutrients that stimulate root growth and early plant vigor. Especially for regular seeds, the early root development makes a noticeable difference in later growth stages.
Step 3: Lighting with Future of Grow (FOG) LED at 200 PPFD 💡
For lighting, I’m using a Future of Grow (FOG) 600W LED. For the germination stage, I’ve dimmed it to around 200 PPFD (photosynthetic photon flux density), which provides just enough light for healthy, strong seedling growth without overwhelming them.
• Why Low Intensity?
• 200 PPFD ensures that young plants aren’t exposed to too much light, which could cause stress or stunting. This level of intensity is perfect for encouraging healthy development without risking “stretching.”
• The FOG LED provides a balanced spectrum tailored to plant growth, setting up these young sprouts for success as they grow.
Step 4: Environmental Control with TrolMaster Tent X Controller 📲
For monitoring and control, I’m using the TrolMaster Tent X Controller, which lets me dial in every aspect of the environment to make sure these little ones have the perfect conditions for germination and early growth.
• TrolMaster Benefits:
• Precision Control: Adjust temperature, humidity, and lighting all in one place.
• Notifications: Sends updates in real-time to my device, so I can make adjustments as needed without being physically present.
• Consistency: Maintains stable conditions around the clock, reducing stress on seedlings and ensuring they’re thriving.
Grow Tips & Reflections:
Germination is one of the most crucial stages in a plant’s lifecycle. Starting with strong genetics like Terpyz Mutant Mentha de Croco, combined with a solid germination setup and the right nutrients, creates the foundation for a successful grow.
💡 Quick Tips for Fellow Growers:
• Hydration Balance: Don’t oversaturate! Moisture levels should be high enough for the seeds to sprout but not so wet that they drown.
• Light Management: A low PPFD for young seedlings prevents stretch and keeps nodes tight, preparing them for a healthy vegetative phase.
• Environment Consistency: Use a reliable controller like the TrolMaster Tent X to manage your settings, and consider monitoring tools for real-time adjustments.
Shout Outs to the Community:
Big thanks to Terpyz Genetics for these incredible seeds, Aptus Holland for their top-notch nutrients, Future of Grow for the stellar LED lights, and TrolMaster for the amazing controller. Also, shout out to all of you in the growing community—you make this journey exciting and filled with endless learning. Let’s keep growing and sharing together!
That’s it for the germination update! Next up, I’ll be monitoring growth closely to identify strong females (and maybe a standout male for breeding). Stay tuned for updates on our Mutant Mentha de Croco adventure—this is just the beginning!
Genetics - Mentha De Croco
https://terpyz.eu/products/menta-de-croco-fern-type?_pos=1&_sid=e9237cbcb&_ss=r
DogDoctorOfficial Discount Codes @ terpyz.eu - DOCTOR 15% off
Nutrition - @aptusholland
https://aptus-holland.com/
Led Power @ F.O.G. Future Of Grow
https://www.thefuturofgrow.com/en/online-store/BLACK-SERIES-600-p489093171
Controls @ TrolMaster
https://www.trolmaster.eu/tent-x
As always thank you all for stopping by, for the love and for it all , this journey of mine wold just not be the same without you guys, the love and support is very much appreciloved and i fell honored with you all in my life
With true love comes happiness Always believe in your self and always do things expecting nothing and with an open heart , be a giver and the universe will give back to you in ways you could not even imagine so
Growers Love To you All 💚

Likes
14
Share


@Kakui
Follow
15 Noviembre:
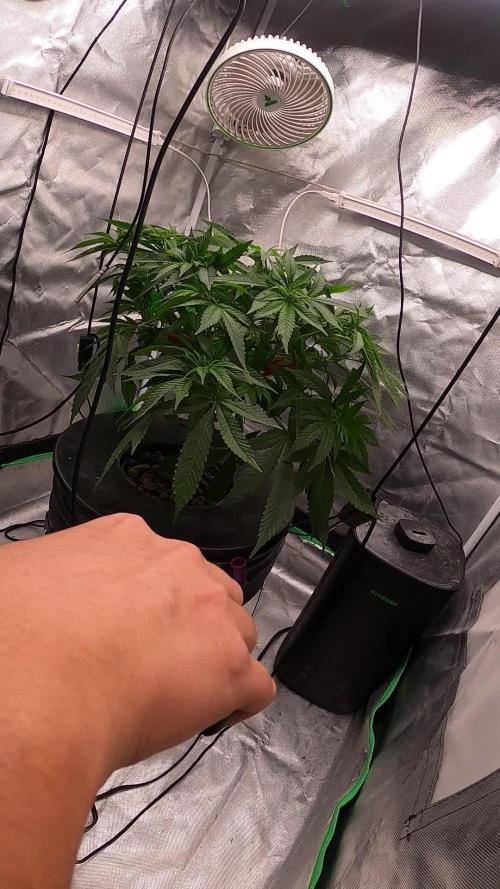
-Hoy se instaló el sistema de riego "Drip to Waste" que me permitirá hacer riego de precisión, con protocolo "Crop Steering".
-Se instalaron sensores de humedad de suelo, para saber cuándo y cuánto regar, el sistema manda datos de humedad de suelo, temperatura y humedad ambiente, etc vía internet a mi celular.
-Mañana se comienza con el primer riego de precisión.
17 Noviembre: Segundo día de riego automático, 3.0EC y 5.9pH, las plantas crecen a buen ritmo, las raíces ya están saliendo por los orificios de drenaje a 2 días de transplantadas.
20 Noviembre: Se realizó una pequeña defoliacion de las hojas tipo abanico muy grandes.



Likes
11
Share


@Nutrient_gro
Follow
First sights of trichomes on leafs (sugar leafs)! No issues she’s growing good just a few yellow leaves on gc2. Looked like she needed cal mag, chopped the yellowed leaves and put cal mag 6 ml. Usually give cal mag every other watering but ima give them more often since I’m using dechlorinated tap water.