
Likes
Comments
Share


@OslyDabs
Follow
Aún las tenía metidas en casa por la noche, por qué las plante en pretemporada y no quería que se congelarán.

Likes
4
Share


@J_Law
Follow
you see 2 sunset sherbets in hydroponics, but then I decided to transplant one of them into potting soil for outdoors. 24 hours in 5.5ph room temperature water and then into the growth plug they go. i will be using BluePlanets organic 3-part FarmersPride, with many other goodies

Likes
34
Share


@Birale91
Follow
Harvested on day 113 after ending week 9 of bloom. after washing week ago with adding flora kleen and then after 3 days turn light to 48 hours darkness before harvest.
First trim in harvest defoliated big fan leaves with all the leaves without sugar and the tip of the small leaves.
When the buds will be dry ill do second trim untill the bud will be like dense diamond.
So, really love this strain and i give her a score of 9/10.
First, for the buds beauty,dense.
purple,red,yellow,pink and blue are showing on buds and its realy amazing.10/10.
Smell are very sweet and strong of grapes.9/10.
Taste is very fruity sweet grapes and i like it.9/10.
Very strong effect on mind but feel very good.9/10.
So, for final, 9/10.
Something like week drying and ill update more pics and videos.
*Added video of drying buds at day 4.
*Added video and pics of well dried buds.
ill add more stunning pics soon.

Likes
11
Share


@L0R3N
Follow
Após 24h de papel toalha, as sementes já apresentam uma leve abertura onde passará a radícula
Likes
25
Share


@TickleToast
Follow
Signs of swelling, & smell is picking up.
Unhappy gal is still putting out pistils / and no sign of continuous deficiencies.
-Need to start bringing up my defoliations / canopy a little bit. More bottom larf than preferred, and it just forces me to pull them later anyway.
~~~~~~~~~~
Questions & Feedback are welcomed, feel free to message me!
Thanks for stopping by growmies! 🤙🤙🤙🙏🙏🙏

Likes
6
Share


@XoticGROW666
Follow
Last week of the sour zkittlez
Sorry y’all I lost the veg vids but here Is the last footage of some organic grown buds compost tea & sst tea

Likes
23
Share


@Chuckwaggon420
Follow
This week has been great for these massive girls i still stand by saying they would do amazing outside somehwere with lots space or a big grow room. 2 buds have grown so far they damn near touching the light. I am going to leave them see what the light does to them. The 1s that are insane close like 1 or 2" are compketly covered in resin sooooo if i can have a even canopy and lower that light ontop of them........ hmmmm curiosity may kill some shit. Didnt say "cat" personalsmoke just for you.
They are getting heavy dose of nutes at 5.6-5.7 ph started the pk 13/14 train wooowoooo
Sooo stinky sooo sticky yummy yummy
Kelp ur head up 😄
Love yall
Likes
8
Share


@Chubbs
Follow
420Fastbuds
FBT2301/Week11
What up GrowFam. Weekly update for these two stunning girls. Getting close for the chop after checking the trichs, I'm starting to see amber so will keep a close eye until we get to about 10%. I did to a major defoliation this week taking off most of the fan leafs to allow some of the lower buds to mature before getting chopped. Over all super happy with the way they've grown up to this point.
Happy Growing

Likes
2
Share


@ChitownCannaChica
Follow
Did this lady in a shared DWC bucket.
Great auto yield. No herming and beautiful red buds.
Gave the floraflex lineup from veg to bloom.
Had some issues with leaves burning up close to the lighting but the buds are a beautiful color and smell like a nice piney gas.
Cannot say anything but great things with this plant! Very happy and results are great.


Likes
19
Share


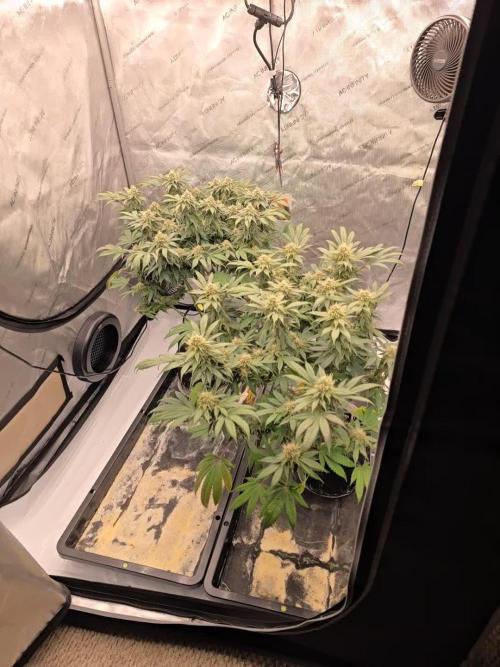
@BB_UK
Follow
So here we are day 24 in bloom! My new girls have started to climb above this beauty now and are off their raises and I feel I may have to start raising this one if they continue to stretch any more! As I have to keep the light at 18” running through my tests of the light! Because I did 12” last grow and ran into light intensity problems and as of yet am I to experience any problems and I hope I literally make it through without any 😊 she’s all organic too which is a treat when it comes to flushing! I do flush for 2 weeks when the pistols turn 60-70% orange! Seems to be the perfect time I’ve been used to and worked! Then I look at the trichromes for perfect harvest! Just know she smells so good already just open the tent and smell her sweet grapefruit terps coming through strong! And her flowers and going to be huge as I’m not yet half way through and look at the growth! I do prefer growing organic and am transitioning towards growing fully organic! All I know is this Zamnesia stuff is incredible! Along side bionova! It’s simple and productive!

Likes
3
Share


@HerrnLubitz98
Follow
Crystals all over, getting stinky and fat as wanted. Peaches are hungryyyy gave them some booster shots and still getting yellows, non the less They’re doing great. Next week will be essential for fat sparkling buds so let’s not mess up!
Don’t forget to check out my instagram for more frequent updates. @Herrnlubitz88


Likes
13
Share


@HeavyHead
Follow
Great strain. Will post more pictures as it cures and update the smoke report :)
Going to aim for a 30 day cure and I’ll post how it looks
Likes
2
Share

@DisTentAint4Campin
Follow
No complaints here they both swelling up really fat and dense im getting sweet mixed slight funk that hits you when you unzip both of these phenos DO NOT stretch at all in flower she literally stayed the same size as you can see in earlier veg pics 🤙⛺️ happy new year
Likes
5
Share


@Laplantadelpie
Follow
6 semana de floracion
pleno engorde 🥦
•1g de enhancer x litro de agua
aplicación en el riegos
Likes
8
Share


@Drtomb
Follow
Gorilla zkittles occupy the middle back between the two nets. It's growing beautifully and roots have definitely established. Flip will occur soon in the coming days.

Likes
10
Share


@Smokeytad420
Follow
Sorry for the late updank. Not a whole lot to report but some awesome stacking and packing. She is def on serious cruise control. Been warm here the past few days so my heat has been a lil higher than normal but i have been keeping it in check. I want to thank everyone for your awesome coments I love it. Busy busy busy we shall be to grow the magical cannabis tree!! Till the next updank. GrowerzLuv✌️
Likes
6
Share


@mEluv420
Follow
Did some defoliation at 20. april for more exposed light.
Watering 3L every 2-3 day ish.
A lot of new growth.. So excited for the next weeks!

Likes
32
Share


@Hawkbo
Follow
Most of them made it only 1 six shooter definitely didnt make it and a cream cookies is a lil stuck. I threw a mexican airlines in the old six shooter cup but just letting it germinate in the soil I havnt done that in a while. They are going to get another feed tmm. The medium is a 50/50 coco/soil mix since I'm using the green buzz and its organic I figured a little soil might be beneficial. Day 7 from germination they should be ready to go into their final pots in the next few days.
Likes
23
Share


@Piorkeed
Follow
At the end of the 12th week I decided to chop. The plant grown a lot filling my entire tent, il she gives to me about 500g (or more) of wet harvest. The smell is very intense and the buds are sticky a lot.
I put the branches into the tent with the dehumidifier, fan and extractor 24 hours on.
Update: two weeks after the first harvest I've decided that it is time to harvest the second plant that I transferred outdoor when I discovered that she was showing signs of illness. It's buds are not so fat as the ones of the other plant, but they are rich of trichomes.
Harvest today, light trimming and put the branches into a box.