
Likes
Comments
Share


@FarmerJons12
Follow
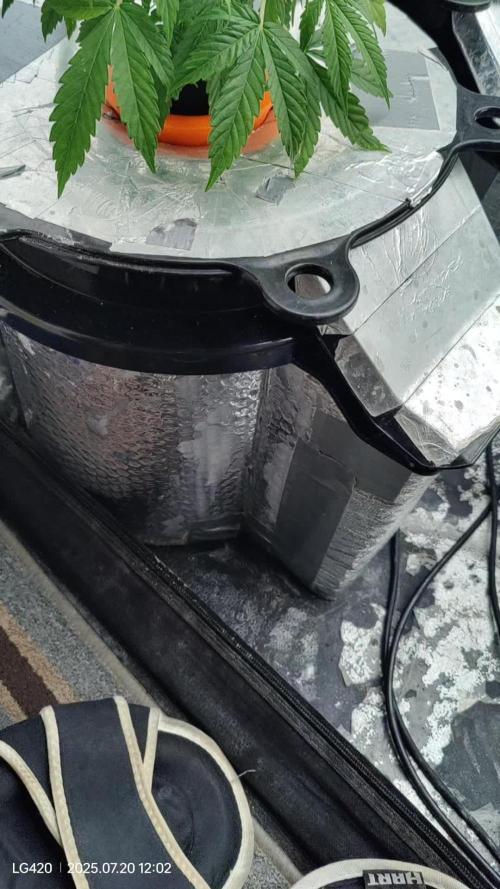
Very excited for my first grow ever. My soil is the Biobizz-Light Mix in a 11L pot .I got so impatient that i even dug it out at some point to see the progress...i hope it won't have any consequences. The first days, i only sprayed the soil with some water to keep the soil moist. At Day 4 of germination i watered it for the first time with 250ml tap water at 6,5ph.
I will run my light for 18 hours now at a distance of 60cm with full power. That will lead to round abot 215 ppfd and 12k lux for the final days of germination.
At day 6 after germination two darker spots appeared on the first 2 leafs. I hope it’s just because of some water drops on the leafs.
Watered every 3 days with 350-500ml of 6,5ph tap water.
23.05.24: For my definition the vegetative stage starts today. I will turn the light up to 500 pphd
Very excited what will happen next!


Likes
4
Share


@Hix57
Follow
Jour 35 et tout roule ! Ma plante se développe à merveille, même si elle a décidé de stopper son élongation assez tôt, ce qui lui donne un aspect trapu et compact.
Je suis plutôt satisfait de mon suivi, car j'ai réussi à éviter les erreurs du passé, comme le surdosage d'engrais. La terre est suffisamment riche en nutriments organiques pour subvenir à ses besoins.
Hâte de voir comment elle va évoluer dans les prochaines semaines
Jour 35
Engrais : max mais pas de NPK sauf phosphore et potassium a petite dose.
Remarque : la plante ne s'est pas étirée suffisamment


Likes
15
Share


@DeepRootGrows
Follow
She’s doin amazing. She’s always happy and is taking the skrog very well. She’s by far my favorite plant I have goin.


Likes
89
Share


@Zurban_Poison
Follow
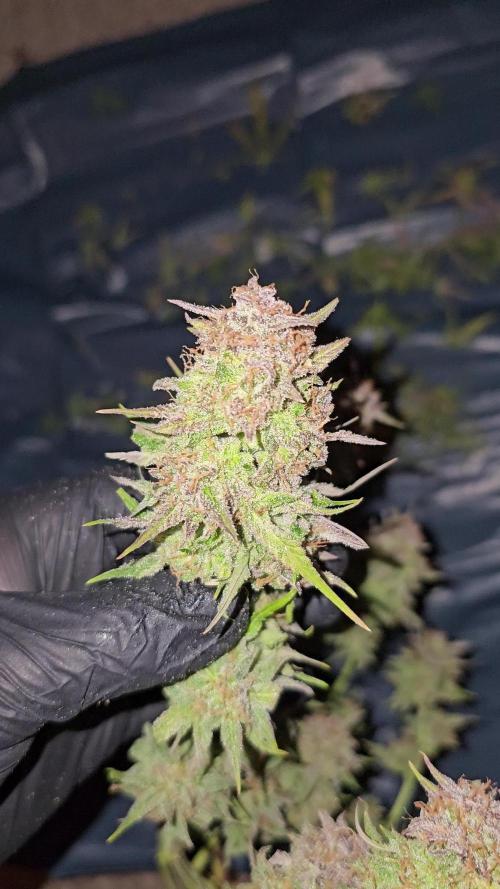
Hello everyone! Made the last defoliation .. removed all hopeless branches and buds .. left only those that can develop normally ..
as you can see, the color of the buds is already violet-red .. and the smell is pleasantly fruity, sweet))


Likes
12
Share


@ChitownCannaChica
Follow
So this was an outdoor auto that had to endure the craziest temps! From 48 degrees to 95 degrees through its life! Squirrels kept trying to dig up the dirt around it, major humidity swings, rain, hot sun, etx—- so I am very pleased with the results after all that Mother Nature threw at her! Smell is amazing, like bubble gum! And that’s rare that the flavor actually matches the name in cannabis! Not the biggest yield, but not the greatest environment and a small pot! ✌️💚🌿💨


Likes
Comments
Share


@GreeneScene
Follow
Week 35 the diary won’t let me update the week number manually. Did a to dress feeding yesterday 7/5/25. Have been feeding every watering since I noticed yellowing leaves after my last top dress feeding. Reason being was I assumed my organic nutrients hadn’t broken down and became available. In retrospect she probably was just hungrier than the top dressed feeding. I will also feed on a 3 week schedule rather than a 4 week schedule moving forward. Additionally when I run out of Gaia Green I’m going to purchase Down to Earth to give it a whirl. I’m still tweaking my nutrients/ light setup to achieve dense great tasting buds .
I moved her from the center to the right side in attempt to train her to fill more of the tent. I upped her liquid nutrient feeding lately as well to try & get her growing more rapidly. I did a heavy defoliation & retrellised her down again. About 4 days after her heavy defoliation I turned around and lollipoped her. After defoliation & lolipoping I made 18-20 cereal milk clones haphazardly to see what takes and what doesn’t with ZERO tlc. I don’t need/want the clones but i do believe it is a good practice & may come in handy after this grow.
My humidistat controller has been down for atleast 2 months the VPD has been fucked this entire time. We’ve just been making do. If I would have noticed water droplets on my overlapping leaves I would have been more motivated to fix it before today.
So on today I reprogrammed my humidistat controller, reinserted the humidifier for the clones sake & to regain control over tent VPD to encourage rapid growth again.
Lastly considering pinching stem tops to encourage a more rapid branching to finish filling tent.
RRRRREEEAAAAALLLLLYYYYYY kicking myself in the rear for allowing this plant to die 70% losing 100% of the plants mass only regrowing 50% of itself after 4 weeks of recovery. I lost SOOOOOOO much time & mass vegging this plant out. I’d be flipping this plant to flower now if i I hadn’t gotten overwhelmed.
Next FEEDING 7/26. Hopefully a veg/bloom feeding if I can encourage rapid growth . I’ve really taken a SUPER LAZY APPROACH TO GROWING THIS LADY as well as all my other plants . I’m still going to be a lazy fuck for my other plants but I am going to buckle down on pouring into this plant all mu hopes and expectations to hopefully get out all those same hopes and expectations lol .
If you’re enjoying this so far give us a like !
Likes
12
Share


@Papabro2k
Follow
Overall the plant grew just great topped one time let it grow totally natural with the boost tablets smelly great n very frosty happy growing all and thanks to who tuned in on my diary’s
Likes
85
Share


@Tropicannibis_Todd
Follow
Start of day 70 ...... Dec 18 Start of week 10 ........ 44 DAYS INTO FLOWERING
( SMELLING GREAT ) !!!!!!!
Check out the full grow video on latest weekly update
Super Exceptional Growth Daily
Still adjusting LST when needed and leaf tucking.......
Water Only when needed but its drinking more every otherday and adjusting lights when needed......
Rain Water Only .......
( DAY 26 AND BOTH NL 1 & NL 2 SHOWED PREFLOWERS )
( DAY 49 AND RESIN PRODUCTION HAS STARTED )
( DAY 57 , EQUIPMENT FAILURE , main FAN , over heated😡 tripped breaker , reset light timers , lost a DAY, REPLACED new Main Fan 😁 back up running 👌)
( DAY 70 AND IT SHOWS A SLIGHT DEFICIENCIE MAYBE A CAL/MAG GETTING CLOSE TO END OF LIFE ) IM ALSO DOING VERY LITTLE, SLIGHT DEFOLIATION
( DAY 70 DID ITS FINAL FLUSHING TODAY TO GET RID OF ANY BUILDUP )
( DAY 75 AND ALL IS GOOD , THERE FATTING UP )
I hope you enjoy my growlog...

Likes
55
Share


@Ganjagrandaddy
Follow
Day 21 Veg: All going good so far with the ladies. At their 5th nodes now and beginning to fill the pots out nicely too now.
I have started giving them Megacrop at 1/4 strength now. nonsigns of burn or any issues
Siz shooter is the smaller of the group and I have removed her 1st nodes to get her to ficus on the higher ones I won't stress her out now as she could be held back if not careful.
Strawberry pie developing well amd i have now tied her main at the 5th node to slow the development and allow the other nodes to equal each other for a canopy. .This will be removed and the node allowed to continue to develop.
Mexican airline had the same treatment as the pie with a tied 5th node. Her colour is perfect with no signs of any issues. We will see how the method works by the next update hopefully. fingers crossed.
be well
Likes
1
Share

@pareto
Follow
Had some nutrient issues but fine all in all.
-----------------------------------------------------------------------------------------------------------------------------------------------------------------------------
Set up cost (fixed costs)
-Lamp: 40€
-Timer: 3,5€
-Pot: 4€
-Total fixed costs: 47,5€
Given 5 years (or 15 grows) usage time translates to around 3,17€ per grow in materials.
Variable costs:
-Seed: 5,54€
-Soil: 4,5€
-Fertilizer: 3,50€
-Power (100 days 18h/day): ~25,92€ (exact figure after harvest)
-Total variable costs: ~39,46€
-Total costs per grow: ~42,63€


Likes
18
Share


@thenotillwizard
Follow
Harvested at day 76, after 72h of darkness.
Very good yield!
3.3 pounds of dry buds + 1 pound of trim
The 2 keepers yielded 366 and 342g of premium quality smoke.
Very uplifting and energizing high :) Love it!

Likes
33
Share


@BADKUSS
Follow
Hello everyone ,
Here is the phase of completed stretch, and the fertilizer fertilizer contribution are 100%, flowering starts very well and the appearance of the first pistil are visible everywhere.
For the height of the plants I find it reasonable and thus keeping all this world a good size the luminous penetration will be excellent ... until now hene no sign of problem for my plants I think that the flowering will follow its rhythm .. to see in the coming weeks ...
now place to photos ...
Processing
Likes
4
Share


Likes
2
Share


@UrbanBoer
Follow
I am not happy with this strain, but I blame myself, I dried it to quick, allowed a lot of airflow in the dry closet when I should of kept the airflow as minimal as possible, slower you dry the bud, the better the result when it it comes to bud size, aesthetics, aroma, smoothness and when smoking it, the taste on your pallet will be fantastic. However I am hopeful when I bake this strain, I will be amazed 😇
Likes
4
Share


@adam_pawloski87
Follow
@twenty20mendocino Ateam R&D Update ~ Lets Go day 38 of flower an these ladies are looking amazing! Gettin in some nice frost a the smell is insane, so many different terps Sour , skunky , fuel , gassy funk a berries 😍so amazing! Not too much longer to go a these ladies will be ready for flush , but let’s take it day by day!! Hope y’all enjoy an have an amazing productive day ! Cheers to y’all 😶🌫️💨💨💨💨
