




Likes
27
Share

@eldruida_lamota
Follow
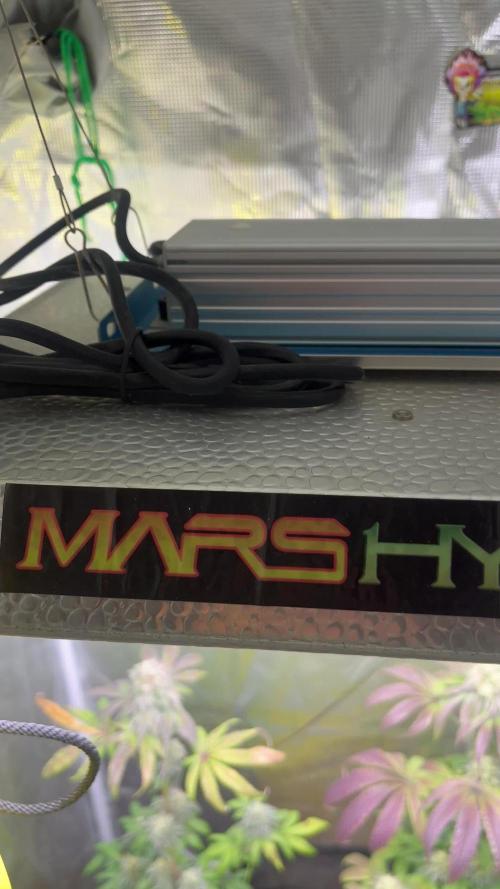
Que pasa familia, vamos con la octava semana de floración de estas Papayton feminizadas de fastbuds.
Vamos al lío, el ph se controla en 6.2 , la temperatura la tenemos entre 25/21 grados y la humedad ronda el 50%.
El ciclo de floración puse 12h de luz, el foco está al 100% de potencia.
De momento van engordando y marcándose unos aromas bastante dulces y afrutados.
COMENTAR: que una de las 3 salió macho y otra la corte ya por qué me estaba dando problemas pero la que queda la aguantamos y ya os enseñaré al final la que corte ya también.
- os dejo por aquí un CÓDIGO: Eldruida
Descuento para la tienda de MARS HYDRO.
https://www.mars-hydro.com
Hasta aquí todo, Buenos humos 💨💨💨

Likes
9
Share


@YD_59
Follow
one of the plants is flowering and the buds on it look nice so far but like said last week, it also has some seeds/pollen sacs, so I'm hoping there'll still be some buds on it by harvest, the other two haven't started flowering much yet, I've only taken videos because I don't have a light and I couldn't see what I was taking a photo of


Likes
5
Share


Likes
37
Share


@Roberts
Follow
Mandarin XL auto has just been switched to ph water for her flush week. Her next update will be her harvest. She has a sweet orange smell. Everything is looking good for a harvest. Thank you Ganja Farmer, Medic Grow, and Gen1:11. 🤜🏻🤛🏻🌱❄️🌱
Thank you grow diaries community for the 👇likes👇, follows, comments, and subscriptions on my YouTube channel👇. ❄️🌱🍻
Happy Growing 🌱🌱🌱
https://youtube.com/channel/UCAhN7yRzWLpcaRHhMIQ7X4g


Likes
20
Share


@Ieiogrow94
Follow
Eccoci qui...
Non ho più parole per giudicare questa meraviglia!!!
Strain 1 è la migliore varietà che io abbia mai coltivato, nel processo di maturazione delle cime ho visto qualcosa di assurdo in quanto questa piccola ha una maturazione totalmente diversa rispetto a tutte le altre erbe!!!
Sono davvero soddisfatto, peccato che Strain 2 sia cresciuta storta, ma poco importa anche essa ha cime che sono dure come sassi, e sono solo 4 settimane di’ fioritura, NE VEDREMO DELLE BELLE!!!
Grazie a @KhalifaGenetics e @xpertnutrients per la collab e a tutti per il supporto🔥🌲❤️

Likes
15
Share


@IsseyBukkake
Follow
Week 2 has gone just as well as I'd like it too!
I had an accident during the week where I had dropped a sticky bug trap on one of my girls, this led to me accidentally ripping off a fan leaf and a half, but she seems to have come out of it just fine! (Thankfully).
I have been feeding 1/3 strength nutes the past few feeds, stepping it up from 1/4.
I will be watering until I see runoff from now on to prevent nutrients from building up in the coco.
Update(day 15, 4/12/20)
Today I purchased a new oscillating fan, co2 bags and a new hygrometer that hooks up to my phone and shows me stats.
The girls have been putting in a lot of work over the past 24 hours.
I also had a Purple Punch photo seed sprout today which I may be turning into a mother plant. I will be starting a diary for this girl too.
Update (Day 16 5/12/20)
Second purple punch photo popped today, going to keep 1 inside and give the other to my mom to take care of.
The girls got their first 1/4 dose of calmag today fed at 6ph due to all the nutrients settling there.( I do have ph +/- but I'm going to try run this whole grow at 5.8-6.2.
Update (Day 17 6/12/20)
Plants seem happy today.
Fan leaves producing a the pre-existing nodes are starting to shoot out quite rapidly.
Unfortunately, my streets power went out today for ~90 minutes, I opened the tent, windows and doors to get any light in I could, thankfully the power came back on shortly after.
I fed the girls today with very little run-off(I'm trying to perfect the amount of water they need).
Update (Day 18 7/12/20)
The girls have jumped up over night!
I wont be feeding today as I'd like the coco to dry out quite a bit more.
Update (Day 19 8/12/20
Gave the girls a small feed today with very little run-off
Everything seems to be going well so far, I'm very thankful!
Update (day 20 9/12/20)
Everything is going pretty well today.
I will not be feeding as the increased humidity has kept the coco more moist than usual.
Will be feeding full strength nutes tomorrow!
Thanks for stopping by, HMU with any questions or tips you have.

Likes
18
Share


@Cockneycultivar
Follow
This week she’s smelling so peng. Literally cannot wait to taste her. I haven’t got a x30 loop eye piece so can’t check the trichomes proper but she looks nearly done. The thc is still milky from what I can see and most hairs are nearly all orange now. I’m flushing her every 3/4 days pure water now from the tap. Leaving her to dry in between last Run off at 378 which is pretty normal for my tap water. Biggest cola at 16.5cm circumference now. So looking forward to giving her the chop. Although She had been showing signs of stress throughout the grow it seems like nothing can stop the hulkberry from yielding a good harvest. Unbelievable I’ll be growing this in again for sure.

Likes
21
Share


@Budhunter
Follow
I did the flushing on Mimosa on day 88. I am now watching the trichomes to see around 30/40% amber to cut it down.
Likes
19
Share


@Master_weeda
Follow
Bonjour à tous les padawans et maîtres jedis
Jour84 arrosage avec 2 litres d'eau ph6.3
Jour87 arrosage avec 2, 5 litres d'eau ph6.3
Jour89 arrosage avec 2,5 litres d'eau ph6.3

Likes
3
Share

@Organic_G
Follow
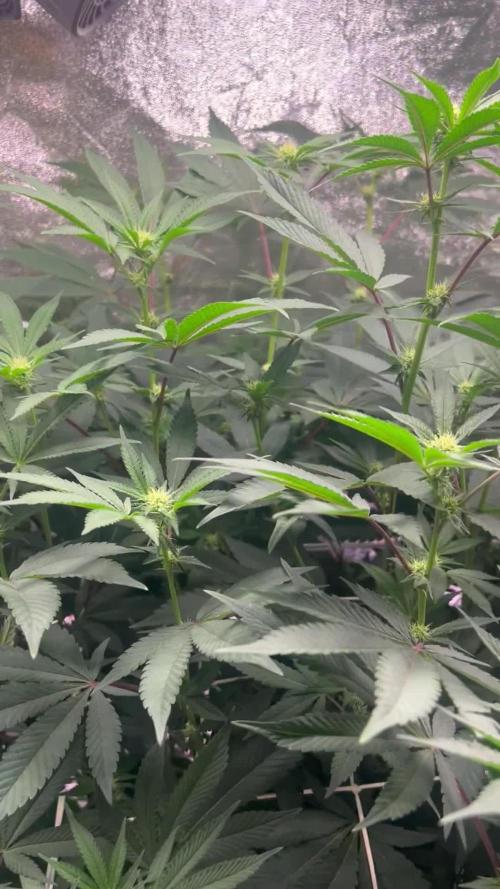
Wachsen soweit super, kein Top Dressig kein anderen Dünger sonst verwendet, Erde einmal angereichert und läuft Super sind Glücklich.
Hätte tatsächlich nicht gedacht das die das Zelt nochmal so füllen würden wie beim Run zuvor mit 6 Pflanzen aber da haben wir es… werden morgen von unten nochmal leicht entlaubt ansonsten war’s das bis zur Ernte. Nothing to do at this point.

Likes
124
Share


@Still_Smoq
Follow
📆 Week 3, 5-11 May 2024
5-11 May - Seedling continues to grow out of its deformity (see pictures and video).
📑 This seedling appears to be coming around. Maybe she will be just fine for the rest of this grow. I’ll push on with her until she shows me otherwise.
🍶 5 May no nutrient solution change, will be changed week 4
🍽️ 5 May feeding schedule unchanged
💧 Using reverse osmosis water with EC/TDS at 0
🐉 Nutrient solution EC 1.0 at 70 degrees F
🔆 Light power at 50%, DLI 12 canopy coverage at 18hrs
😤 Using PYPABL, Air Pump, 400GPH
That is it for this week. Thanks for the look, read and stopping by.

Likes
13
Share


@Robeeriegenetics
Follow
Second week of flowering in the bag, and they’re all looking really healthy, even healthier than when I first threw them in the flower steady as she goes
Likes
24
Share


@TerpTurtle
Follow
White Truffle x Red Pop by Detroit Seed Co
BuildASoil 3.0 LOYAL TO THE SOIL
Strawberry truffle | Vivosun 2x4 | Mars hydro sp3000 | 7 gallon pot
Chem 91 x Red pop | AC infinity 2x3 | AC Infinity Iongrid 24 | 5 gallon pot


Likes
10
Share


@420_Vamp
Follow
Smoke smell in curing jars.
All have a peculiar smell. Sweet but not strong. When buds taken out no smell on collectively that they have a smell.
Smoke it self is very very smooth the flushing must of done it good that's an assumption but the smoke it's grey/white a tinge of black
The affects are very heavy no paranoia or anything just a good strong indica smoke
RQS have done it again excellent smoke and happy growing I would recommend to anyone.
Only thing is I would recommend to anyone is ALWAYS PH YOUR FEED. Everything must be ph'ed it saves you alot of time and makes sure your girls are catered for.
Perhaps another time I would use rooting enhancement as there wasn't a lot of roots like I was expecting
Happy smoking all
PS.
The light was 240w
So that's 0.44 gram per watt. Probably could of done bette had the small potted one been in a 40L as well.
Likes
40
Share


@valiotoro
Follow
easy trim✂️
The buds are Absolutely perfect,exactly what i was looking for🤩
Green pheno : cookie,diesel & gelato🍪⛽️🍦
Purple pheno : flower,sweet & honey🌸🍯
After 7 days on the dry rack she was ready for the jar to start the curing process.😋


Likes
11
Share

@Ribemarti
Follow
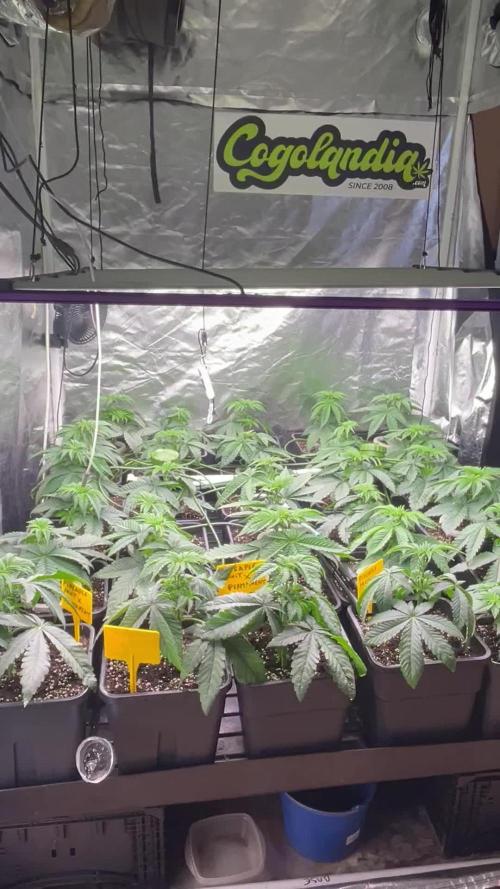
Las plantas estan podadas ya, esta vez le he quitado a todas los 2 nudos bajeros de una vez, asi aprovechamos para hacer esquejes para exterior, por aqui ya hace 25/30 grados afuera
Esta semana, sera la ultima de crecimiento ya en unos dias pasaremos a floración y a esperar a que empiezen a tirar hacia arriba, las raizes son una barbaridad mucho vigor,
Estoy regando cada planta con 1L y el PH 6,3 EC 1140 toda la tabla que marca el fabricante de biobiz y complemento con el Gold Complet de la marca Gold Green son una pasada
Las Pineaple fruit estan las 4 iguales se notan las semillas frescas de www.cogolandia.com