


Processing
Likes
7
Share


@Kushizlez
Follow
Day 42-49
(Day 42) Just watered today but couldn’t go until runoff because I didn’t have enough RO. I forgot to add the probiotic too. Nonetheless, everything is starting to recover from those weird deficiencies and is looking super healthy. Plants are really bushing out now too. I had to top the zkittlez and BBB#3 again as they are just getting too big. Nothing is definitively showing sex yet but I’m seeing clues. Shouldn’t be long now. If I get 4 females or less I will use 10gal pots, 5-7 fem 5gal pots and 8-12 3gal pots.
I need to stop overwatering. Even though it doesn’t look too overwatered, it is much better to water a little bit each day at lights on. This will help keep the humidity down as well as deliver optimal oxygen to the roots speeding up plant growth considerably.
(Day 45) Gave an EM1 spray down today. The beneficial bacteria is said to overpopulate surfaces so powdery mildew and septoria can’t form. Something seems to be really working as I haven’t seen any yet.
(Day 47) I sealed up the tent and am running both dehumidifiers and it’s keeping the RH around a safe 70% night and day which is right on track with VPD. Plants are all looking super healthy. Deficiencies have pretty much all cleared up. Cold nights I’m running 600w and warmer nights I’ll run 400w.
I was asking around Instagram about white ash/good burn and a few different people assured me it has to do with mineral content of the soil. I was told the three best products for clean ash is glacial rock dust/basalt, oyster shell flour and langbeinite. I already have langbeinite so I’ll grab the other amendments today and top dress.
I grabbed the amendments and also got some Destiny Organics dark matter super soil, coco and some beneficial nematodes. Top dressed each amendment except langbeinite and mulched in some coco coir.
(Day 48) My shelf came in today and I think it may be to big for the 4x4 tent. Each square is 12”, not the 11.8” advertised. I could wipe down my flower room and set it up in there which would give my plants a good adjustment to the new lights before I flip. Or I could set it up in the veg tent but that seems like a huge hassle as the need to be moved and flipped soon anyway. I wish they would show sex already so I can toss out the plants I’m not keeping.
For flower I am considering starting over fresh with the new Destiny soil and coco mixed with some amendments. I’m concerned that my current mix might be too hot. I could also dilute it with the Destiny/coco mix. Those little bulb mites that came in with the worm castings are a little concerning as well. Some say they are just beneficial composters aka “worm bin mites” and others are telling me they’re predatory bulb mites which destroy crops like garlic. I’m leaning towards beneficial composters but in another grow I watched them devour a seedling before it sprouted. Gotta check the current roots but the plants aren’t quite ready to be transplanted.
(Day 49) Got everything in the flower tent wiped down and sprayed with alcohol then EM1 few hours later. Got the shelf set up and got all my temp controls set up and running. I put the controllers outside the tent this time and will patch any light leaks. Gave a lite compost tea at 830ppm and a velokelp foliar spray at 6ml/L. This will be the last veg feeding before I transplant into their final containers on the 31st.
BCTG#2 is a confirmed male and I pulled him. No one else is showing definitively. Roots looked super healthy with very few mites but I’m not 100% convinced they’re all clean. I saw a few mites on leaves today too.
Saw a bit of droop after the move but they all look happy just a few hours later.
Took a few clones from some sucker branches on a few of the blackberries.
Likes
40
Share

@SundancerS
Follow
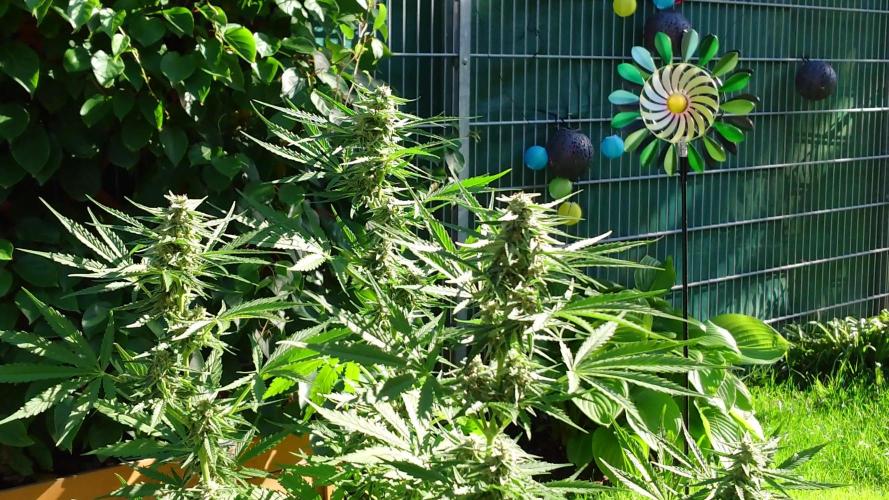
Die Green Crack F1 Auto zeigt sich bisher als echtes Kraftpaket. Sie wächst zwar etwas wilder als ihre Nachbarinnen, aber genau das scheint zu ihrem Charakter zu gehören.
Normalerweise steht sie etwas geschützter als im Video, trotzdem sieht man gut, wie problemlos sie mit Wind und Wetter zurechtkommt. Die Triebe werden von Woche zu Woche kräftiger und die gesamte Pflanze wirkt erstaunlich stabil.
Das einmalige Toppen hat ihr sichtlich gutgetan. Sie bleibt dadurch etwas kompakter, baut aber eine schöne breite Struktur auf und scheint ihre Energie lieber in stabile Seitentriebe als in unnötige Höhe zu stecken. Gerade Outdoor kann das später ein echter Vorteil sein, wenn die Buds schwer werden.Außerdem macht sie dadurch einen deutlich transportableren Eindruck. Wer seine Pflanzen bei Gewitter, Hagel oder anderen Wetterkapriolen mal schnell umparken muss, weiß das durchaus zu schätzen.
Bisher macht die Green Crack F1 Auto jedenfalls genau das, was man sich von einer Outdoor-Pflanze wünscht. Robust, unkompliziert und immer mit einem kleinen Hauch von Chaos. 💪

Likes
12
Share


@GrowGuy97
Follow
Day 14 - 3 out of 5 are growing a little slow/weird, all 5 seem to be growing kinda slow compared to my first run of autos but hopefully everything does good🤞🏼 Happy growing friends🌱✌️🏼
Day 17 - Still have 2 extremely weird looking ones, really hoping they bounce back🙏🏼🤞🏼
Day 18 - 3 out of 5 still going strong, the other 2 havnt changed much!


Likes
4
Share


@WakingUpHeartless
Follow
Bumped up the nutes to 10ml for calmag and tiger bloom. Started having mag deficiency between weeks but seems to be recovering quickly after the bump in nutes.

Likes
Comments
Share

@bigsmoke42069
Follow
Week 5 (12.28.25--1.4.26)
took photos on 12.29.25
2.1.26
1x1 transitioned to late bloom nutes

Likes
1
Share


@der_1gaertner
Follow
das wird mein eigener strain am ende. glünstiger als ständig neu kaufen


Likes
57
Share


@BudBoutique
Follow
Welcome to Bud Boutique Grow Diary - really appreciate all your love and support :)
Dont forget to check out my other current grows!
🗓️ This Week:
- Day 52: the end is near
- Day 53: Trichomes check from #1 and #2 - looking super good almost all cloudy, a few amber and clear. perfect point to chop
- Day 54: this one is finished, let's chop them both #1 & #2 !! ✂️✂️✂️
- both phenos got still super purple beautiful leaves
- now its time to dry inside the tent at about 60%rh and less than 20°C/68°F trying to get it even lower for the next 10-14 days
Thank you for still staying with me 💚
___________________________________________
--- 🌱 Strain (Sponsor) 🌱 ---
🏷️ PEACH GIRL by Art Genetix
https://www.artgenetix.world/product-page/peach-girl
--- 🥗 Nutrients and Feeding (Sponsor) - (APTUS Ambassador) ---
🍸 APTUS: full nutrient schedule extreme
-- Regulator, N-Boost, P-Boost, CaMg-Boost, K-Boost, Allin1 Liquid, Startbooster, Topbooster, Enzym+ every feeding
-- Fulvic-Blast, NutriSpray as Foliar each once a week
🔗 https://aptus-holland.com/
--- ♻️ Grow Control (Sponsor) ---
TROLMASTER: TENT-X + LM14 Light Adapter to dim/sunrise/sunset lights + Temp & rH Sensor all remote on App
🔗 https://www.trolmaster.eu/
--- 🚿 PetraGrow (Sponsor) ---
CannaFogger Foliar Spray
🔗 https://www.petratools.com/product/petragrow-cannafogger-atomizer-new-mini-fogger
--- 🏭 Grow Setup ---
💡LUMATEK Zeus Pro 600
* 🏠🌿 Indoor: Homebox 120x120x200cm (4x4)
* 📐🌀 PrimaKlima exhausting Fan 1180m3/h (running on 60-80%)
* 🌀 Can Light Filter 800m3/h & 1x Fanbox 1x Dyson fan for Air circulation
🔗 https://lumatek-lighting.com/zeus-600w-pro-29/
🔗 https://primaklima.com/de/shop/ventilatoren-de/ec-ventilatoren/pk160ec-tc/
🔗 https://canfilters.com/products/filters/
All Likes and comments are highly appreciated!!!
👨🌾 don't forget to check out my Instagram for daily educational content: budboutiquee
- Bud Boutique

Likes
2
Share


@samuraifroggig
Follow
Whorled Phyllotaxy is the arrangement of leaves on a plant stem, three in this case. I never noted it until the buds started to form in threes on the stem instead of twos on just opposite sides. Plant also has 11 finger leafs that are ginormous I hack them off every other day. bud sides are forming well faster than I expected HPS in veg was a good option to keep the plant short and bushy.

Likes
62
Share


@OwlGang_Uk
Follow
Happy 1 Month To My Girls (Inserts Celebration Emojis)
I’m Very Proud Of The 1st Month’s Progress These Girls Has Really Exceeded My Expectations.
I’m Very Proud Of The Of The Purple Power If You Go Back To Week 1 You Will See That She Started Off The Slowest But She Is Now The Tallest In The Pack Standing At 21 Inches (that’s without adding the few cm I covered with soil) She Has Also Shown Signs Of Purple In Her Bud Development (Favourite Color) Can’t Wait To See Them, You Go Girl!
I’m Also Proud Of The Gorilla Glu (12 inches) Stardawg (17 inches) And Girls Scout Cookies (16 inches) Development, They Are My Favorite Buds Here In The UK. They Are Very Bushy & Branchy And Their Stems Are Very Thick. They Have The 3 Main Pillars To Accommodate BIG Buds.
Happy Growing Everyone. #OwlGang #AGrowingEmpire


Processing
Likes
17
Share


@Mr_nugs_lover_David
Follow
She's looking absolutely gorgeous, she's has become a beautiful bush full of bud sites everywhere and she's gonna produce a lot of beautiful colas, I think I have achieved a very good shape before flower. So let's see how this wonderful ak420 bush performs.

Likes
44
Share


@rudiak
Follow
Hey everyone!
It’s been another fabulous week of the girls fattening up getting ready for the ever looming harvest time! The colas are huge and glistening like a glitter ball!
The back right girl has been on flush since day 51, 2 more went on flush on day 53, and the final girl front right went on flush today, day 56!
Over the week I gave 3 girls a really heavy defoliation taking the majority of fan leaves off to allow good airflow and try fattening up those lower buds. It’s still impossible to tell if I prefer defoliation or not but we are getting close to harvest so should have a definitive answer to that soon! The back right girl has had absolutely no defoliation or trimming through her life cycle.
I still regularly think back to when we broke one of the girls and transplanted, the cannabis gods were on our side warning us 4 girls will be huge, we were very lucky or would be seriously short of space as of now.
As the girls are going to be harvested at slightly different times to ensure each are at their optimum, I have had to construct a dry box.
How I built my smell free DIY dry box:
Take a large cardboard box, cut an extraction hole in the top at one end and mount some ducting and seal the gap around the edge. Cut a flap in the opposite end at the bottom which will be the passive intake and promoting a draft through the hanging buds. Poke some holes in each end of the box using a screwdriver and thread some thin rope or string through the box tying the ends together once finished to give you sturdy locations to hang some pegs from. Finally I attached an extra bit of card on one of the flaps at the top; this overlaps the slight gap in the top between the flaps that could allow light to enter. Once completed I put the ducting into one of the lower intakes of the tent; the negative pressure in the tent then uses the air in the dry box as a passive intake creating a smell free area to dry your cannabis outside of your grow tent. This also keeps a slight breeze flowing through the box to ensure even drying.
Happy toking guys and hope you enjoy the pics and vids, thought it was getting hard to tell how big these girls were in pics anymore so the vids help a lot, and I was lazy this week! :P
Likes
19
Share


@Foggedaboudit
Follow
These are done stretching (finally!) and are in full-bloom mode. The purple is definitely here and the smell is a pleasant mix of earth, fruits and expensive wood. Muy bien!
Likes
38
Share


@Targona
Follow
Targona: 36 days since my little girl sprouted from seeds🌱
Fifth week of vegetation of my Auto Melonade Runtz 🍉🥤🍉
Nutrients:
I use Advanced Hydroponics Of Holland nutrients - three basic components, still according to the table for growth and flowering, I only change the dosage according to the plant phase 💓 -
- Dutch fertilizer Formula 1 Grow - supplies the plant with substances necessary for the perfect development of roots, stem and leaves; intended for the growth phase 🌾
- Dutch fertilizer Formula 2 Bloom - contains a large amount of nutrients necessary for rapid growth and fruit development, supplies the plant with energy; intended for the flowering phase 🌸🌿
- Dutch fertilizer Formula 3 Micro - increases oxygen intake, improves plant immunity, ensures better absorption of nutrients; intended for the growth and flowering phase 🌴
--------------------------------------------------- -------------------------------------------------- ------
Plagron Power Roots - Root Stimulator Plagron Roots is a biological root stimulator that supports the formation of the root system. I use it until the fifth week of growth 🍃🍃 - I fertilize for the last time in the fifth week of plant growth - this week I fertilize for the last time.
-------------------------------------------------- -------------------------------------------------- --------
BioBizz Calmag - The special Calmag supplement was designed for professional and hobby growers who need to supply calcium and magnesium in organic quality to their plants in the long term or immediately. The 100% organic 💩💩 and certified BioBizz Calmag product is made of calcium carbonate and magnesium sulfate supplemented with humic acid.
-------------------------------------------------- -------------------------------------------------- --------
BioBizz Bio pH - is an organic pH regulator. An aqueous solution of citric acid, which occurs naturally in citrus fruits 🍋🍋
---------------------------------------------------------------- -------------------------------------------------- -------
During the flowering period I add stimulants:
- JUNGLE X Environ is a highly effective complex preparation for stimulating flower formation. 🌸🏵️
- Bud Candy - carbohydrates for my girls 🍭🍭🍭
General:
Auto Melonade Runtz 🍉🥤🍉 - The plant looks good, the side branches have grown to the height of the main stem, as if I were topping - but I didn't. I basically only do defilia and LST for autoflowers. Unfortunately, the girl reacted to the change in fertilizer dosage during the flowering period and brown spots appeared on a few leaves, fortunately there are really not many of them 🍂. It reminds me of a magnesium deficiency, but it is the only plant that has reacted like this so far. I will try to flush it with Terra Aquatica FlashClean 💦💦
Training:
This week I performed LST on the adult young branches by attaching them to the sides of the pot with string, like the others. I also did more defoliation this week to allow light to reach the buds 💚🌞🌞
Light: Mars Hydro TS1000 The plants are responding effectively and the light is technically very well managed - I try to have 50 cm between the light and the plants, so I move it up regularly 💡💡💡
Thanks for the likes :)
See you soon 😍😍


Likes
114
Share


@Tropicannibis_Todd
Follow
💩Alrighty Then Growmies We Are Back At it 💩
Well folks we just finished up the last run and so we are back to do it all over again 😁
So what do you say we have some fun 👈 We got some Gorilla Punch 👊 👊 👊 DAY 49
👉 😳 So I've had a few issues what's done is done , but I think we are on track and she's doing good 👌
I've been experimenting with some new nutrients and ive been having a few issues 🤔 but I think I have under control 🤔
FC4800 from MarsHydro Lights being readjusted and chart updated .........👍👉Added an RU45 too the mix 👍
www.marshydro.ca
👉I used NutriNPK for nutrients for my grows and welcome anyone to give them a try .👈
👉 www.nutrinpk.com 👈
NutriNPK Cal MAG 14-0-14
NutriNPK Grow 28-14-14
NutriNPK Bloom 8-20-30
NutriNPK Bloom Booster 0-52-34
I GOT MULTIPLE DIARIES ON THE GO 😱 please check them out 😎
👉THANKS FOR TAKING THE TIME TO GO OVER MY DIARIES 👈
Would you like to hang with the growdiary community 👉 https://discord.gg/gr4cHGDpdb 👈
Likes
22
Share


@Fatnastyz
Follow
9-3
Everyone got a little light burn, she didn't seem to mind. Light still adjusted. 😱
Growin good!
9-6
Whats growin on!
This girl is!
500 ml water, with HP connect.

Likes
40
Share


@Lady_NugWitch
Follow
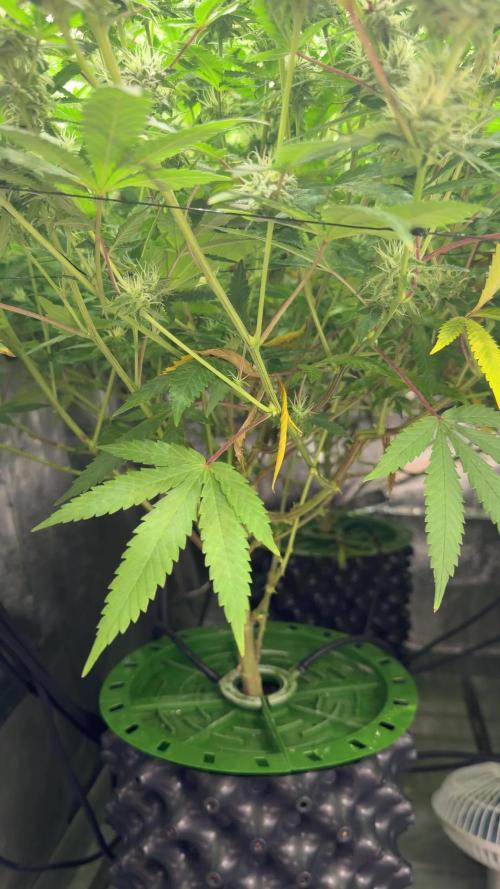
They are both growing good.. Some issues with the runt leaves.. They are showing signs of deficiency but I've given mostly cal mag water 💦 to her. The video shows how frosty main witch is, wow.