
Likes
Comments
Share


@THCpapa
Follow
What an incredible journey this has been! From start to finish, these plants dazzled at every stage. The drying process was a bit of a marathon – 21 days of suspense. But now, they are absolutely perfect. They snapped off the stems with a satisfying crunch – straight into my rolling paper for, ahem, "quality control" purposes.
I'm beyond excited to have 2 more seeds ready for the future. Though I won't be growing them in my next round, I can't wait to see what they'll do next time. These gorgeous ladies have rewarded me with a whopping 248 grams dry! I'm in absolute weed heaven.
Now comes the hard part – keeping my hands off while they cure and reach their full potential. My trusty humidor will help make sure they become everything they're meant to be. Here's to a fantastic harvest and many more green adventures ahead! 🌿🎉


Likes
10
Share

@Yamamoto420
Follow
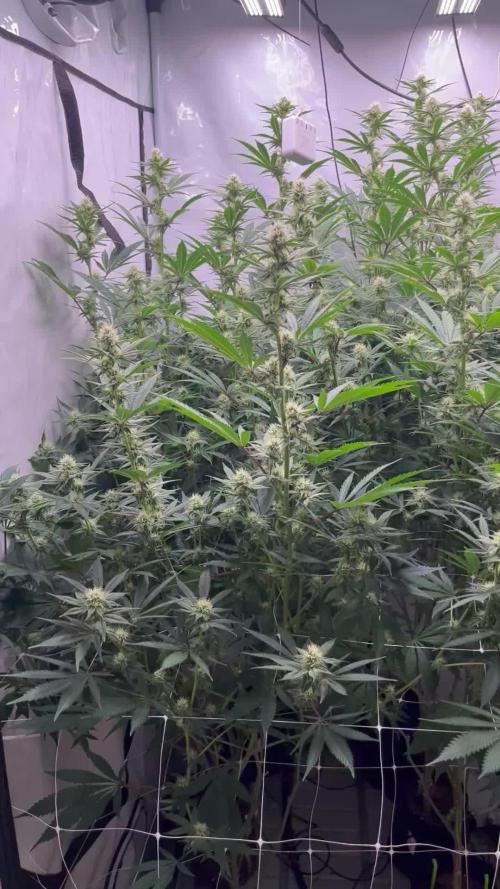
Week 4 day 22 the ladies stop stretching I had to do important deflation for the under canopy and stems where the light is not reaching, I don’t want popcorn buds. So far so good.

Likes
16
Share


@guitarrasrockeras
Follow
Hola A todos la verdad el tiempo no me da mucho para estar haciendo un seguimiento continuo pero de todas formas acá estamos ya van cuatro semana y la plantica ya fue trasplantada a su maseta de 25L.
hasta Ahora esperando unas semanitas mas para comenzar con el proceso de scrog. Saludos.!!

Likes
346
Share


@Canna96
Follow
This week went pretty well, other than she stretched like crazy and I am now getting worried about running out of vertical space. I also had a few of my bottom leaves get a few brown and yellow spots on them. I did post some pics and asked a question, thank you for the responses, much appreciated! I am thinking about adding my Spyder Farmer LED 100 Watt light into the tent for the nebula auto because it is about 23 inches shorter than the sour diesel. I believe it would only raise my temp about 2 degrees, and possibly lower the humidity by one or two percent. I must say my dehumidifier has been a freaking stud, running 24X7 and not complaining. I should look into adding another unit, it has been in the mid 90's and muggy for about a week. So far I have to say I am super impressed and excited with this setup, the genetics, and with growing this wonderful plant in general. Already planning ahead to my next grow, and what I can do better. I have been enjoying myself and I really appreciate everyone who has taken the time to answer my questions! I am having a blast and am excited to see what this lady will give up in a few weeks!

Likes
19
Share


@Black_Widow
Follow
Привет садоводы
мой цветок цветет полным ходом
последний раз я полил его обильно водой и через пару дней буду поливать ripen
есть и небольшые проблемы , сгорают некоторые листики
в общем опять красавица выросла , а смола имеет запах острого сладкого цитруса

Likes
12
Share


@555ABKY555
Follow
good guys
weekly comment?
nice situation!
I wasn't sure of this success unfortunately little room for growth!
THESE PLANTS COULD BE MONSTERS
it would have taken ample space but the yield gives me hope three CBDVs and a mokum tulip, this last one has been subjected to the most stress in the last week with ice the colors are hallucinating. the trichomes have turned red. i watered with water only for two weeks but no night without light i decided and cut i had huge buds full of red trichomes, and a kind of foxtail tendency on the largest apical which gave me a shock for don't leave time and cut everything, unfortunately I suffer from a disorder that causes me epilepsy I think CBDVA is a worthy replacement for my shitty drugs. Surely it was a challenge to insert such large vases and not perform the topping but it was not recommended in fact they have grown enormous think an LST in an open space exposed to the sun at 360 degrees. They gave me the mokum tulip and I am very grateful for having already fallen in love with this strain in terms of terpenic and visual aspects, a bit difficult the growth in the sixth week had to be followed it had to be sprayed with a lot of air. but the attention was rewarded by an Asian genetics I happened to have a very diesel phenotype you can also smell the aromas of hops mango and blueberries indescribable last
I've already cut and trimmed! photos soon


Likes
8
Share


@biggerbud420
Follow
i feed a 50/50 mix of fox farm happy frog all purpose and fruit and flower 1 tbs per gallon of media
watered a half gallon
Likes
10
Share


@Rob691
Follow
This week the girls look very thirsty. They clearly increased their consumption of water, maybe because of the temperature witch is quiet high for a end of october....
Anyway, I have to water the plants every 2 days maximum otherwise the leaves are going down...
Beside this, they look great :)
Likes
55
Share


@GardenOfHerbs
Follow
- i'm back already! i decited to harvest today on day 93, there was about 5-10% amber so i din't want to wait any longer!
- all pics are from right before/during/after harvest
- the 2 lowest branches are trimmed up and drying in a brown paper bag, the rest is drying in my carboard box
- i will be back with a harvest report and smoke report in about 10 days when everything is nice and dry.
- added 3 videos at the end so check em out
Likes
2
Share


@CalGonJim
Follow
6/9 MONDAY 12am. Looks good. Using distilled water in a spray bottle for now, did a light mix of Grow Con .5ml per L ONE TIME...good.
6/10 weed good. In a kit stickers temperature indicators too hot icon shows hot face or something. without power like fishtanks sticker thermometer. 3pm BPP Picture today Analog special effects lost a day to lighting and special effects all practical im also a tiny bit demonic it adds to the character.
4pm look up fluid dispersal in root medium
6/13 5am everyone looks good medium lights. Now to try the fiberglass cubes.... tired of bugs hope I dont regret this...
6/14 1230pm looking good. no problems. very tired. found a little pair of unicorn slippers from a long time ago. probably headed to another Leaving Las Vegas melt down so who knows.
1pm
6/15 245am BPP is hard to grow. so its good for a small container grow since it seems to be a smaller plant, bigger containers dont make that much of a difference. It's this one is growing great setting 5 on AC Humidity dome now, with blue & red as well full power. Going to try fiberglass for all this time.
1053am IVE SEEN THINGS YOU PEOPLE WOULDN'T BELIEVE ....BECAUSE I CANT UPLOAD MY PRECIOUS PHOTOS... I CANT SPELL BELIVE...GOT DAMNITO
Likes
Comments
Share

@Antarctic
Follow
Week 11 (Mar 11 – Mar 17)
March 11–16 → trichome close-ups, mostly clear/milky.
March 20 → end of stretch, buds swelling, first pistils turning orange.
⸻
Week 12 (Mar 18 – Mar 24)
Grow left on autopilot during vacation.
Plants stable, humidity/temps under control.
Buds continue swelling naturally.
⸻
Week 13 (Mar 25 – Mar 31)
Returned March 31 → plants very big, buds thickening.
Trichomes mostly milky, no amber yet.


Likes
34
Share


@Dunk_Junk
Follow
Day 91 - Still going. Harvested a little bit already as shown in video.

Likes
Comments
Share


Likes
25
Share


@The_GodPOTTer
Follow
Day 30 for the oldest ones and day 21 for the youngest.....the Canna Neutrients, Mammoth P, and a little Recharge......so far so good.


Likes
19
Share


@HeavyHead
Follow
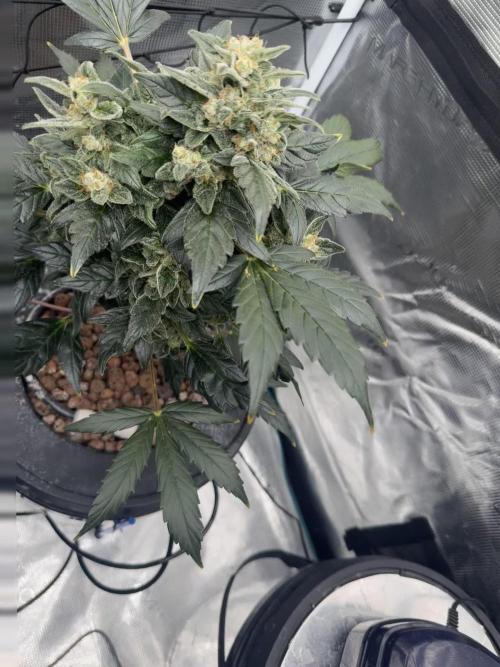
Most of the girls have been switched to straight fresh water at this point, with the exception of the few that look to need another week or two before flushing.
Dropping the room temps and tossing a few ice cubes on top of tops before watering.
Likes
10
Share

@MasterGrowda88
Follow
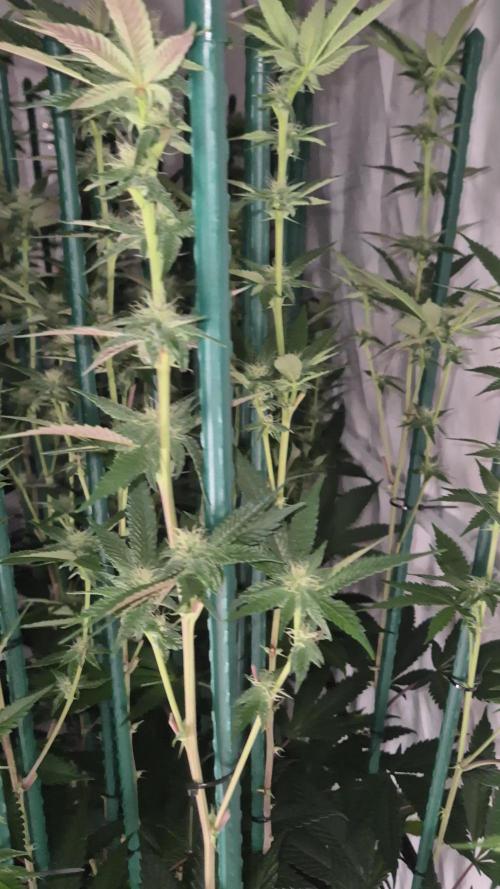
The third week is over, and the ladies have finished their stretching phase. This meant one last trimming. I removed all the solar eclipses that were on a flower. This way, every flower receives light and photosynthesis is absorbed through the lower part. This way, I achieve maximum yield and no undeveloped flowers
