


Likes
23
Share


@Condocannibus
Follow
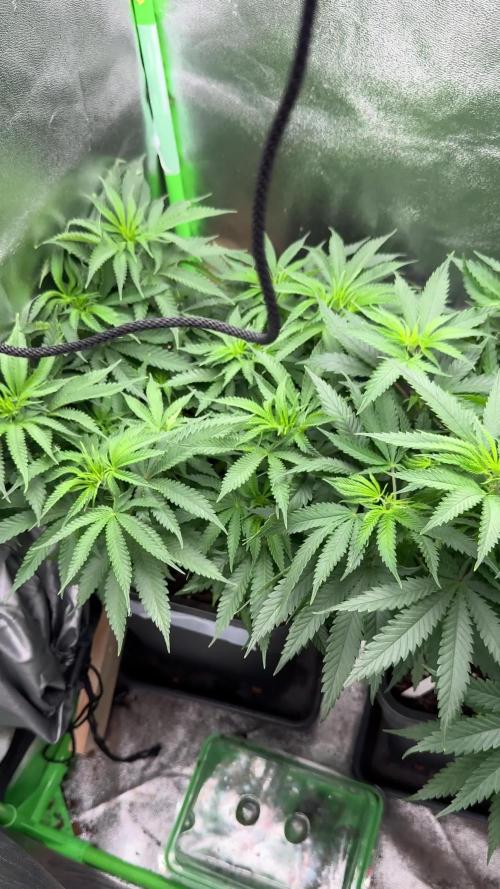
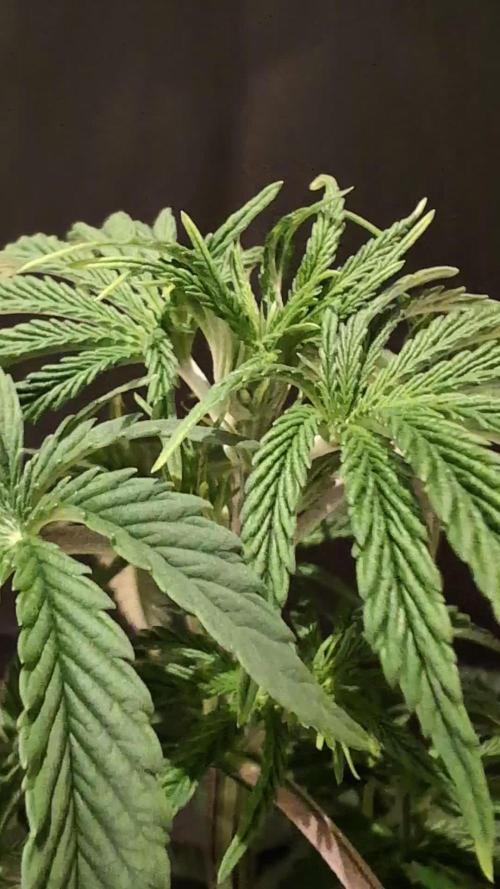
2nd week of stretch done.
No deficiencys
Big stretch.
Thanks everyone

Likes
203
Share


@yan420
Follow
🌈💐🍬🌈💐🍬🌈💐🍬🌈💐🍬🌈
Hi and welcome to another grow again from Kannabia we are talking about my second attempt at the strain Runtz Auto it's going to be a single plant diary and I'll be LSTing HSTing topping and pruning like last time.
Only difference is that I’ll be trying a different nutrient schedule this time to try and avoid pH fluctuations as much as possible as the last pheno seemed a bit sensitive on pH issues, so I’ll be keeping it more simple but maybe at a higher dose let’s see what she wants.
Thank you Kannabia for the chance to try out your awesome seeds 🙏🏻❤️
🌈💐🍬🌈💐🍬🌈💐🍬🌈💐🍬🌈
💭❗💭❗💭❗💭❗💭❗💭❗💭
❗Events"&thoughts worth noting❗
💭❗💭❗💭❗💭❗💭❗💭❗💭
23.10.24(GW)(morning)The little lady popped her head above ground.
23.10.24(VW1)(afternoon)Soaked her with (*1) again, I really hope I won’t burn her, what I’m doing is not advisable but I’m a greedy man I guess, it’s all or nothing 😉
27.10.24(VW1) Add 10ml TriPartMicro to (*1) and use at next feed.
30.10.24(VW2) in the clip I’m just strengthening the main stem for her future training and not just being mean😉
02.11.24(VW2) Add another 10ml of TriPartMicro and get it to 20ml and let’s see how she reacts, use on next feed✅.
05.11.24(VW2) Topp her and prune nodes not needed and start training preparations, add clay pellets up to the first node from the bottom that I’ll keep (if possible of course)📸✅. *part of training preparation👇🏻
05.11.24(VW2) Add another 10ml of TriPartMicro and get it to 30ml and let’s see how she reacts, use on next feed✅.
08.11.24(VW3) noticed the leafs being too green nearing slight N toxicity so I’ll feed with (*1) at 50% strength the next two feeds observe and act accordingly.
09.11.24(VW3)Did first LST session and then fed her(📸)
13.11.24(VW4) She seems to be happy with nutes at 50% strength so I’ll keep it that way for another few days observe and give her a regular 100% strength feed hopefully timed right with the flowering stretch.
16.11.24(VW4) Pruned excess bud sites and defoliated (📸)
20.11.24(VW5) LST until stretch is over and maybe do one last pruning of excess bud sites just as the first bunch of pistils/buds appear.
23.11.24(VW5) Did my last major HST & LST session✅, end of the week I'm switching the diary to flowering as first pistils are visible and I'll keep on doing a light LST until harvest, might do a last pruning session though maybe middle or end of next week.
27.11.25(FW1) Did a defoliation and LST session✅📸.
Noticed some leafs with brown spots📸so she seems to need a bit more PK so I dropped TriPartMicro to 20ml from 30ml and increased GreenBuzzBloom to 40ml from 30ml✅.
02.12.24(FW1) Added 20ml TriPartBloom.
💭❗💭 ❗💭❗💭❗💭❗💭❗💭
🐝🌼🐝🌼🐝🌼🐝🌼🐝🌼🐝🌼
🌼Day to day tasks & actions🌼
🐝🌼🐝🌼🐝🌼🐝🌼🐝🌼🐝🌼
18.12.24(FW4) No feed no water
19.12.24(FW4) fed with (*1) 5l
20.12.24(FW4) No feed no water
21.12.24(FW4) fed with (*1) 5l
22.12.24(FW4) No feed no water
23.12.24(FW4) No feed no water
24.12.24(FW4) No feed no water
🌼🐝🌼🐝🌼🐝🌼🐝🌼🐝🌼🐝🌼
🍶💦🍶💦🍶💦🍶💦🍶
💦Nutrients in 30l(*1) 💦
🍶💦🍶💦🍶💦🍶💦🍶💦🍶💦🍶
💦TriPartMicro: 10ml*20ml*30ml*20ml
🍶TriPartBloom: 0ml *20ml
💦 Fermented🌿juice:0ml
🍶GreenBuzzBloom: 30ml*40ml
💦Cal-Mag: 60ml
🍶buxXtrade citric acid Ph-
💦🍶💦🍶💦🍶💦🍶💦🍶💦🍶💦
⚙️✂️⚙️✂️⚙️✂️⚙️✂️⚙️
✂️Tools & equipment ✂️
⚙️✂️⚙️✂️⚙️✂️⚙️✂️⚙️✂️⚙️✂️⚙️
✂️➡️2xMarsHydroSP3000
⚙️➡️MarsHydro150mmVentilatorACF
✂️➡️Trotec (big) dehumidifier
⚙️➡️Small no name dehumidifier
✂️➡️Kebab stainless skewers 3 (LST)
⚙️➡️wire+roast beefskewers(LST)
✂️➡️trimming scissors.(HST)
⚙️➡️Waterproof vacuum cleaner for
✂️spills.
⚙️✂️⚙️✂️⚙️✂️⚙️✂️⚙️✂️⚙️✂️⚙️
🍭🍦🍬🌈🍭🍦🍬🌈🍭🍦🍬🌈🍭
🍦RUNTZ AUTO KANNABIA
🍬🌈🍭🍦🍬🌈🍭🍦🍬🌈🍭🍦🍬
🌈Seed:Auto Zkittlez&Gelato😋.
🍭Effect: Balanced
🍦THC: 20 %.
🍬Features: For beginners
🌈Flavor: Earthy, Floral, Sweet
🍭Complete cycle: 70 days.
🍦Average height: 100.
🍬Yield: 450-500 gr/m2.
🌈🍭🍦🍬🌈🍭🍦🍬🌈🍭🍦🍬🌈,


Likes
4
Share


@MaroonWater
Follow
My biggest white widow is getting 24 hours of darkness before I chop and hang the whole plant for a long dry and cure.

Likes
6
Share

@ChitownCannaChica
Follow
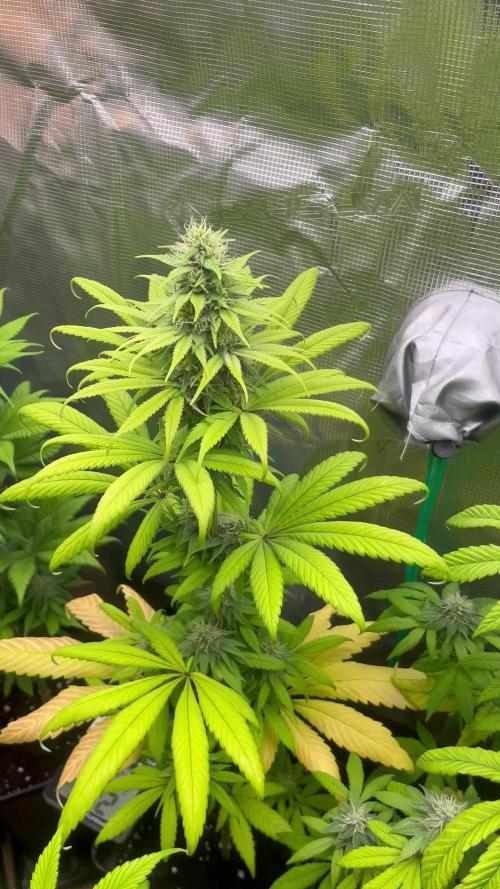
Observations:
Strong lateral branching
Thick fan leaves
Very strong stem development
Mild funky/skunky smell even in veg
I defoliated lightly around week 4 to improve airflow and flipped to flower after about 5 weeks when the canopy filled the tent.
Flowering Stage – Week 1–9
Stretch during early flower was moderate — around 1.5x in height. Bud sites stacked nicely and formed dense golf-ball style flowers early on.
Around week 4–5 of flower the smell became intense:
Diesel
Funky broccoli/skunk notes
Earthy sweetness
Slight garlic undertones
By week 6 the trichome production really kicked in. Leaves and sugar trim became heavily frosted and resin production exceeded expectations for a casual run.
The plant handled nutrients well throughout flower with only slight tip burn near peak feeding. Lower humidity during late flower helped avoid mold issues despite the dense buds.
Final Results:
Flower Time: ~9 weeks
Yield: Around 4.5 oz dry from one plant
Density: Dense and sticky
Trim Difficulty: Moderate due to resin buildup
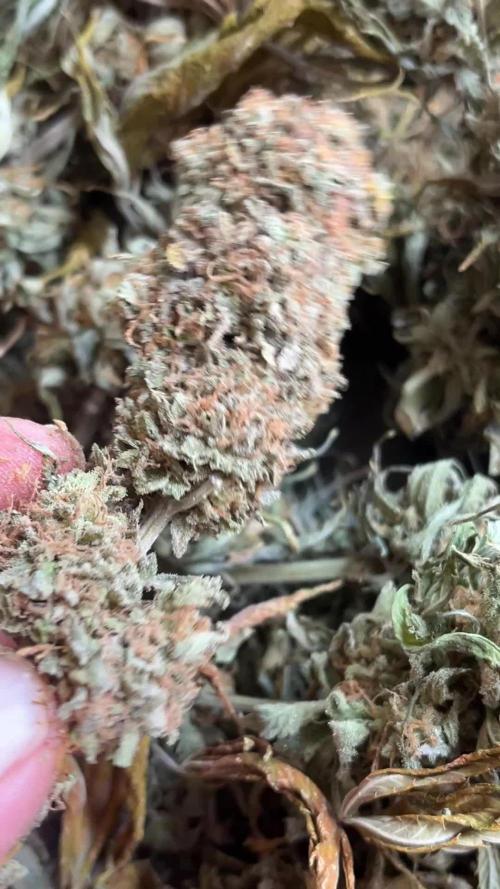
Smoke Report:
After a 2-week dry and roughly 3-week cure:
Smooth smoke
Strong nose out of the jar
Funky savory terp profile
Relaxing hybrid effects with a noticeable body buzz but still mentally uplifting
Overall Impression:
Sticky Broccoli was an easy strain to grow with solid resilience and good bag appeal. It stayed manageable indoors, produced very frosty buds, and delivered a unique terpene profile that stood out from sweeter dessert strains.
Would definitely grow again, especially for anyone who likes gassy/skunky cultivars with decent yields and low maintenance.

Likes
16
Share


@grow_nerd420
Follow
Just topped part of this beauties 🔥👌✌️
Put 2ml per l revive by Advanced nutrients
I've noticed that helps girls to recover After transplant & topping
This accually a week 3 of vegetation cuz i threat first 2-3 like seedling stage After germination stage😁😂🤪

Likes
15
Share

@eldruida_lamota
Follow
Que pasa familia, vamos con la quinta semana de floración de estas Green Gelato feminizadas de RoyalQueenSeeds.
Vamos al lío ,se trasplantaron en macetas de 7 litros definitivamente.
El ph se controla en 6.0 , la temperatura la tenemos entre 24/20 grados y la humedad ronda el 50%.
El ciclo de floración puse 12h de luz, el foco está al 80% de potencia.
De momento van creciendo a buen ritmo y tienen un buen color.
La flor también va formándose y engordando, también empieza a producir tricomas, estaban muy bien enraizadas al realizarle el trasplante se notaba la abundancia radicular.
Agradecer Agrobeta por el envío del kit gold series en cuestión, unos maestros 🙏
- os dejo por aquí un CÓDIGO: Eldruida
Descuento para la tienda de MARS HYDRO.
https://www.mars-hydro.com
Hasta aquí todo, Buenos humos 💨💨💨


Likes
8
Share


@jayizrollin
Follow
Day 49
TG1 is starting to dense up already, super even canopy and even size buds everywhere. It’s so small compared to my other plants I have it on a shoebox to get more light.
TG2 is looking better now, it has healed well from my abuse last week and is producing buds everywhere, super tight spacing, I haven’t seen any more pollen sacs.
Thanks for checking out my grow!

Likes
30
Share


@Virginia_Nugz_540
Follow
So this grow wasnt to bad considering it was my first indoor auto grow. For the most part I am satisfied with. However I will stick with the high end genetics from here on out as I want to grow the dankest of the dank and this is what I enjoy doing so why not do it the best way possible with the best names in the game. Stay tuned to see what 🔥 I’m growing next!!! Thanks for tuning in and as always stay Smokey my Friends!! 💨💨💨

Likes
4
Share


Likes
13
Share


@FlavoursUk
Follow
So, eventful week.
Prior to putting my seeds into my system, my light and rdwc system was left on as I was dialling in the growing environment before placing the seeds as a final home. My only issue was I had a light leak BEFORE putting the foil top covers on the clay pebbles. Long story short, I got algae which ended up turning to root rot.
I spotted it very swiftly and did a res change adding beneficial bacteria to the system along with the base products of remo nutrients. A few days later new growth and recovery is taking place.
Day 16- Fully back on track, new roots shooting out into the water and the growth rate has picked up as it should.
Foliar feeding twice a day for a little boost until the root system establishes a bit more. Huge changes in just a day. Can't wait to see what a week's growth looks like.
Really loving the sunset/sunrise feature on the trolmaster, something I got to experience watching recently!
Watching by closely to make sure everything stays in track.
Stay tuned for the next one 😉

Likes
8
Share

@GoodTimesOrganics
Follow
Hi liebe Community and Welcome Back! 🌿💚
Die kleinen Äffchen kriegen richtig Fette Blätter! 🌄🐒
Hier im gesponserten Bio Tabs NL Grow, erreichen wir aktuell eine höhe von 32 CM.
Nächste Woche, vermute ich werden die beiden Pflanzen in ihrn neuen Topf umziehen und dort sieht Mann den Vergleich dann erst richtig, da dort dann die ganze Palette der organischen Growdünger zum Einsatz kommt.
Für den ultimativen Vergleich kommen bald noch zwei neue Diaries mit zwei identischen Stecklingen um genau zu beobachten wie was performed.
Die Pflanzen entwickeln sich super gut und sind sehr robust.
Die Seitentriebe bilden sich immer weiter aus. Die Blattform ist schön Breit und Buschig.
Die Umgebungsgegebenheiten sind aktuell gut:
—————
🌞 Temp: 24
🌚 Temp: 18°C bis 19°C
💨 RH: 58%
VPD: 0,91 kPa
💡ppfd: 330 mpm
—————
Viele Grüße 👋


Likes
15
Share


@GYOweed
Follow
Nothing special. Its sis in south facing solo cup smells amazing and sticky but that one is farther ahead. Gonna do just organic ferts and water see what happens im getting lazy
Likes
21
Share


@MadeInGermany
Follow
Info:
Unfortunately, I had to find out that my account is used for fake pages in social media.
I am only active here on growdiaries.
I am not on facebook instagram twitter etc All accounts except this one are fake.
Have fun with the update.
Flowering day 40
since time change
to 12/12.
Hey everyone 😊.
It gets more beautiful from week to week 😍.
The buds are getting thicker and thicker and already smell very good :-).
The time has come when she no longer puts her strength into growth but into the flowers :-).
It was poured 3 times this week with 1.2 l each time.
When watering, there was 1 g of GHSC enhancer per liter of water as every 2 weeks 👍.
Of course, as always, the tent was cleaned every day and the humidifier refilled.
The complete filter system was also checked again.
I filled the tank with fresh osmosis water for the coming week.
I wish you all a nice week.
Stay healthy and let it grow 🙏🏻👍
You can buy this Strain at
https://www.amsterdamgenetics.com/product/kosher-tangie-kush/
Type:
Kosher Tangie Kush
☝️🏼
Genetics:
Kosher Kush
X
Tangie
👍
Vega lamp:
2 x Todogrow Led
Quantum Board 100 W
💡
Bloom Lamp :
2 x Todogrow Led
Cxb 3590 COB 3500 K 205W
💡💡☝️🏼
Soil :
Canna Coco Professional +
☝️🏼
Fertilizer:
Green House Powder Feeding
☝️🏼🌱
Water:
Osmosis water mixed with normal water (24 hours stale that the chlorine evaporates) to 0.2 EC. Add Cal / Mag to 0.4 Ec Ph with Organic Ph - to 5.5 - 5.8 .
